Oobesettings Error: How to Fix it on Windows 10 & 11
7 min. read
Updated on
Read our disclosure page to find out how can you help Windows Report sustain the editorial team Read more
Key notes
- The Windows 11 oobesettings error occurs when your system’s registry is damaged.
- You can resolve the problem by using the SFC utility, as described below.
- Obesettings Something went wrong errors also pop up on your screen when you are trying to open any application or program.
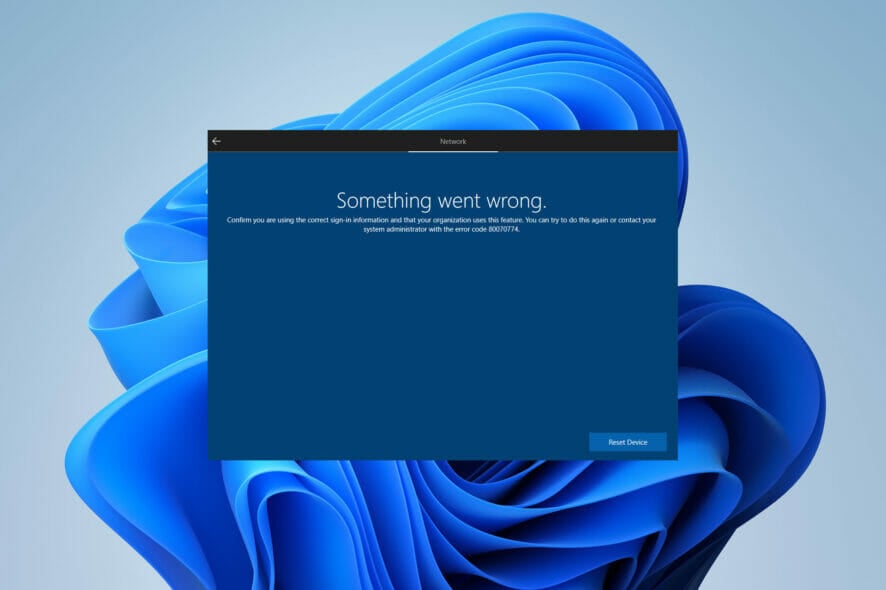
The oobesetings error in Windows 11 is a blue screen error that occurs because of a damaged registry. When the registry is faulty, it causes problems with the rest of the operating system. If you get an oobesetings error, you must repair your registry to fix the problem.
A problem with the registry can lead to errors that prevent your computer from booting correctly or even starting at all. If you get this error when trying to open a new file for the first time, you’re probably experiencing a normal memory shortage. Increasing your virtual memory may help correct the problem.
Your computer might not have enough installed memory to handle all of your programs at one time. Alternatively, one can install more RAM or reduce the size of your programs so they run faster.
What can I do to fix the oobesttings error in Windows 11?
1. Restart your device
The easiest way to fix this issue is by restarting your computer. This will solve the challenge if it occurs due to temporary causes like a pending service pack or an installed application that might conflict with your current settings.
2. Use the SFC utility
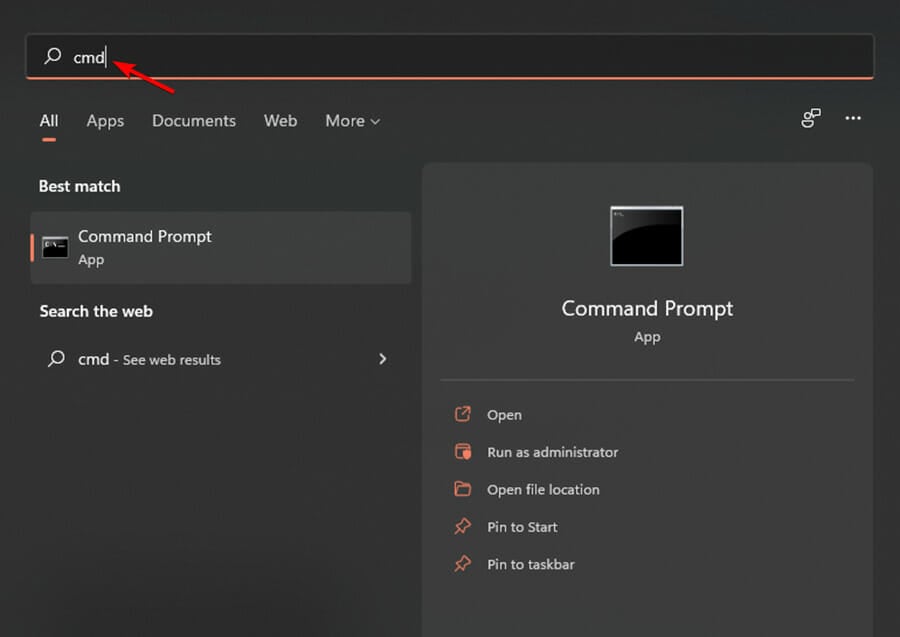
- Click on the Search icon on your taskbar and type cmd.
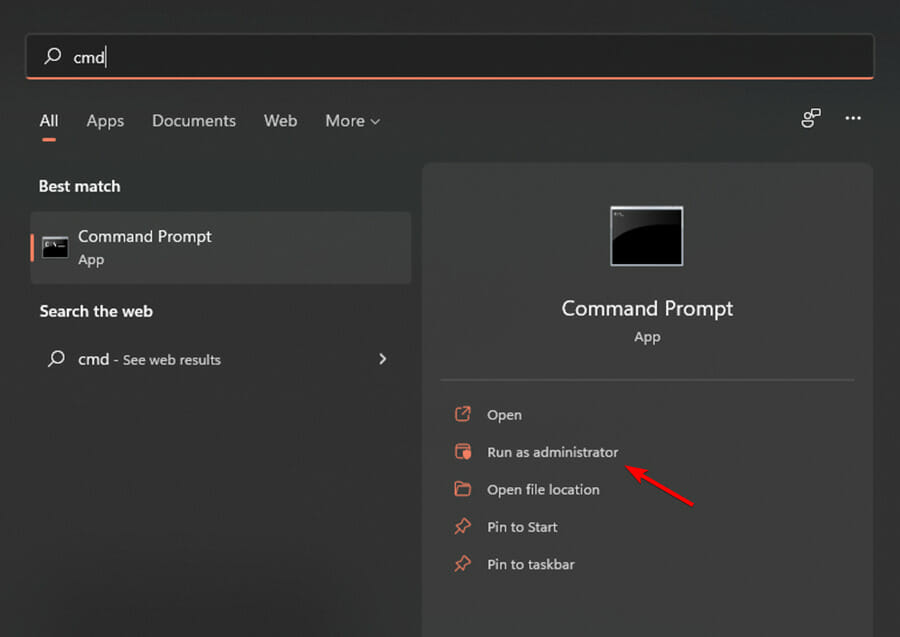
- Select the Run as Administartor option.
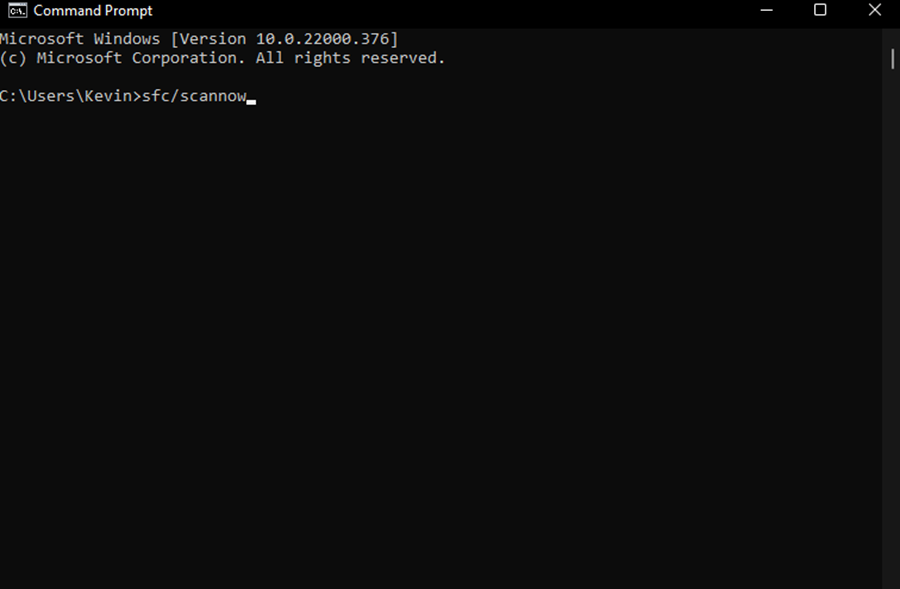
- Then, key in the following command:
sfc/scannow - Wait for the scan to complete, then restart your device to check whether the issue has been resolved.
For more advanced features, we recommend using specialized repair software. They will scan your system for corrupted files and repair them automatically with healthy components from its extensive database.
3. Repair the registry
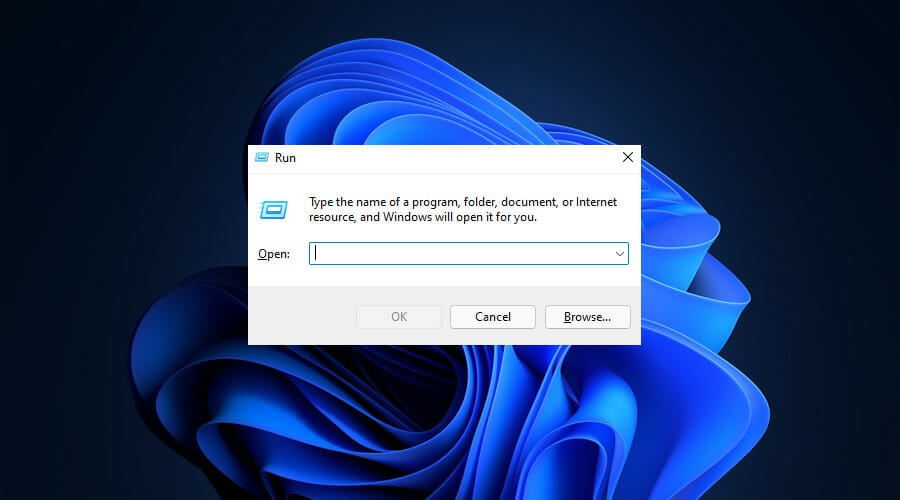
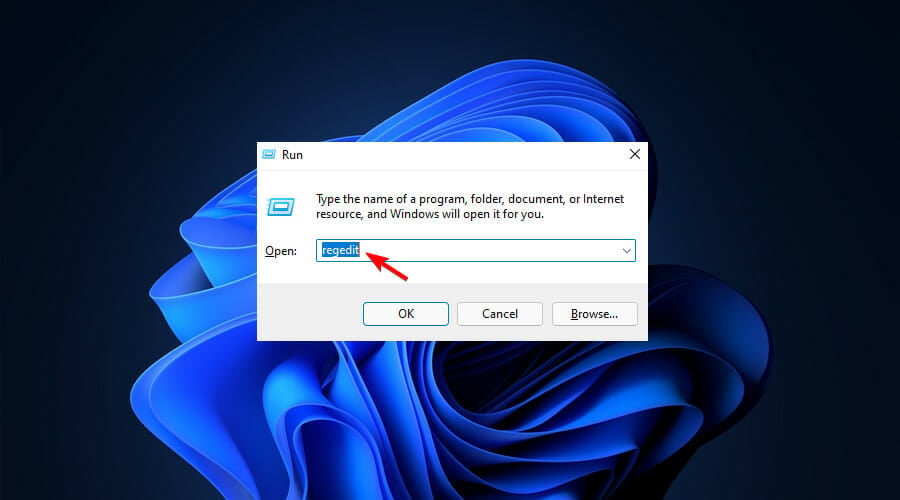
- Press Windows key + R key on your keyboard to open the Run dialog box.
- Then, key the following code in the Run window and press Enter key on your keyboard to open the Windows Registry Editor:
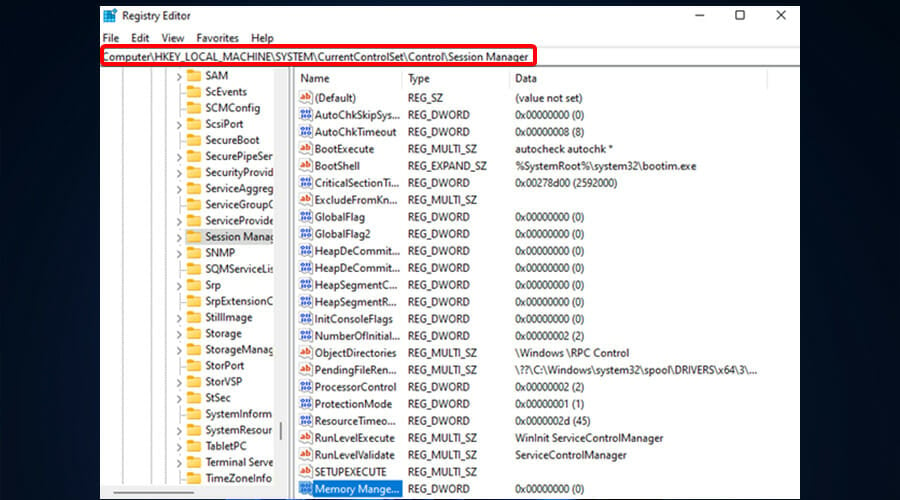
regedit - Navigate through the following path:
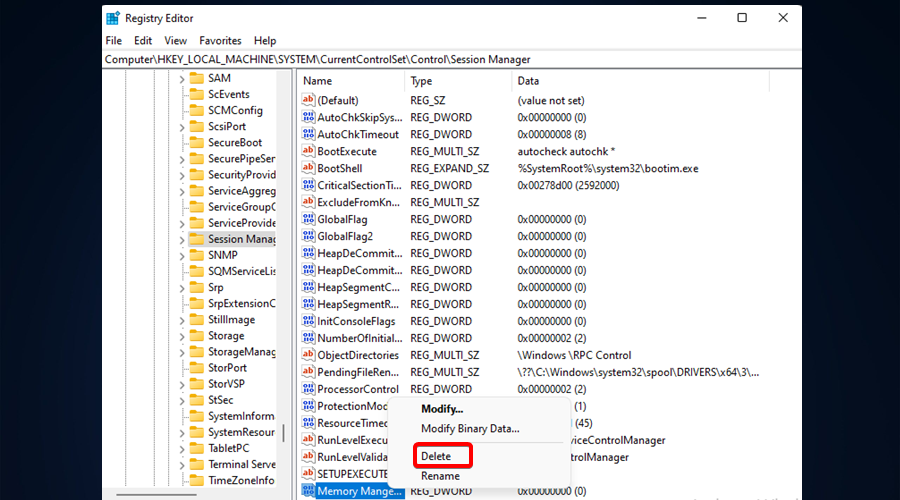
HKEY_LOCAL_MACHINE/SYSTEM/CurrentControlSet/Control/Session Manager/ Memory Management. - Right click on CommitLimit value in right pane and choose the Delete option. Click Yes button when you get a confirmation message.
- Close the Windows Registry Editor and restart your computer.
4. Reset Windows 11
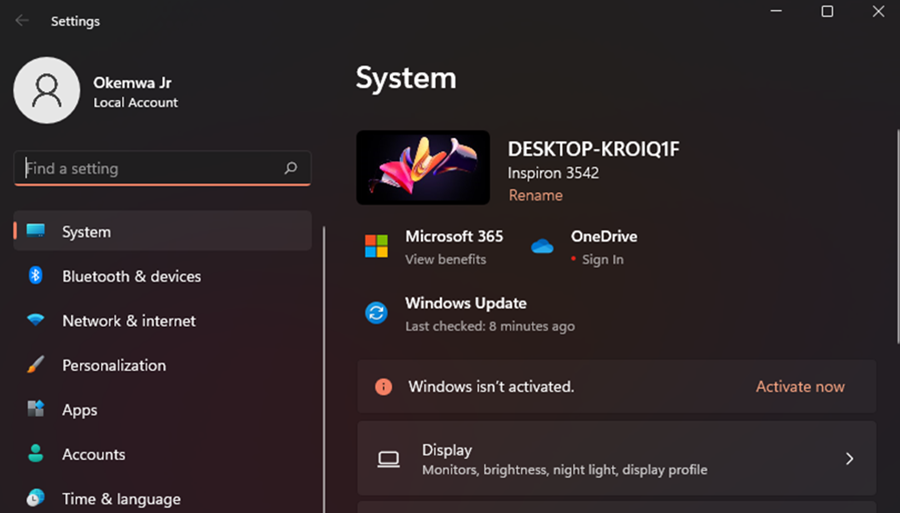
- Press Windows Key + I key to open Settings.
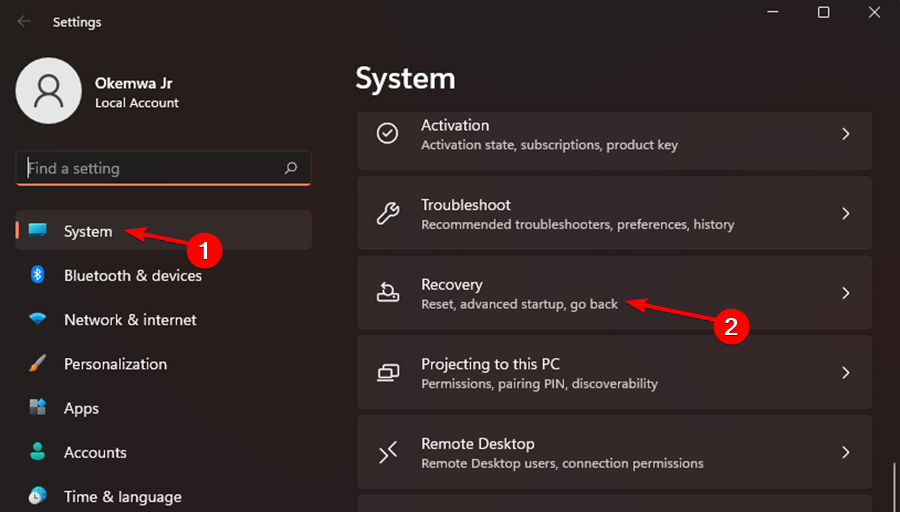
- Navigate to the System section and select Recovery.
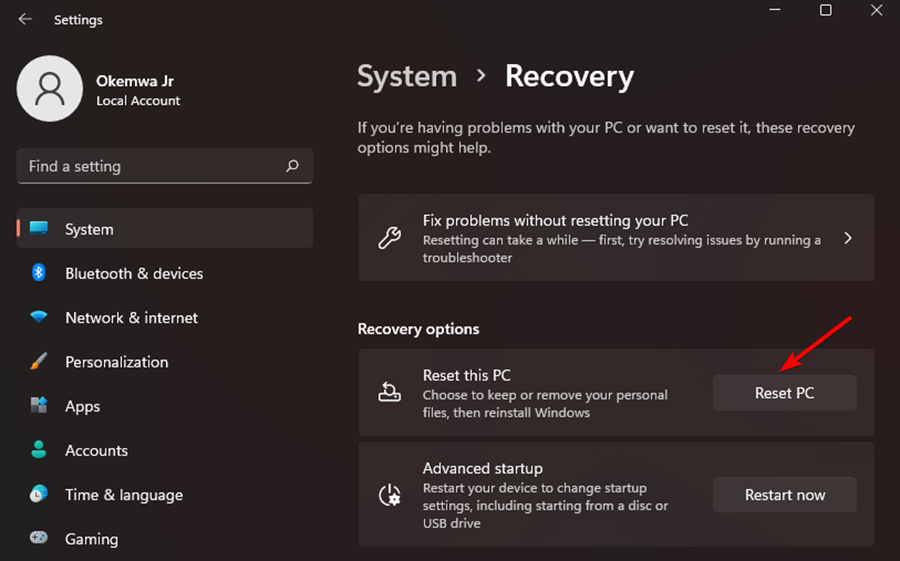
- Now click the Reset PC button.
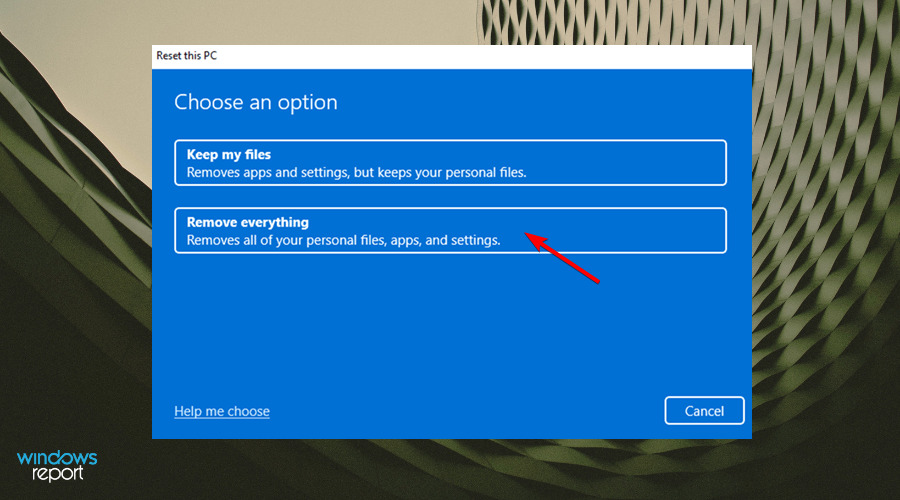
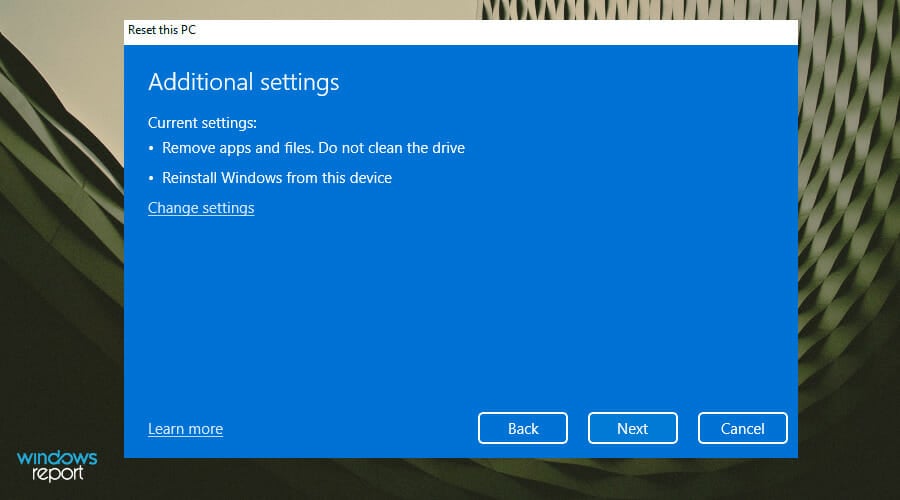
- Select the desired option. In most cases, it’s better to use Remove everything, but if you choose it, be sure to back up your files beforehand.
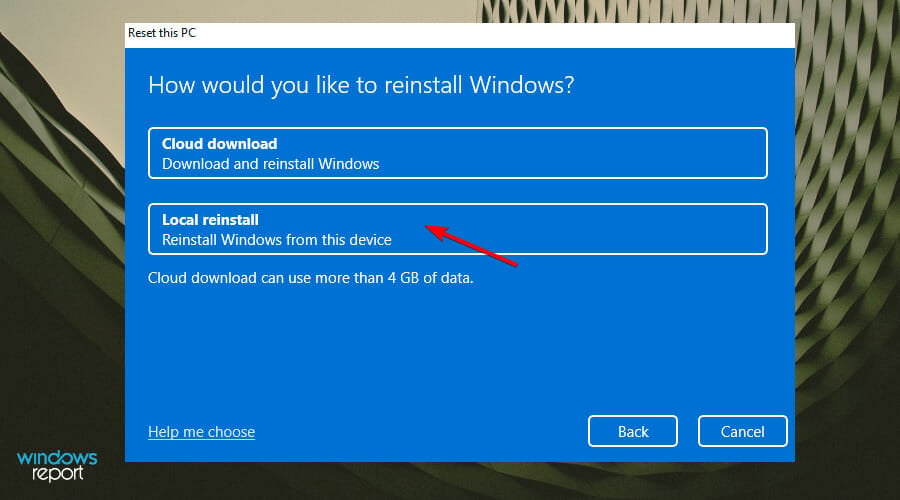
- Select the type of reinstall that you want. We used the Local reinstall.
- Confirm your reinstall settings.
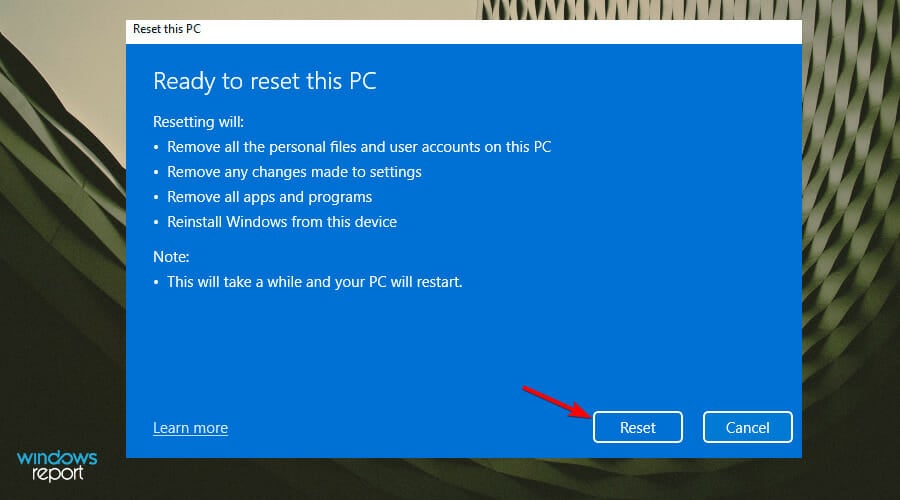
- Click Reset to start the process.
- Follow the instructions on the screen to finish it.
If you still have problems after trying all the other solutions, reinstall Windows. This will delete all your files, and you’ll start over with a fresh system.
However, it is important to note that this solution should be used as a last resort. Here’s one of our detailed guides on how to download Windows 11 ISO or update from Windows 10 to get things up and running again.
Why does the oobekeyboard error occur in Windows 11?
If you are getting this error variation instead, let us tell you that the oobekeyboard error will prevent you from using your computer. It is a serious challenge that occurs due to corruption in your Windows 11 system files.
Moreover, the error can appear because of a damaged OS registry. A faulty hard drive often leads to this issue as well.
You may have received the error message because your system files are corrupt or a critical system file has been deleted or misplaced.
Furthermore, the problem also occurs if your Windows 11 registry is missing or damaged. If you do not repair the errors on your own, the oobekeyboard error will continue indefinitely and prevent you from using your PC.
The best way to fix the error is to run a complete diagnostic scan with an advanced cleaner program. This software will automatically scan and repair any problems that are found within seconds, ensuring that your computer will run more efficiently and without errors.
We also have a guide that will help you understand the OOBEEULA error on Windows 11 and show you how to overcome it effortlessly.
You may use one of these best registry cleaner tools since they are fully compatible with Windows 11 as well.
Why is the Surface Go Oobesettings Something went wrong error occuring?
The Surface Go Oobesettings Something went wrong error appears in Windows 11 when your device is infected by malicious third-party software.
Therefore, it is important to note that the error can show up in different ways, depending on the particular infection. The error message itself is not dangerous, but it indicates that you need to take immediate action to fix the problem by using a great antivirus.
Microsoft has acknowledged this issue and will most likely solve it in a future release. It only affects PCs that connect to the Internet during OOBE when a new computer is setting up for the first time, for example, or when you’re installing Windows 11 after using Refresh or Reset.
The oobesettings is a Windows utility that is used to reset the user settings and preferences in Windows 11. It displays a wizard that helps you configure your computer after a network or hardware change, such as adding or removing an add-in card, changing the power settings, or installing new software.
It performs an automatic configuration of the operating system by detecting basic hardware components, configuring Microsoft Office, and updating the system settings. The utility is part of Windows and does not require any installation to run.
Why does the oobesettings error appear in Windows 11?
It is a very common issue for Windows 11 users. Usually, the error will appear when you open or use a certain application, especially some applications of games. When you start to use the application, you will get an error message like:
Cannot start [some name]. This app has failed to start because oobesettings.dll was not found.
The cause of the oobesettings error message is a corrupt registry. This is one of many error messages that can occur when you are unable to open a file or access the data that you need. It can be frustrating to look for a solution but the good news is that it’s possible to fix these error messages.
 Tip
Tip
Does the oobemsangcenroll error affect Windows 11?
Oobemsangcenroll is another error message that you get when an update isn’t successful. This can happen for several reasons, but it’s always important to talk to your IT administrator about any updates that aren’t correctly installed.
In some cases, there’s a conflict between new and old components that need to be resolved before you upgrade everything. If this happens, make sure you have a backup just in case you need to revert to the previous version of the software.
Moreover, visit our guide on how to fix Microsoft Security Essentials OOBE errors to help you resolve the issue effectively and efficiently.
If none of these methods works for you, it’s possible that there’s some other issue at play here. For example, if you’re using a VPN or proxy server.
It could also very well be interfering with Windows’ ability to connect properly with its own settings. If that’s the case, try disabling these programs and see if things improve.
Therefore, if this error occurs during an upgrade, revert to your previous version of Windows and then run Windows Update again. This should resolve any outstanding issues and allow you to continue upgrading without problems.
Which of the above methods helped you resolve the problem? Share your thoughts with us in the comments section below.

