Windows 11 Resolution Keeps Changing: 7 Ways to Fix It
Problematic graphics drivers usually cause this problem
![]() 6 min. read
6 min. read
![]() Updated on
Updated on
Share this article

Improve this guide
Read our disclosure page to find out how can you help Windows Report sustain the editorial team Read more
Key notes
- If your Windows 11 PC screen resolution keeps changing by itself, a faulty display adapter might be the cause.
- A recent Windows update and an outdated graphics driver might also be responsible for the unwarranted resolution fluctuation.
- You can fix this issue by updating your drivers, restoring Windows to default settings, and troubleshooting system maintenance.
You are not alone if Windows 11 resolution keeps changing automatically on your computer. Windows 11 resolution pixelating and changing by itself after a Windows update is a common problem.
What causes Windows 11 screen resolution to keep changing and how can you fix it? All the answers you need are in this guide.
Why does Windows 11 resolution keep changing on my computer?
Several possible reasons can cause abrupt screen resolution changes in Windows 11. The most common ones are:
- Faulty or outdated graphics driver – The leading cause of resolution problems on Windows 11 is a malfunctioning or out-of-date graphics driver.
- Recent Windows update – Since Windows 11 multiple bugs issue is yet to be resolved, a recent update could mess up your screen resolution.
- Second monitor issue – If Windows 11 fails to detects a second monitor correctly, you will likely have this issue.
- Malware and virus attacks – Both can be responsible for any Windows 11 error that could ever affect your computer. They can be the reason for this too.
Whether you can pinpoint the root of the problem or you can’t, below are some solutions you can employ to fix the problem.
What can I do if Windows 11 resolution keeps changing on my computer?
Before you proceed to the major fixes in this guide, try out these basic solutions to see if they could solve your problem:
- Go to display settings on your computer and change your display resolution to the default settings.
- If you use a custom or downloaded screensaver, try to turn it off to see if it fixes the problem.
- Updating to the latest version of Windows can solve the problem if bugs cause it.
- Performing system restore is also another potential solution. Just make sure you back up your data before starting the process.
- Scan your computer for malware and viruses attacks to detect and fix the problem.
If these fixes don’t rectify the issue, you can employ the advanced screen resolution troubleshooting methods below.
1. Reinstall the graphics driver
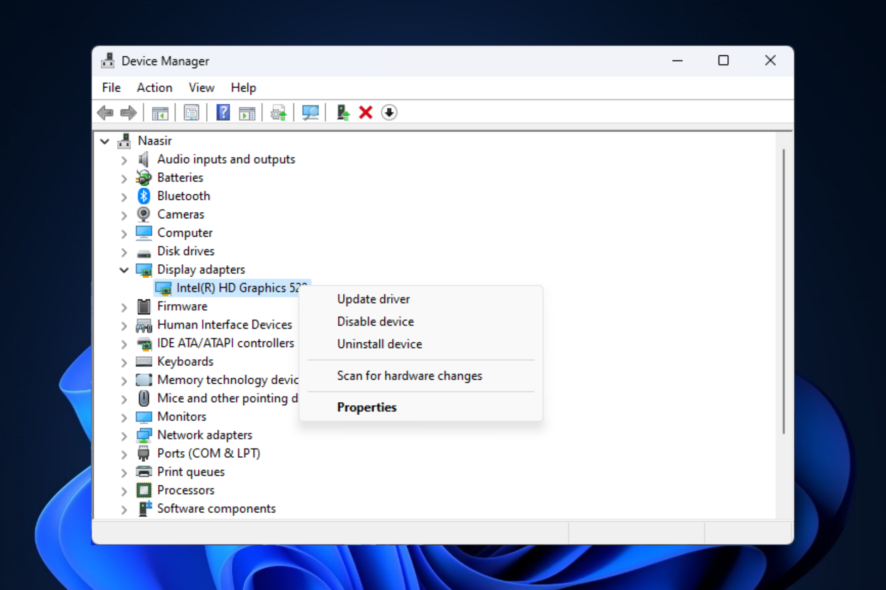
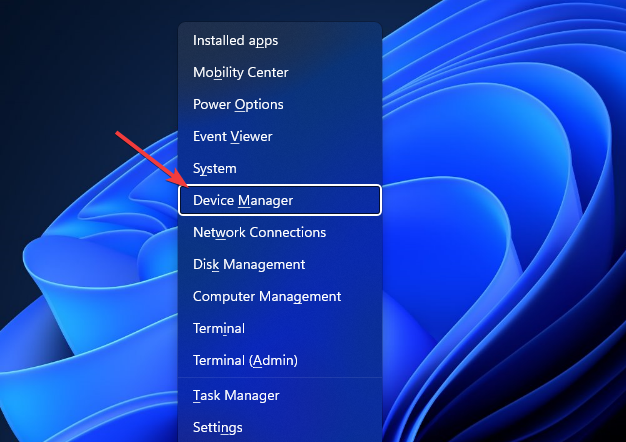
- Press Windows + X on your keyboard and click on Device Manager.

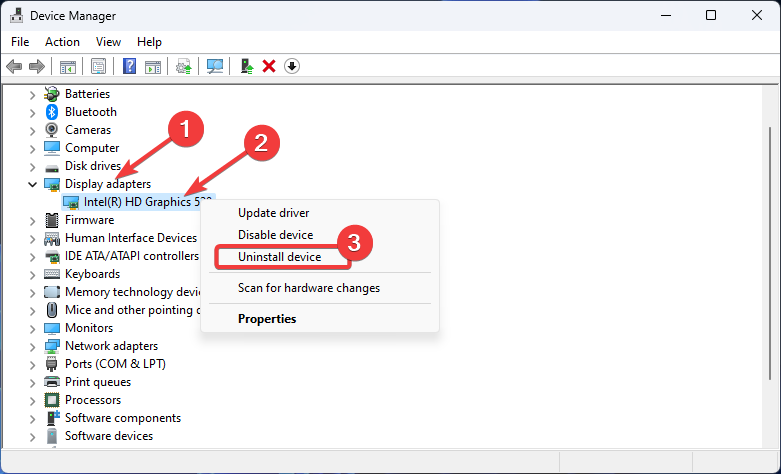
- Locate Display adapters from the list and double-click to expand it. Right-click on your driver and select Uninstall device.

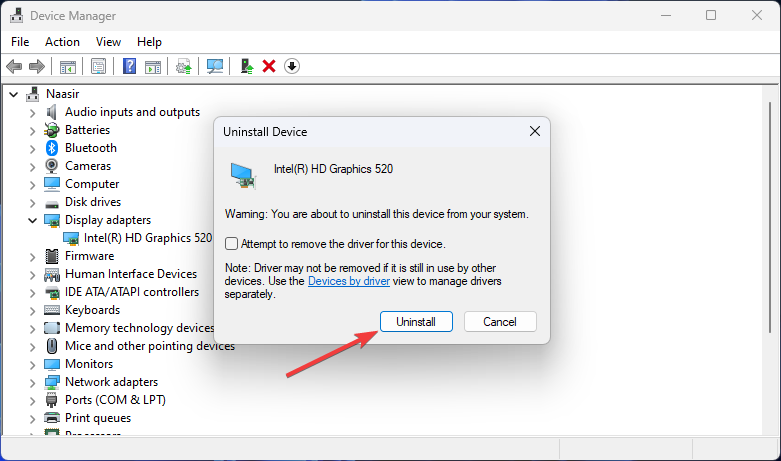
- Select Uninstall from the dialogue to remove the driver from your computer.

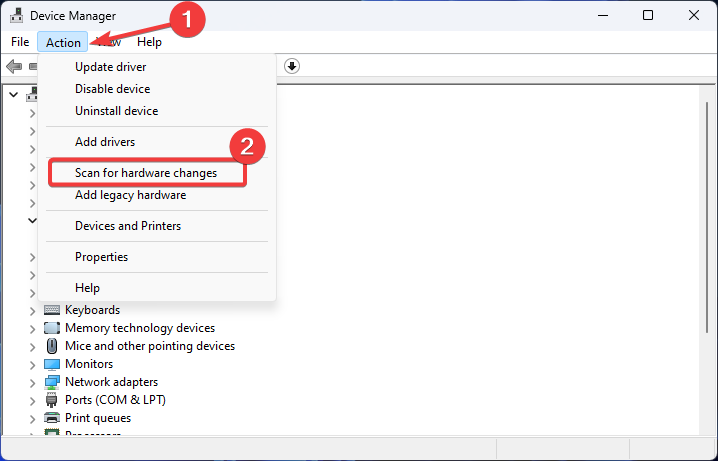
- To reinstall the graphics driver, go back to your Device Manager, switch to the Action tab and select Scan for hardware changes from the drop-down menu.

- Wait for Windows to automatically reinstall the graphics driver and restart your PC once the installation is complete.
- Now, go back to the Device Manager and expand Display adapters to confirm that the driver has been reinstalled.
If you can’t find your graphics driver in there, it means Windows ran into some issues. Follow our guide on Windows encountered a problem installing the driver to fix it.
2. Rollback the graphics driver
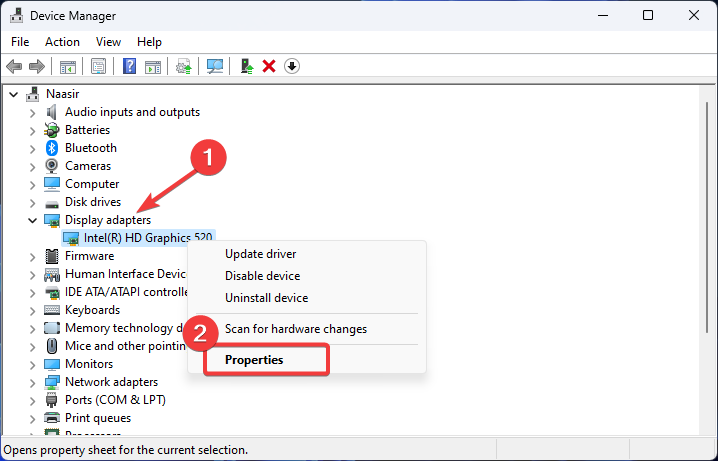
- Press Windows + X on your keyboard and click on Device Manager.
- Double-click to expand Display adapters, right-click on your graphics driver, and select Properties from the options.
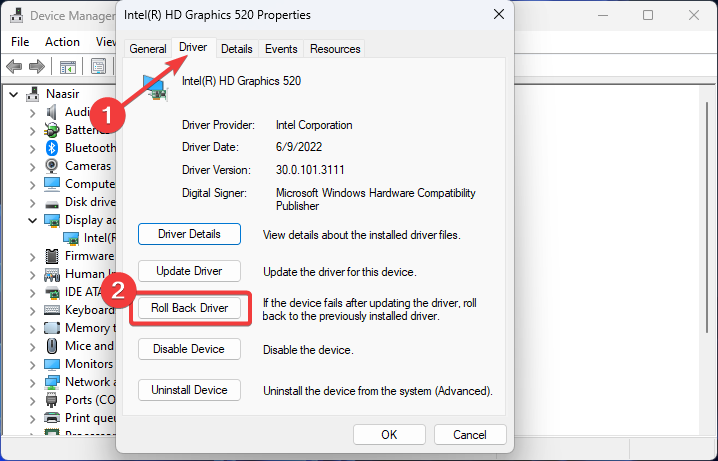
- Switch to the Driver tab and click on the Roll Back Driver button.
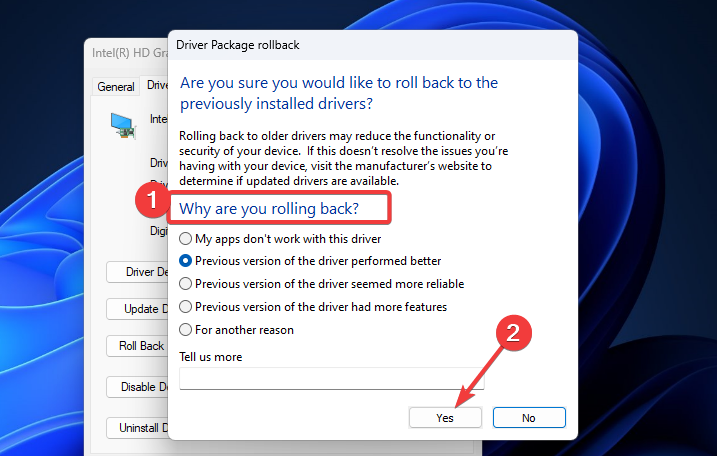
- Select any of the answers under Why are you rolling back? and click Yes to continue.

- Wait for Windows to roll back the driver and restart your PC.
If the roll back option is greyed out, it means you don’t have a previous version of the driver to roll back to. Move to the next solution.
After rolling back your graphics driver and the problem is fixed, you might want to prevent Windows from updating the driver again. Our comprehensive post on how to disable automatic driver update on Windows 11 can guide you.
3. Disable the base video option
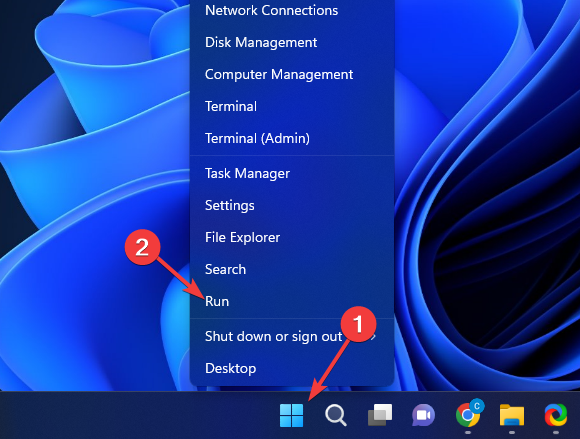
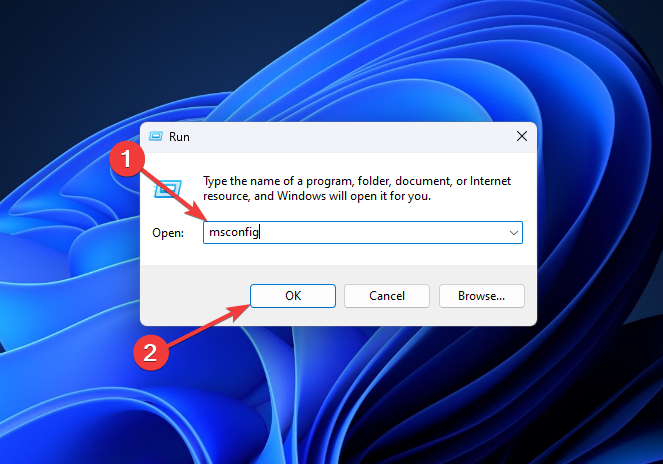
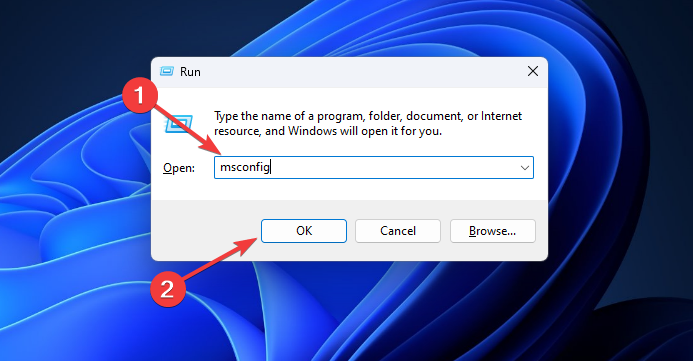
- Right-click on the Windows button on your taskbar and select Run from the shortcut menu.

- Enter the following command in the box and click the OK button:
msconfig
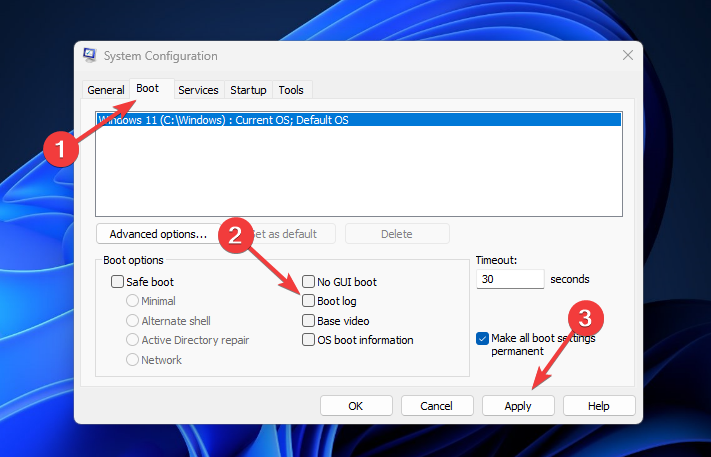
- Switch to the Boot tab on the System Configuration page, uncheck the box next to Base video and click the Apply button.

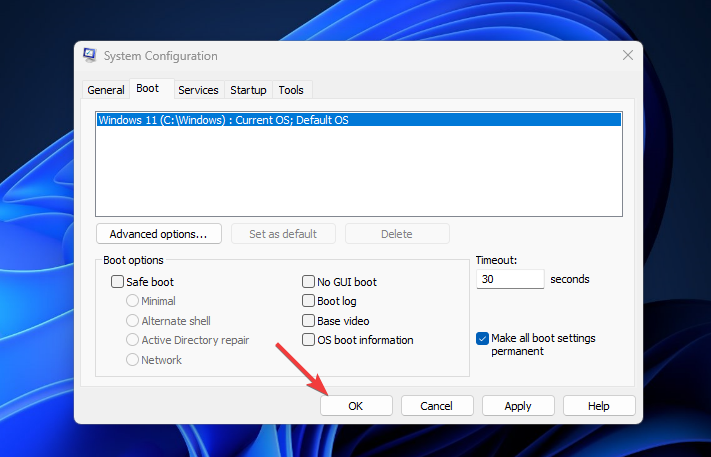
- Next, select OK to confirm your changes.
- Restart your computer and check if the problem has been solved.
4. Disable the Display Control Panel
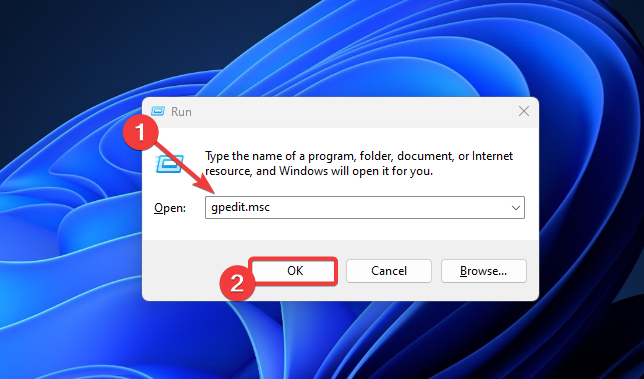
- Press Windows + R keys on your keyboard, input the following command into the Run command box and click OK:
gpedit.msc
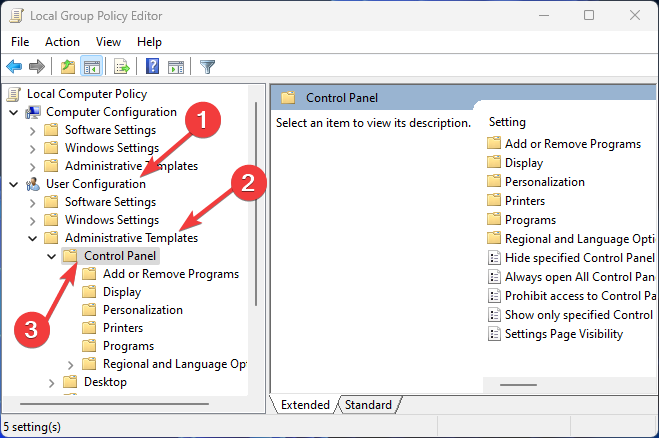
- Under User Configuration on the left pane, click on Administrative Template and double-click to expand Control Panel under it.

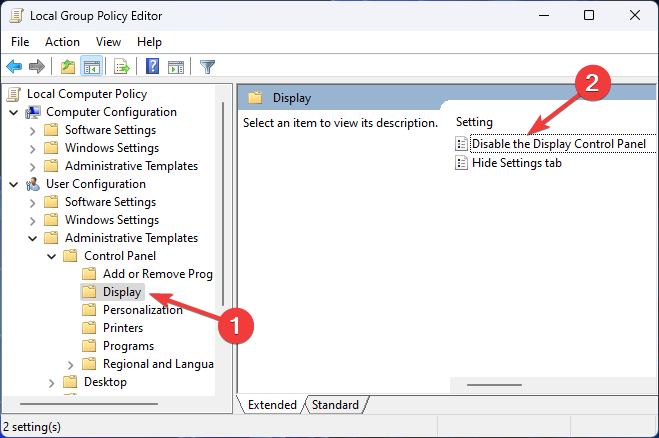
- Next, go to Display and double-click on Disable the Display Control Panel from the right.
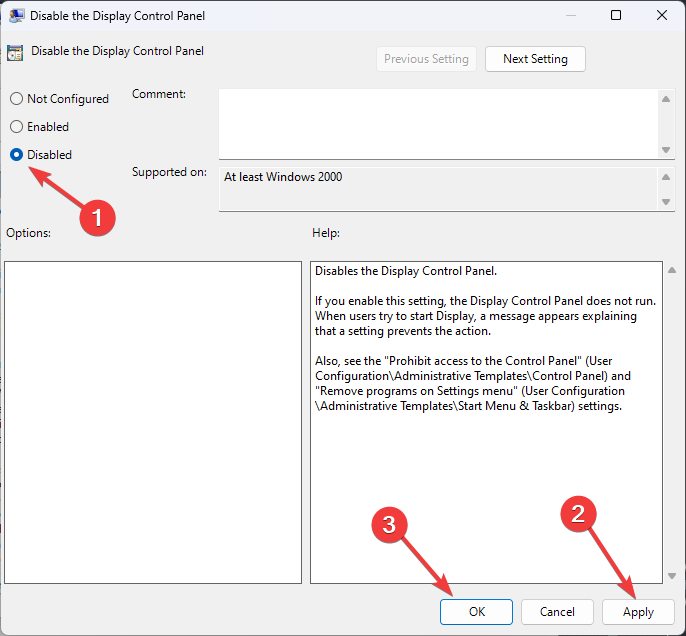
- Choose Disabled, click the Apply button and select OK to complete the changes.

- Restart Windows.
5. Run the system maintenance troubleshooter
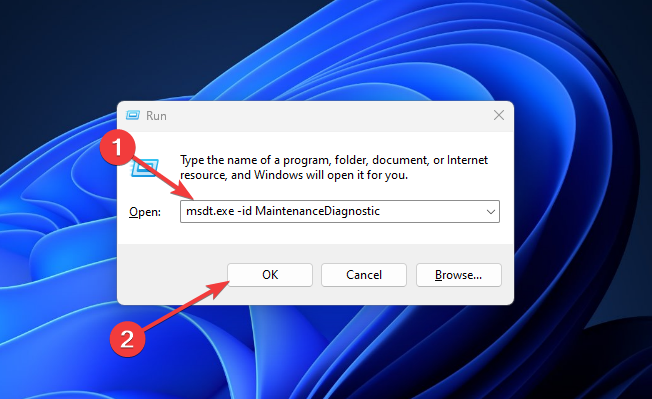
- Press Windows + R keys on your keyboard, enter the following command into the Run command dialog box, and click OK:
msdt.exe -id MaintenanceDiagnostic
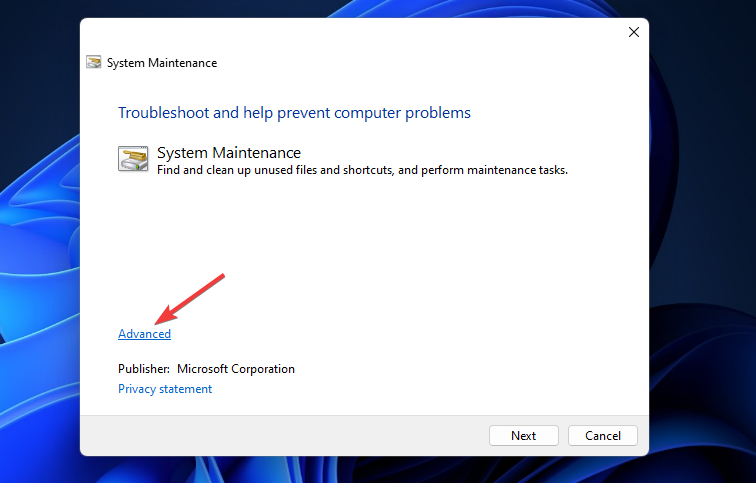
- Click on Advanced on the bottom left corner.

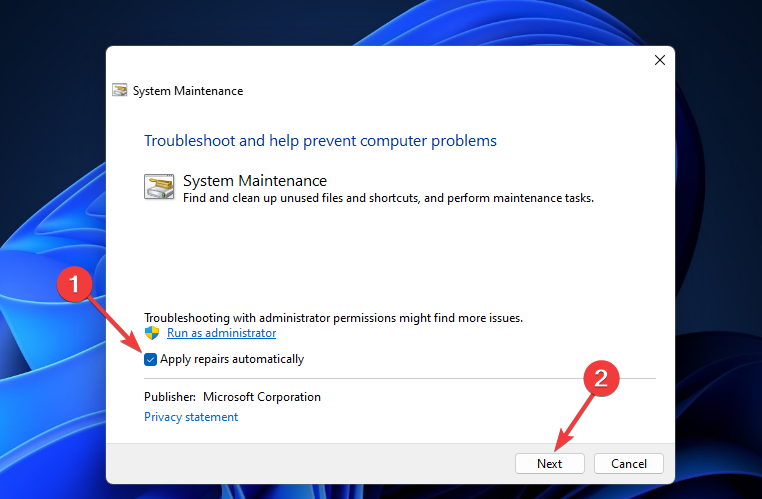
- Next, check the Apply repairs automatically box and click on the Next button.

- Wait for Windows to detect the problem and follow the on-screen instructions to complete the process.
You can also use a troubleshooting tool to perform this operation. Here are the best Windows PC troubleshooting tools to pick from.
6. Uninstall the latest Windows update
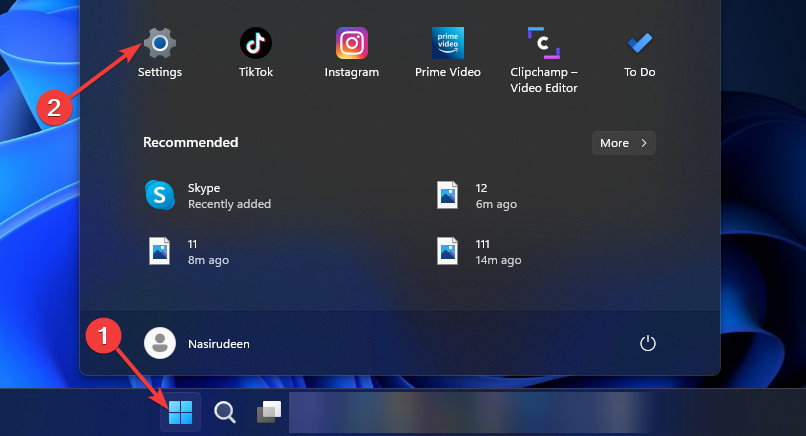
- Click on the Windows icon on your taskbar and select Settings from the Start menu.

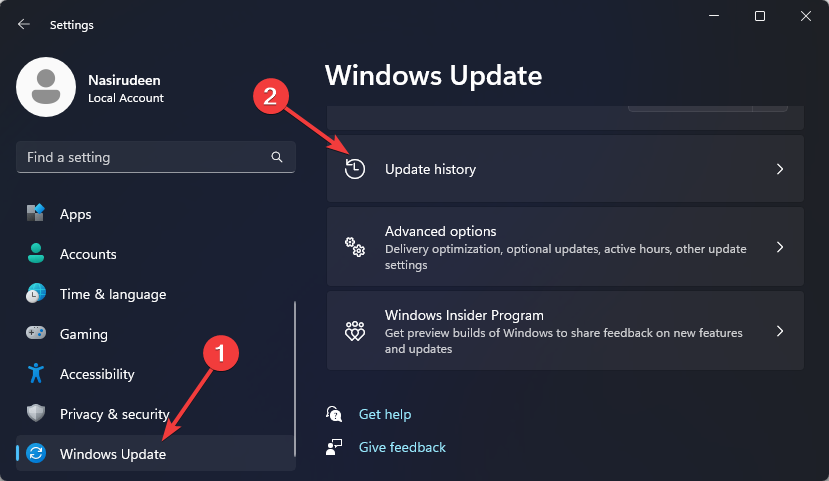
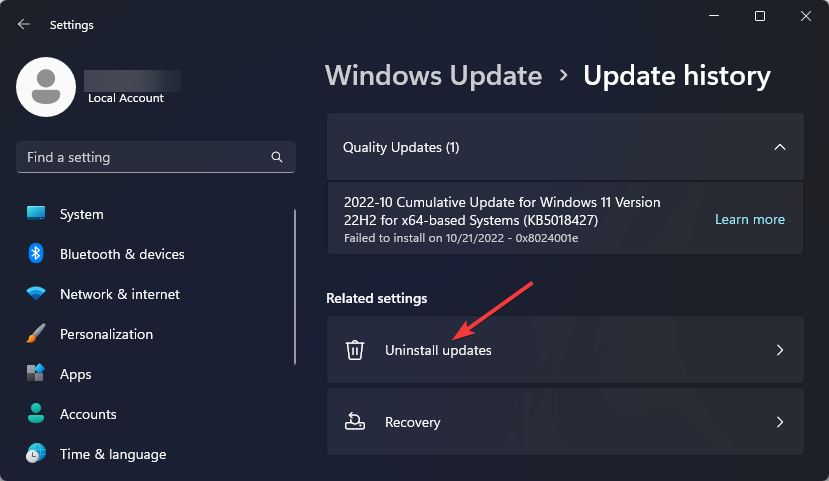
- Select Windows Update on the left pane and scroll down to Update history on the right.

- Next, click on Uninstall updates under Related settings.
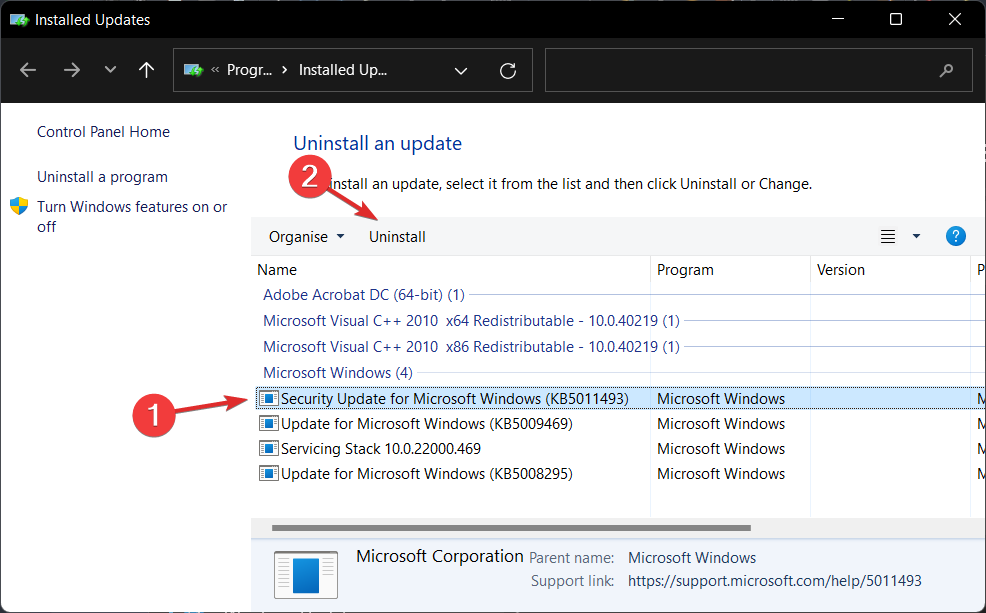
- Click on the latest update under Microsoft Windows and click on Uninstall.

- Click Yes on the confirmation box that pops up and wait for Windows to complete the removal.
- Restart your PC.
7. Clean boot Windows 11
- Press Windows + R keys on your keyboard, input the following command into the Run command box and click OK:
msconfig
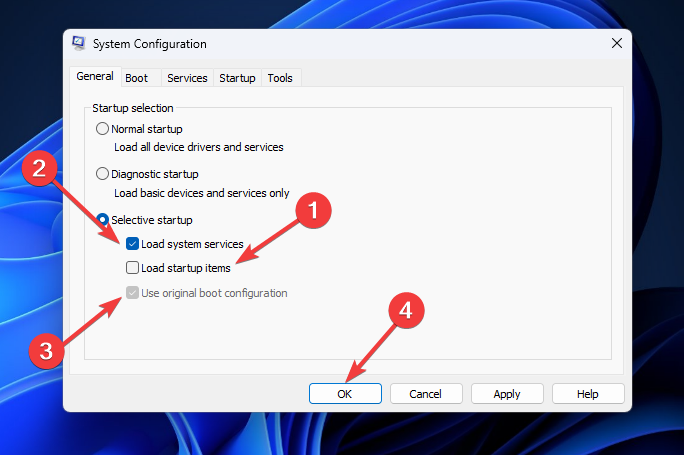
- Under Selective startup, uncheck the Load startup items box, check the box next to Load system services and Use original boot configuration. Click OK to save the changes.

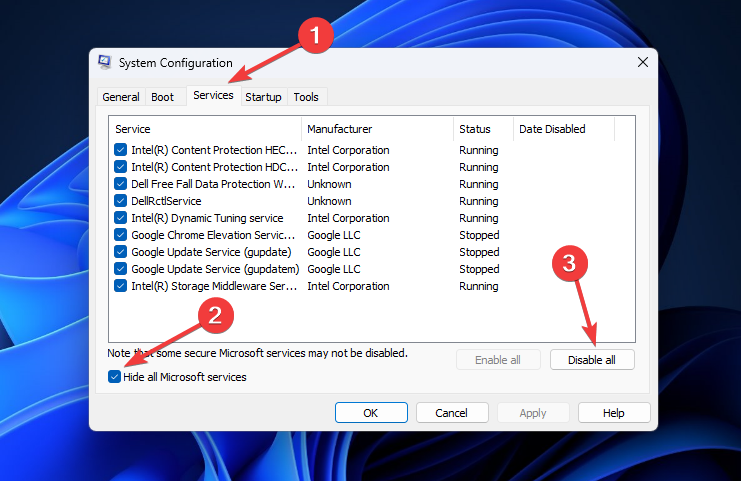
- Next, switch to the Services tab, check the box next to Hide all Microsoft services at the bottom of the page, and click the Disable all button.

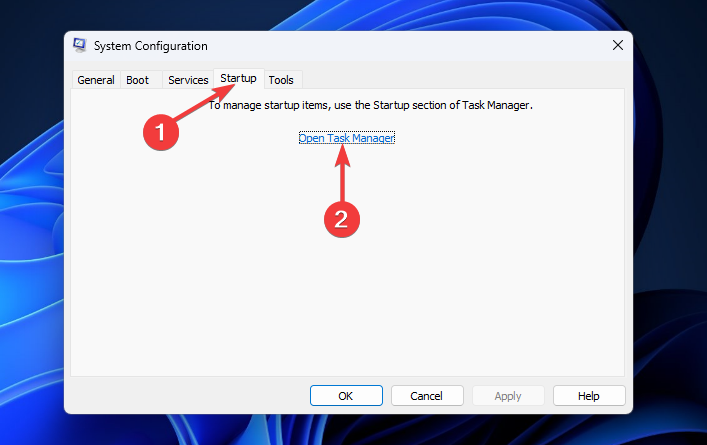
- Next, switch to the Startup tab and click Open Task Manager.

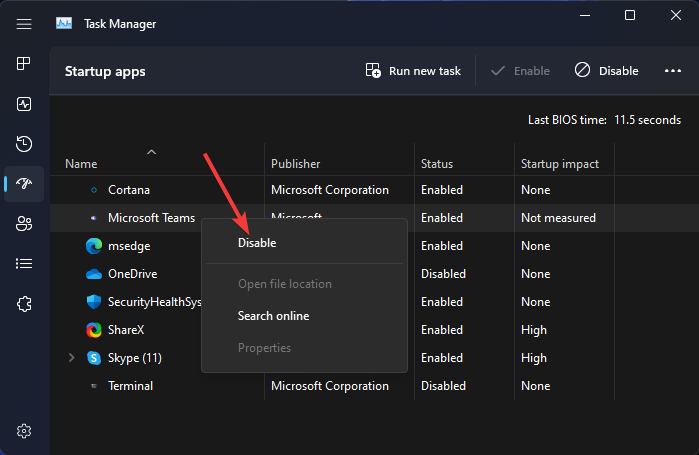
- Right-click each item under the Startup apps and Disable them one after the other.

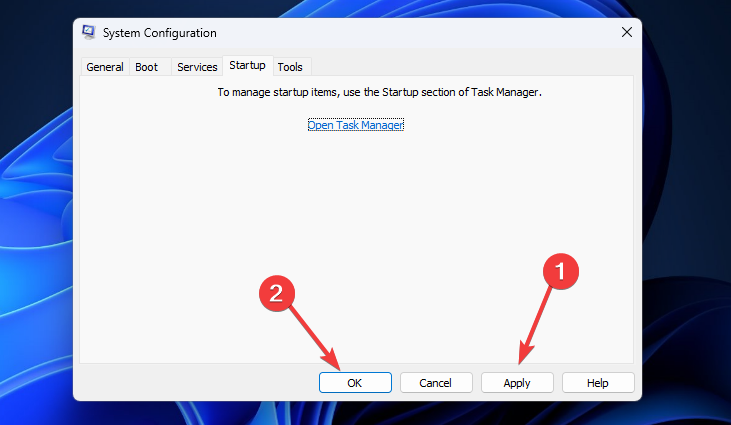
- Close the Task Manager and go back to the System Configuration window. Click on the Apply button then press the OK button to save all changes.

- Restart your PC.
Those are the solutions that have helped many users put an end to screen resolution changing automatically on Windows 11.
You may have to try more than one of the solutions. If one doesn’t work for you, feel free to move to the next until you are able to fix the problem.
Another typical resolution problem you will likely encounter is having a larger display than screen size. To fix it, check out how to make Windows 11 display fit to screen.
You might also be interested in reading our guide on how to correct low resolution on Windows 11. The guide is for Windows 10, but the solutions are the same for Windows 11.
If you have other methods that work, share them with us in the comments section below.