Windows 11 Switch User is Missing: 4 Ways to Enable It
Ensure the user accounts are enabled for them to appear on the login screen

Some users have reported that Windows 11 Switch User feature is missing from the login screen. If there is no Switch User option in Windows 11, that is usually because of improperly configured user accounts or a corrupt user profile. Before trying the solutions below, ensure you’re using a legitimate version of Windows and check if you’re using a trial version, because that would prevent you from accessing this tool.
How do I enable the Switch user option in Windows 11?
1. Create another user account
- Hit the Windows keys and click on Settings.

- Click on Accounts on the left pane then select Family & other users.

- Select Add account.

- Follow the on-screen prompts to create a user account, then try switching users again.
In case you’re unable to add another user account, check out our helpful guide to bypass this restriction.
A professional repair software can also help solve the operating system errors and missing files much faster and more safely.
The tool scans for your system files that are modified, corrupted, or missing, and compares them with the ones that are in their initial state from its repository. Once detected, Fortect replaces the problematic ones with their fresh copies from its database.

This is how you can fix Windows 11 errors using Fortect:
- Install and launch Fortect.
- Launch the application.
- Wait for the software to identify stability issues and possibly corrupted files.
- Press Start Repair.
- Restart your PC for all the changes to take effect.
⇒ Get Fortect
Disclaimer: This program needs to be upgraded from the free version in order to perform some specific actions.
2. Enable the user account
- Hit the Windows + R keys to open the Run command.
- Type lusrmgr.msc in the dialog box and hit Enter to open the Local users and groups console.

- Click on Users on the left pane, then select the user you want to switch to in the right pane.
- Right-click on the user and select Properties.

- Navigate to the General tab and ensure the Account is disabled option is unchecked.

- Click on Apply and OK to save changes.

3. Enable fast user switching
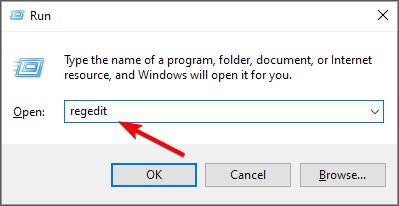
- Hit the Windows + R keys to open the Run command.
- Type regedit in the dialog box and hit Enter to open the Registry Editor.
- Navigate to the following location:
HKEY_CURRENT_USER\Software\Microsoft\Windows\CurrentVersion\Policies\System - Click on System but if it’s missing, right-click on Policies and select New Key then rename it as so.
- Now go to the right pane, right-click on an empty space and select New DWORD (32-bit) Value then rename it as HideFastUserSwitching.

- Double-click on it, set the Value data to 0 and press OK.

We also must remind you that if you’re not familiar with the registry and don’t know what you’re doing, you could permanently damage your computer.
You can easily delete a registry key or value that causes problems for your computer, or you may inadvertently change a setting that prevents the operating system from starting properly.
If you make changes to the registry, it’s a good idea to create a restore point before you start. A restore point is an image of your system at a specific time that you can revert back to if things go wrong.
4. Restore Local security policy settings
- Hit the Windows key, type cmd in the search bar and click Run as administrator.

- Type the following command and press Enter:
secedit /configure /cfg %windir%\inf\defltbase.inf /db defltbase.sdb /verbose
Before you choose this solution, remember that resetting the Local security policy will erase all standard user accounts, and you’ll be left with only the administrator account. Therefore, if you have any unsaved work or files that could get lost, this is not your option.
Why is there no Switch user on my Windows login screen?
If the Switch user option is missing from your lock screen, it may be because of one of the following reasons:
- Incorrect configurations – Some user accounts may be improperly configured and hence won’t appear on the login screen.
- Corrupt user profile – If your current user profile has become corrupted somehow, you may be unable to access some features.
- A glitch in the system – Sometimes Windows undergoes random glitches, which usually resolve themselves after a few moments. If you can’t switch users in Windows 11, you may have to wait it out.
- Disabled/missing account – The account that you want to switch to may also be disabled or even missing entirely from the computer.
- Outdated OS version – It’s possible that an update or lack of has caused this issue with the Switch User option missing in Windows 11.
Hopefully, one of these methods has helped you bring the switch user option back if it was missing in your Windows 11. You may also be interested in enabling/disabling password expiration, so be sure to check out our detailed article on how to go about it.
If your user account has expired, we show you how to get it back in a few easy steps. To learn more about user accounts, we have a great guide on how to switch users on Windows 10, so be sure not to miss it.
Share with us what method worked for you in the comment section below.
Read our disclosure page to find out how can you help Windows Report sustain the editorial team. Read more


Improve this guide


User forum
0 messages