How to use the Voice Typing Tool in Windows 11
5 min. read
Updated on
Read our disclosure page to find out how can you help Windows Report sustain the editorial team. Read more
Key notes
- If you want to use the Windows 11 Voice Typing Tool, keep in mind that it is easier than you think.
- To open it, you only need to know a quick keyboard shortcut.
- Note that Windows 11's Voice Typing Tool offers multiple languages from which you can choose.
![How to use Voice Typing Tool in Windows 11 [Complete Guide]](https://cdn.windowsreport.com/wp-content/uploads/2021/09/82b5wA3gMN-1-886x590.jpg)
It is no longer a surprise that the latest Microsoft OS comes up with impressive features, which create a brand new environment.
From what we found, it seems like there are plenty of users who are wondering how to efficiently use the Windows 11 Voice Typing Tool.
The great news is that there are no complicated ways. So, do not worry if you’ve never tried it before. In case you’re not that familiar with this feature, take a look at some reasons to give it a shot.
What can the Windows 11 Voice Typing Tool offer?
Also known as a dictation tool, voice typing does nothing more than its name says. It records what you’re speaking, then converts it into text in real-time.
Note that you can use it in any text box. So, we talk about text editors or composing boxes of a chat app, typing an email, and the list can go on with many other options.
It is no doubt that the latest operating system came up with some new great features and improvements, and that also applies to Voice Typing Tool.
On the previous OS, you were supposed to edit what you already dictated, and this means outlining yourself and punctuating the words accordingly. Now, your work will be more simplified, with Windows 11 doing all the job.
How can I use Voice Typing Tool in Windows 11?
1. Open the Voice Typing Tool
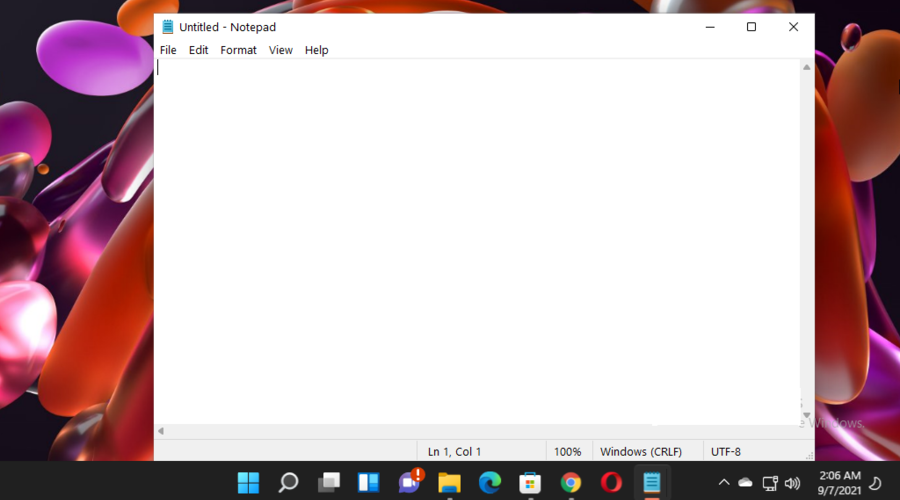
- Select the text box where you want to type (in this particular case, we opened a Notepad box).
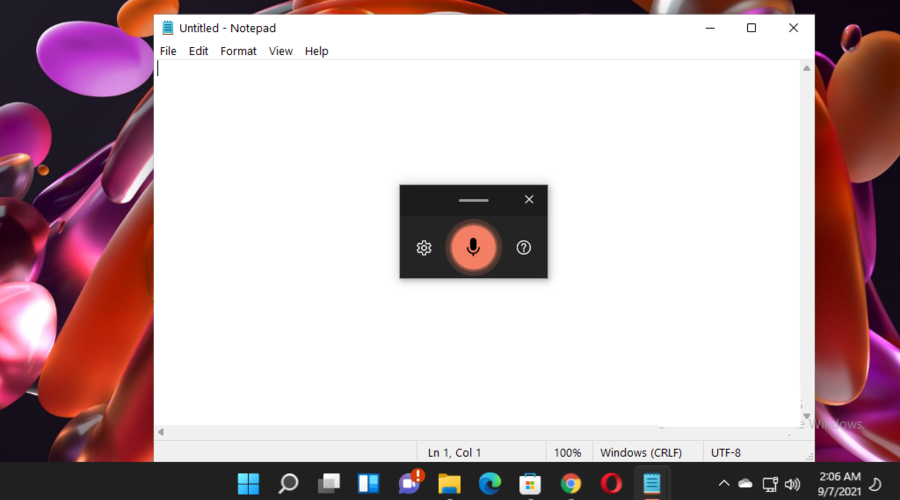
- Remain with the cursor in that text box, then use the following keyoard shortcut: Windows + H.
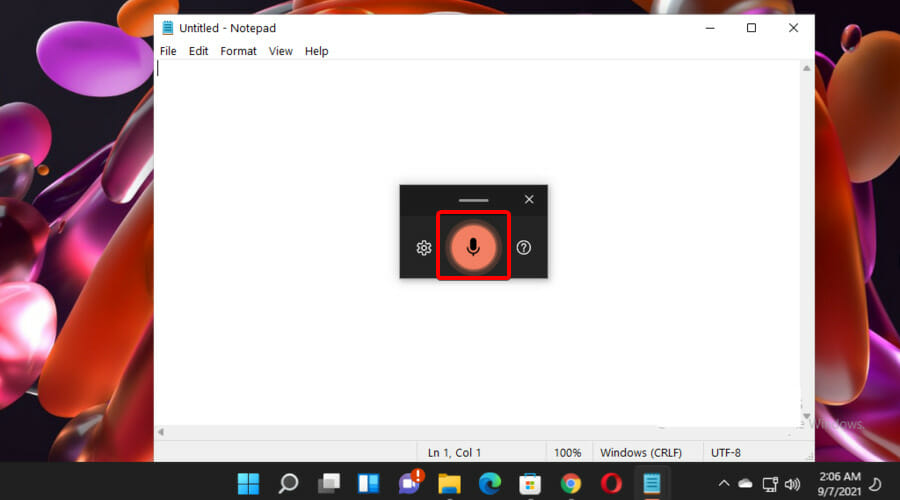
- A little pop-up box will appear and you’ll be able to move it anywhere.
- In case it’s obstructing your screen view, just click and hold the bar at the top to drag and move it around the screen.
2. Enablethe Voice Typing launcher
- Open the Voice Typing Tool, as you learned from the previous method.
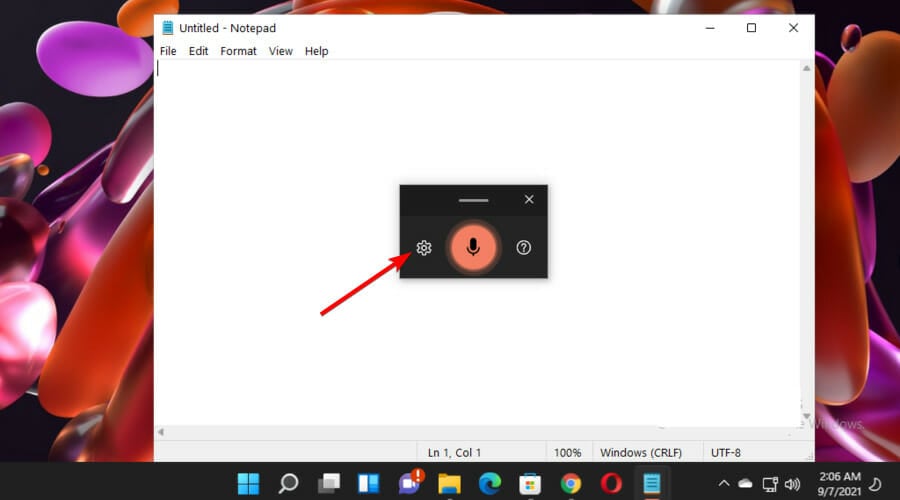
- In the pop-up box, click on the Settings icon (marked as a gear).
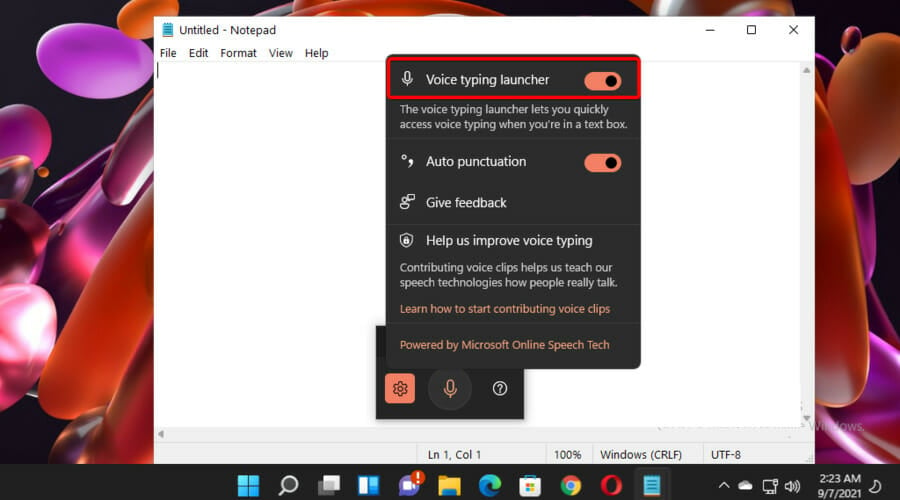
- Make sure that the toggle button from the Voice typing launcher is On.
In case you enable this option, you’ll be able to quickly voice typing launcher when you’re in a text box. In other words, it will automatically appear anytime you click inside a text field.
For those who dictate often, this choice would be extremely helpful to save your working time. Of course, if you change your mind, it can always be turned back off.
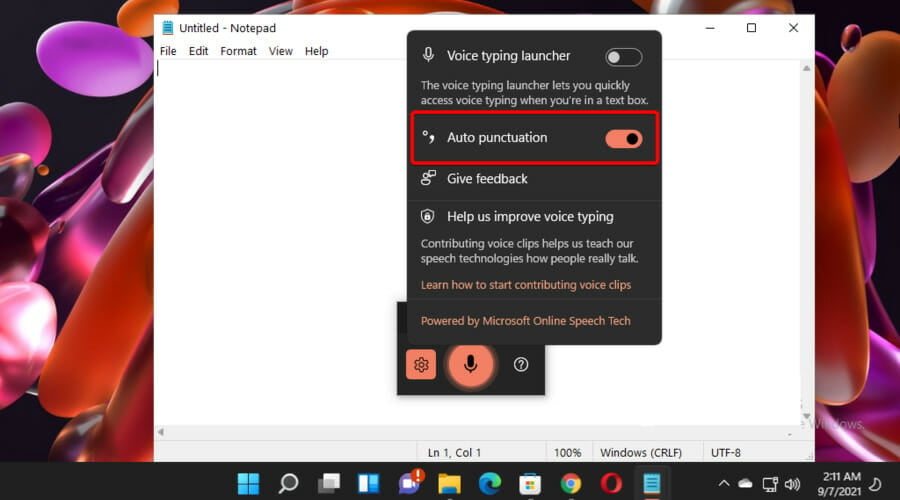
3. Turn on auto-punctuation
- Open the Voice Typing Tool, then navigate to Settings.
- Look at the Auto-punctuation section, then make sure the toggle button is On.
4. End dictation
4.1 Stop or pause the dictation
- Click on the Microphone icon.
- If you decide to stop or pause the dictation, you can also use the following keyboard shortcut: Windows + H.
4.2 Exit Voice Typing Tool
The quickest way to exit the Windows 11 Voice Typing Tool is by pressing the Esc key.
What are the supported languages in Windows 11 Voice Typing Tool?
Even if voice typing is a great feature, there are a few catches you should consider. First of all, it is mandatory to be connected to the Internet. Besides that, it only works with certain languages.
Take a look at the list below and find out from what you can choose:
- English (US, Australia, Canada, India, United Kingdom)
- French (France, Canada)
- German (Germany)
- Italian (Italy)
- Portuguese (Brazil)
- Spanish (Mexico, Spain)
- Simplified Chinese
Check out this Windows 11 voice assistant
Besides the Voice Typing Tool, Windows 11 comes up with an incredibly useful voice assistant. You’ve probably heard before about Cortana.
If not, keep in mind that you can use it for multiple reasons like setting a reminder, scheduling a meeting, searching the Internet, locating items on your PC or Windows phone, and much more.
Unlike the previous version, this time Cortana will no longer be included in the initial boot sequence, nor be pinned in the Taskbar.
The voice assistant is installed in Windows 11 but is not active by default. Before using it, you’ll need to turn it on, launch, and sign in to the Cortana app.
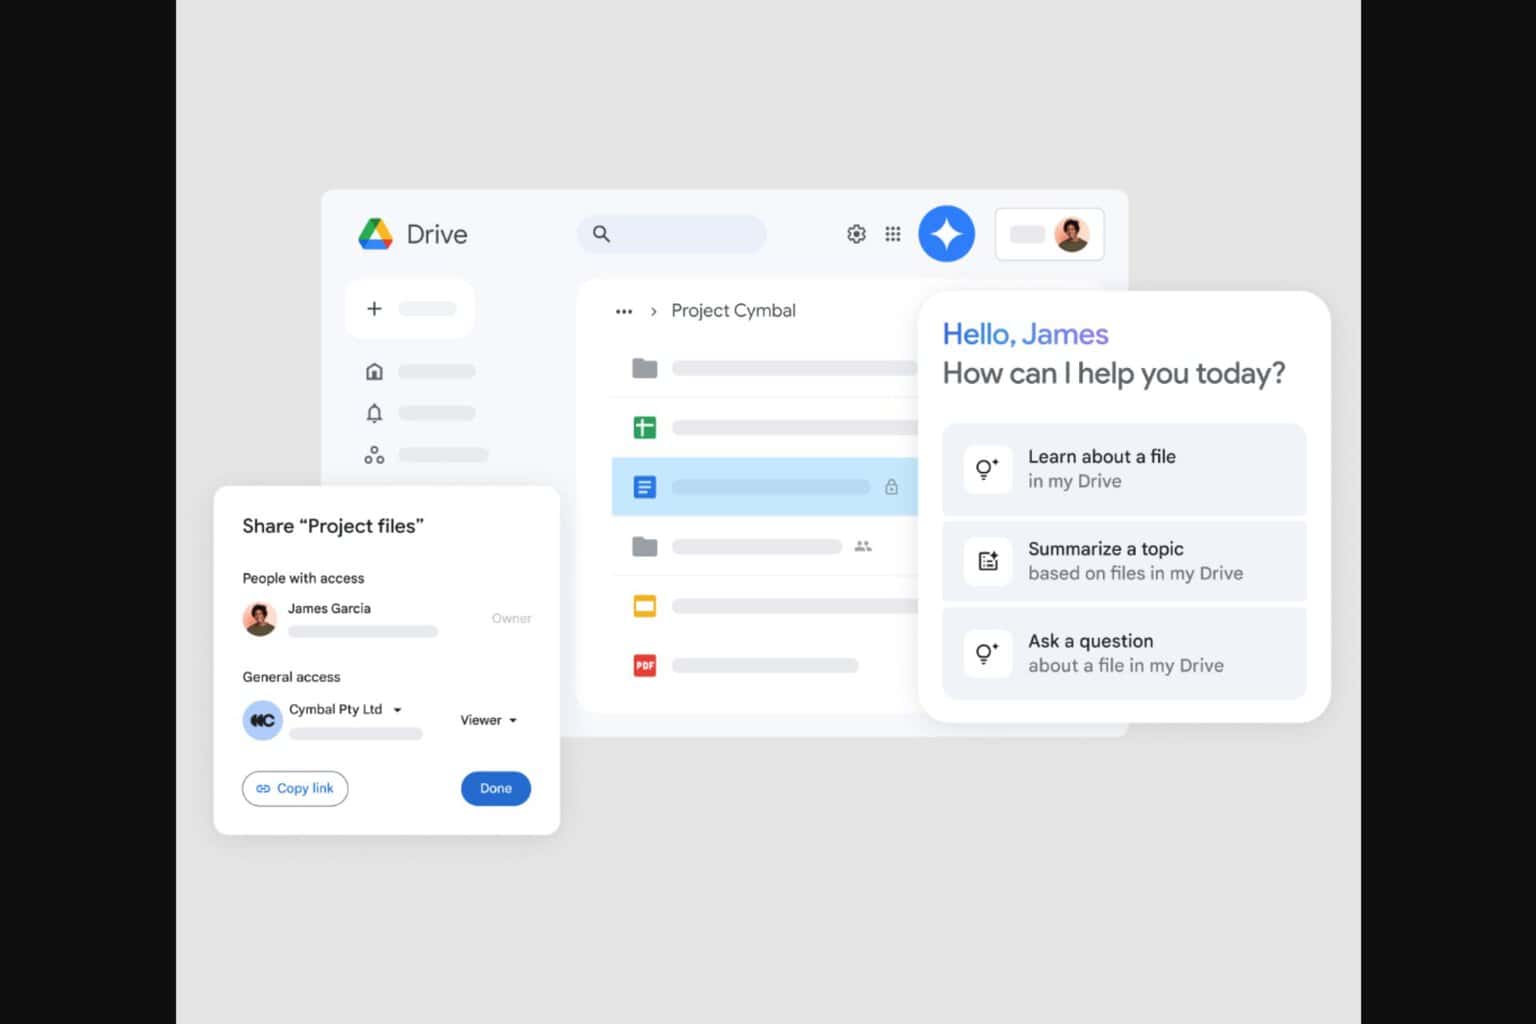
As you can notice in the picture below, it uses high-quality artificial intelligence. But let’s shortly explain what is this all about.
Raw data can originate from multiple sources, such as databases, apps, sensors, devices, and IoT systems.
On the other hand, various transformations, analytics, and machine learning processing can provide insights that are presented or delivered to users, apps, and automated systems.

So, if you were wondering how Windows 11 Voice Typing Tool works, there you are, having a complete guide regarding this subject.
For more advanced features you can use Dragon Professional Individual to boost your productivity and get much more accurate transcripts.
In case you still have unclear information or additional curiosities, do not hesitate to notify us by leaving a comment in the section below.



User forum
0 messages