Windows 7 Sleep Mode Not Working: 5 Ways to Fix It
Note that viruses can prevent Windows 7 sleep mode from working
5 min. read
Updated on
Read our disclosure page to find out how can you help Windows Report sustain the editorial team. Read more
Key notes
- Windows 7 Sleep Mode not working can be due to outdated device drivers on your PC.
- You can fix the issue by tweaking your Power Options settings.
- A clean boot can also resolve Windows 7 sleep issues in no time.
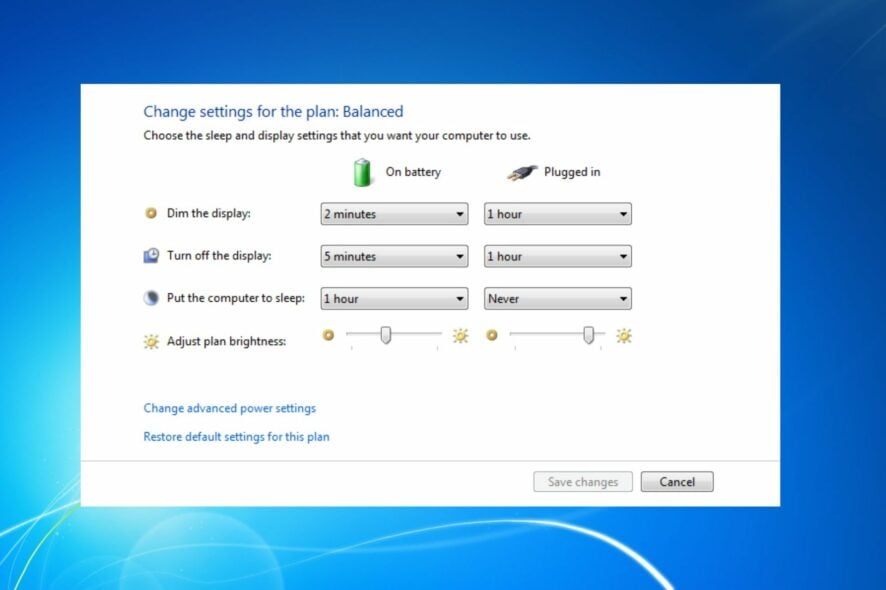
Some of our readers complain about Windows 7 Sleep Mode not working whenever they enable it. This problem can occur for many reasons, and it’s also common in other Windows versions. Also, some reports about Windows 11 Sleep Mode not working on their PC.
Why is the Sleep Mode not working in Windows 7?
The most common factor responsible for Windows 7 Sleep Mode not working is outdated drivers on your PC. When the devices connected to your computer run on outdated drivers, they may interfere with the Sleep Mode functionality.
Other factors that can cause the Sleep mode on Windows 7 not to work are:
- Issues with the Power Options settings – If the Power Options settings in your PC are not well configured, you may have difficulties using the Sleep Mode option.
- Virus and Malware – Many issues may occur with your computer if it becomes infected with malware or viruses. It can prevent it from performing tasks such as sleeping. Look at our recommended list of the best anti-malware software to combat this issue.
- Devices connected to the PC – Your PC may not be able to use the Sleep Mode option if a device connected to it is using it, causing it not to go to sleep. Also, the device can malfunction and affect how your computer works,
These causes may vary on different Windows 7 computers. Hence, we’ll walk you through some general fixes for the problem.
What can I do if Sleep Mode does not work on Windows 7?
Do not hesitate to go through the following preliminary checks:
- Disconnect any external devices from your PC.
- Turn off background apps running on your computer.
- Temporarily disable antivirus software.
If you’re still not able to put your PC to sleep, try the following solutions.
1. Check the Power Option settings
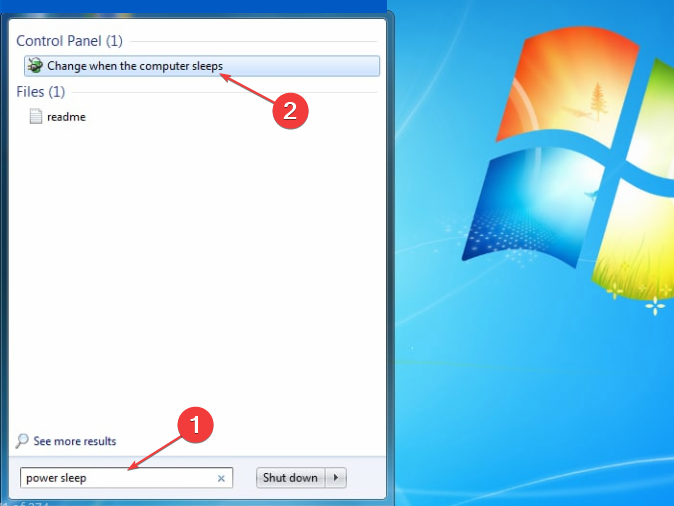
- Left-click the Start button, type power sleep in the text box, and click on Change when the computer sleeps.
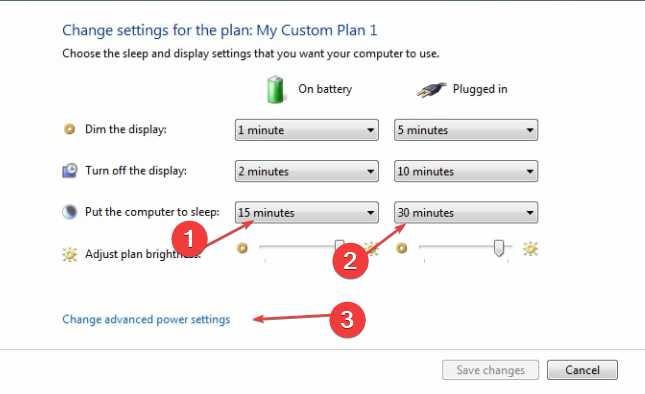
- Go to Put the computer to sleep and select a new value, such as 15 minutes.
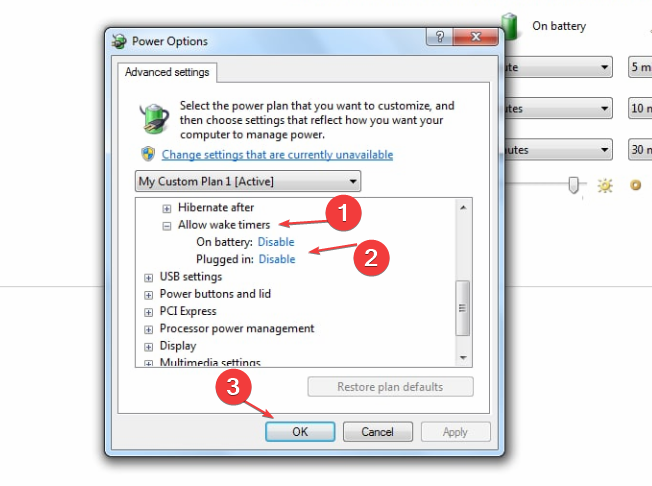
- Click Change advanced power settings, expand the Sleep tab, expand Allow wake timers, then select Disable.
- Click on Multimedia settings, expand When sharing media, and Allow the computer to sleep.
Read what to do if the sleep option is missing from the Power Options on your computer.
2. Update drivers to the latest version
- Go to the hardware maker’s website and download the latest hardware driver.
- Open File Explorer from the taskbar and find the downloaded zip folder.
- Right-click on the zip folder, select Extract All from the drop-down, and then follow the prompts.
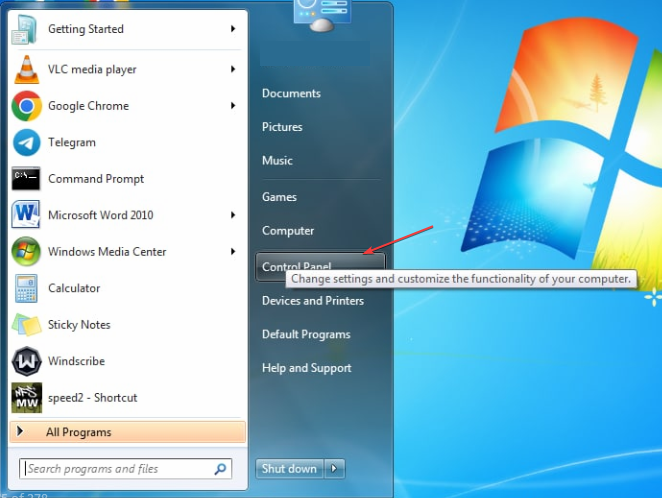
- Right-click on Start and select Control Panel.
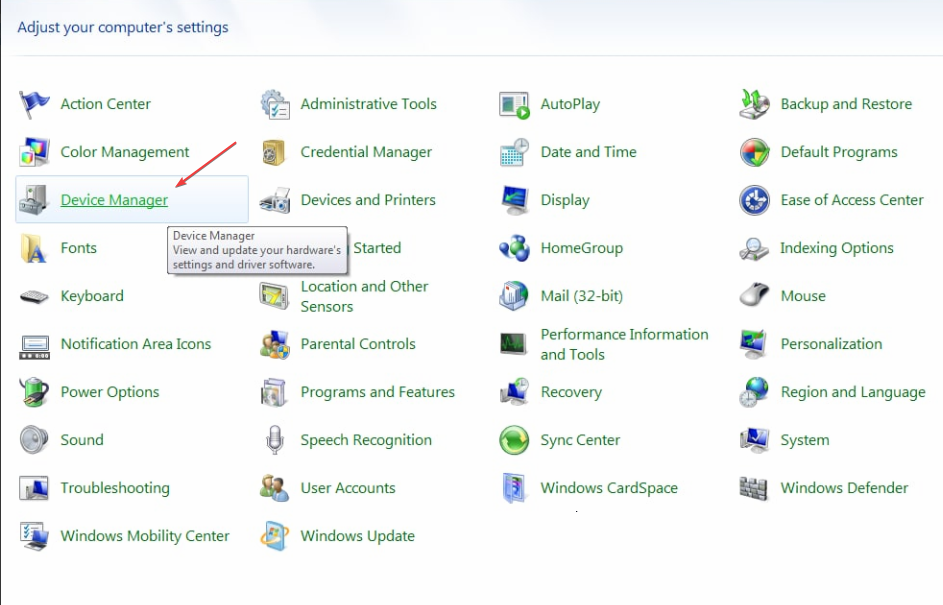
- Click on Device Manager to start it.
- Double-click on the device you want to update its driver and select Update Driver Software.
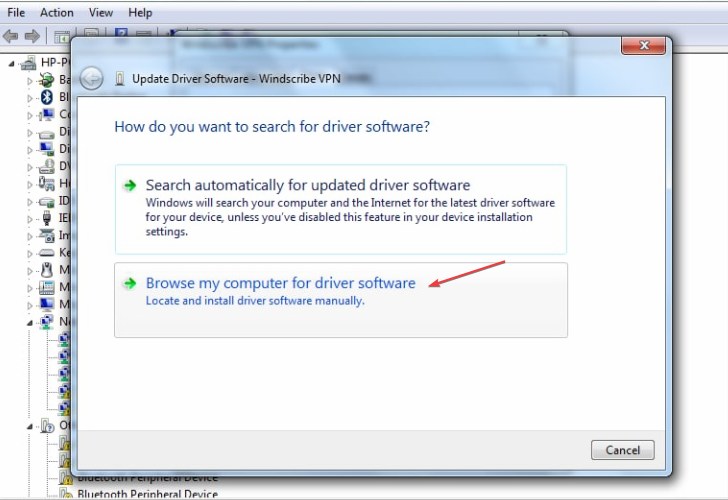
- On the next prompt, select Browse my Computer for driver software, then click Browse to find the extracted driver file.
- Select the driver file and click Open, then click Next on the Update window.
Follow the onscreen instructions to complete the update. Repeat these steps for all your device drivers. Updating your drivers will help their devices perform better and fix Windows 7 Sleep Mode not working.
As another possibility, you can let a third-party software help you update your drivers automatically. Outbyte Driver Updater is an excellent pick because it has a vast database where it can locate the latest updates in just a few minutes.

Outbyte Driver Updater
Worry less about searching for the right drivers and let Outbyte Driver Updater get the latest versions for you.3. Disable devices from waking the computer
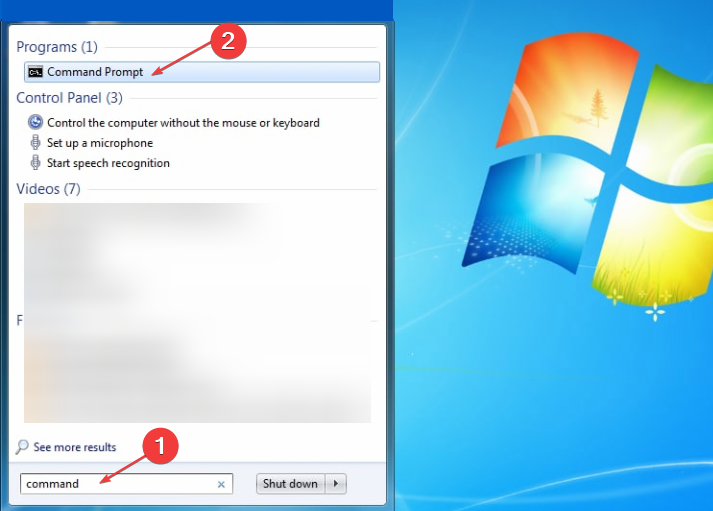
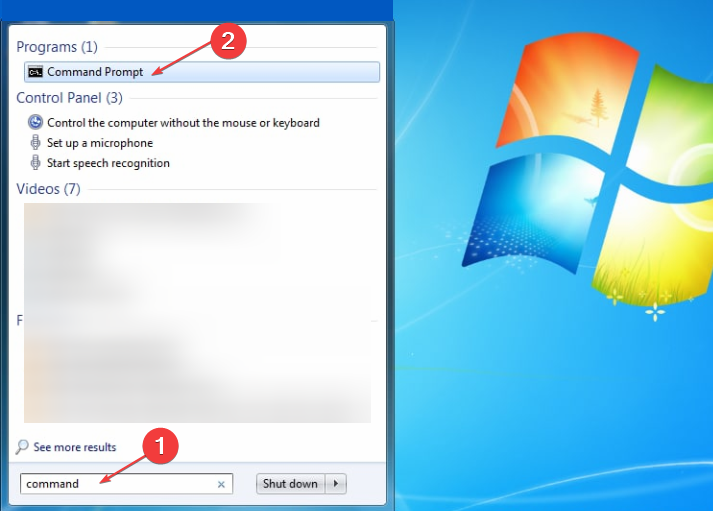
- Left-click Start, type command in the text box, and select Run as administrator from the drop-down.
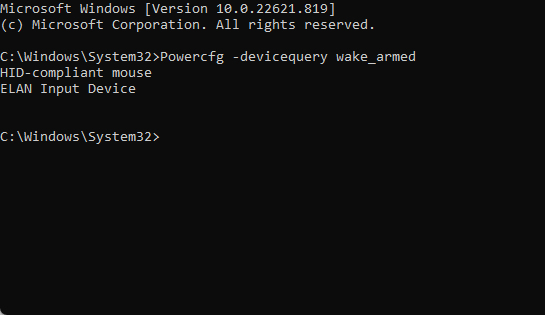
- Run the following command to show the devices that can wake the computer:
Powercfg -devicequery wake_armed - Find the app to disable from waking the computer, then run the following command:
Powercfg -devicedisablewake devicename
Check if the issue persists. If it’s not resolved, run the following command to enable the disabled device: Powercfg -deviceenablewake devicename
Disabling devices from waking the PC will fix any interference from the device, preventing the Sleep Mode from working.
4. Perform a Clean boot
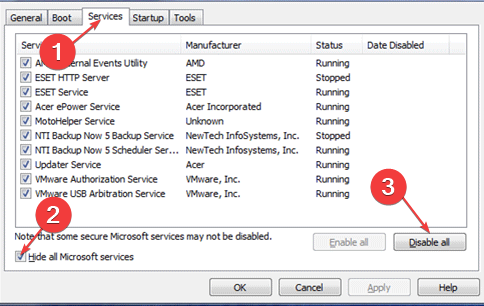
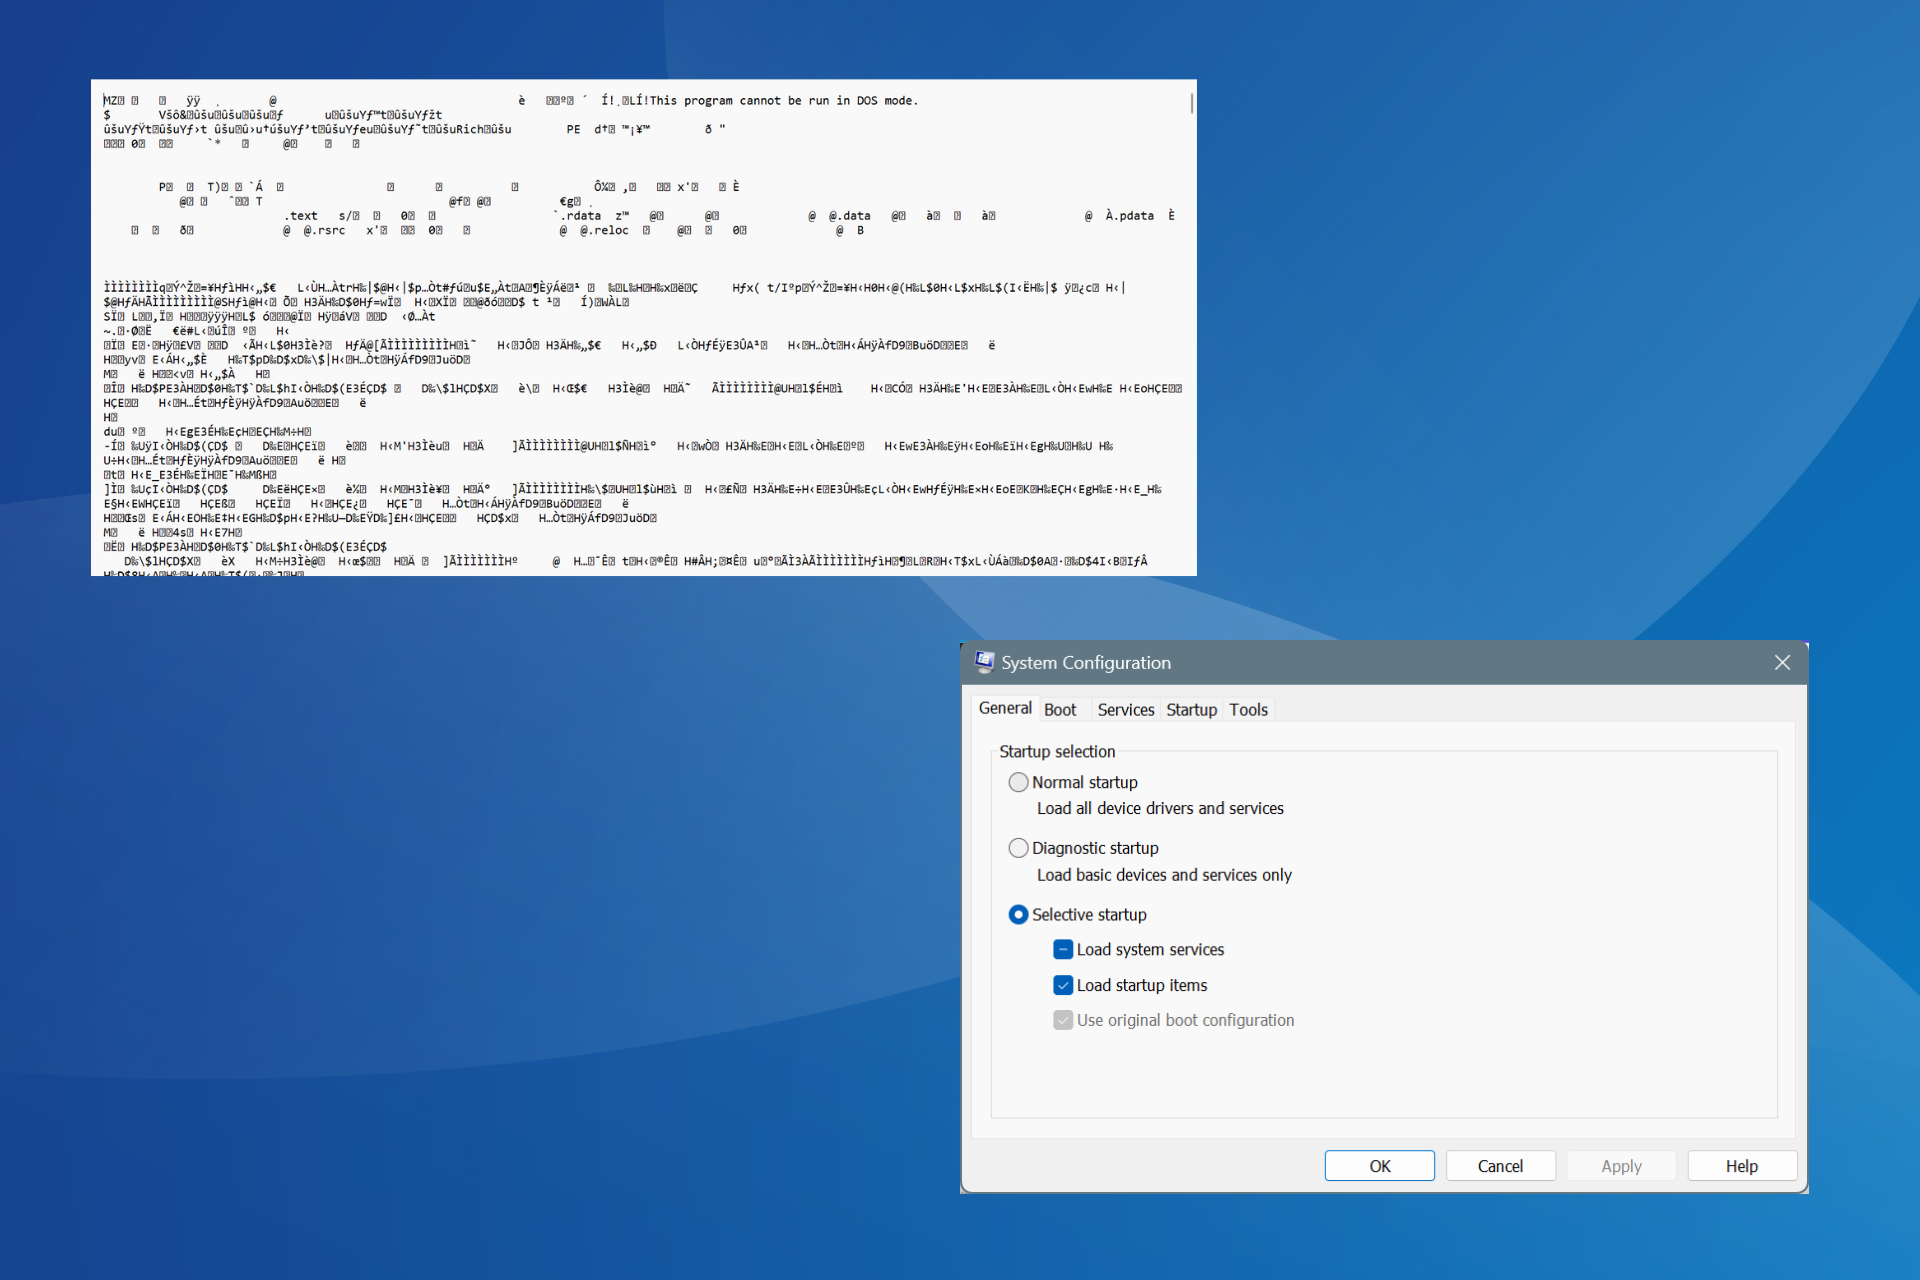
- Left-click Start, type msconfig in the text box, and go to the Services tab.
- Check the box for Hide all Microsoft services and click the Disable all button.
- Go to the Startup tab, click the Disable all button, then click OK to save the changes.
- Restart your PC.
A clean boot will disable startup services that can cause Sleep Mode issues on your PC.
5. Run an SFC scan
- Left-click Start, type command in the text box, and select Run as Administrator from the drop-down.
- Click Yes on the User Account Control (UAC) prompt.
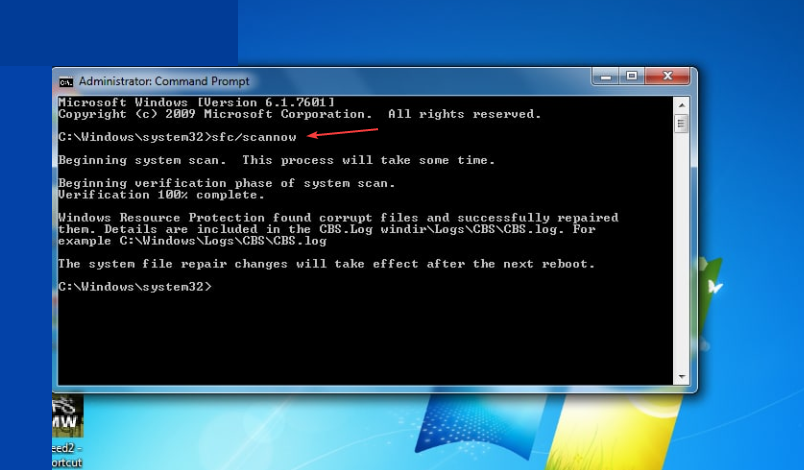
- Type the following and press Enter to open the System file checker:
SFC /scannow
After the process is complete, restart your PC. Performing an SFC scan will check and repair corrupt system files.
Alternatively, you can read about Windows 11 shutting down instead of sleeping and some fixes. Likewise, we have a detailed article about how to fix hibernation and sleep issues on Windows11.
If you have further questions, kindly drop them in the comments section below.





User forum
0 messages