Here's how to fix Windows was unable to find a certificate error
5 min. read
Updated on
Read our disclosure page to find out how can you help Windows Report sustain the editorial team Read more

If you have set up a new wireless router or Internet connection, the possibility is that you may end up with the Windows was unable to find a certificate to log onto to the network error while trying to connect to the network.
This error can be problematic, but there’s a way to fix it.
How can I fix WiFi certificate error on Windows 10?
- Disable FIPS for your network
- Check for disabled startup services
- Manually add a wireless network
- Connect to another PC
- Flush DNS and reset Winsock catalog
- Restore Windows to an earlier point
1. Disable FIPS for your network
If you’re getting Windows was unable to find a certificate error on your PC, you might fix it by disabling FIPS for your network.
- Open Control Panel from the search/Cortana bar.
- Open Network and Internet > View Network Status and tasks.
- Under Active Networks, click on the problematic WiFi network.
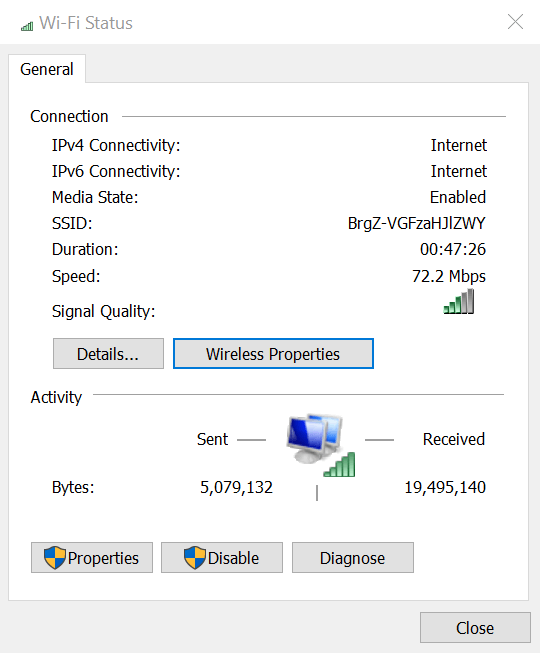
- Click on Wireless Properties button.
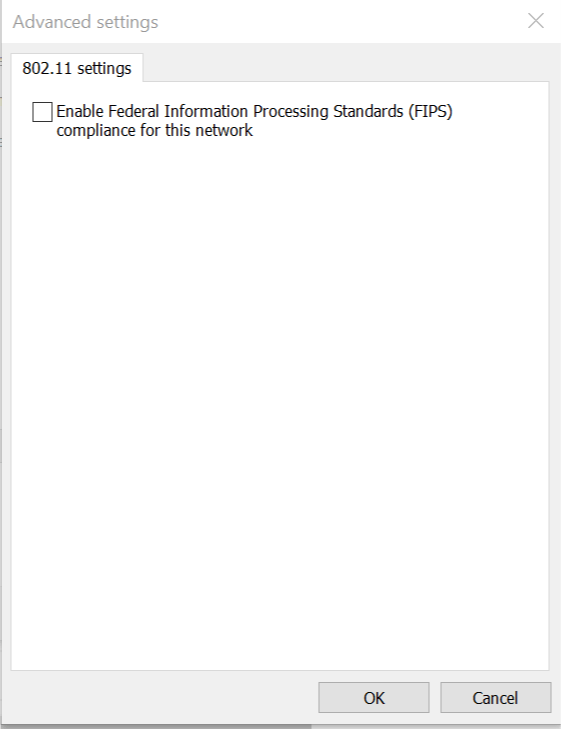
- Next, click on Security tab and click Advanced Settings.
- Uncheck Enable Federal Information Processing Standards (FIPS) compliance for this network option.
- Click OK on all the open windows to save the changes.
- Also Read: 10 best anti-hacking software for Windows 10
2. Check for disabled startup services
Windows was unable to find a certificate can sometimes appear if you have disabled important startup services. To fix that, follow these steps:
- Press Windows Key + R.
- Type msconfig and hit Enter.
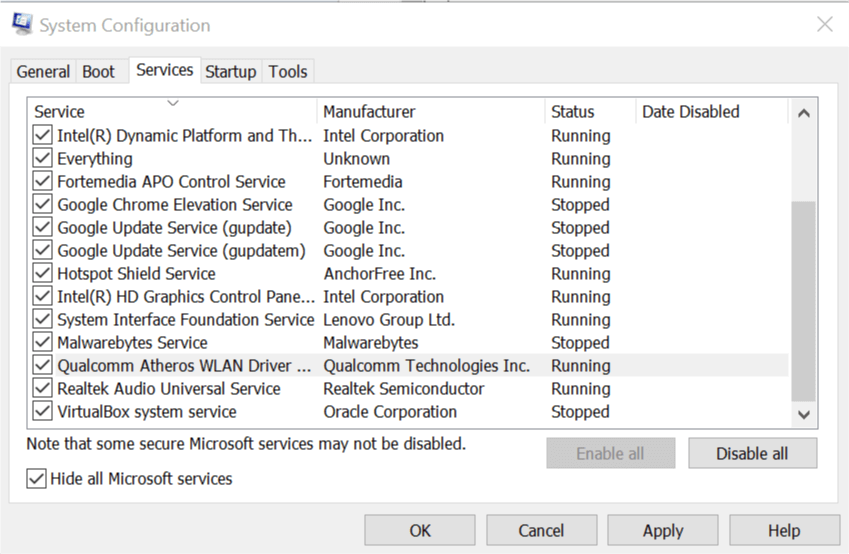
- In the System Configuration window, go to Services tab.
- Go through all the services. If you see any service that is disabled (unchecked), simply check the box to enable it again.
- Click Apply > OK button to save the changes.
- Restart your PC and check for any improvements.
3. Manually add a wireless network
To fix this error you can create or add a wireless network profile manually to your Windows computer. Follow these steps to create a wireless network manually. The steps work across all the version of Windows since Vista.
- Open Control from the Cortana/search bar.
- Click on Network and Internet.
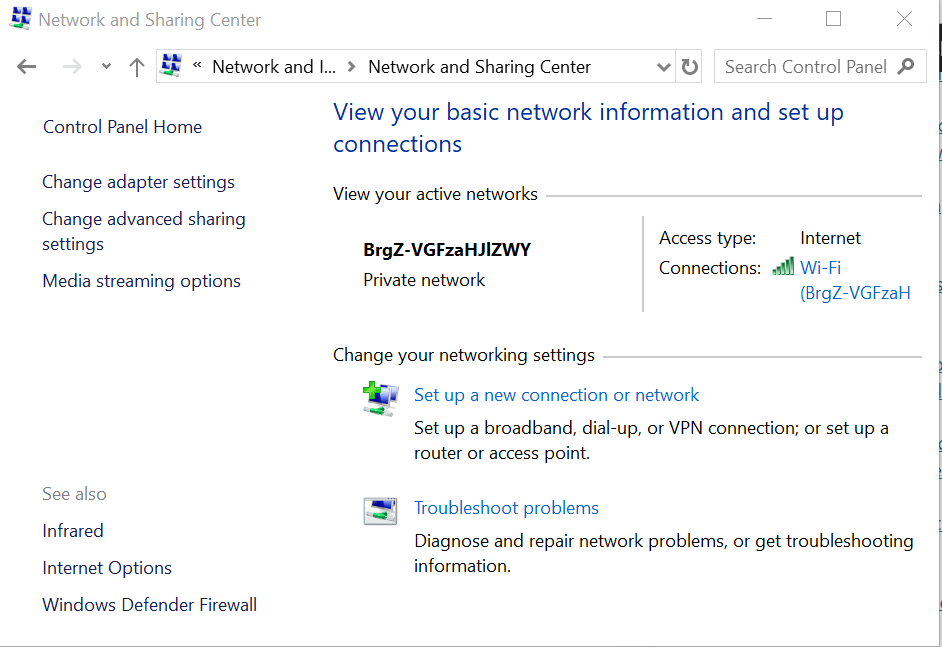
- Open Network and Sharing Center.
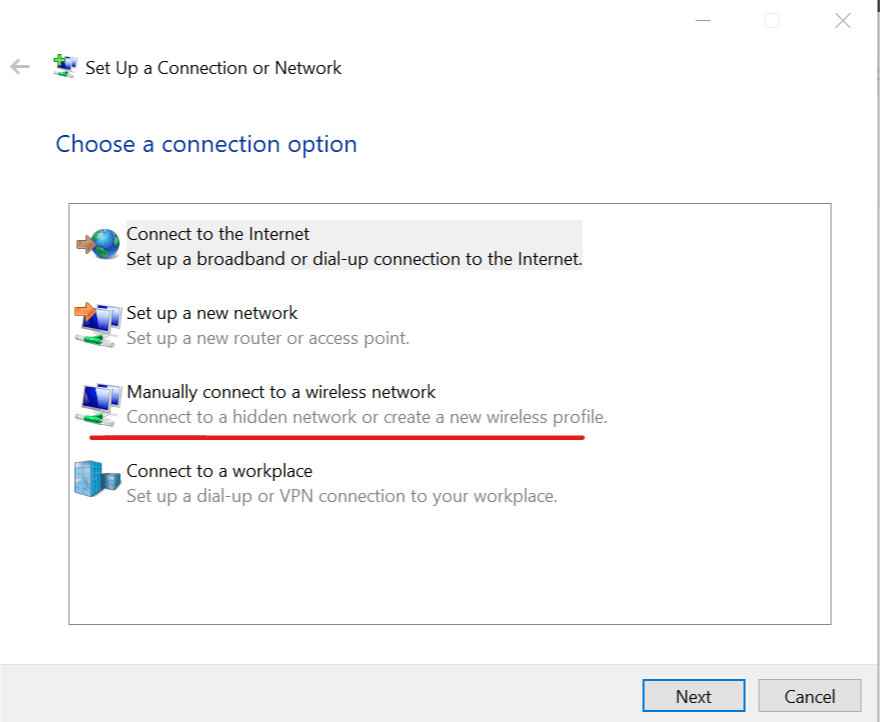
- Click on Set up a new connection or network option.
- A new dialogue box will open. Select the Manually connect to a wireless network option and click Next.
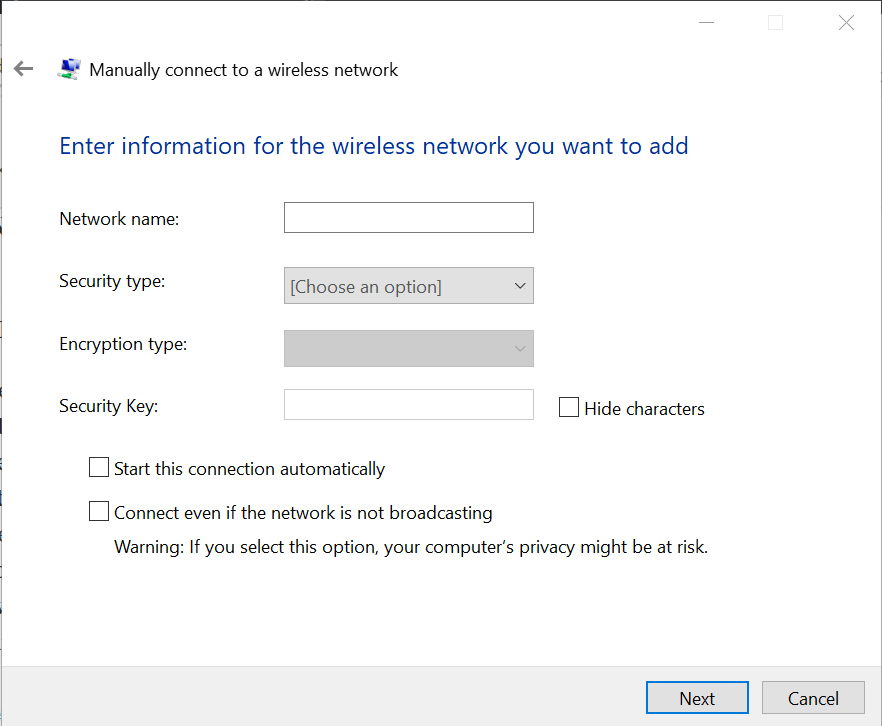
- Here you need to enter information for the wireless network you want to add. So, enter, Network Name, select the type of security from the drop-down menu and enter the security key (password for the network).
- Select Start this connection automatically and Connect even if the network is not broadcasting option. Click Next and close the window.
- Go to Network and Sharing Center > Manage network connections. And try to connect using the newly created network.
Now try to access the Internet to see if the issue is resolved.
4. Connect to another PC
To make sure the problem is with your computer and not related to your Wireless router, try to connect another laptop or PC to the same network. If connected, the problem is mostly with your computer and not the router.
In addition, you might want to check your wireless card. Sometimes certain Wi-Fi adapters aren’t fully compatible with certain routers or versions of Windows, so be sure to check your adapter as well.
5. Flush DNS and reset Winsock catalog
In some cases, Windows was unable to find a certificate error can appear due to problems with DNS cache. To fix that, do the following:
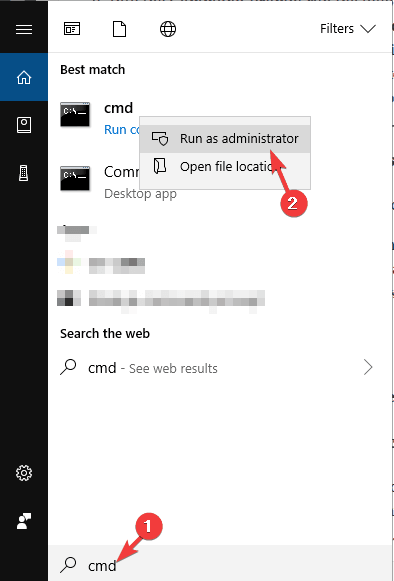
- Type cmd in the search /Cortana bar. Right-click on Command Prompt from the results and select Run as administrator.
- In the Command Prompt, type the following command and hit enter:
- ipconfig /flushdns
Next, you need to reset the Winsock catalog. Here is how to do it.
- Open the Command Prompt as administrator.
- In the Command Prompt window, type the following command and hit enter:
- Winsock reset
- Once it’s complete, you will see a Winsock reset completed successfully message.
- Restart the PC and check if the network is resolved.
6. Restore Windows to an earlier point
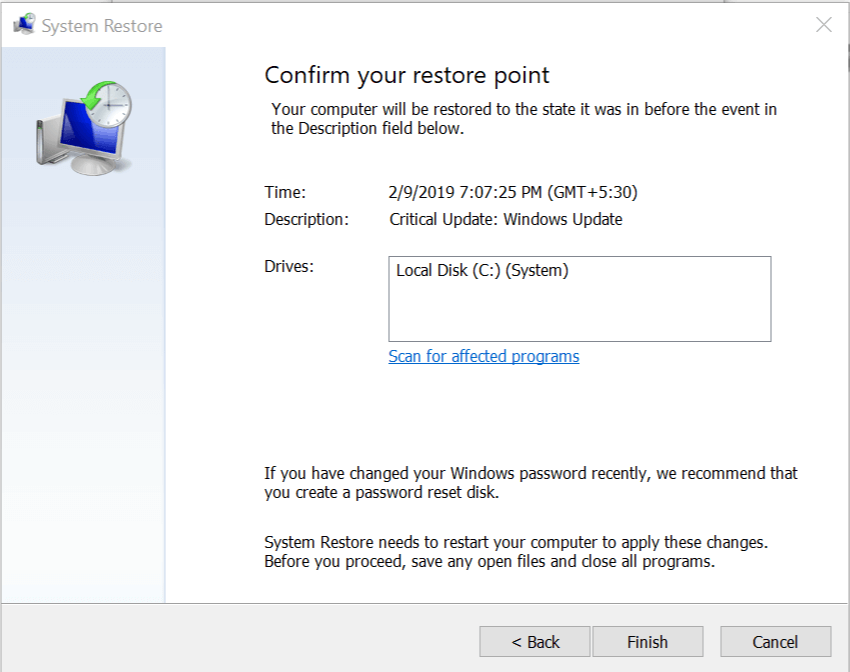
Windows OS by default creates a System Restore point in your local hard drive. If you’re getting Windows was unable to find a certificate error, you might be able to fix it by doing the following:
- Type Restore Point in the search/Cortana bar and Create a Restore Point option.
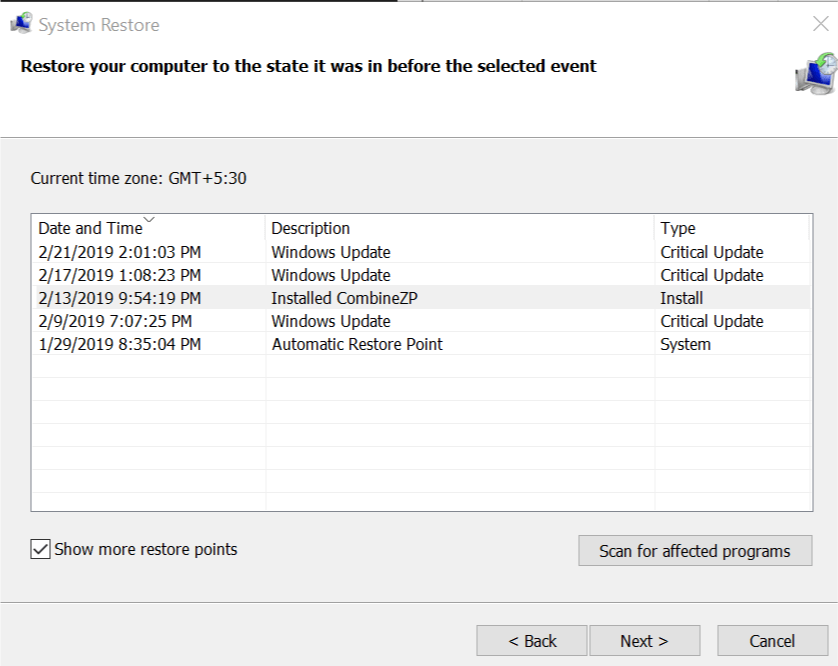
- Click on System Restore. Click Next when the new dialogue box appears.
- Check Show more restore points option.
- Go through all the system restore points and select the recently created restore point.
- Click on Finish. Wait for the Windows to restore the PC to an earlier point.
- After the restart check for any improvements.
There you go, these are a couple of solutions that might fix the Windows was unable to find a certificate error on your PC.
RELATED ARTICLES YOU MAY LIKE:

