Windows Update Error 0x80073701 [Solved]
Getting error 80073701 while updating your PC? Apply these fixes
Key notes
- Windows Update error 80073701 blocks Microsoft’s cumulative updates.
- Most of the time, the cause for this problem is corrupted system files.
- Check out the solutions mentioned in this guide to resolve the Windows 10 error 80073701.

The Windows update error 080073701 occurs in Windows 10 and earlier platforms. That error blocks Microsoft’s cumulative updates and has been reported by multiple users.
Thus, you can’t update Windows when the issue arises. In addition, there is no specific official resolution for error 0x80073701, even though Microsoft has acknowledged the error code.
Speaking of that, users also reported similar issues involving the same code. So, let’s take a closer look to know precisely what you’re up against.
What does error 80073701 mean?
Error 0x80073701 or simply error 80073701 occurs when the system fails to perform the update process. Though it doesn’t cause any severe problems, you won’t be able to install the latest updates on your PC if this issue exists.
After some research, we have prepared a list of the most common reasons you would face the error 80073701 on your Windows 10 PC:
- Presence of corrupt system files.
- A third-party antivirus or malware program is interfering with the update service.
- There is a network connection problem.
- Presence of problematic or missing Windows update components.
- Malfunctioning Windows update service.
Where else can this error occur, and what to expect?
- 80073701 error code is also specific to Windows 7.
- The install error 0x80073701 is encountered by Windows 11 users too.
- ERROR_SXS_ASSEMBLY_MISSING 0x80073701 is a particular error code frequently associated with a more detailed description stating that some update files are missing or have problems. Thankfully, we have a guide that lists all the solutions you can apply to fix it.
- This error also appears with a different error code, 0x800f0988. So, if you come across that, you can apply the below solutions to resolve it.
How do I fix the Windows Update error 0x80073701?
1. Run the Windows Update troubleshooter
- Click the Start button and select Settings.

- Choose Update & Security.

- Click on Troubleshoot from the left pane and select Additional troubleshooters from the right.

- Click on Windows Update and hit the Run the troubleshooter button.

- The troubleshooter might then provide some resolutions. You can press the Apply this fix button to apply a suggested resolution.
The Windows Update troubleshooter is a built-in system tool for fixing Windows update bugs. So that might come in handy for fixing error 0x80073701.
It was reported that upon running this tool, it managed to fix some bugs but ended in displaying another error: The requested service has already been started. More help is available by typing NET HELPMSG 2182.
We’ve covered this issue in our guide on how to fix the NET HELPMSG 2182. Some of the solutions presented there also apply to the 80073701 stop code.
2. Perform a clean boot
- Type msconfig in the Windows Search bar and open System Configuration.
- Click the Services tab.
- Check the Hide all Microsoft services, and then select Disable all.

- Select Apply to apply the changes.
- Now, click on the Startup tab and hit the Open Task Manager link button.

- For each enabled item you don’t need, select Disable and close the Task Manager.
- Finally, restart the PC that will now load only the minimum set of services.
After this procedure, try updating Windows and see if the problem has been resolved.
3. Use the Windows 10 Update Assistant
- Download the Update Assistant.
- Launch the program.
- Hit the Update now button.

- Follow the on-screen prompts.
- Install the update if available.
- After the update is installed, hit the Restart now button.

4. Use specialized repair tools
Error 80073701 can prevent you from installing cumulative updates and upgrading your OS to a newer version. The most common reason behind this is missing or broken update files.
Fortunately, specialized tools can address file corruption and repair Windows update errors and numerous other severe system errors instantly.
Using such a program is far more accurate and time-effective than manual troubleshooting.
Fortect fixes these issues automatically by repairing corrupted system files. Once restored, your updates install normally, keeping your PC secure and up to date with the latest improvements.
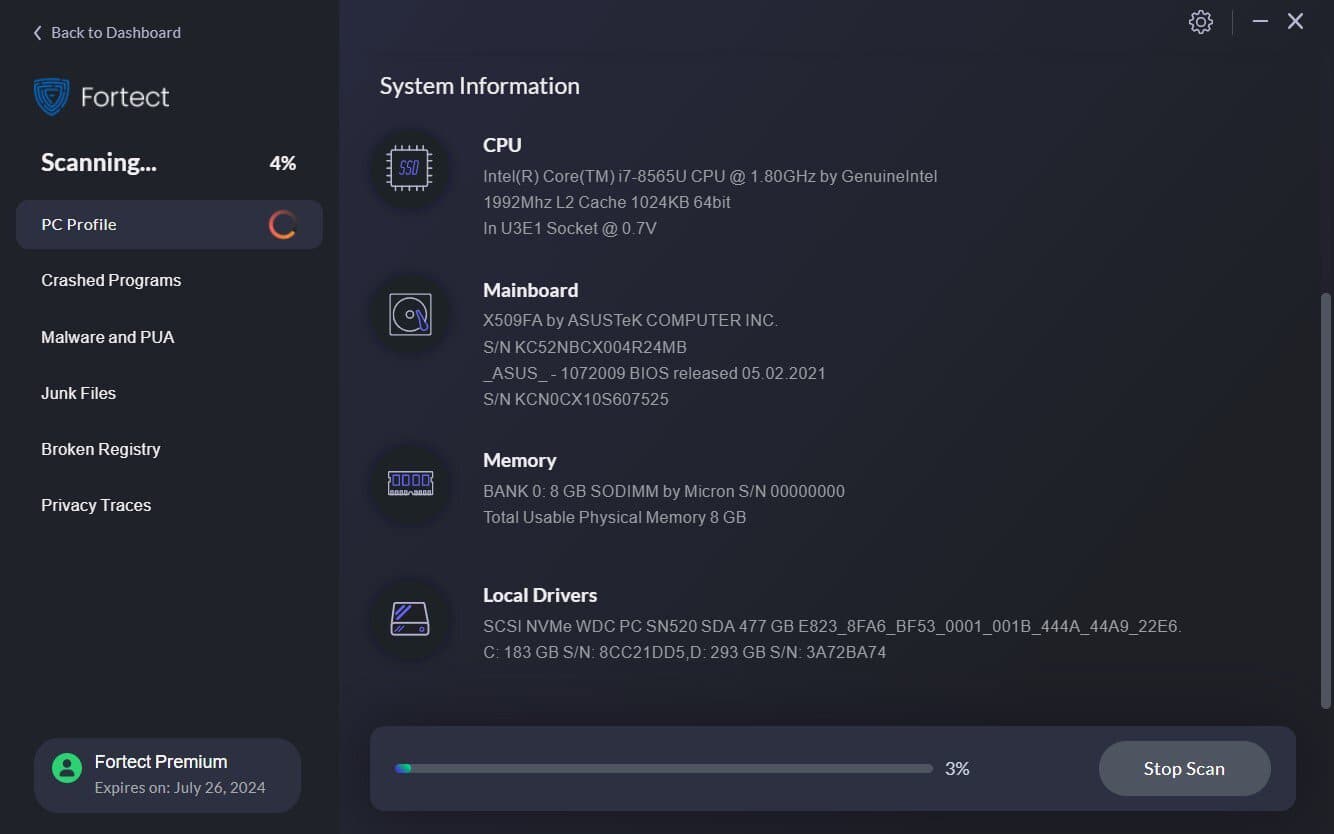
This is how you can fix Windows Update errors with Fortect:
- Install and launch Fortect.
- Run a full system scan.
- Let Fortect replace faulty update files.
- Restart your PC and install updates.
Disclaimer: In order to perform some operations, this software must be updated to the premium plan.
5. Run Deployment Image Servicing and System File scans
- Press the Start button.
- Type cmd and select Run as administrator.

- Execute the command and press Enter:
DISM.exe /Online /Cleanup-image /Restorehealth
- After the process ends, type the following command to launch the SFC scan and press Enter:
sfc /scannow
- Wait until the process finishes, then restart Windows if the SFC scan does repair files.
The Windows Update error 0x80073701 might be due to corrupted system files. We recommend using the Deployment Image Servicing and Management tool to repair them.
The System File Checker also repairs corrupted system files, which will be beneficial to run.
6. Restart the Windows Update service
- Launch Run with the Windows + R keyboard shortcut.
- Type services.msc and click OK or press Enter.
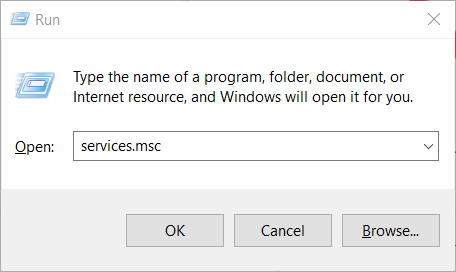
- Scroll down to Windows Update on the Services window and double-click the service.

- Press the Stop button on the window, and click OK to close the window. If the button is grayed out, the service is not started.

- After the service is stopped, right-click Windows Update and select Start to restart it.

7. Reset the Windows Update components
- Click the Windows Start button, type cmd, and select Run as administrator.

- Then enter the following commands separately and hit the Enter key after each one:

net stop wuauserv
net stop cryptSvc
net stop bits
net stop msiserver - Next, rename the SoftwareDistribution folder by entering this command and pressing Enter on your keyboard:
ren C:\Windows\SoftwareDistribution SoftwareDistribution.old
- Then, input the following command to rename the Catroot2 folder to Catroot2.old and press Enter:
ren C:WindowsSystem32catroot2 Catroot2.old
- Enter this line to edit the SoftwareDistribution folder title:
C:\Windows\SoftwareDistribution SoftwareDistribution.old
- Restart the stopped services by entering the following commands:

net start wuauserv
net start cryptSvc
net start bits
net start msiserver - Then exit the Command Prompt window, and restart your desktop and laptop.
Resetting Windows Update components will restore them to their default values. So this resolution is undoubtedly worth a shot.
8. Check the Date and Time Settings
- Right-click the clock from your taskbar and select Adjust date/time.

- Select a time zone on the Time zone drop-down menu if required.

- You can also toggle the Set the time automatically option off and press the Change button to adjust the date and time manually.

- Alternatively, you can synchronize the clock with the server by clicking Add clocks for different time zones.

- Select the Internet Time tab, and press the Change settings button.

- Then you can select the Synchronize with an Internet time server checkbox and select a server from the drop-down menu.

- Click the Update Now button.

- Press the Apply and OK buttons.
Error 0x80073701 can also be due to date and time settings in Windows 10. So, ensure Windows 10’s date and time are set correctly.
Some of those resolutions might fix error 0x80073701. Also, you can check out our guide on how to fix Windows update errors for additional fixes.
If you’re dealing with related errors, this helpful guide on Windows Update error 0xxxxxxxxxx explains some common fixes you can try.
If this guide was helpful, drop us a line about your experience with the steps you used to get your device back on track.
Read our disclosure page to find out how can you help Windows Report sustain the editorial team. Read more


Improve this guide


User forum
1 messages