0x800700b7 in System Restore: Use These 7 Simple Solutions
Using specialized repair tools will be the easiest fix
![]() 6 min. read
6 min. read
![]() Updated on
Updated on
Share this article

Improve this guide
Read our disclosure page to find out how can you help Windows Report sustain the editorial team Read more
Key notes
- The System Restore error 0x800700b7, like any other Windows issues with that code, is related to missing or corrupted system files.
- Other possible causes might be incomplete uninstalling of software or components.
- File and system corruption may also be caused in turn by hardware problems or malware.
In this article, we explore the error code 0x800700b7. System Restore is an invaluable tool that restores Windows to an earlier date. The utility enables you to undo system changes.
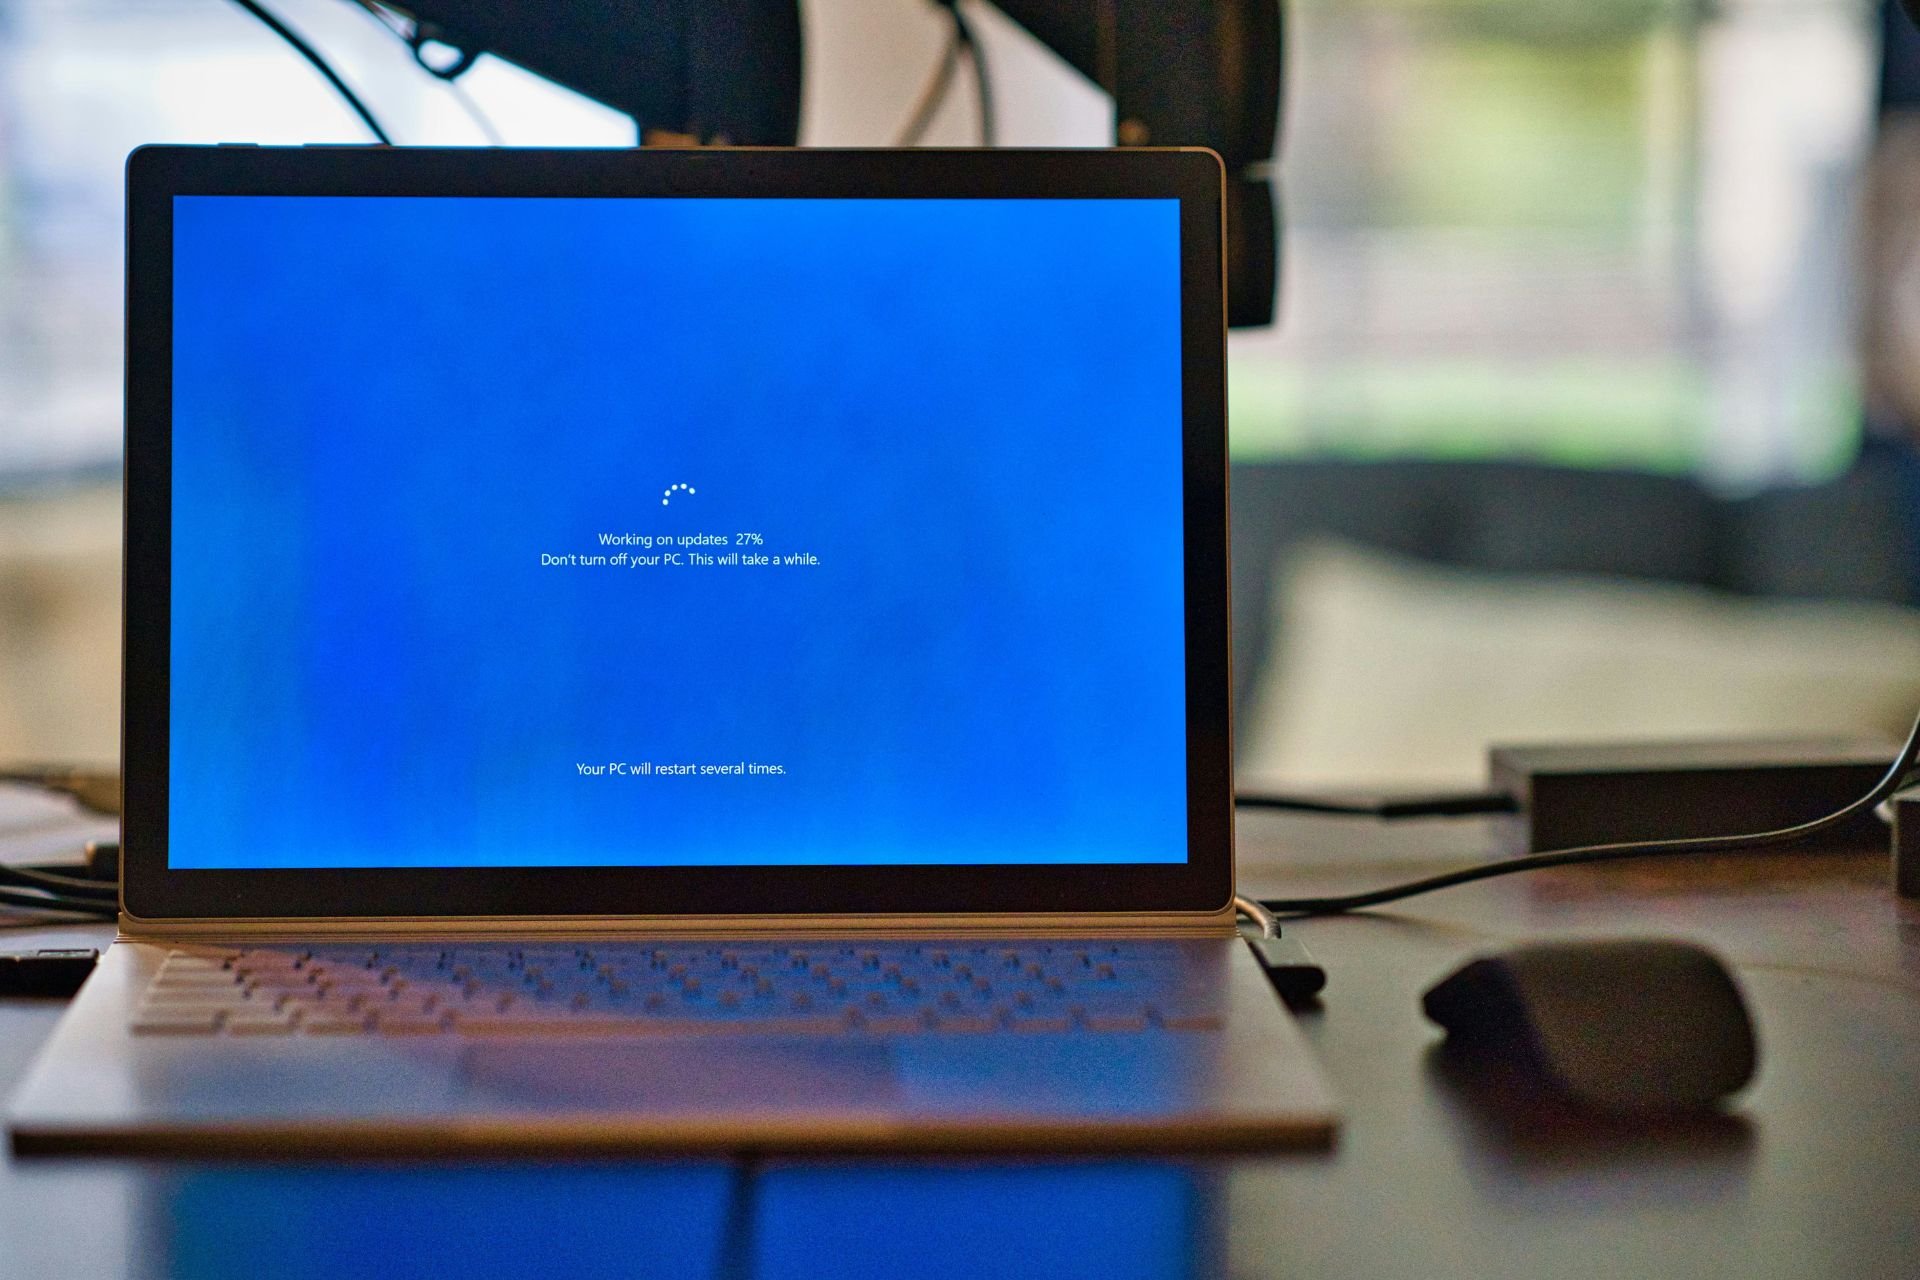
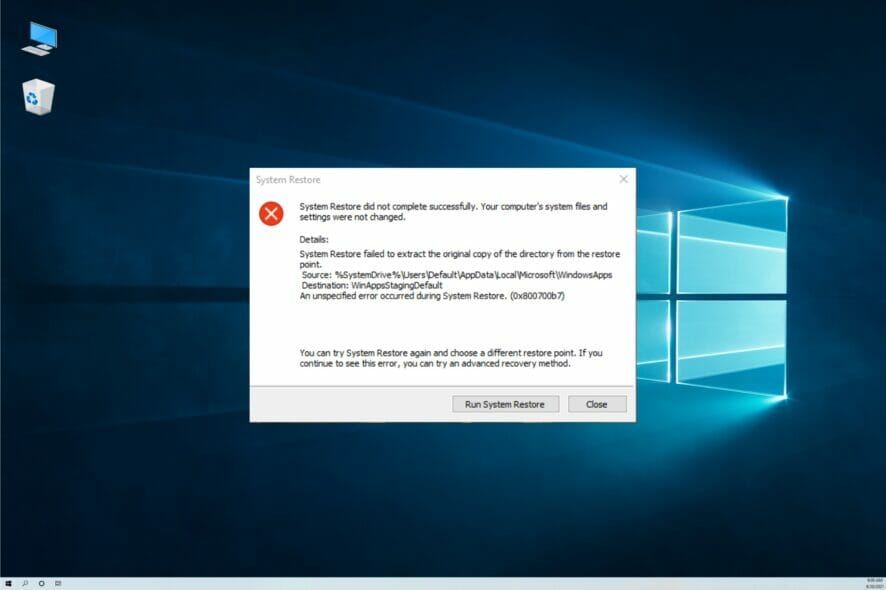
However, System Restore doesn’t always work for some Windows users and returns an error message stating: System Restore did not complete successfully. This can include the 0x800700b7 code.
What does error code 0x800700b7 mean?
This error means that there has been a problem with the Restore process. It is usually followed by the message: Windows couldn’t complete the requested changes, and it appears that certain Windows components are damaged.
This code can also appear as a Windows Update error and, more recently, as a Windows Subsystem for Android in Windows 11.
There are a few triggers for this error, and on top of the list are the following:
- Antivirus software – The 0x800700b7 error can be due to antivirus software interfering with System Restore or incomplete software installations, leaving invalid registry entries.
- Damaged installation – If your installation is damaged, then you might encounter the System Restore did not complete successfully message when trying to restore your PC, and this is a trigger for error code 0x800700b7.
- Bad system files – Being so diverse, it’s hard to pinpoint this error to a single cause, but most are related to corrupted system files that need fixing to resolve the 0x800700b7 error.
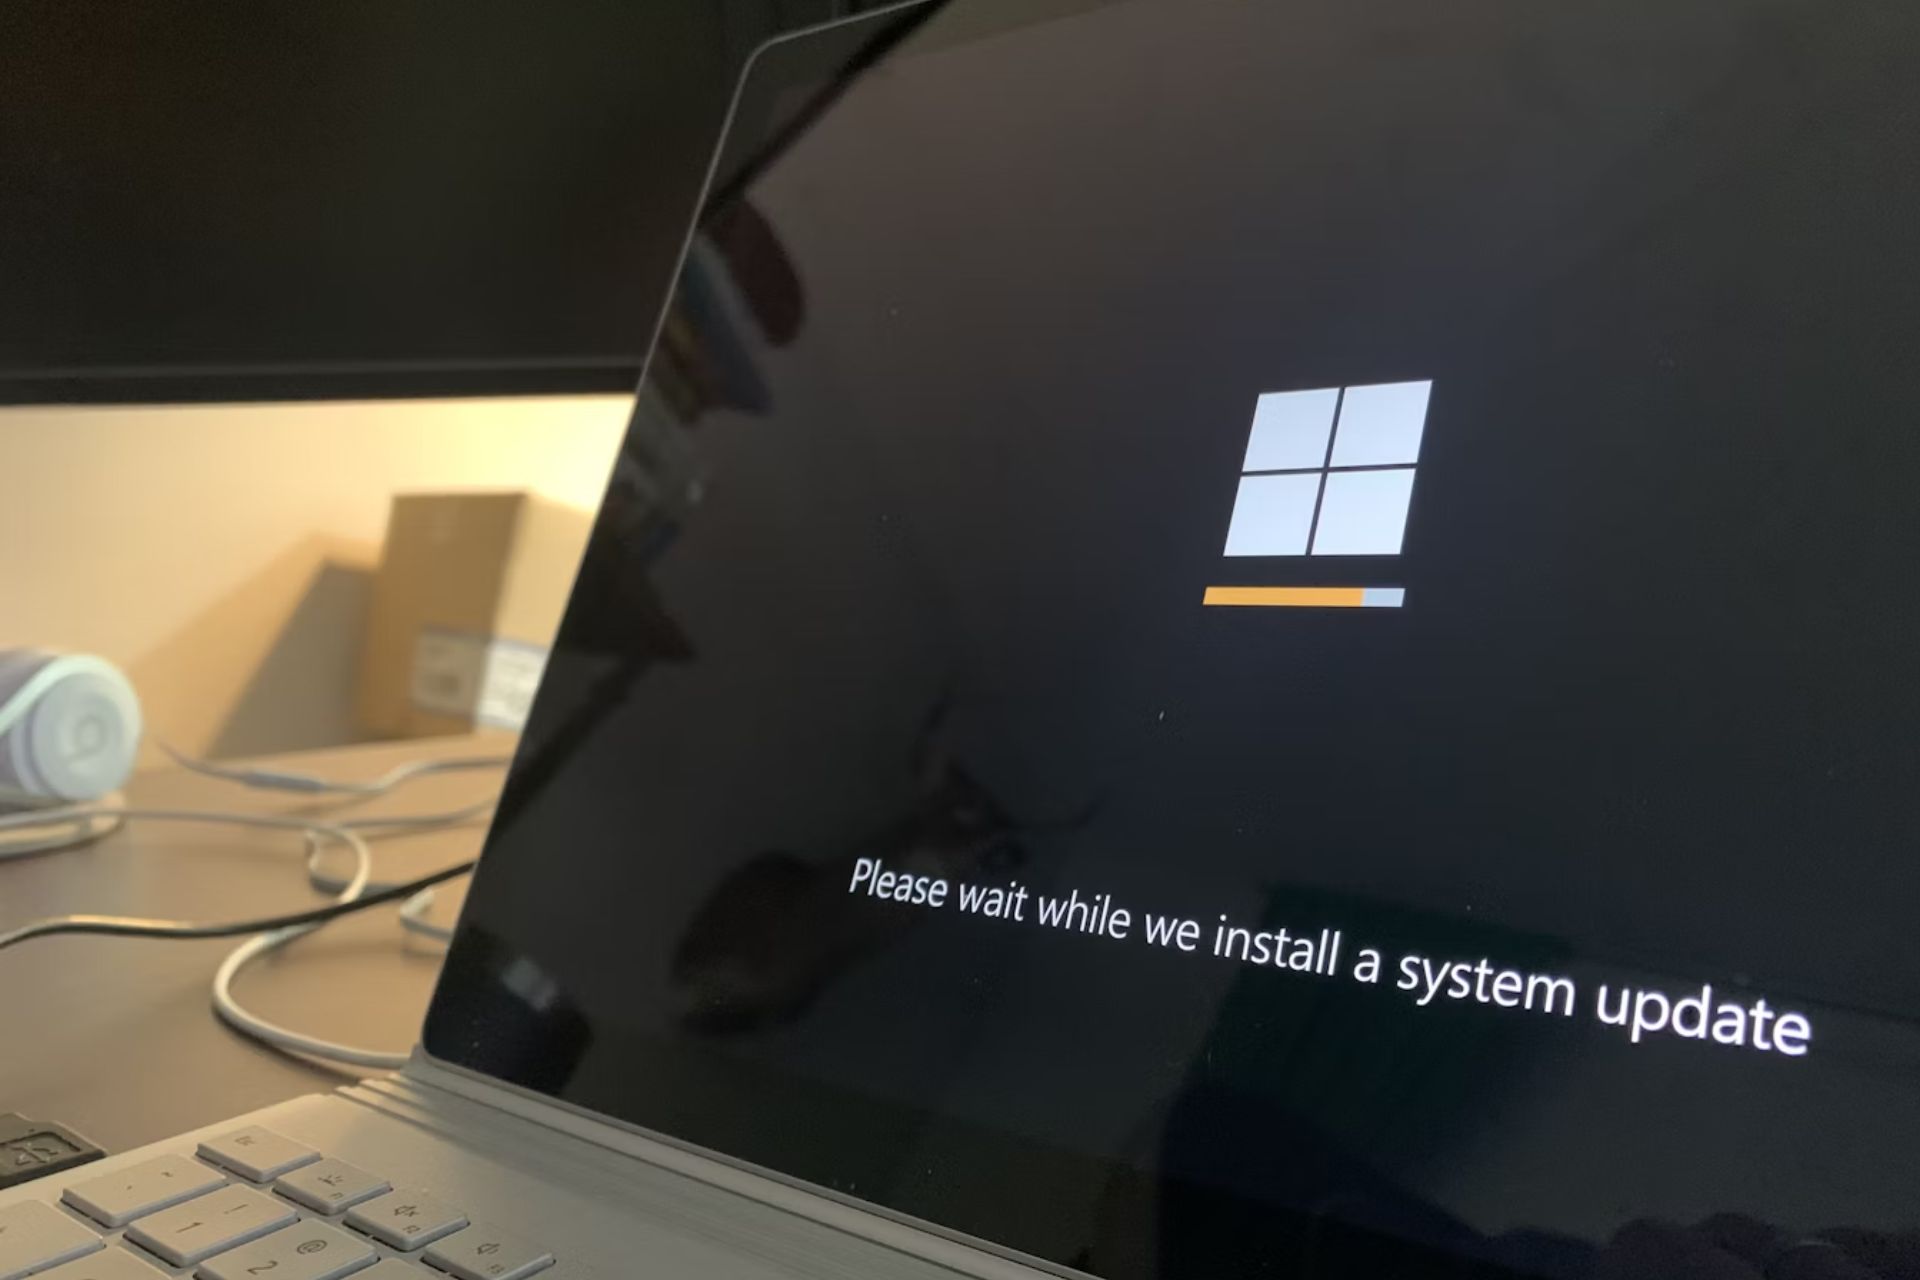
- Update problems – This critical error appears when you’re trying to update your OS, when you want to restore it to a different point, or now, in Windows 11, when installing a subsystem.
Here are a few potential fixes for the 0x800700b7 error for your Windows devices.
How can I fix the System Restore error 0x800700b7?
1. Use specialized software
If you’re dealing with system errors such as 0x800700b7 then specialized software might be able to help you. These tools are able to scan, identify, and quickly replace any broken system file.
2. Uninstall and reinstall software
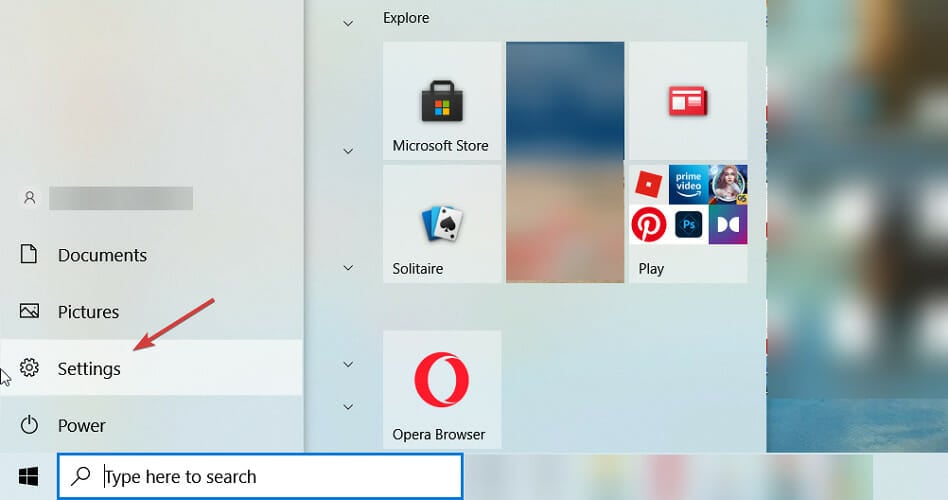
- Click the Start button and select Settings.

- Select Apps from the list.

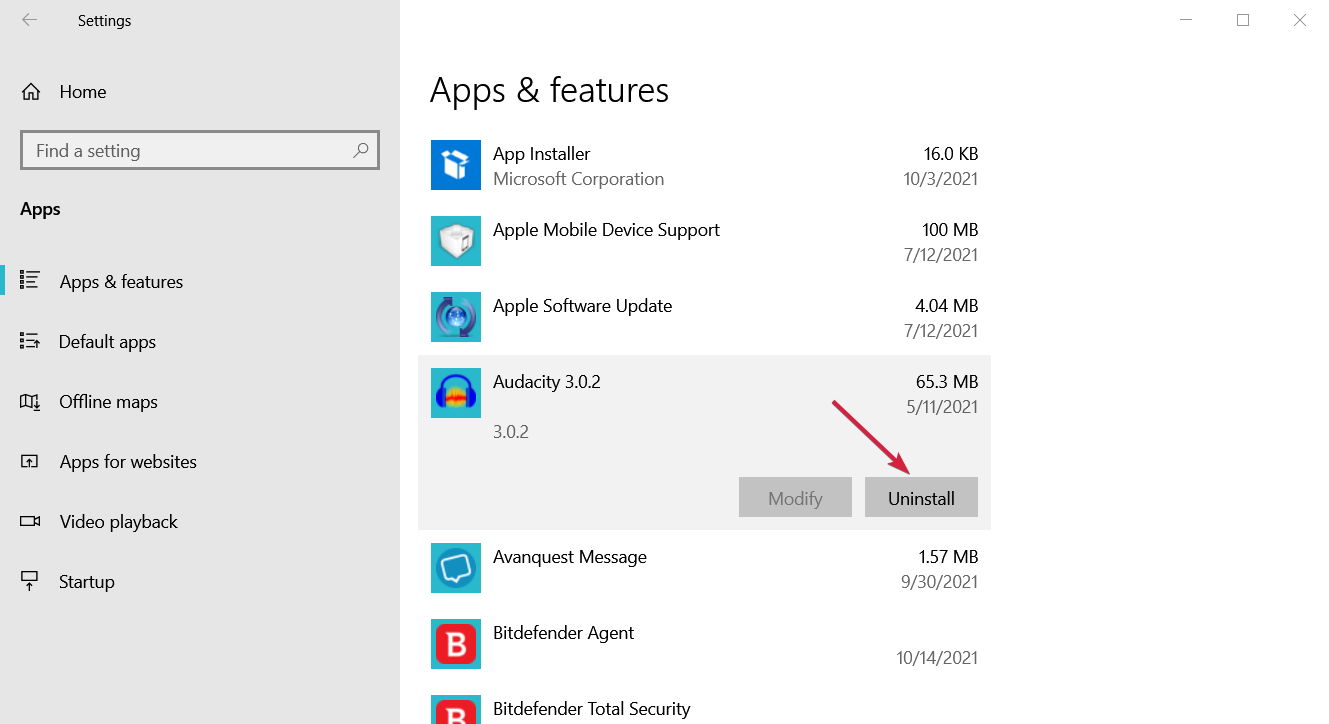
- Click on the recently installed app and choose Uninstall.

- Next, check if the error persists and if not, try reinstalling the app, with full settings.
This problem might be caused by apps not being installed properly because the process was somehow interrupted.
So, make sure you uninstall the ones you’ve recently installed and restart the process. Also, if they have some optional components you’ve left out, this time, include them.
3. Run a System File Checker scan
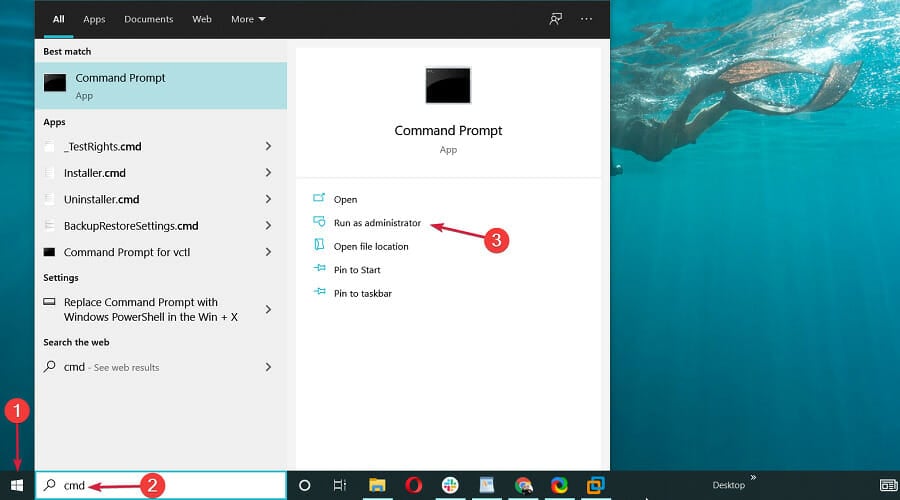
- Click the Windows button, type cmd, and select Run as administrator to run Command Prompt with administrative privileges.

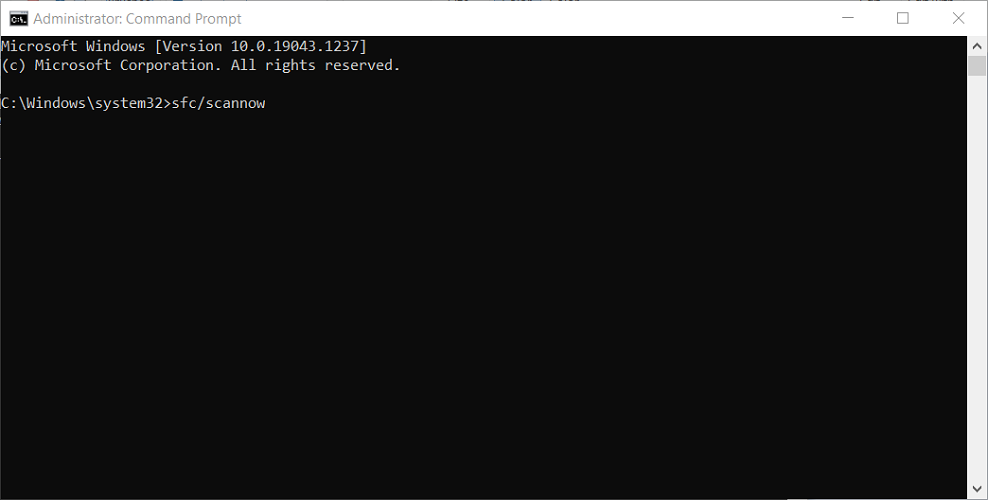
- Next, paste the following command and press Enter:
sfc /scannow
- If SFC repairs files, the Command Prompt will state: Windows Resource Protection found corrupt files and successfully repaired them. Restart Windows if the SFC does fix something.
4. Run the Check Disk utility
- Select the Start button, type cmd, and click on Run as administrator to run Command Prompt with full privileges.
- Paste the following command and press Enter to run it:
chkdsk /r
- Check Disk might then fix some corrupt entries. If it does, it might also request that you restart Windows.
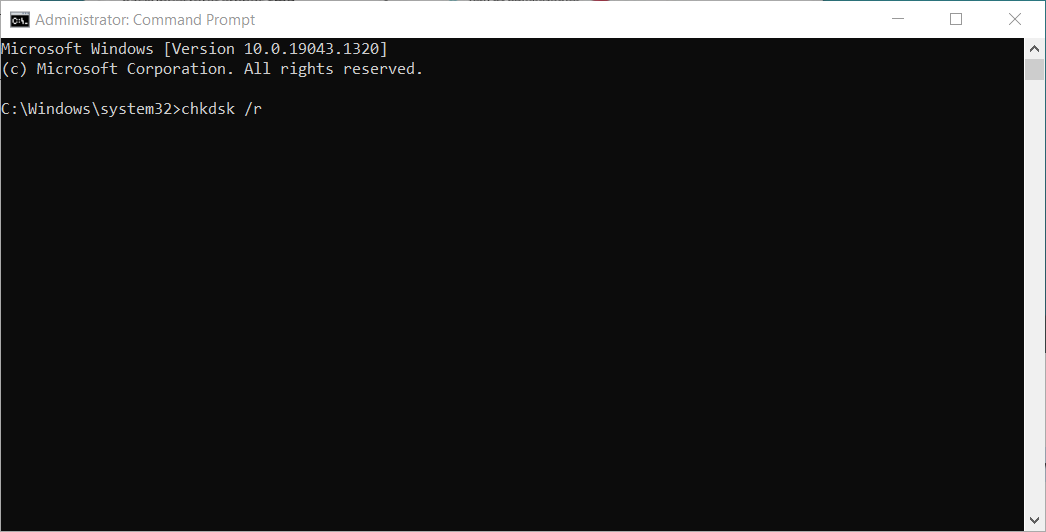
This procedure will check any disk errors and attempt to repair them, but it will take a little while, depending on your drive size, so wait until the procedure finishes.
5. Restore Windows 10 in Safe Mode
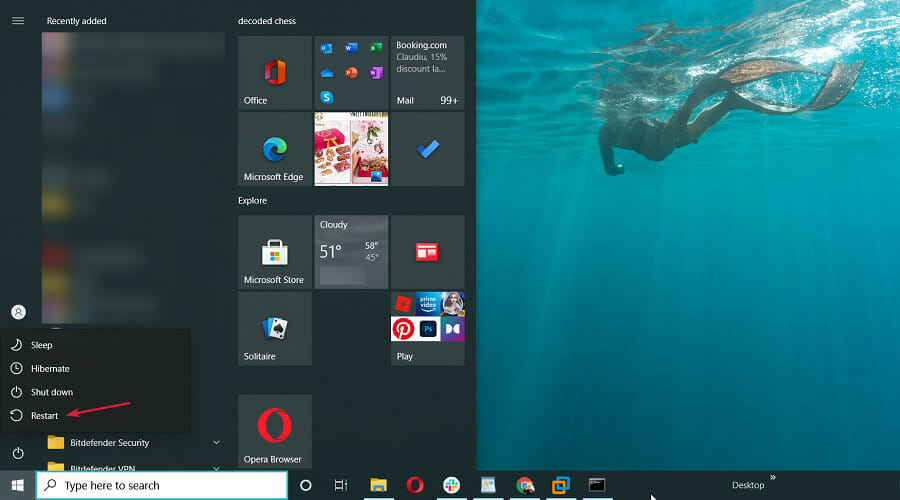
- First, press the Power button on the Start menu.
- Hold the Shift key and then select Restart.
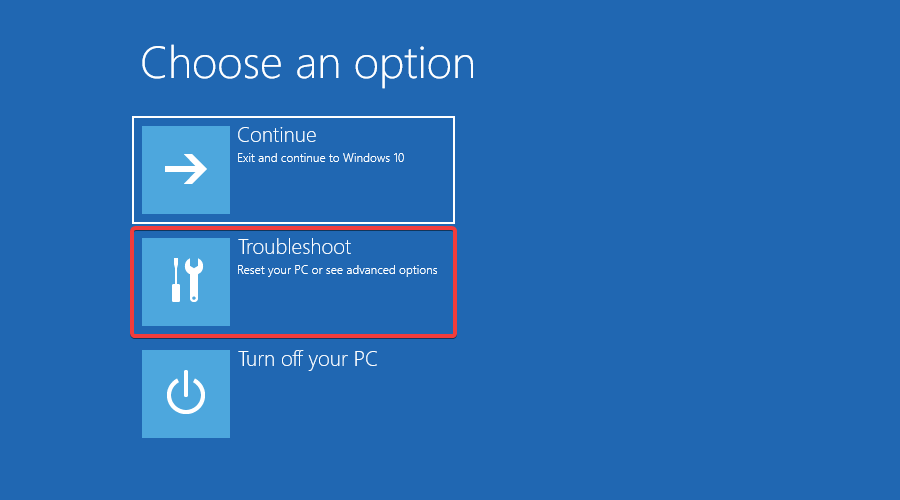
- Windows will reboot and open its Advanced Startup options. Press the Troubleshoot button.
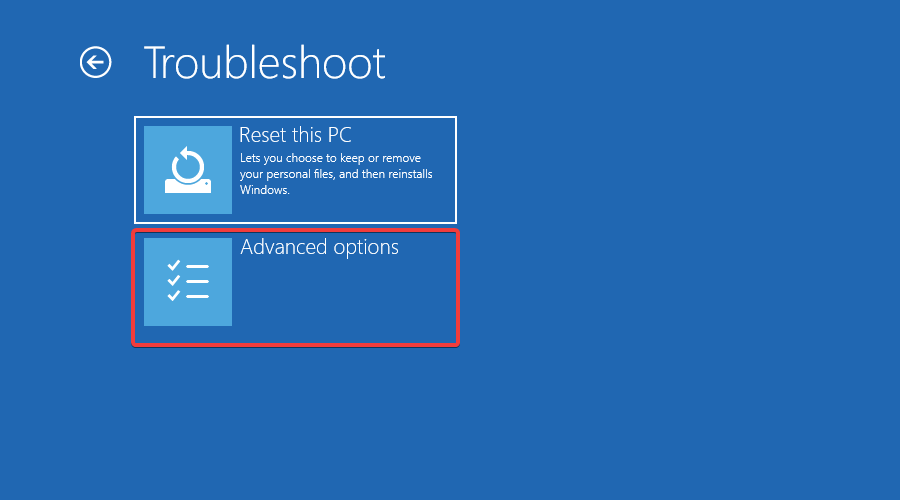
- Now, select Advanced options to open further settings.
- Select Startup Settings and press the Restart button to reboot.

- Press the 4 key to start Windows in Safe Mode.
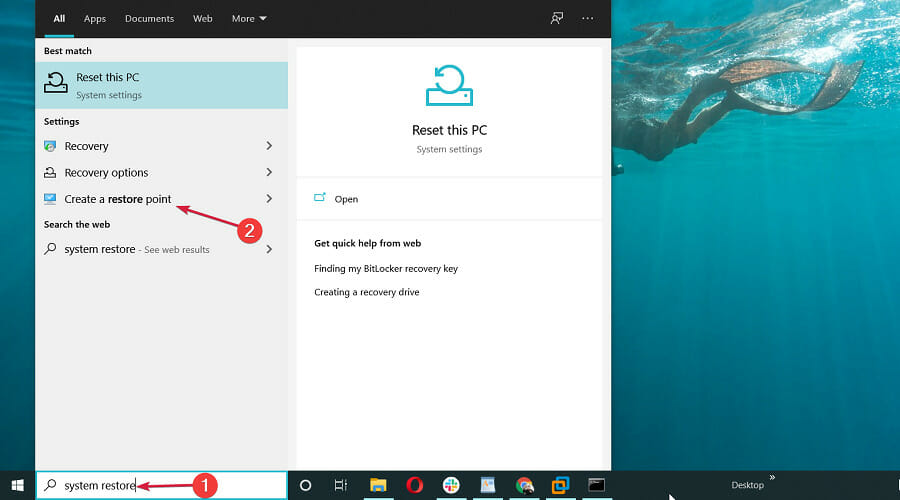
- After restarting, type system restore in Cortana’s search box. Select Create a restore point.
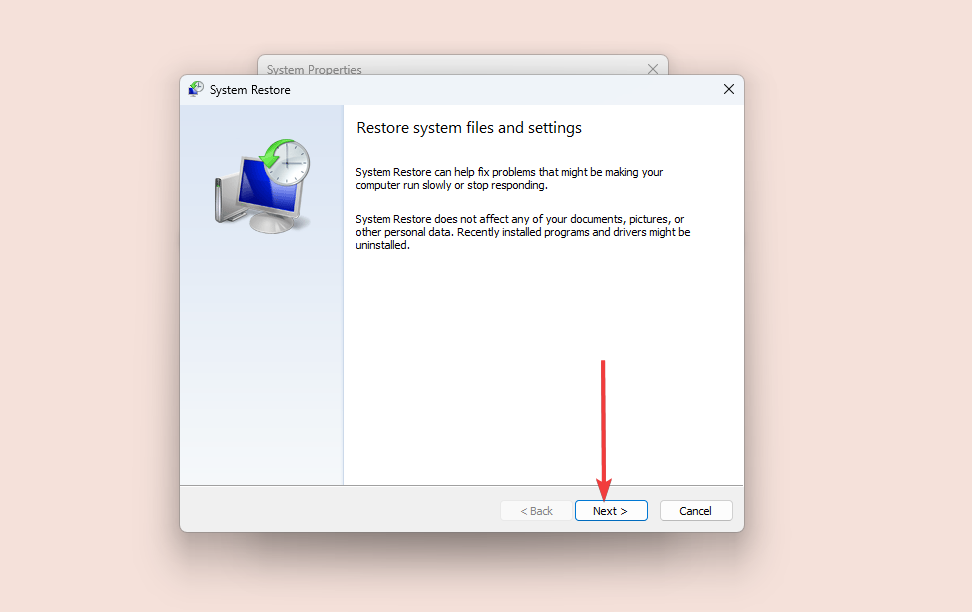
- Press the System Restore button.

- Now select Choose a different restore point if available, and click the Next button.

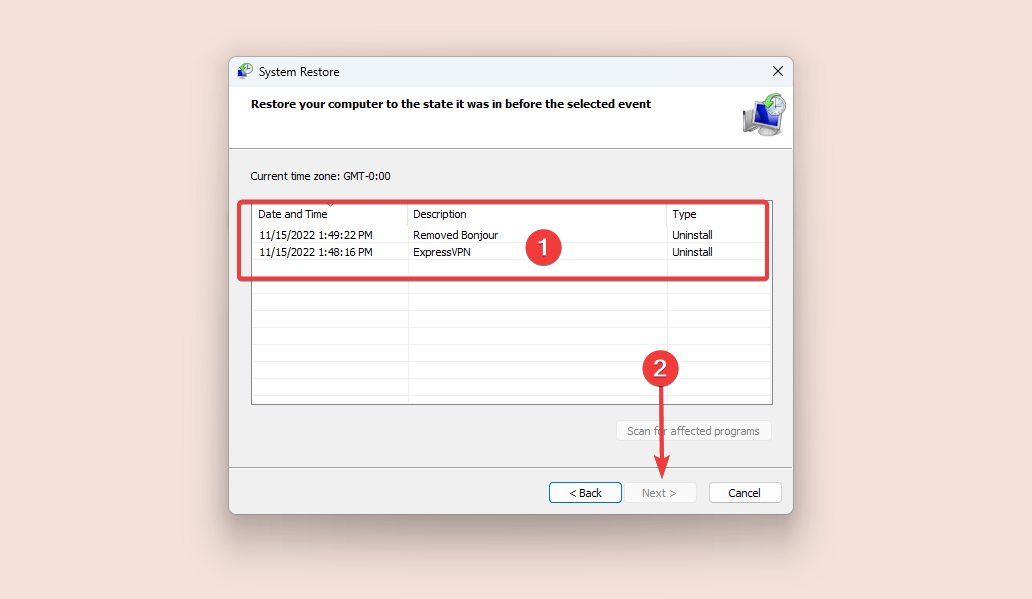
- Select a listed system restore point and press the Next and Finish buttons.


Safe Mode is a great troubleshooting mode for Windows. System Restore might work in Safe Mode. In this case, you can restore Windows to a date when you experienced no issues in System Restore.
6. Turn off the antivirus software
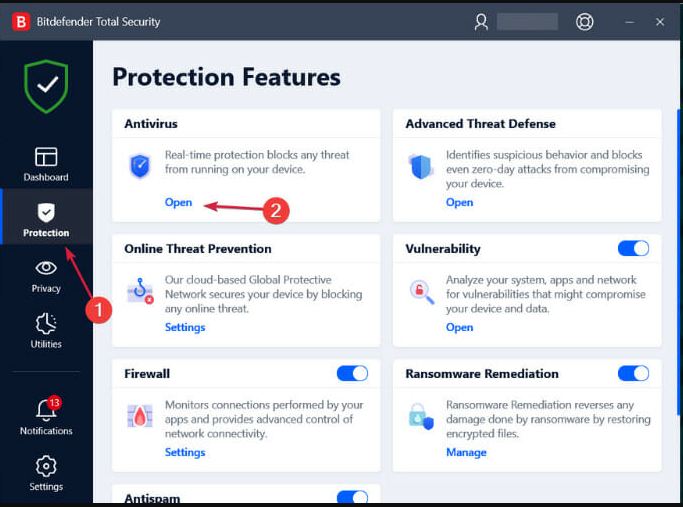
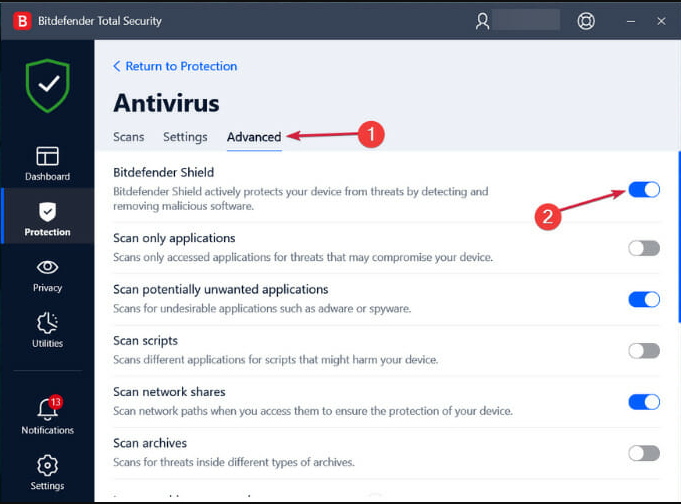
- First, right-click the third-party antivirus icon and click the required option to start the tool. In our example, it’s Bitdefender, and the option is Show.

- Press the Protection button from the left pane and click on Open from the Antivirus section.

- Select the Advanced tab and toggle off the Bitdefender shield button from the right.

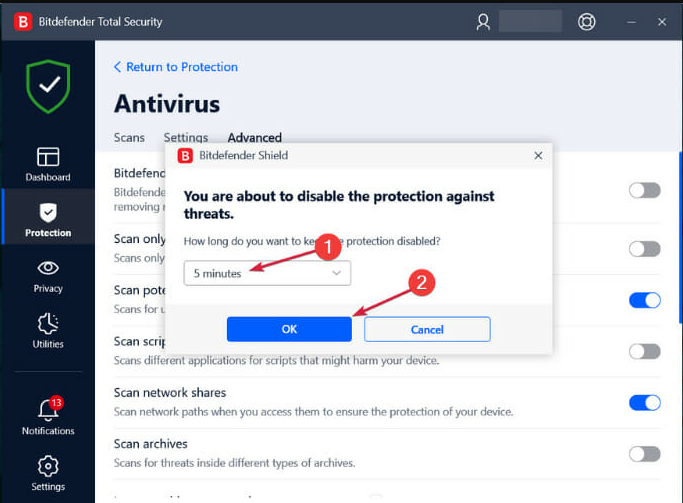
- Then select the duration of the deactivation and hit the OK button. 5 or 15 minutes would be more than enough to confirm that System Restore works without antivirus protection.

- Try to see if System Restore works now.

Third-party anti-virus software can block System Restore from accessing flagged files. As such, disabling the antivirus can also be a potential fix for the 0x800700b7 error.
The solution above is just an example of how to deactivate an antivirus temporarily. With your antivirus, the settings to do that might be completely different
Some of our readers reported that the Norton antivirus software blocks System Restore from making any changes to the utility so try deactivating it temporarily.
Alternatively, you can remove the anti-virus software from the Windows startup with the Task Manager’s Start-up tab.
7. Delete the Task Cache key from the Registry
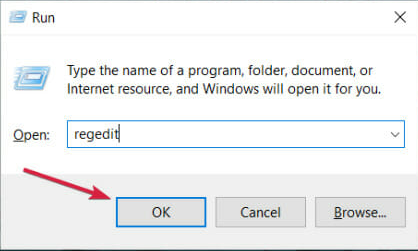
- Press the Windows key + R to start Run, type regedit, and press Enter to launch the Registry Editor.

- Navigate to this registry path:
Computer\HKEY_LOCAL_MACHINE\SOFTWARE\Microsoft\Windows NT\CurrentVersion\Schedule\TaskCache
- First, back up the TaskCache registry key. Right-click TaskCache and select Export on its context menu.

- Enter a title for the backup file, select a folder for it, and press the Save button.
- Next, navigate to the following path:
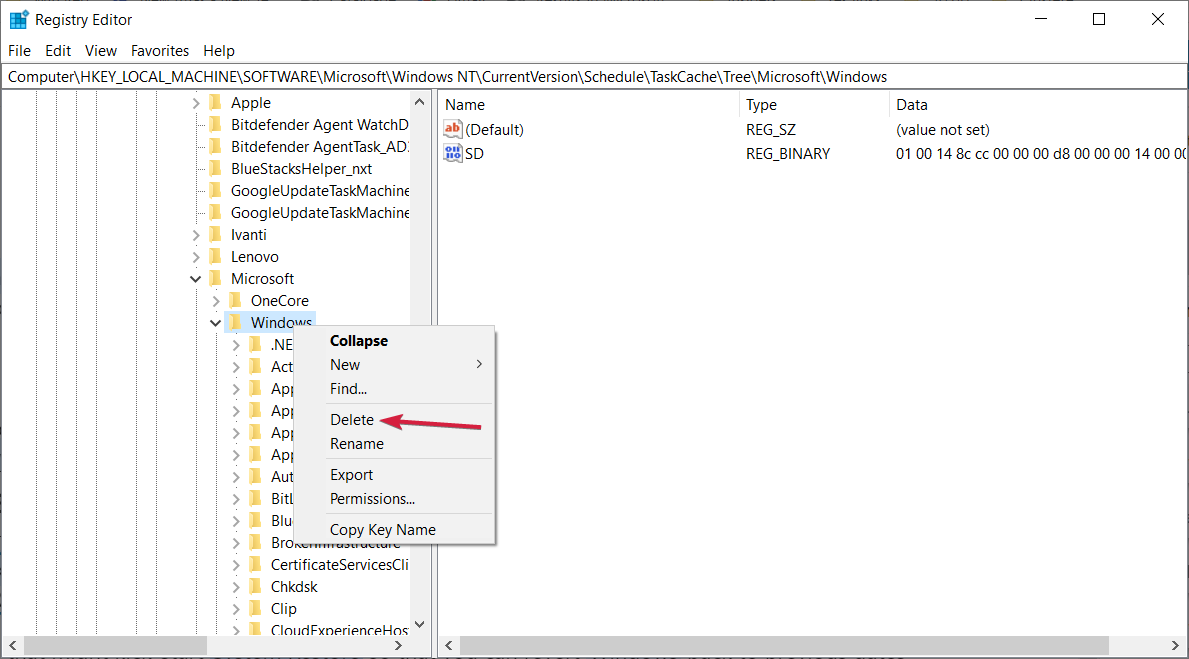
Computer\HKEY_LOCAL_MACHINE\SOFTWARE\Microsoft\Windows NT\CurrentVersion\Schedule\TaskCache\Tree\Microsoft\Windows
- Right-click the Windows key and click Delete on its context menu.
- Press the Yes button to confirm, and then close the Registry Editor.
- Restart your laptop or desktop.


Deleting the Task Cache key from the registry has fixed the 0x800700b7 error for some Windows users.
Those are a few remedies that might kick-start System Restore so you can revert Windows to previous dates. All the errors with the code 0x800700b7 have a common ground in missing or corrupted system files.
In case you need further solutions, check out our article on how to fix other System Restore issues.
If you’ve had this problem or you have any good solutions, leave us a line in the comments section below.