Windows PowerShell Keeps Popping Up: 7 Ways to Stop It
Corrupt system files are often related to this problem
![]() 6 min. read
6 min. read
![]() Updated on
Updated on
Share this article

Improve this guide
Read our disclosure page to find out how can you help Windows Report sustain the editorial team Read more
Key notes
- Windows PowerShell should only appear when invoked by the user.
- Corrupt system files and wrong startup settings may cause PowerShell to keep appearing when not initiated.
- Restarting Windows PowerShell and running SFC & DISM scans can fix the issue.
PowerShell is a powerful tool in Windows PC that helps run commands and carry out tasks in an automated manner. It is usually available only when invoked by running a command or launching the program.
However, users complain that Windows PowerShell keeps popping up when not invoked, and it interrupts the user’s activities. Even more, you can read through our guide on What PowerShell is and how to use it on Windows PC.
Why does PowerShell keep popping up?
The Windows PowerShell popping up repeatedly on your PC makes it hard to use or work on. The issue can occur for some notable reasons. Some are:
- Issues with the Startup configuration – You can run into PowerShell repeatedly appearing on your computer if it is set as a startup program. It allows it to launch immediately when the system is booted and runs as an essential component. So, it can cause it to keep appearing even when not prompted.
- Corrupt system files – The computer can malfunction when you have corrupt system files interfering with the activities of its programs. They can infect the needed components for running PowerShell, causing it to malfunction and appear at will on the computer.
- Outdated Windows OS – Running an outdated Windows operating system can affect performance. It indicates the system can’t access the needed patches and updates to fix bugs and improve its functionality. So, these bugs can impede the ability of PowerShell.
- Interference from other programs – Windows PowerShell can malfunction and keep popping up if another program is using its services. It can override the operating behavior of the tool, resulting in PowerShell constantly appearing without being invited.
Fortunately, we have some basic steps prepared to help you fix the issue and get your system running correctly.
What can I do if Windows PowerShell keeps popping up?
Before attempting any advanced troubleshooting steps, we recommend you go through the following:
- Turn off background apps running on your PC.
- Temporarily disable antivirus software on your computer.
- Restart your PC and check if the issue persists.
If you can’t fix the issue, proceed with the troubleshooting steps below:
1. Run the SFC and DISM to repair damaged system files
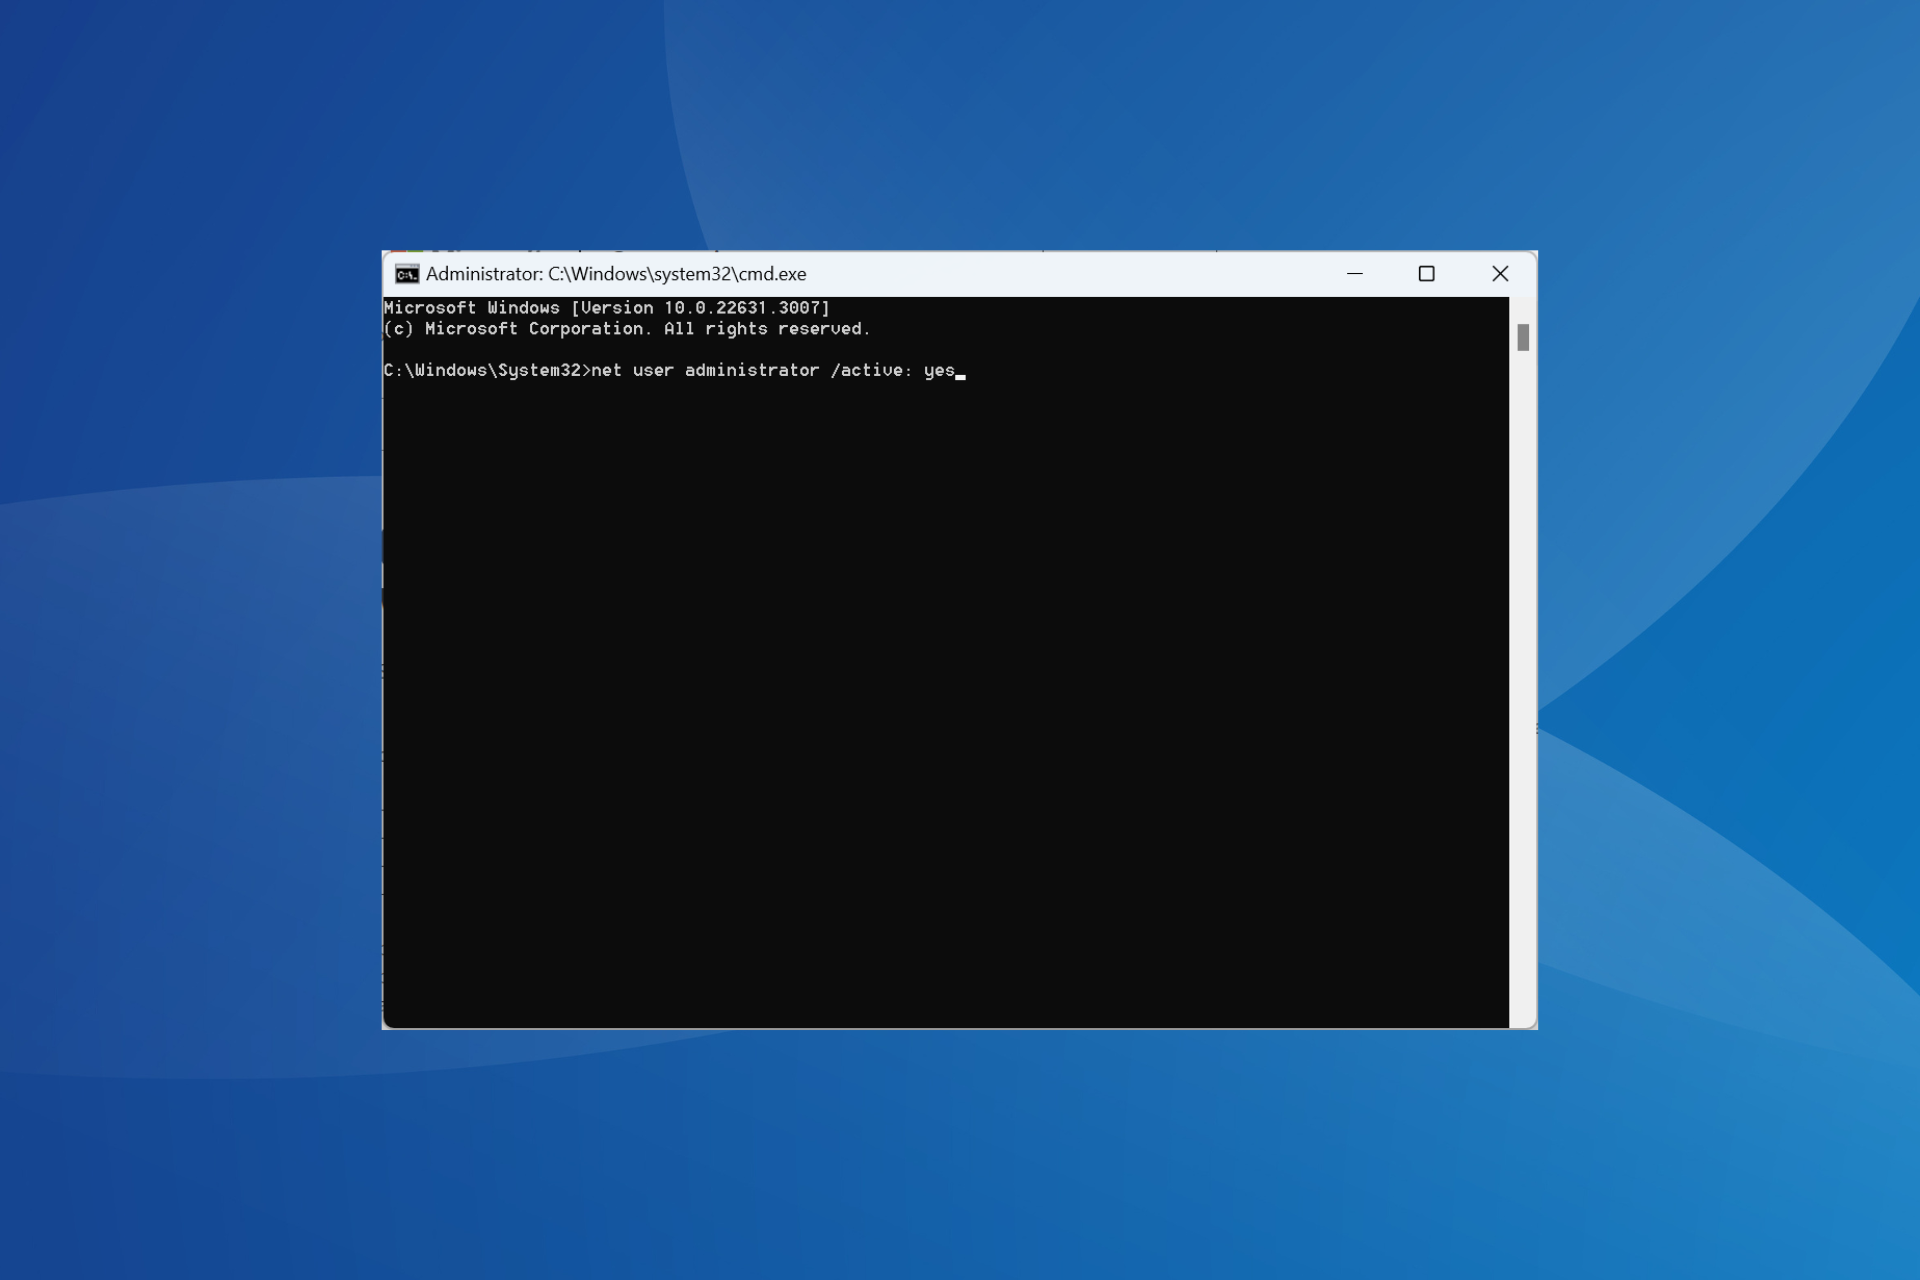
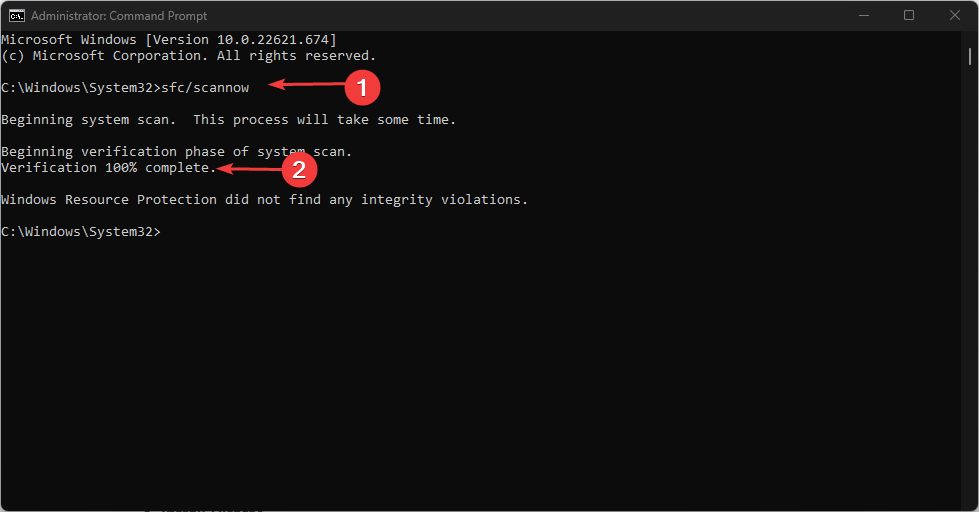
- Left-click the Start button, type Command Prompt, and click the Run as administrator option.
- Click Yes on the User Account Control (UAC) prompt.
- Type the following and press Enter:
sfc /scannow
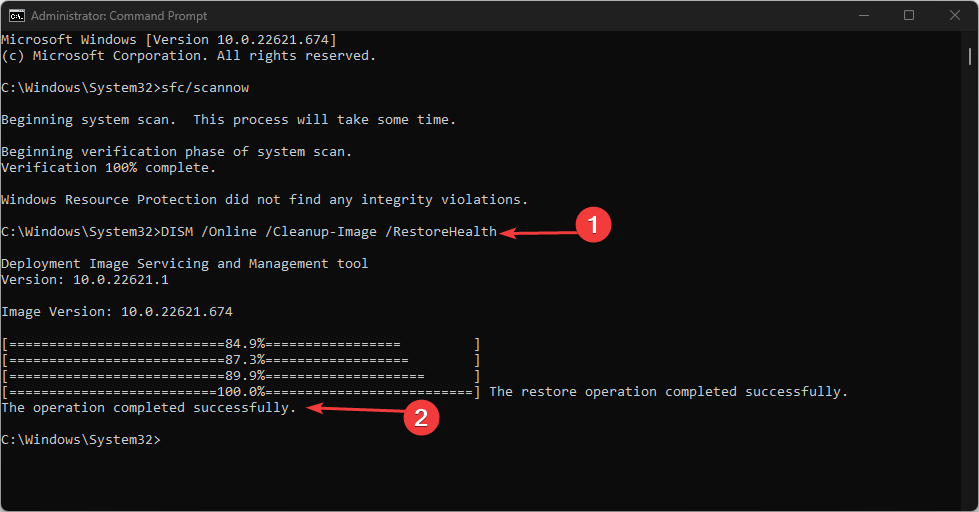
- Type the following commands and press Enter after each:
DISM /Online /Cleanup-Image /RestoreHealth - Restart your PC and check if PowerShell continues to appear repeatedly.
Running an SFC scan will detect and repair corrupt system files causing PowerShell to keep popping up. Check how to fix the run as administrator option if it’s not working on your PC.
2. Restart Windows in Safe Mode
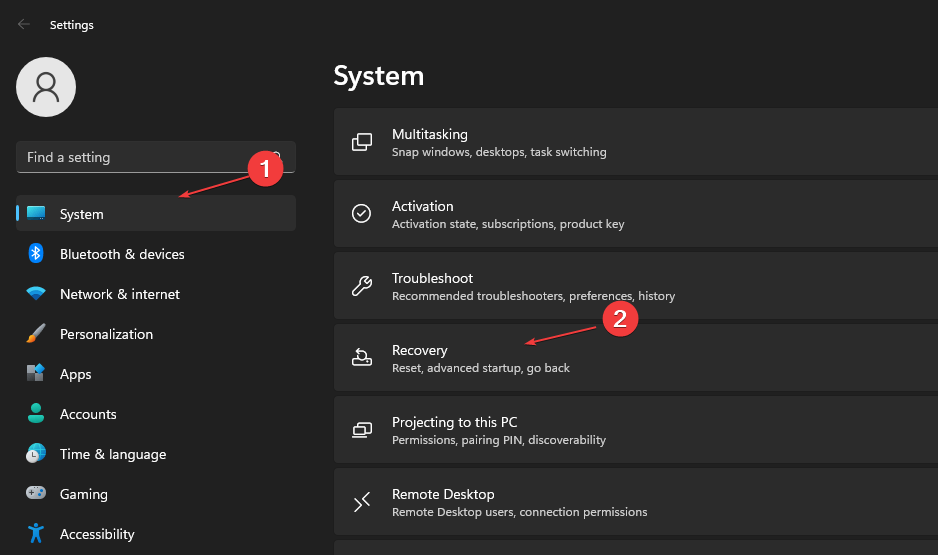
- Press Windows + I key to open the Settings app.
- Click on System and click Recovery.

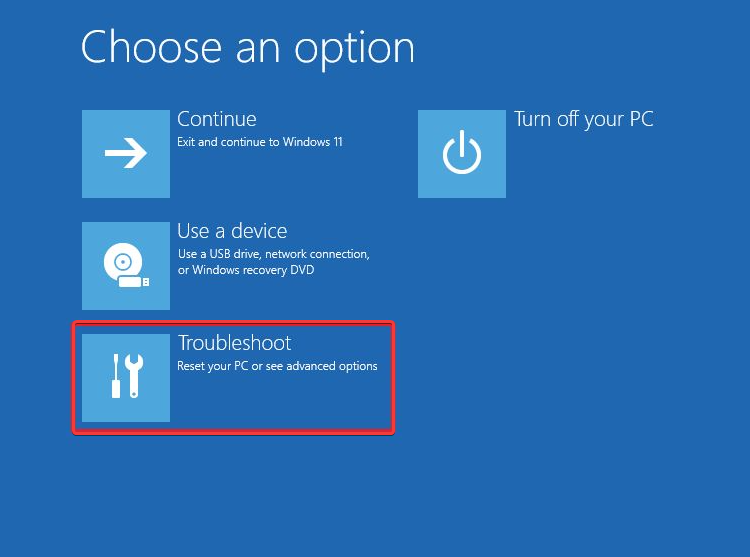
- Go to Advanced Startup, then click Restart now.
- Windows will automatically restart into the Choose an option window, then click on Troubleshoot.

- Click Advanced Options and click on the Startup Settings option.

- Press the F4 key to Enable Safe Mode.
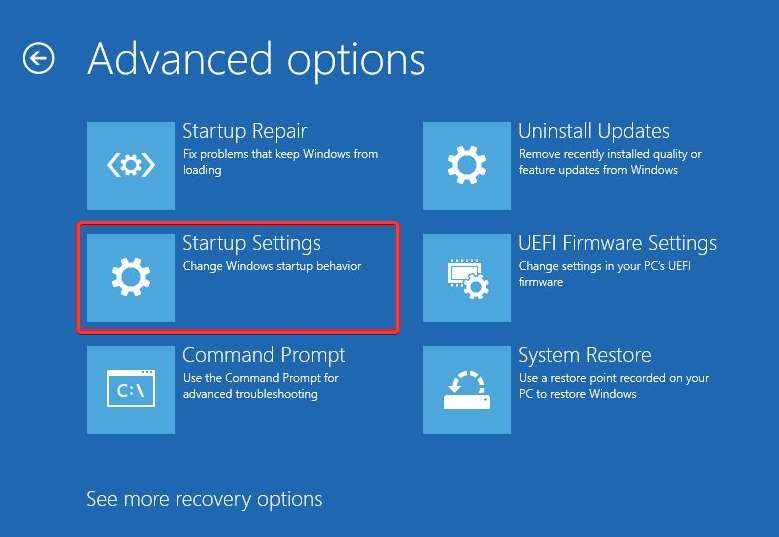
Restart windows in Safe Mode will resolve startup issues liable to cause the issues with how Windows PowerShell works and appears.
Read our guide on how to fix the Safe Mode not working on Windows 11.
3. Update Windows OS
- Press the Windows + I to open the Windows Settings.
- Select the Windows Update and click on Check for Updates. Wait for the Windows update result and click on Install Update if a Windows update is available.

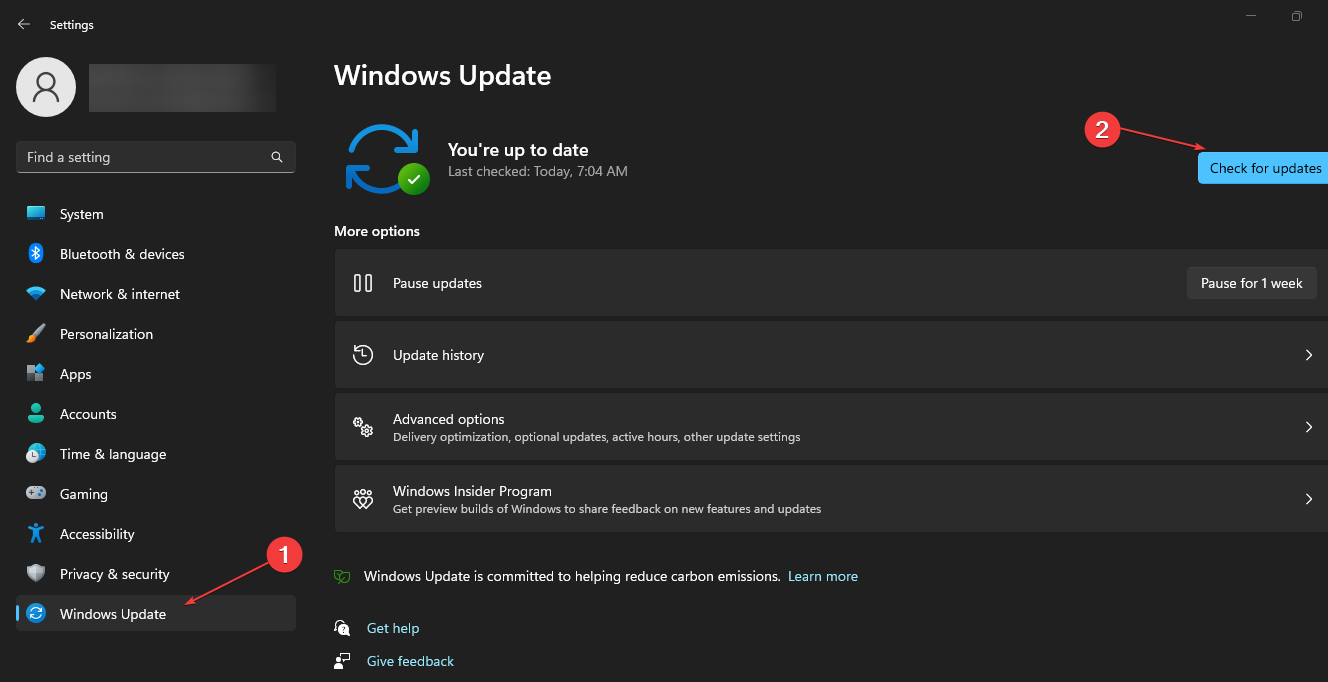
Updating the Windows OS will install patches for fixing bugs affecting your computer. Read about fixing Windows not connecting to update service if the error occurs on your PC.
4. Disable the PowerShell Startup Status on the Task Manager
- Press Ctrl + Shift + Esc keys simultaneously to open the Task Manager.
- Go to the Startup tab.
- Right-click on the Windows PowerShell option and select Disable from the drop-down.

- Close the Task Manager and restart your PC to check if PowerShell continues to appear repeatedly.
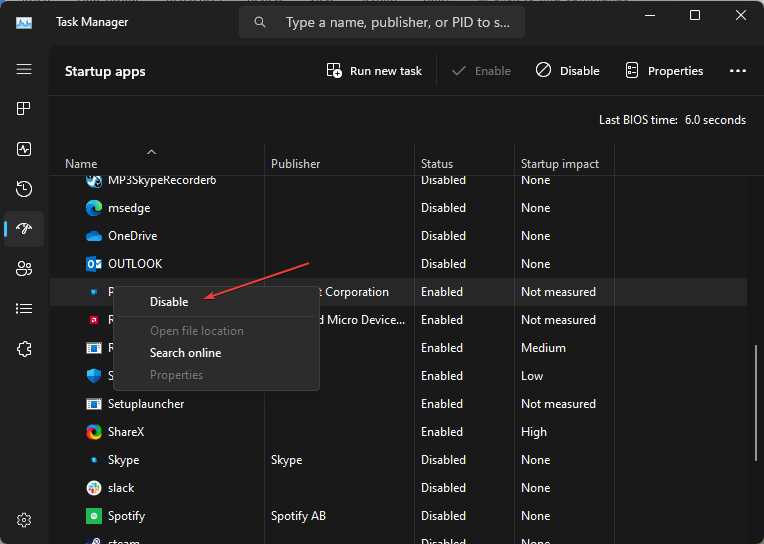
The above steps will disable PowerShell from the startup menu and prevent it from running when the computer boots.
5. Perform a clean boot
- Press Windows + R key to open the Run dialog box, type msconfig, and click OK.
- Select the Services tab and check the box for the Hide all Microsoft services option, then click the Disable all button.

- Click the Startup tab and open Task Manager.
- Click the startup programs, then the Disable button.
- Restart your PC and check if the issue persists.
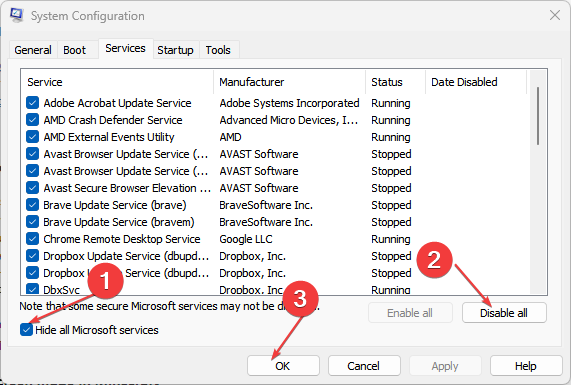
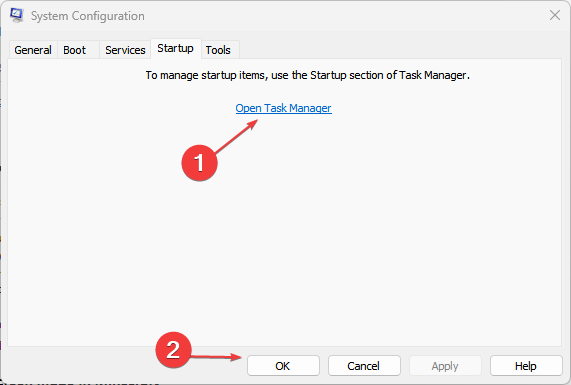
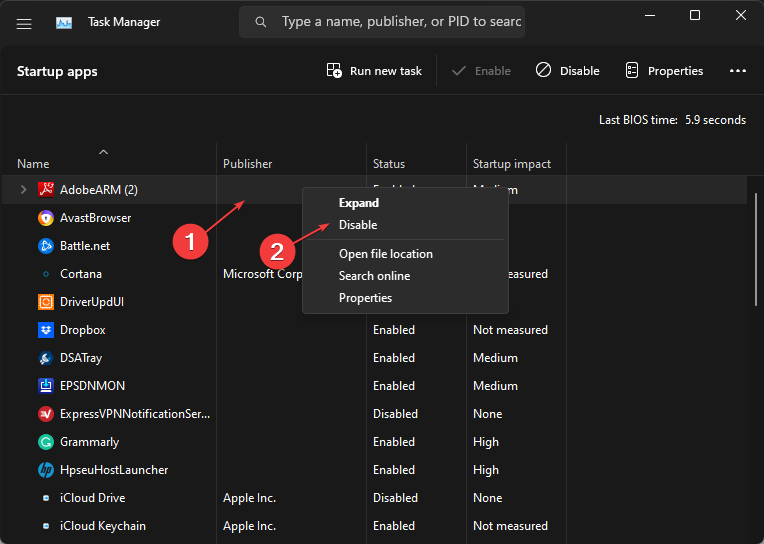
Performing a clean boot can fix background apps actions causing issues with how PowerShell works on your PC.
6. End tasks for background apps via Settings
- Press the Windows + I key to open the Settings app.
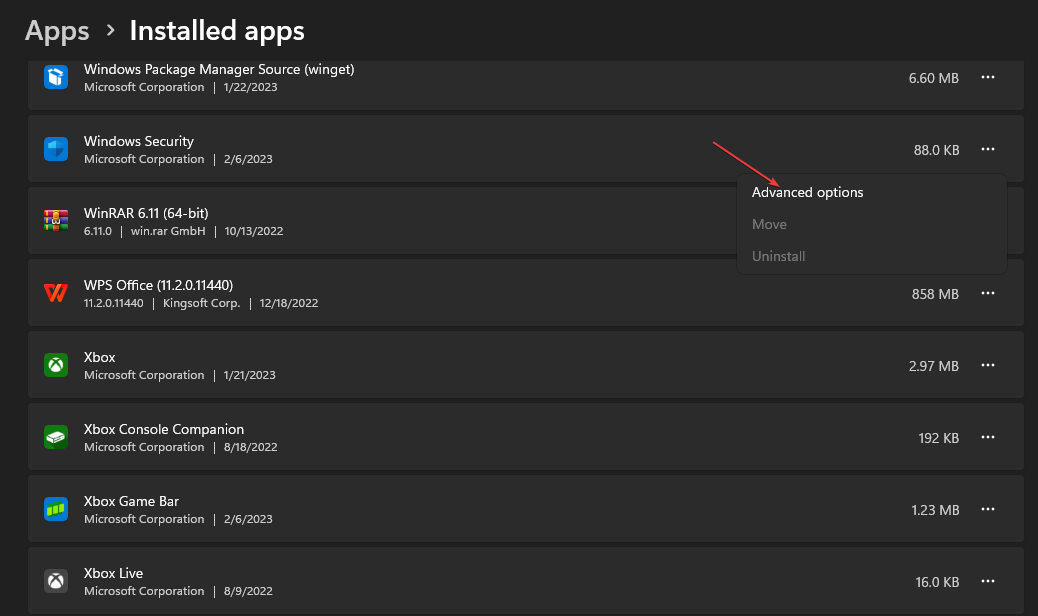
- Select Apps from the left pane and click on Installed apps.

- Choose the apps to end the task, then click on the three dots and select Advanced options.

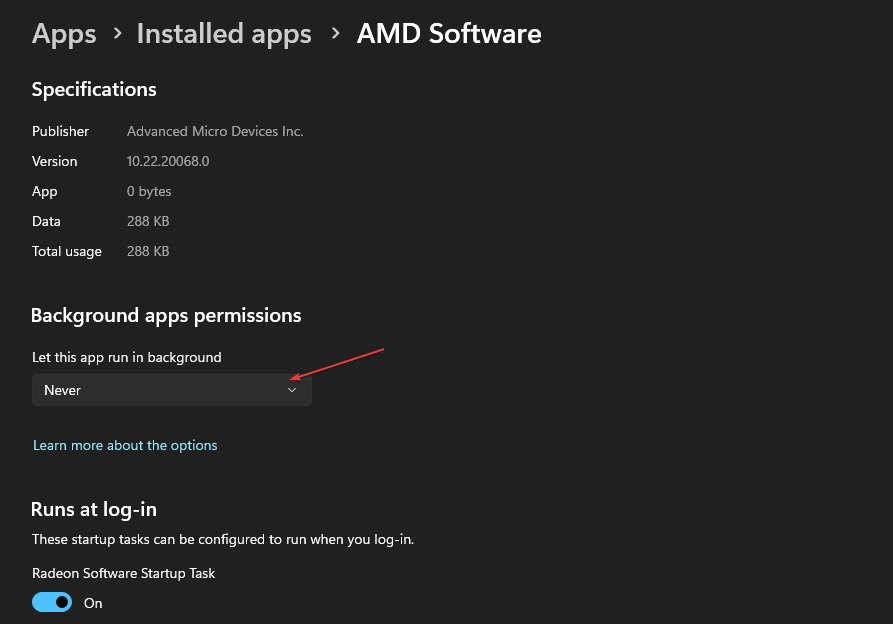
- Go to Background app permissions, click the drop-down button, then select Never.

- Repeat the steps for all apps you want to restrict background permissions.
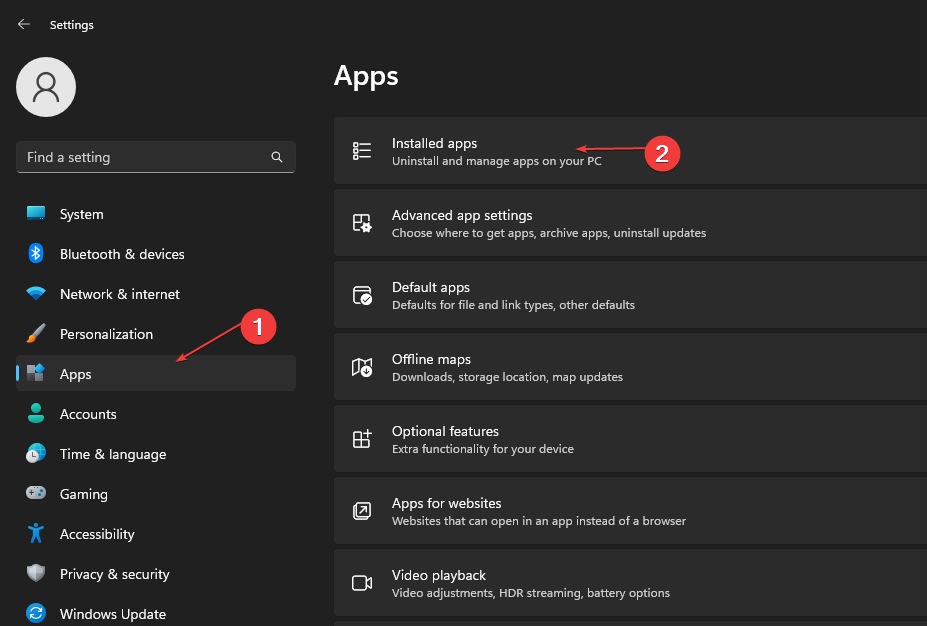
Ending tasks for background apps will fix the activities of programs that may prompt PowerShell to appear repeatedly on your computer.
Check ways to turn off background apps in Windows 11 if you have issues using the steps above.
7. Temporarily disable Windows PowerShell
- Left-click the Start button, type Command Prompt, and click the Run as administrator option.
- Click Yes on the User Account Control (UAC) prompt.
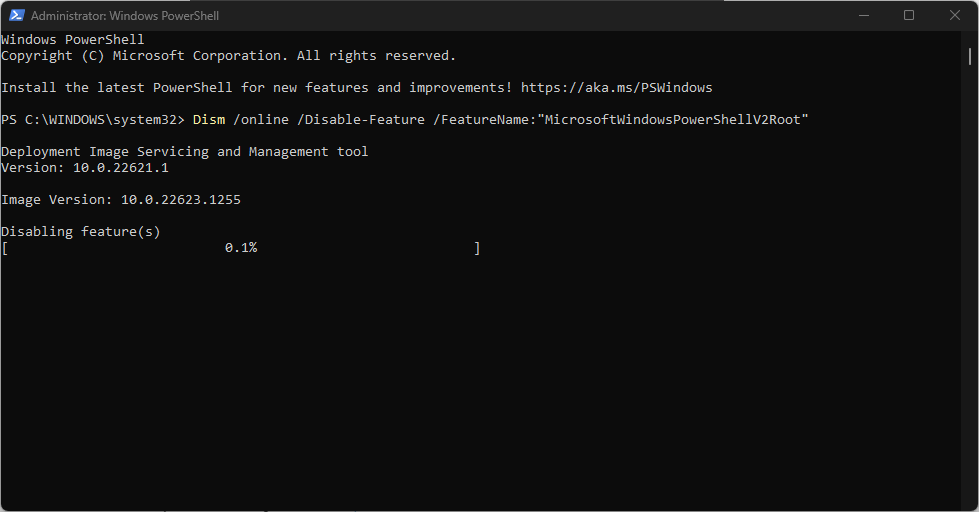
- Type the following commands and press Enter:
Dism /online /Disable-Feature /FeatureName:"MicrosoftWindowsPowerShellV2Root" - Wait for the process to complete, and then restart your PC.
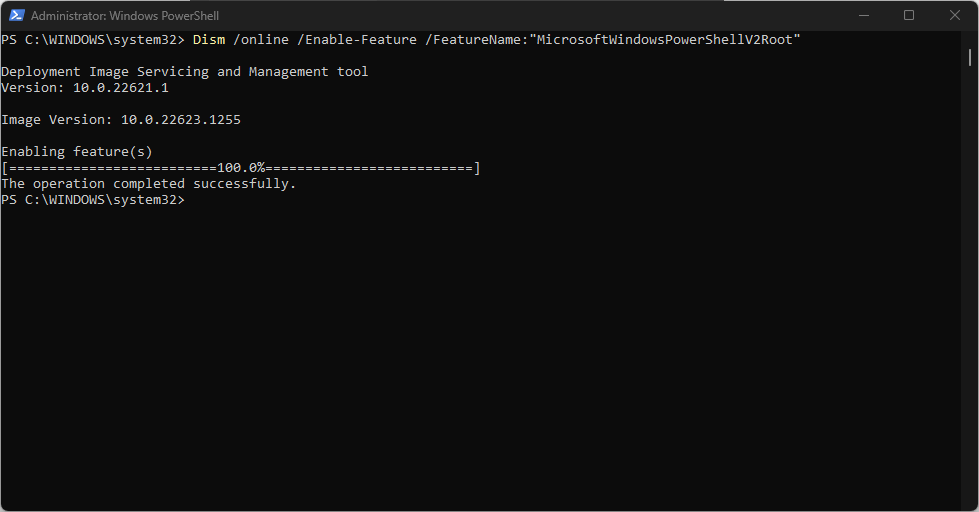
- Repeat steps 1 & 2, then run the following commands to enable PowerShell:
Dism /online /Enable-Feature /FeatureName:"MicrosoftWindowsPowerShellV2Root"
Disabling and reenabling Windows PowerShell helps refresh its process. Check our guide on what to do if Command Prompt keeps crashing on your PC.
Conclusively, our readers may be interested in how to use PowerShell ErrorAction on Windows PC. Also, you can check our guide on how to print Environment Variables in PowerShell.
For further questions or suggestions, use the comments section below.