0x80248007 Windows Update Error on Windows 11 [Fix]
Note that corrupt system files may cause this error
6 min. read
Updated on
Read our disclosure page to find out how can you help Windows Report sustain the editorial team. Read more
Key notes
- Updating the operating system or downloading other program updates via Windows Update can cause issues.
- Error code 0x80248007 may occur due to a buggy update package and unidentified Microsoft Software License Terms.
- Resetting Windows Update components and running Windows Update troubleshooter can fix the error.
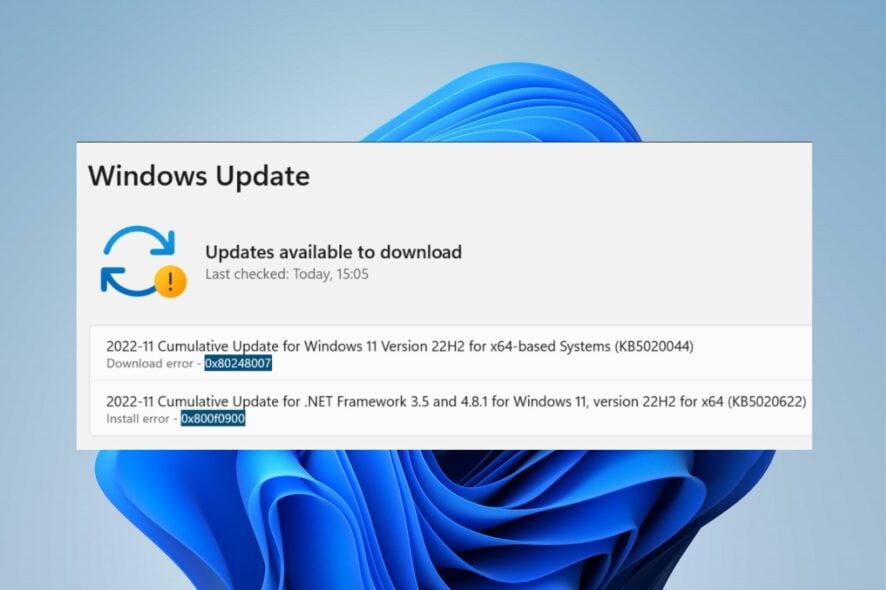
Microsoft releases updates for the Windows operating system and other components, such as drivers, to improve performance and resolve bugs. Users can download and install these updates on their devices by updating their OS.
However, the process can encounter issues, resulting in error code 0x80248007 and other errors. Since many of our readers have reported this kind of problem, we decided to devise some solutions to solve it for good. So let’s dive in.
What causes the error code 0x80248007?
The error code 0x80248007 on Windows is an update error that occurs when there’s an interference with the download process. Some factors that may be responsible for the error are:
- Buggy or missing update packages – When the update you’re trying to install is buggy or corrupt, it can cause your system to run into errors during the process. Also, an essential component may be missing in the update package, causing issues with the update process.
- Issues with Windows update services – The error can occur due to issues with Windows Update services not running correctly on your device. The services involved may have a pending process running, causing it not to interact with the needed components.
- Unidentified Microsoft Software License Terms – You can run into the error when the update cannot find the Microsoft Software License Terms. It makes it impossible for the update to identify the necessary documents needed for the update process.
- Corrupt system files – Corrupt system files can cause the update download error to occur on your computer. They impede the smooth installation process.
Also, you may be interested in the Windows Update Error 0x80073701 and ways to fix it.
How can I fix the error code 0x80248007?
Before proceeding with any advanced troubleshooting steps, fix network congestion on your PC, temporarily disable antivirus software, and restart Windows in Safe Mode to check if the error code 0x80248007 persists.
1. Reset the Windows Update components
- Left-click the Start button, type Command Prompt, and click Run as administrator.
- Click Yes on the User Account Control (UAC) prompt.
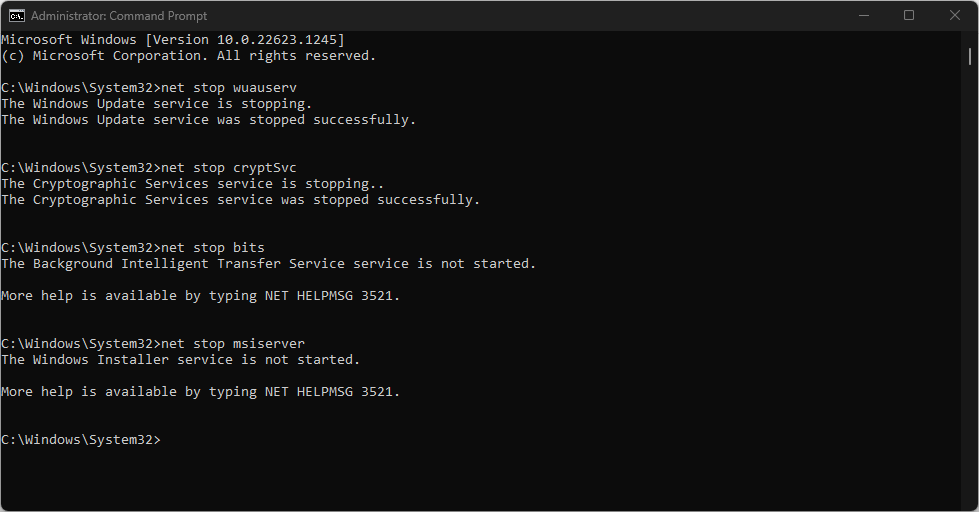
- Type the following lines of commands and press Enter to run them:
net stop wuauservnet stop cryptSvcnet stop bitsnet stop msiserver - Run the following command one after the other:
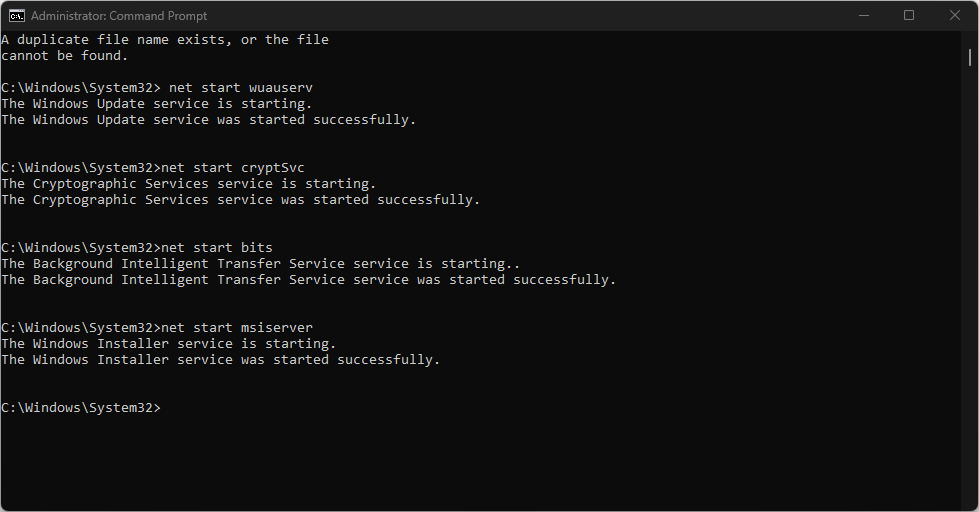
ren C:\Windows\SoftwareDistribution SoftwareDistribution.oldren C:\Windows\System32\catroot2 Catroot2.old - Type the following commands and press Enter after each one:
net start wuauservnet start cryptSvcnet start bitsnet start msiserver - Exit the Command Prompt and restart your PC.
Resetting the Windows update process helps fix problems causing the Windows update services not to download updates.
2. Run Windows Update Troubleshooter
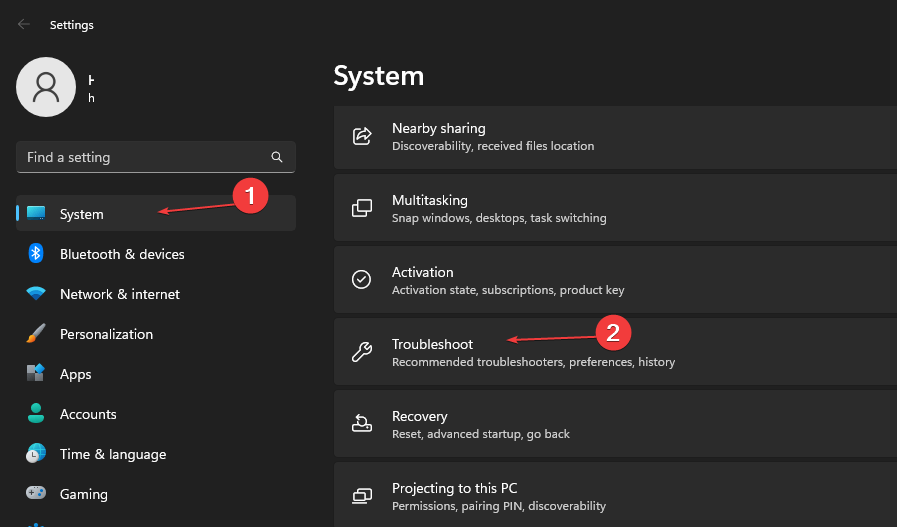
- Press Windows + I key to open the Settings app.
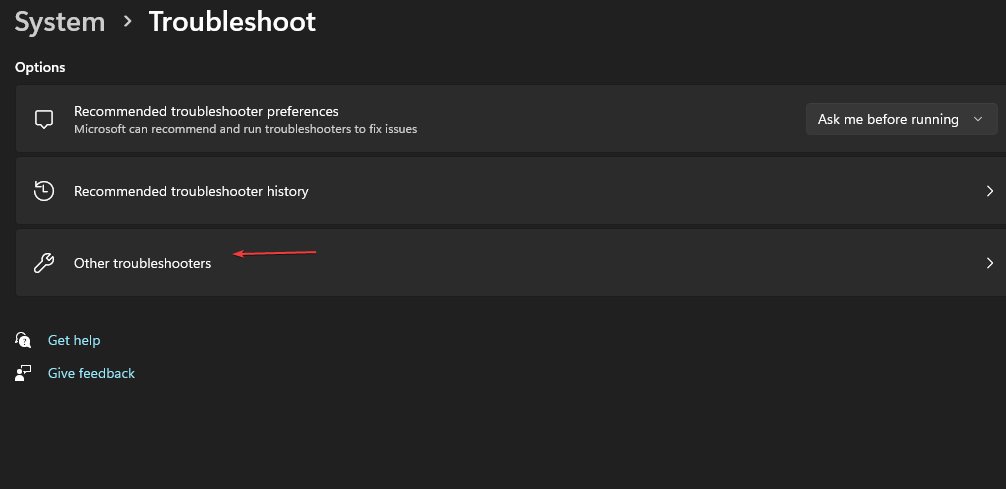
- Select System and click Troubleshoot.
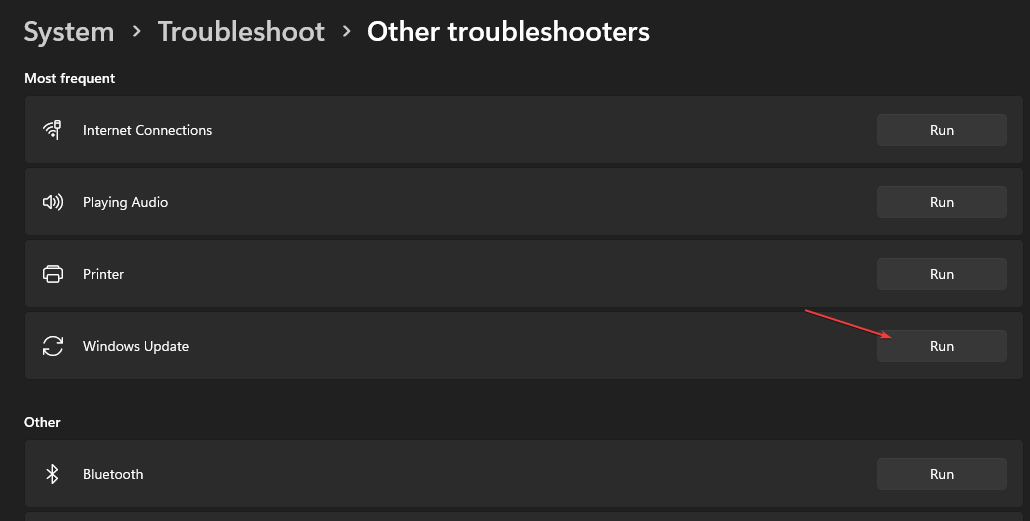
- Select Other troubleshooters.
- Click the Run button beside the Windows Update.
- Follow the on-screen instructions and restart your PC.
The troubleshooter will find and repair issues causing the Windows update error code 0x80248007 on your PC.
If you can’t use the steps above, check other ways to run the Windows Update troubleshooter in Windows 11.
3. Verify that the Windows Installer is running
- Press Windows + R key to open the Run dialog box and type services.msc, then press Enter to open Services.
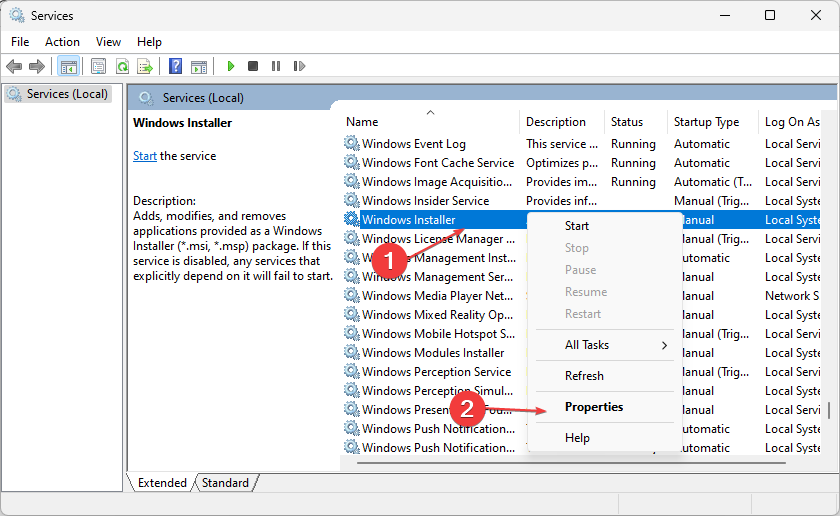
- Go to Windows Installer and right-click, then select Properties from the drop-down.
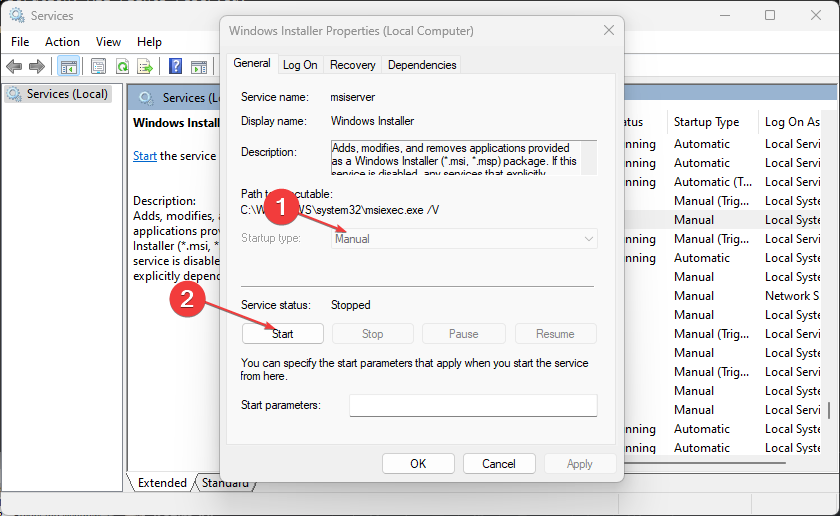
- Set the Startup type to Automatic and click the Start button. Click the Apply button and OK.
- Restart your PC and check if the error persists.
Verifying that the Windows Installer service is running allows the PC to install new programs and updates smoothly.
4. Clear Windows Update cache via Run
- Press Windows + R key to open the Run dialogue box, and type services.msc, then click OK to open the Services app.
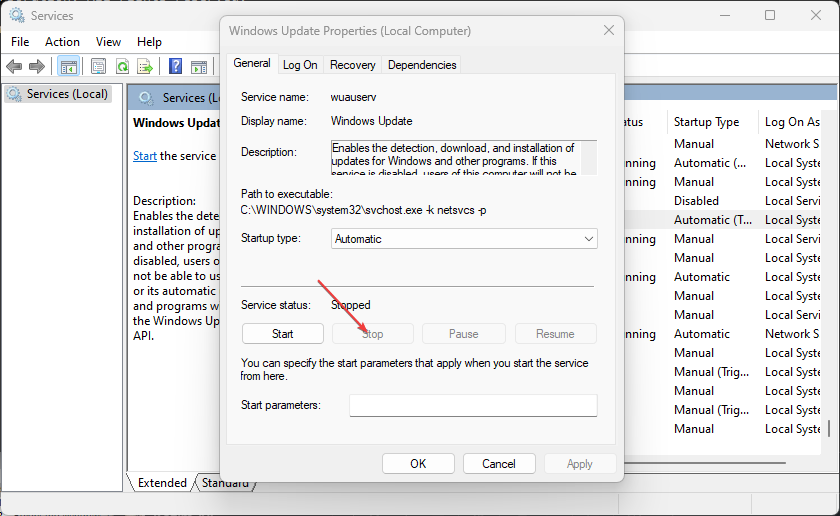
- Double-click Windows Update and select Stop.
- Open the File Explorer, and go to the
C:\Windows\SoftwareDistribution\Download folder - Press Ctrl + A to highlight every file, then delete.
- Press Windows + R key, and type services.msc, then press Enter.
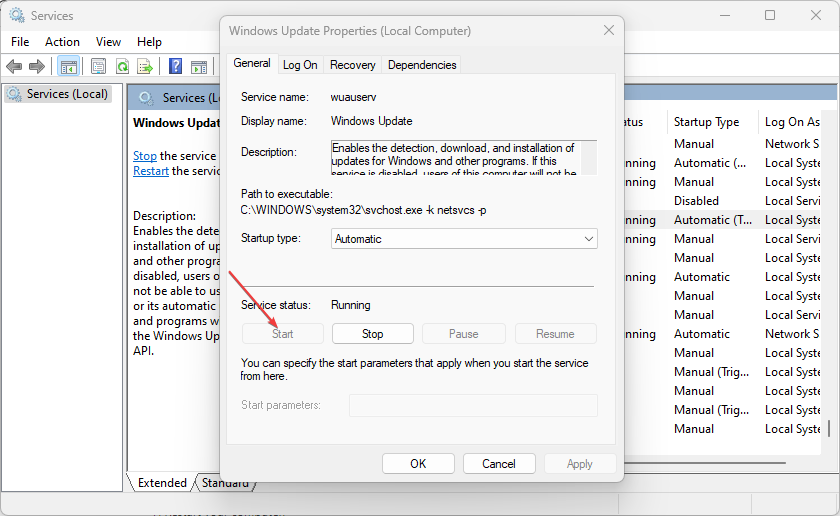
- Find and double-click on Windows Update, then click Start.
- Restart your computer.
Disabling Windows Update services and clearing the distribution directory will clear the cache file.
5. Verify the relevant Windows Update services
- Left-click the Start button, type services.msc, and press Enter.
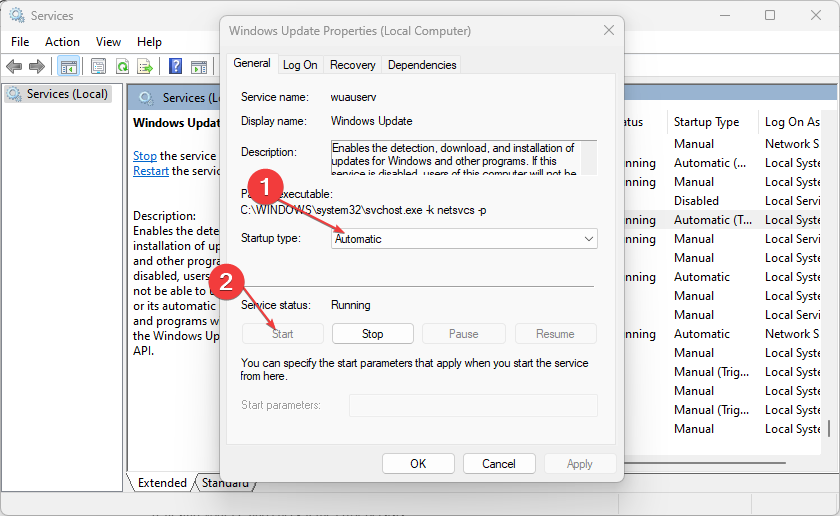
- Double-click the Windows Update service.
- Click on the General tab. Ensure the Startup Type is set to Automatic or Manual. Click the Start button under the Service Status bar.
- Double-click Background Intelligent Transfer Service (BITS).
- Then click on the General tab. Make sure the Startup Type is set to Automatic or Manual, then click the Start button under the Service Status bar.
- Restart your PC and check if the error persists.
The above steps will help verify and fix issues with Windows Update Service and the Background Intelligent Transfer Service if they aren’t working.
6. Run an SFC scan
- Left-click the Start button, type Command Prompt, and click the Run as administrator option.
- Click Yes on the User Account Control prompt.
- Type the following and press Enter:
sfc /scannow - Restart your PC and check if the Windows update error persists.
An SFC scan will find and repair corrupt system files prompting the error code 0x80248007. You can check how to fix the run-as-administrator option if it’s not working on your PC.
7. Disable Windows Firewall
- Left-click the Start button, type control panel, then press Enter to open the Control Panel.
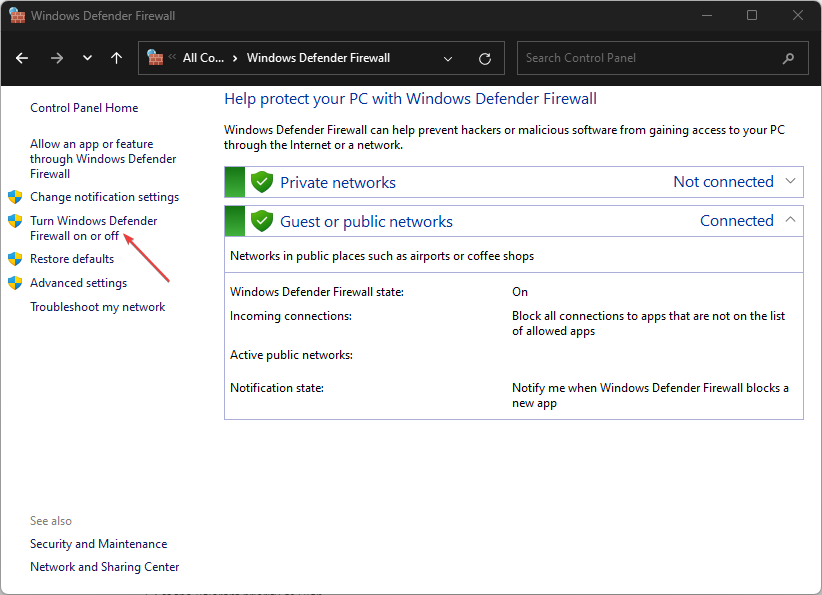
- Select the Windows Defender Firewall option.
- Click the Turn Windows Defender Firewall on or off option.
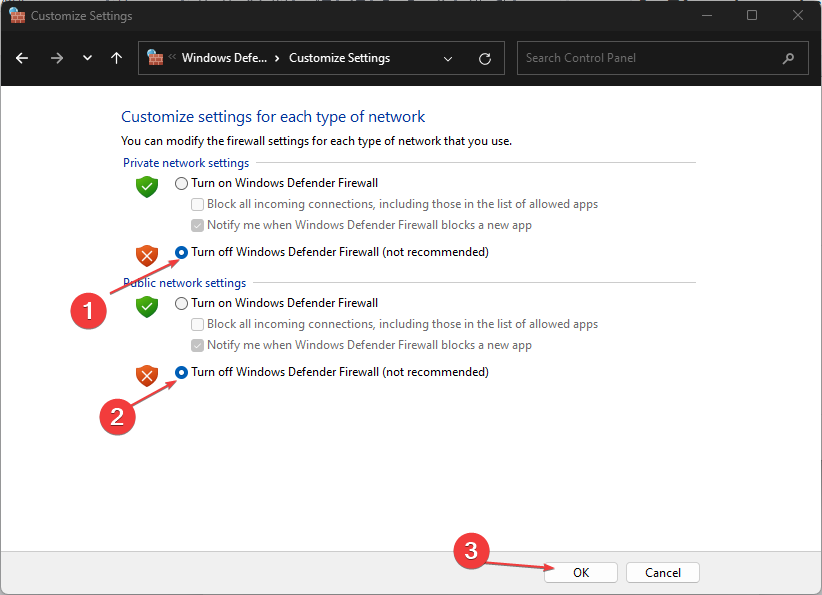
- Go to the Private and Public network settings, then click the radio buttons for the Turn off Windows Defender Firewall (not recommended) option.
- Exit the Control Panel and restart your computer.
Disabling the Windows Defender Firewall will fix any problems the firewall is causing in the Windows update process.
8. Run System Restore
- Left-click the Start button, type Restore, and click on Create a Restore Point.
- Go to the System Protection tab, and click System Restore.
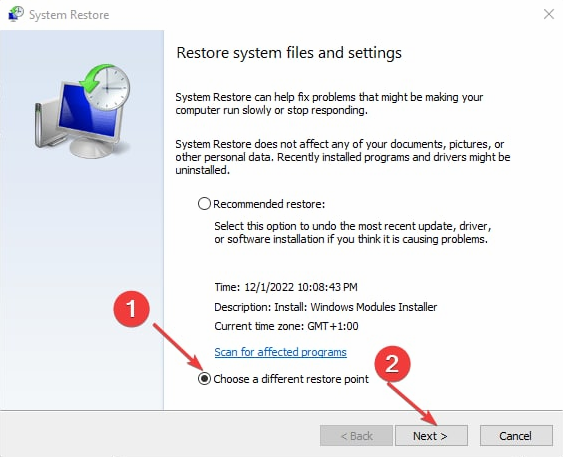
- Choose a different system restore and click Next to select a specific Restore Point.
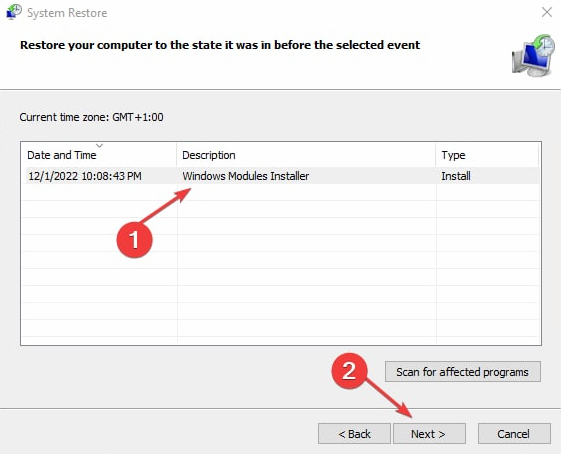
- Select the last time you were able to install updates on your PC, and click Next.
- Click the Finish button.
System Restore backdates your PC to the Restore Point and fixes issues affecting it. Check how to fix Restore Point if it’s not working and if you have any issues running it.
Conclusively, our readers can check our article for fixing slow Windows updates on Windows 11. Also, we have a detailed guide on Windows Update error 0x8007045b and some fixes.
You might also be interested in our guide on resolving Windows 11 update error 0x8024d001.
Let us know which procedure worked for you in the comments section below.











User forum
0 messages