0xc00000ba Boot Error: 4 Ways to Quickly Fix it
Windows Startup Repair is the most effective solution for this error
6 min. read
Updated on
Read our disclosure page to find out how can you help Windows Report sustain the editorial team. Read more
Key notes
- The 0xc00000ba boot error is often related to messy boot configuration, damaged hard drives, or malware/virus infections.
- This is a very common Windows error that can stop your device from starting up and needs to be fixed immediately.
- There are various reasons for this boot error, but the most frequent one is either a hard disk drive failure or a Boot Configuration Data (BCD) is missing or corrupt.
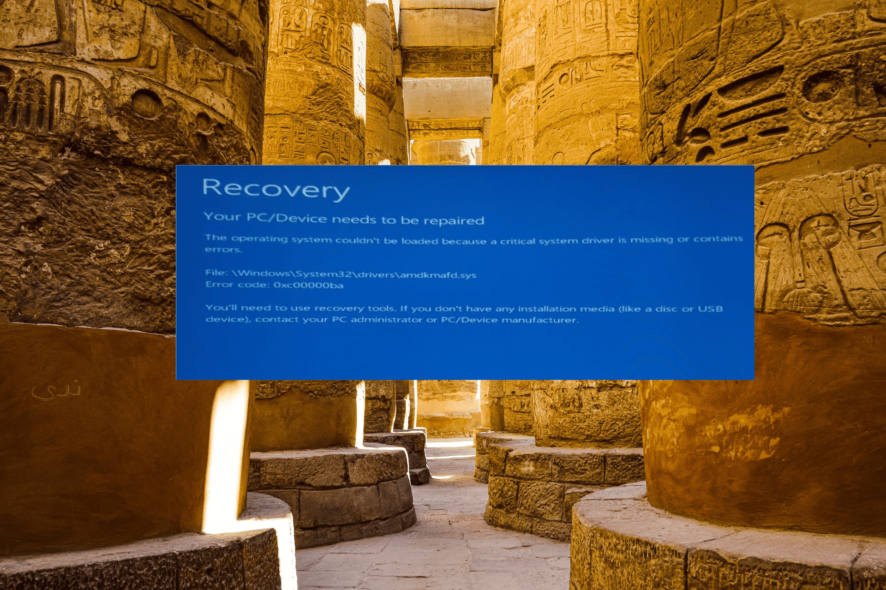
The Windows error code 0xc00000ba occurs when the system encounters a problem with its boot configuration, preventing it from successfully starting up to Windows. It indicates that a required device or file for booting is inaccessible or corrupted.
The most common error message that is associated with the 0xc00000ba error code is as follows:
Your PC/Device needs to be repaired.
The operating system couldn’t be loaded because a critical system driver is missing or contains errors.
This is a critical error that needs to be repaired right away. Follow these steps to fix it quickly.
What is 0xc00000ba boot error?
0xc00000ba is a type of blue screen error that usually happens when starting up your computer. This error can occur for various reasons, which include:
- Corrupted boot files: This error may happen when the necessary boot files needed to start the operating system become damaged or corrupted. Unexpected power loss, improper shutdowns, or disk errors can cause this.
- Hardware or device issues: Problems with hardware components, such as hard drives or SSDs, can result in boot errors.
- Incorrect boot configuration: If the boot configuration data (BCD) contains incorrect information or important bcd entries are missing, the system may fail to boot and display the error.
- Malware infections: Certain types of malware can interfere with the boot process and cause errors like the 0xc00000ba error.
- Faulty or outdated device drivers: Incompatible or outdated device drivers can create conflicts and lead to boot errors.
- Hardware or firmware changes: Making significant hardware changes, like replacing the motherboard or CPU, without properly updating the system configuration can trigger boot errors.
How do I fix error 0xc00000ba?
Before delving into more advanced solutions, it is recommended to try these prerequisite solutions first.
- Check boot device connections: Ensure all the cables connecting your hard drive or SSD (solid-state drive) are properly connected. If you find any loose connections, carefully reseat the cables tightly and properly. If the cable shows any wear or tear, replace it.
- Perform Power Cycle: Unplug the power and remove the battery, then hold the power button for 30 seconds to discharge any residual power from the system. Doing this can sometimes resolve minor hardware or firmware issues.
1. Perform Startup Repair
1.1 Create a bootable USB
- Connect a USB drive with a minimum capacity of 8 GB to your computer.
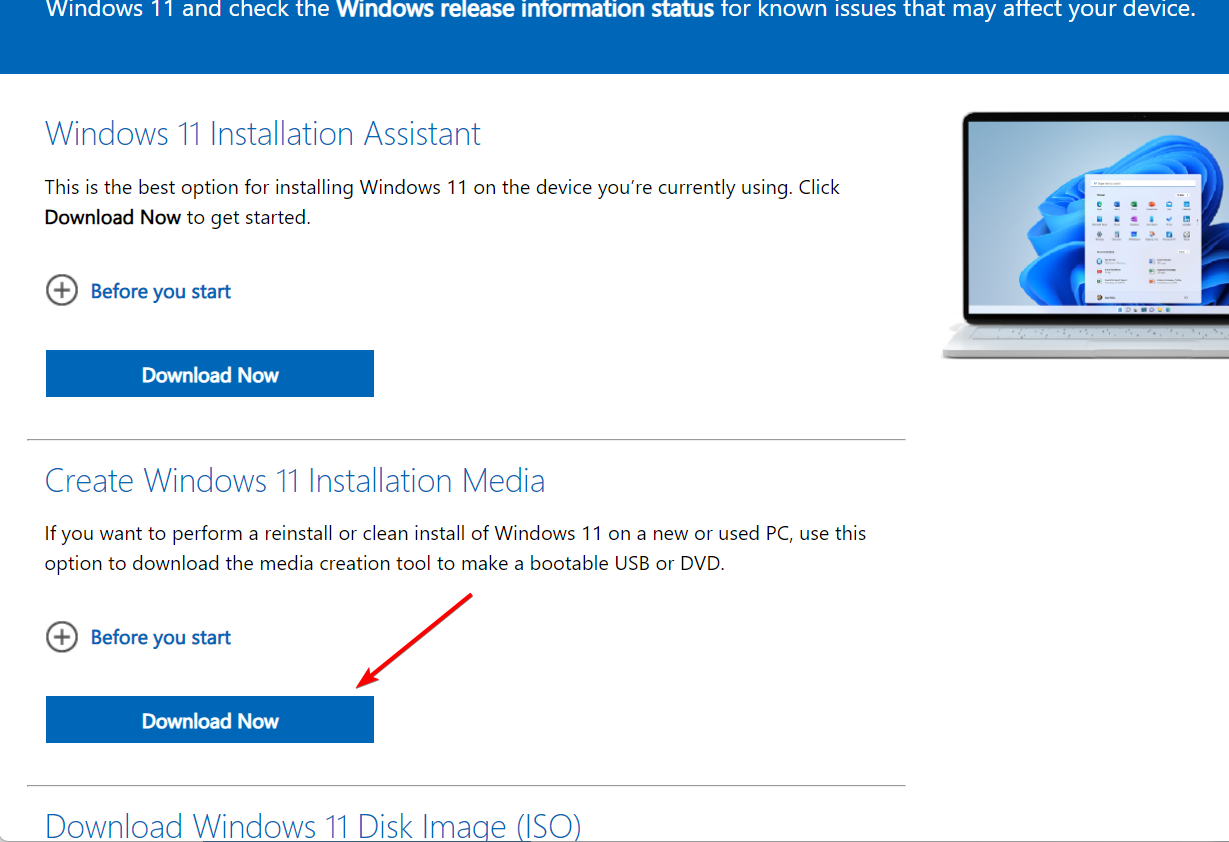
- Then, go to the Microsoft official website and download the Media Creation Tool under the Create Windows 11 Installation Assistant section.
- Then, locate the downloaded mediacreationtool.exe file and double-click on it to run the wizard.
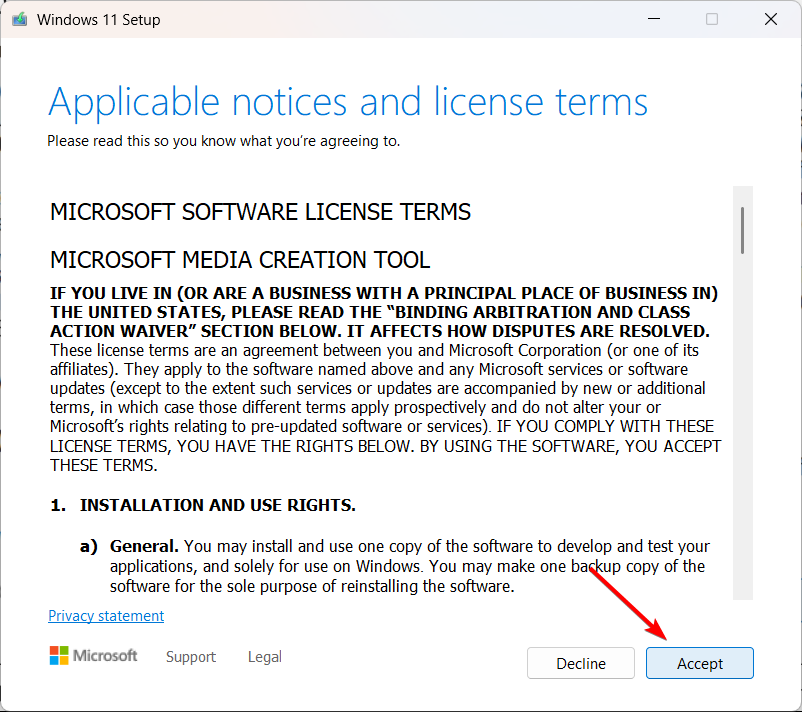
- Click Accept to agree to the licensing terms and conditions.
- Select Create installation media (USB flash drive, DVD, or ISO file) for another PC option and click Next (if prompted).
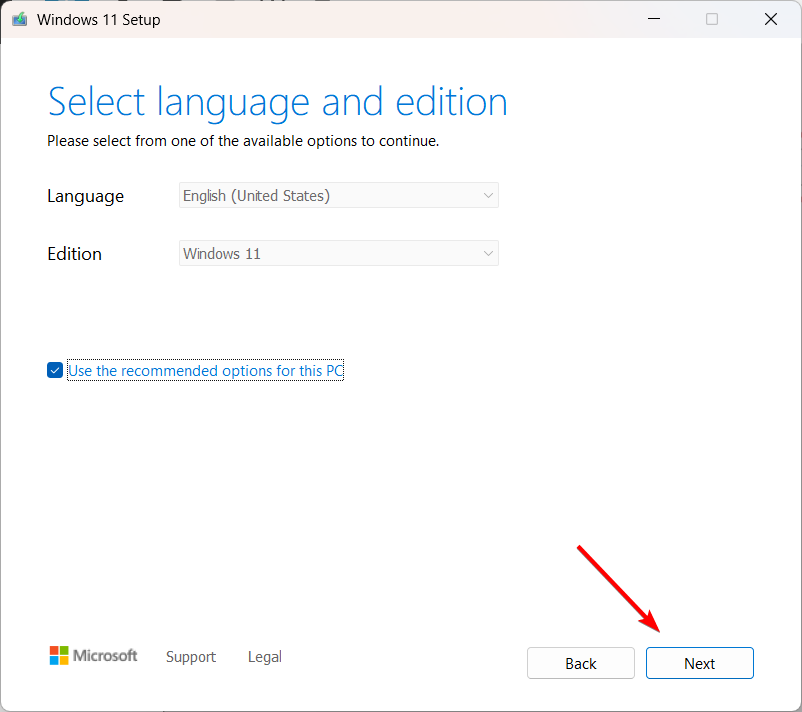
- If you want to change the language or edition, uncheck the box next to Use the recommended options for this PC and select language and edition from the drop-down menus, then click Next.
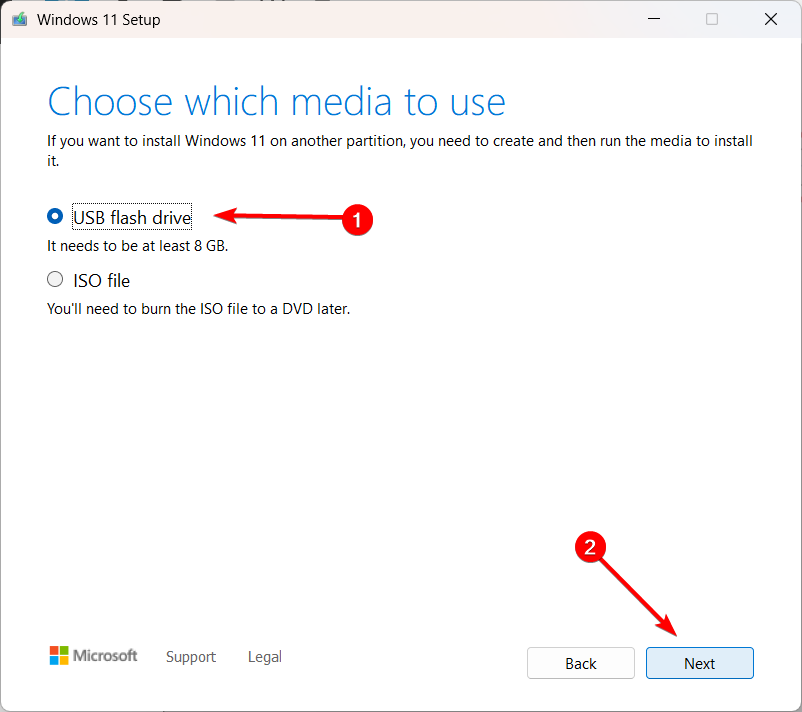
- Choose USB flash drive as the media type and click Next.
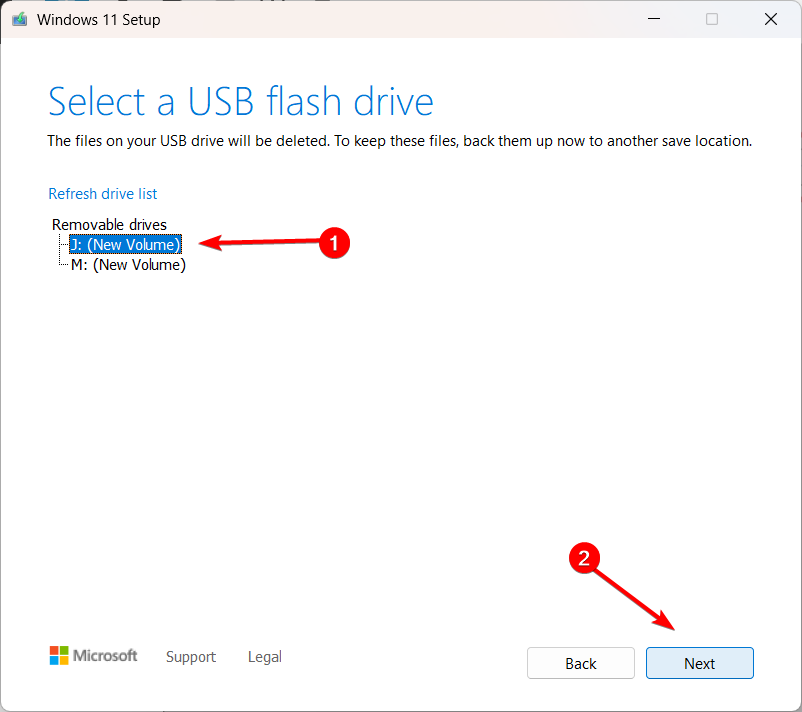
- Select the USB drive you want to use and click Next.
- It may take several minutes to download the installation files.
- After the download is complete, click Finish.
1.2 Perform Startup Repair
- Insert the bootable USB drive into the PC showing the error and boot your PC from it.
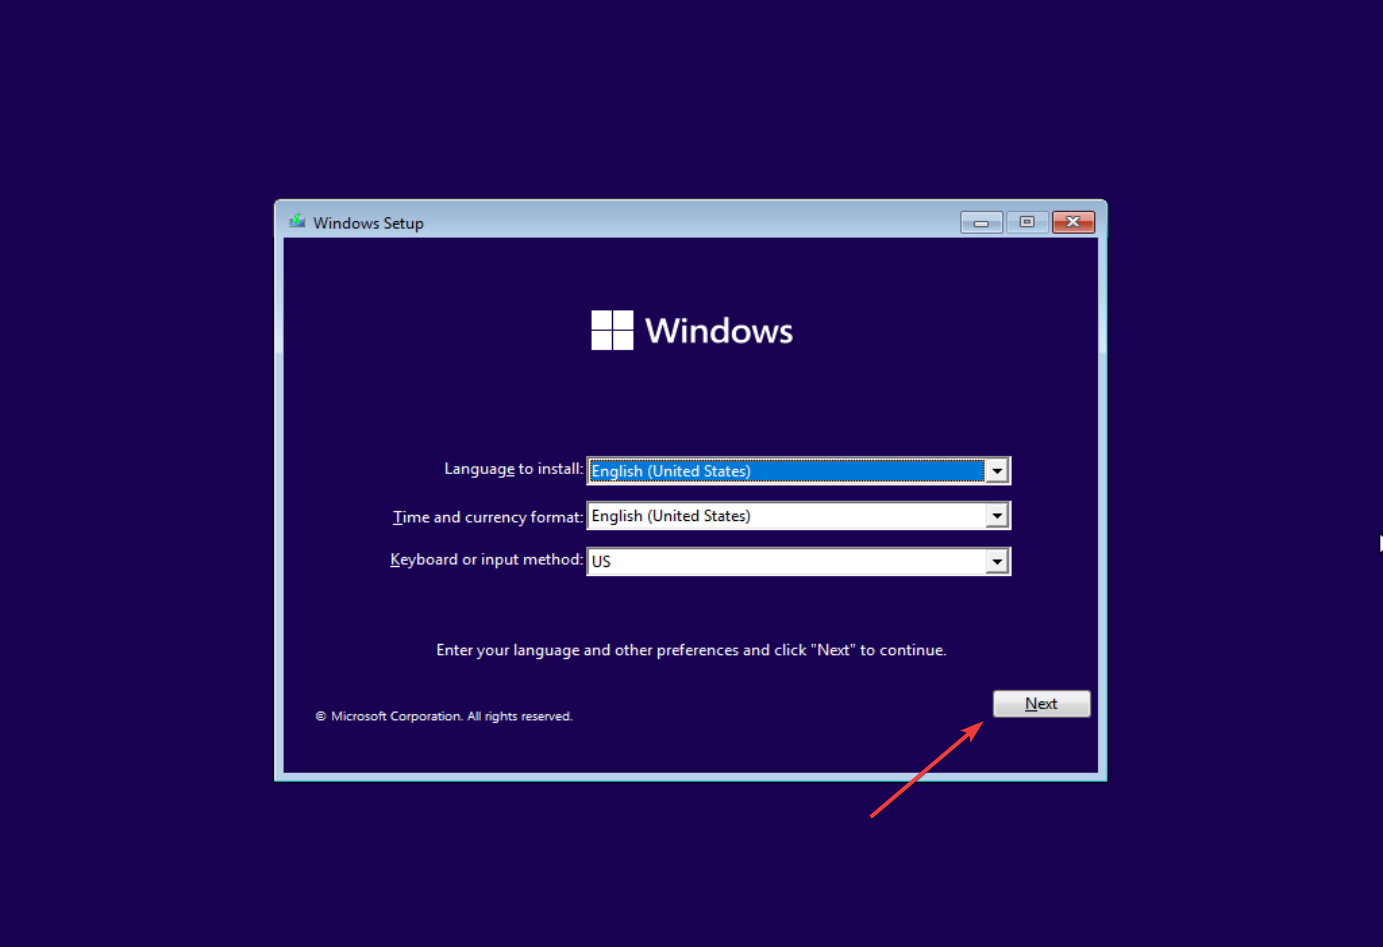
- Click Next in the Windows Setup window to continue.
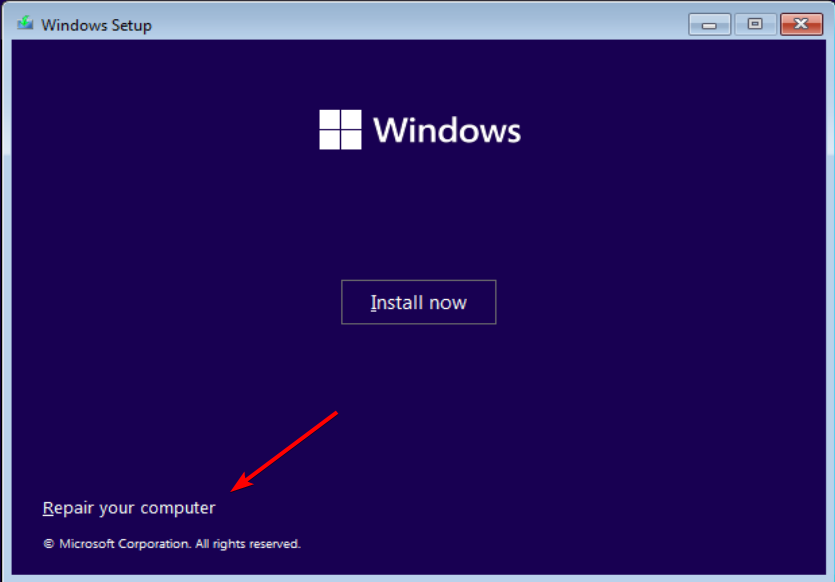
- Next, select the Repair your computer option at the bottom left corner.
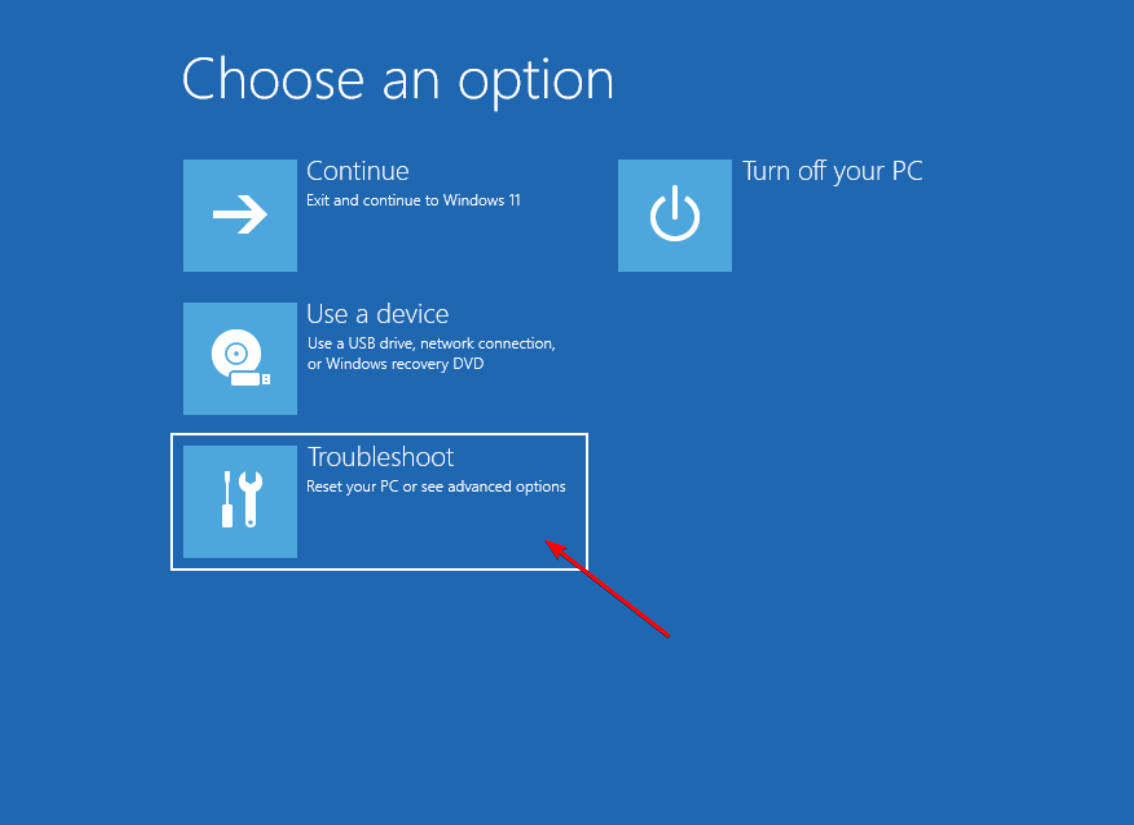
- On the next screen, choose Troubleshoot.
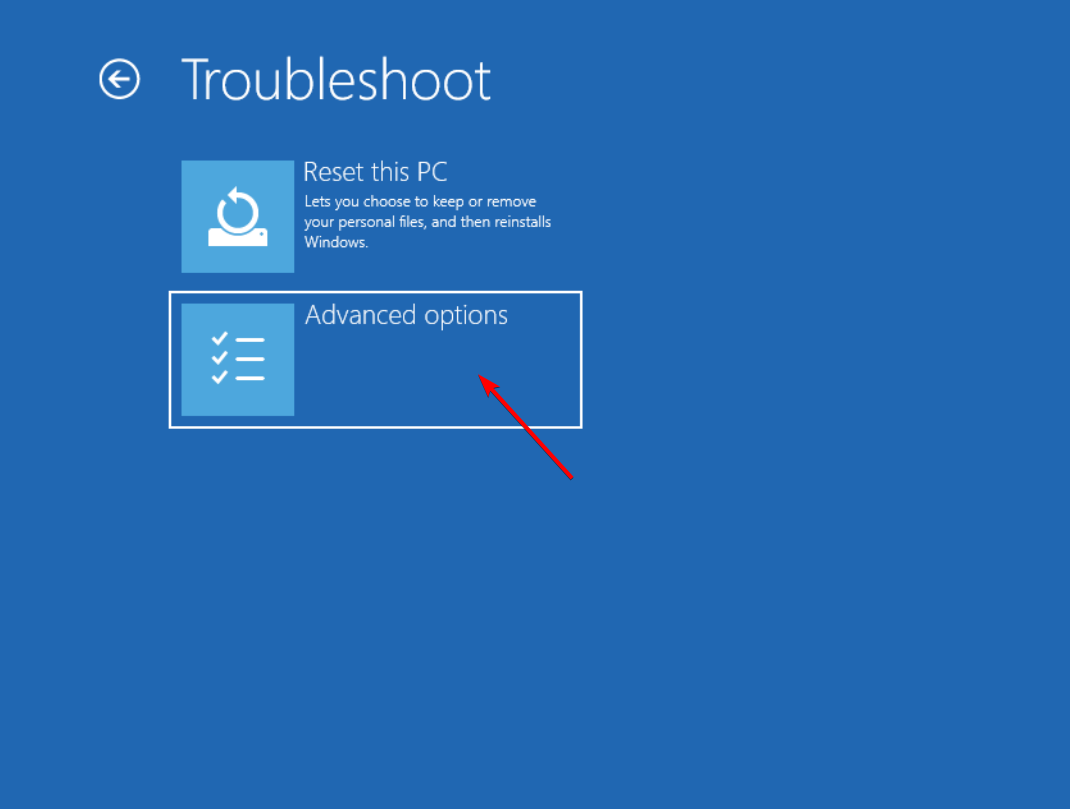
- Then, click Advanced options.
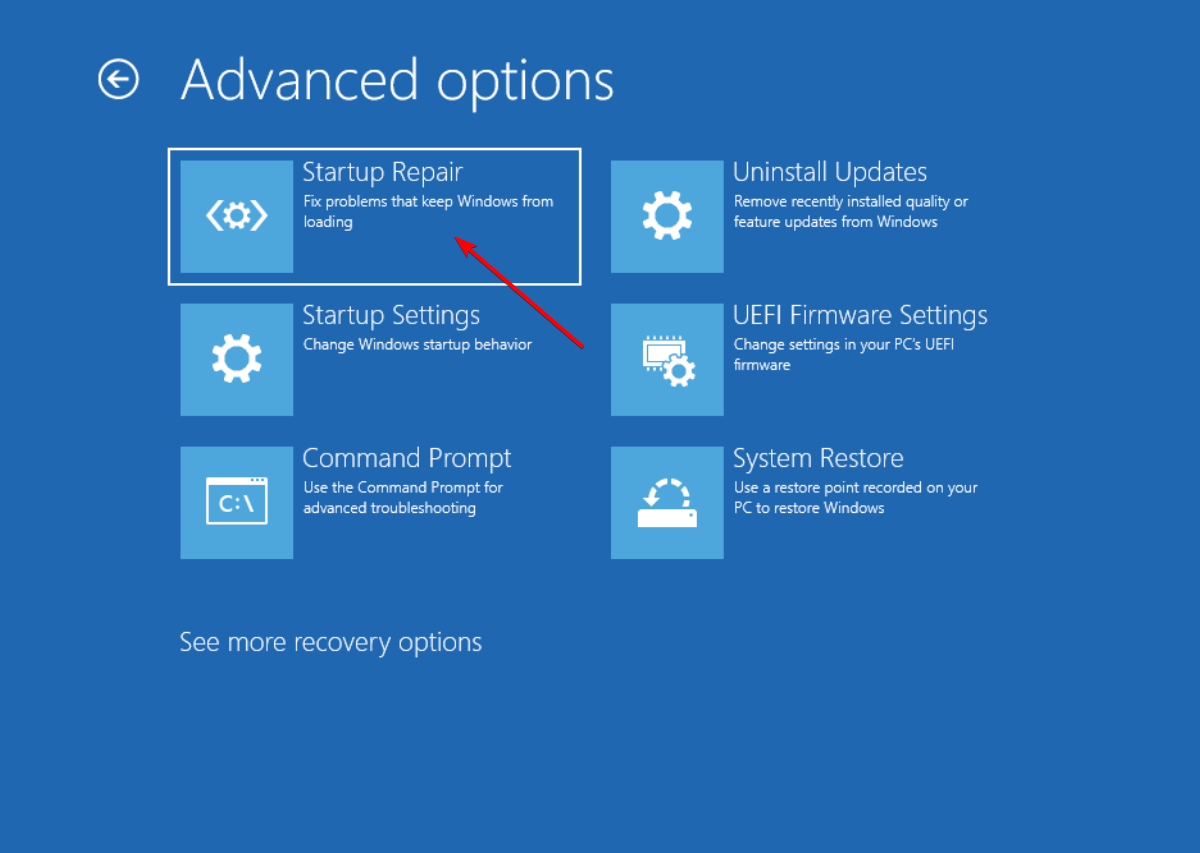
- Select the Startup Repair option to start the automatic repair process.
2. Run SFC and DISM scan
- Insert your bootable USB into your computer and follow Steps 1 to 5 in Solution 1.2.
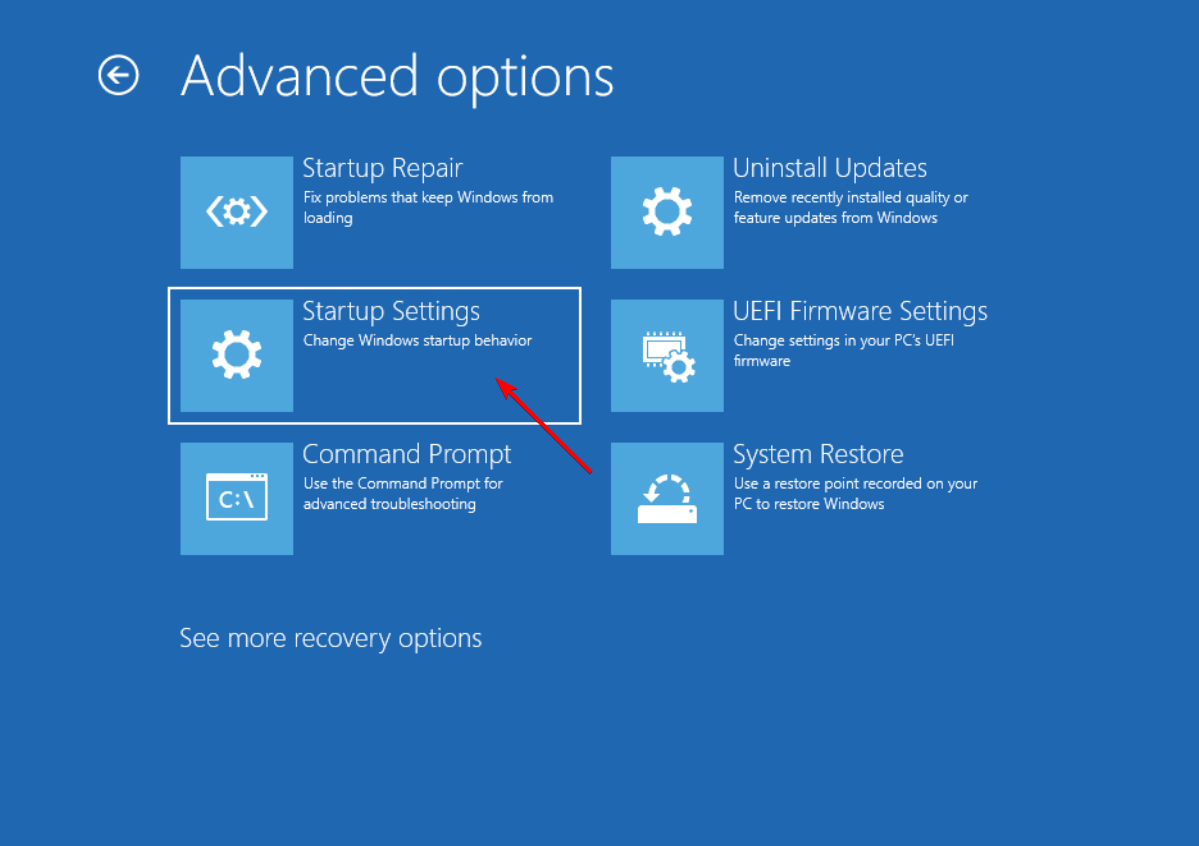
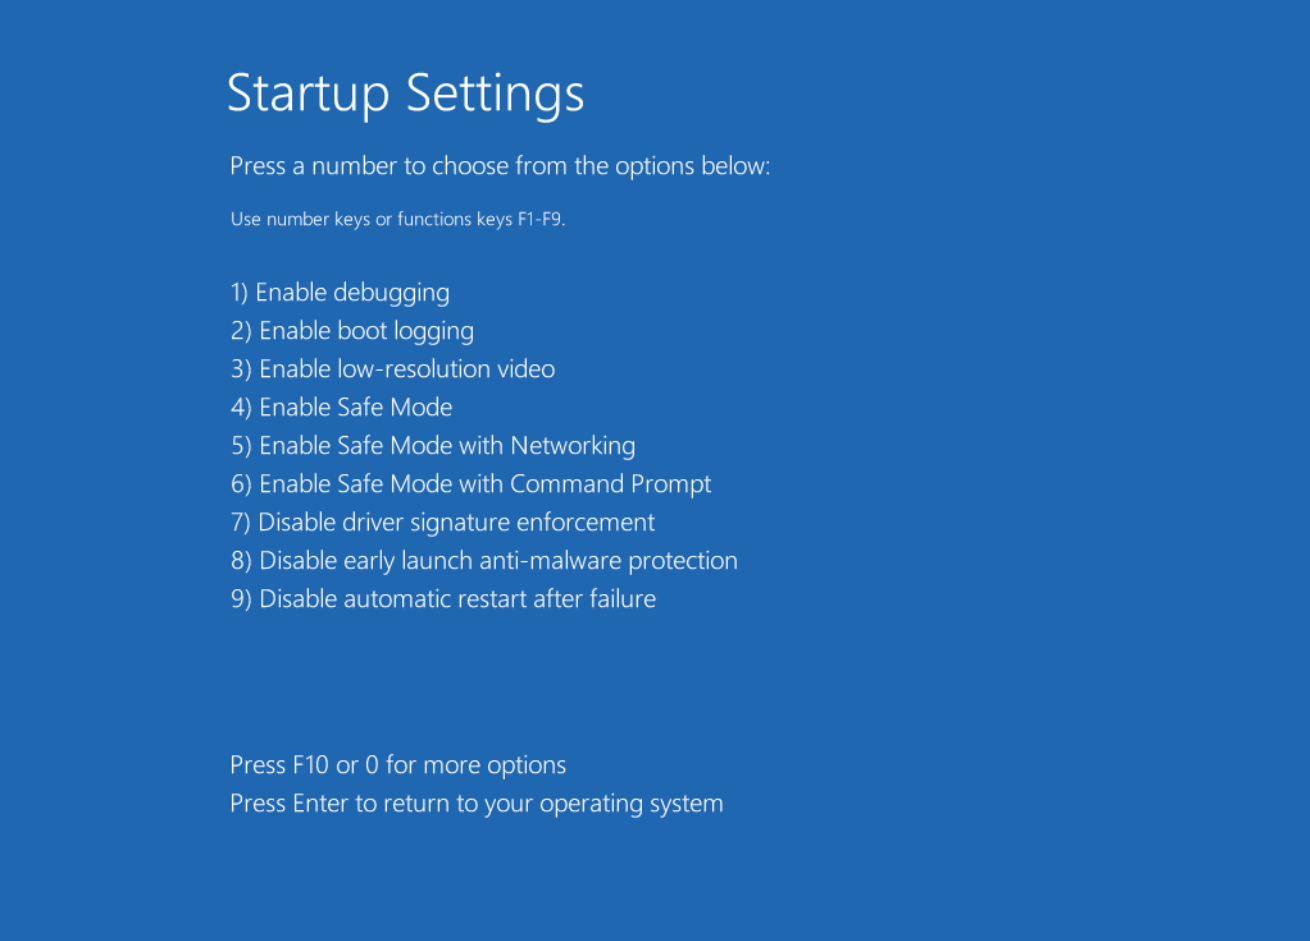
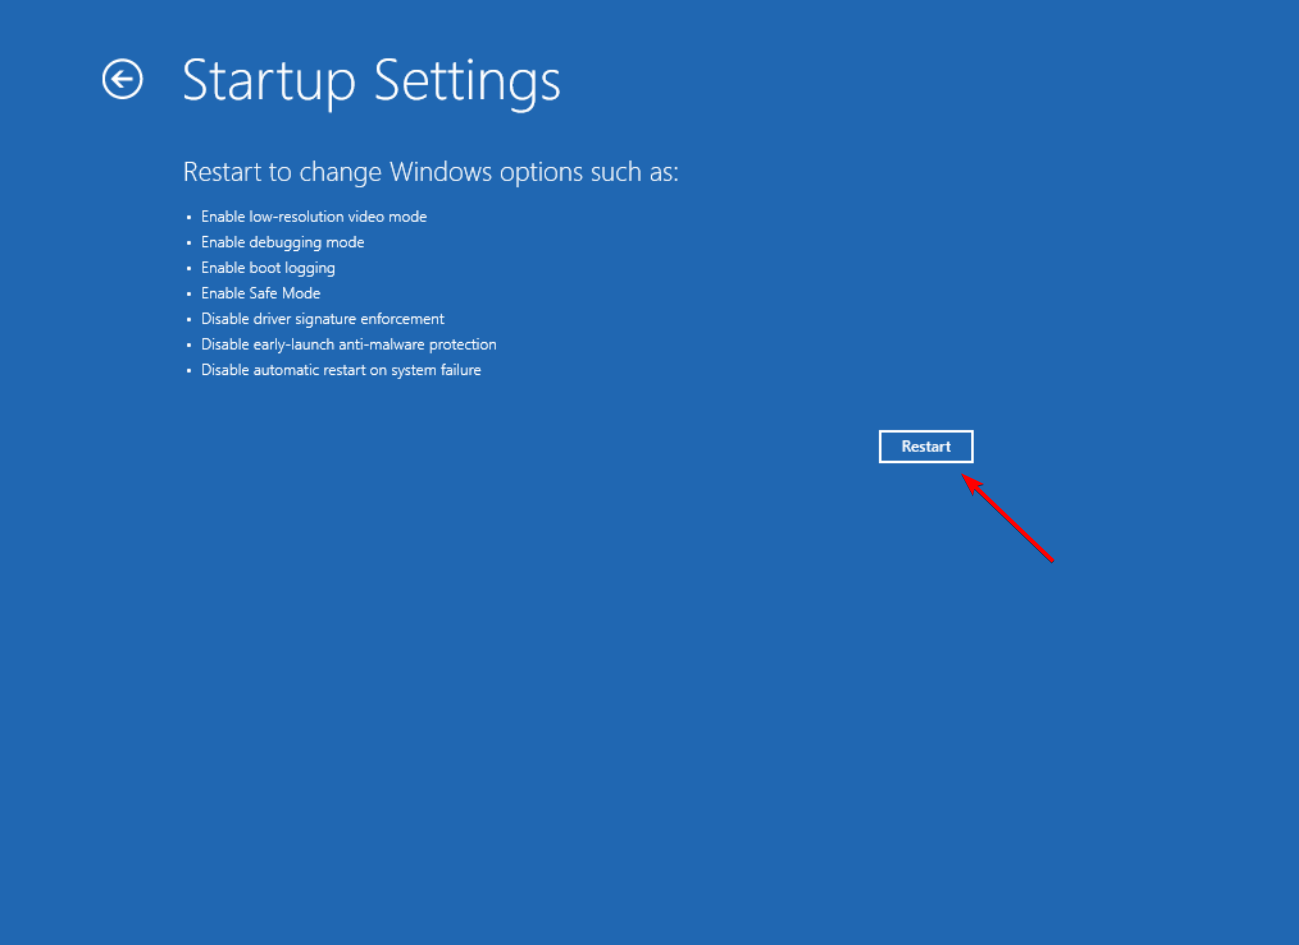
- Then, select the Startup Settings option.
- Press 6 or F6 to choose Enable Safe Mode with Command Prompt option.
- Then, click on Restart.
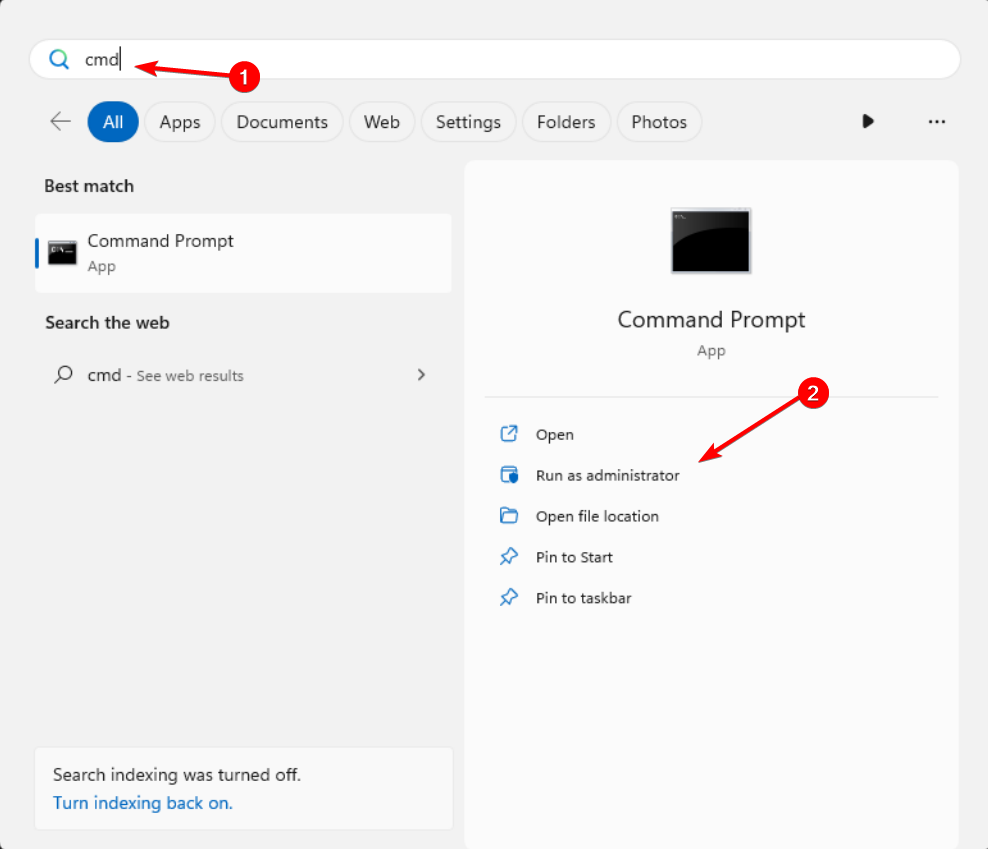
- When your system boots into safe mode, open the Start menu, type cmd, and select Run as administrator.
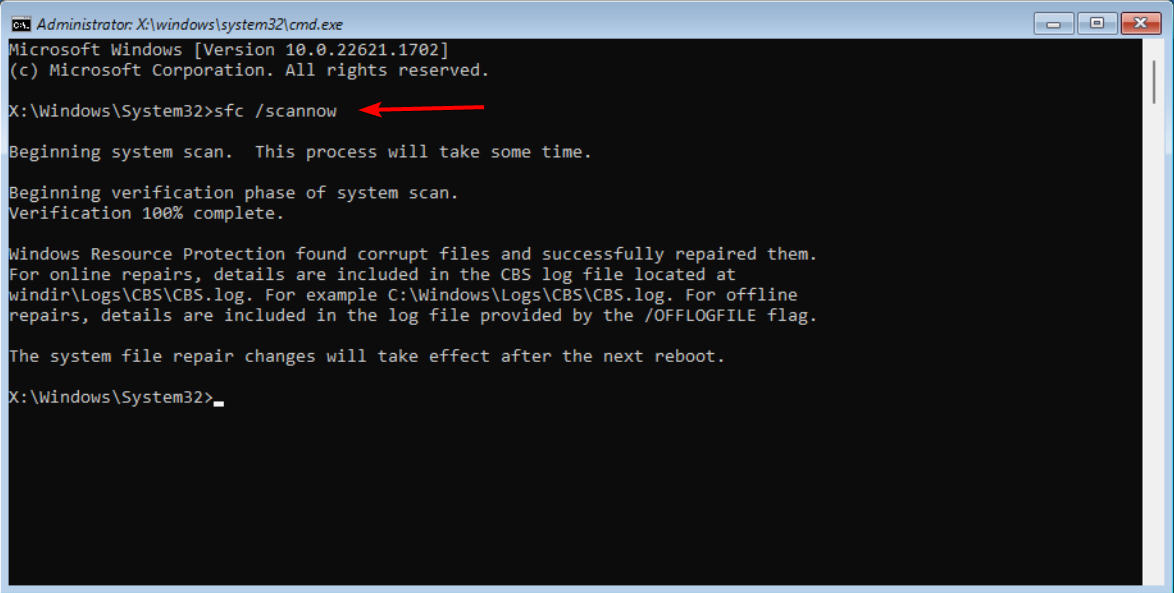
- Type the following command and hit Enter to run the SFC scan:
sfc /scannow - Wait for the command to finish, then run the below DISM commands one after the other:
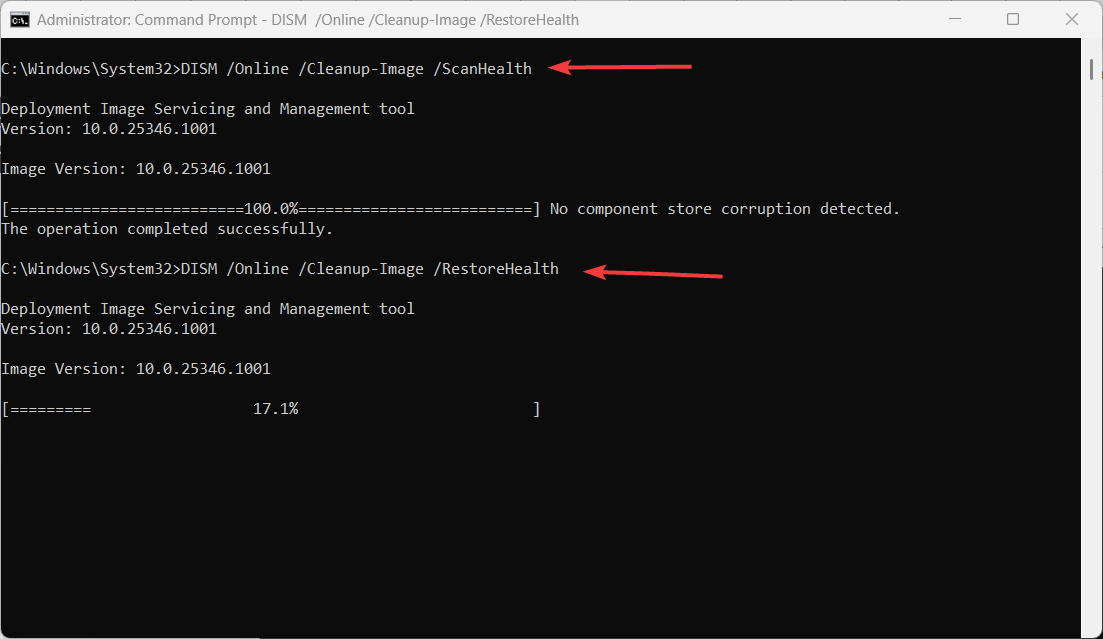
DISM /Online /Cleanup-Image /ScanHealthDISM /Online /Cleanup-Image /RestoreHealth - After running DISM scans, check your disk for errors with the below command:
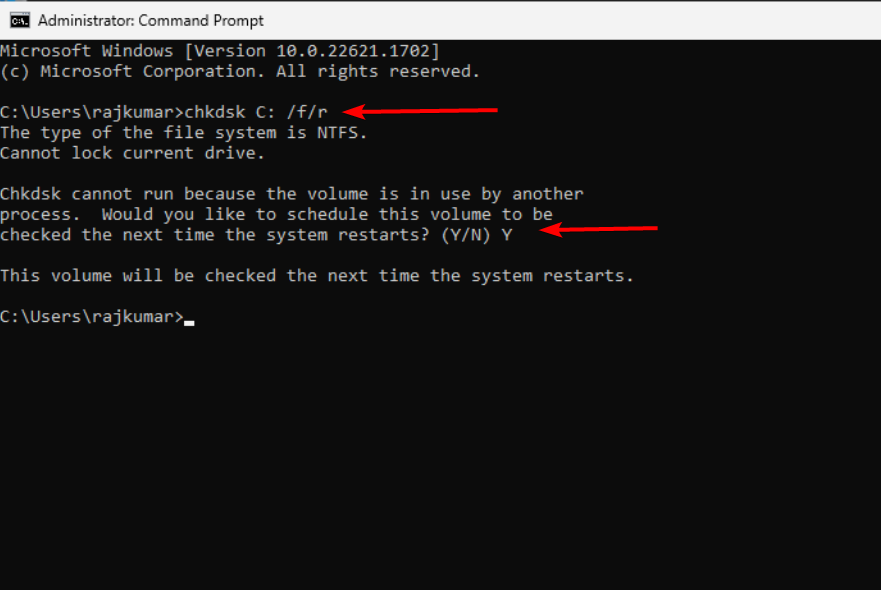
chkdsk C: /f/r - If prompted to schedule the scan on the next restart, type Y and hit Enter.
- After that, restart your PC and let Windows check the hard drive for errors.
If this method doesn’t seem straightforward, we recommend you try a specialized repair app to scan and detect corrupt system files and replace them almost instantly with healthy components.
3. Rebuild Boot Configuration Data (BCD)
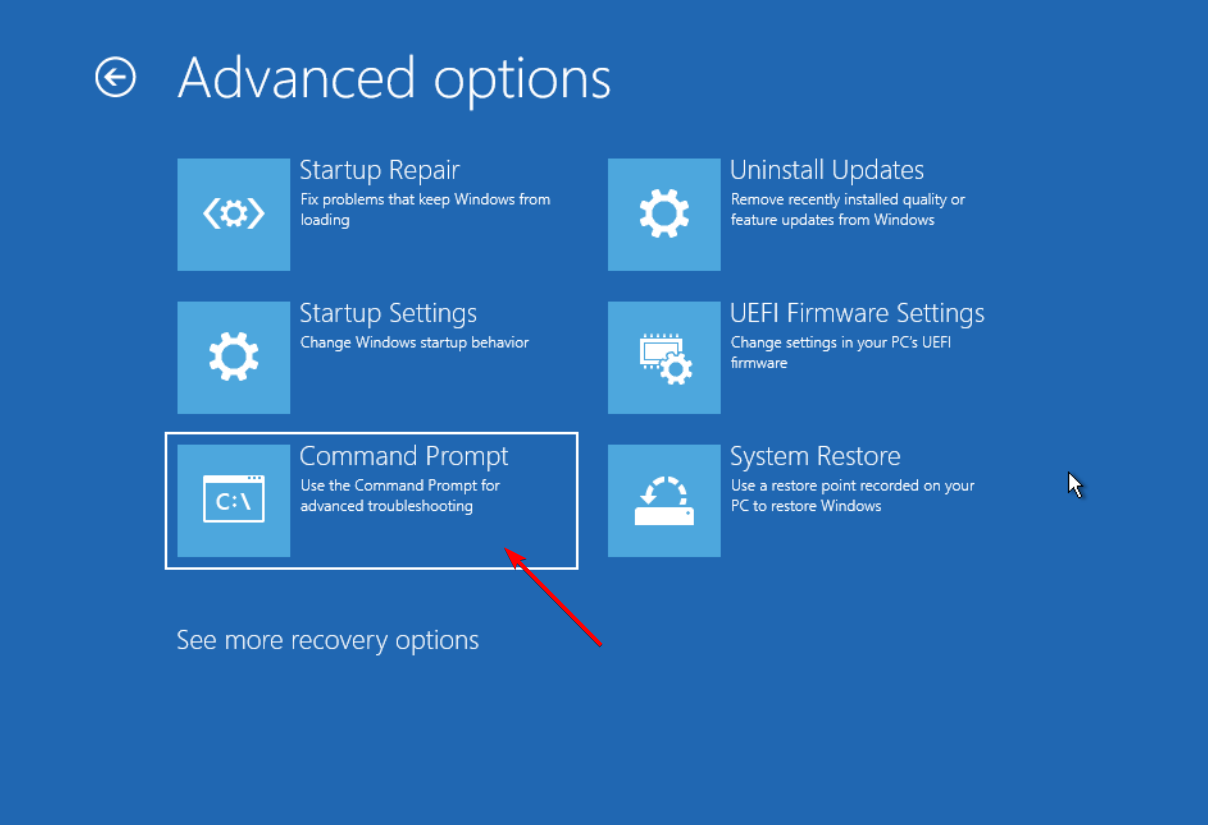
- Repeat Steps 1 to 5 in Solution 1.2 and select the Command Prompt option.
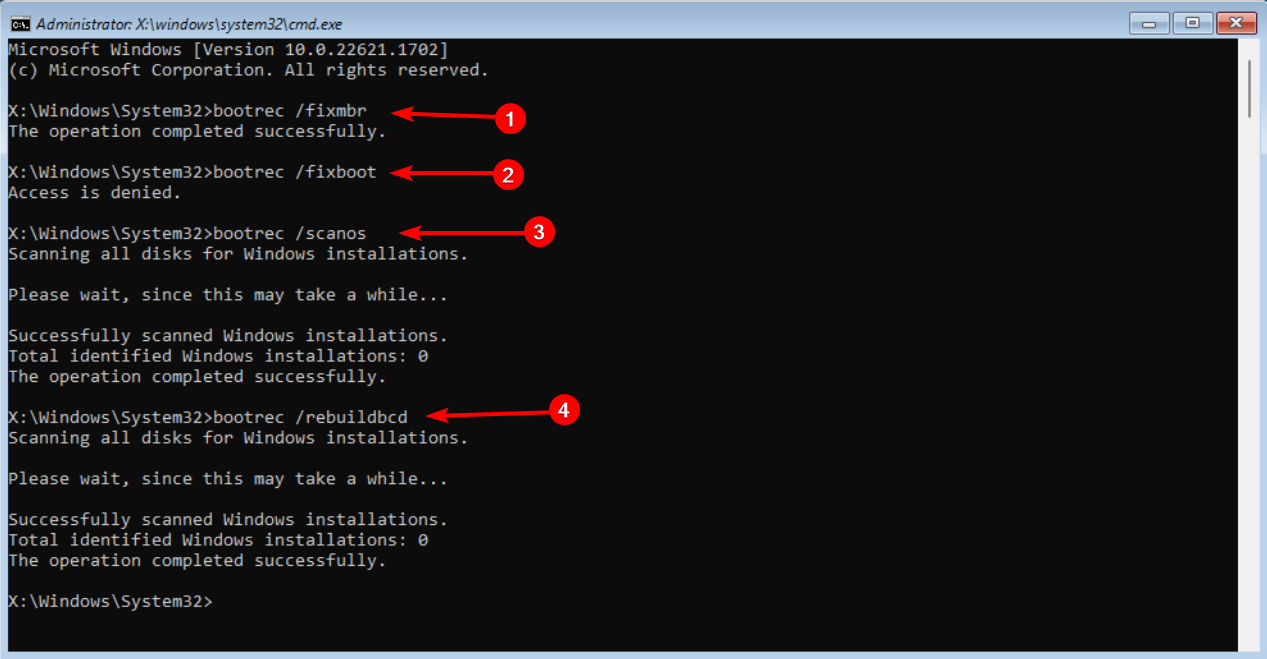
- Type the following commands and press Enter after each.
bootrec /fixmbrbootrec /fixbootbootrec /scanosbootrec /rebuildbcd - Sometimes, these commands might not work. If that happens to you too, you can try using the following commands instead:
bcdedit /export c:\bcdbackupattrib c:\boot\bcd -h -r -sren c:\boot\bcd bcd.oldbootrec /rebuildbcd - When prompted to add installation to the boot list, just type Y and then press Enter.
- After you see the message The operation completed successfully, restart your PC and see if it starts up normally without the boot error.
4. Restore your PC
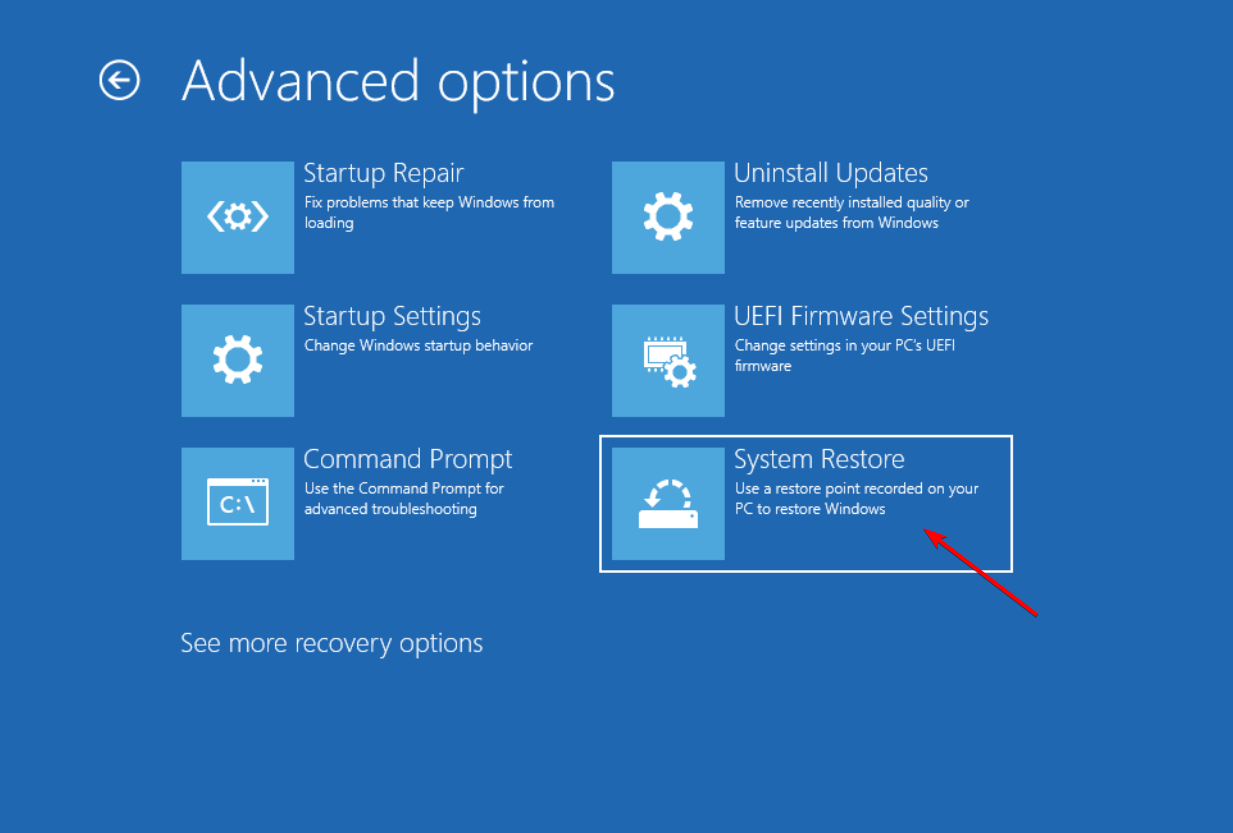
- Repeat Steps 1 to 5 in Solution 1.2 and select System Restore under Advanced options.
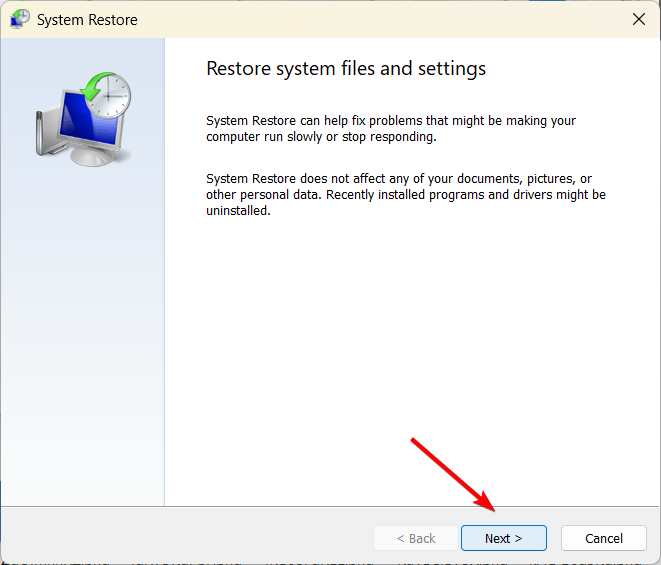
- Click on Next to continue.
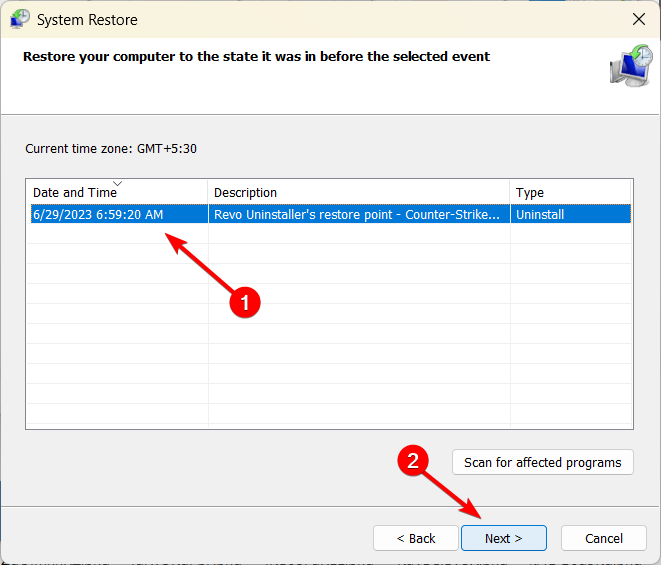
- Choose the most recent system restore point and click on Next.
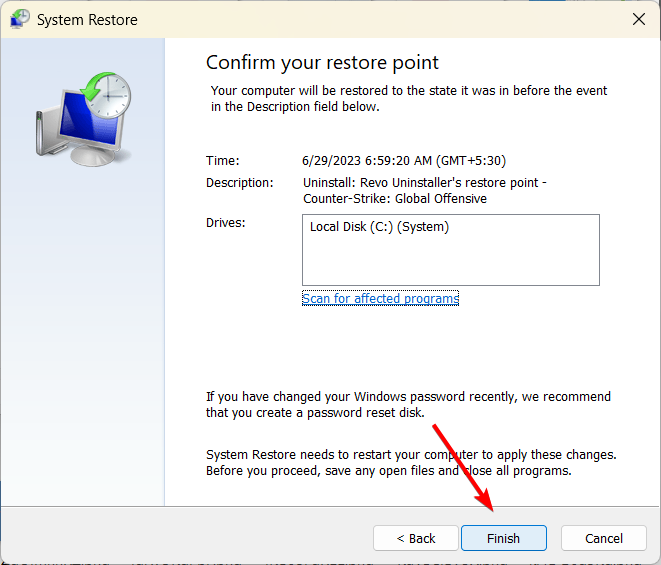
- Finally, click Finish to restore your computer.
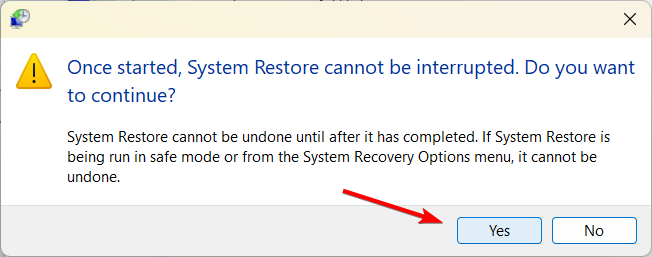
- Click Yes to confirm the action.
If none of the methods mentioned above were able to fix the issue, try resetting or clean-installing Windows as a last resort.
This isn’t the only error that will prevent you from accessing Windows, and we wrote about error 0xc0000001 on Windows 11 in a separate guide.
Feel free to share in the comments below the solution that helped you resolve this problem.



User forum
0 messages