PxHIpa64.sys Memory Integrity: How to Fix Incompatible Drivers
Outdated drivers or corrupt system files are often responsible
5 min. read
Updated on
Read our disclosure page to find out how can you help Windows Report sustain the editorial team. Read more
Key notes
- PxHIpa64.sys Memory Integrity error occurs when you try to enable the Core isolation feature.
- It can be due to interference from programs using the PxHIpa64.sys driver or outdated drivers.
- You may resolve it by removing the concerned driver or disabling it via the Registry Editor.
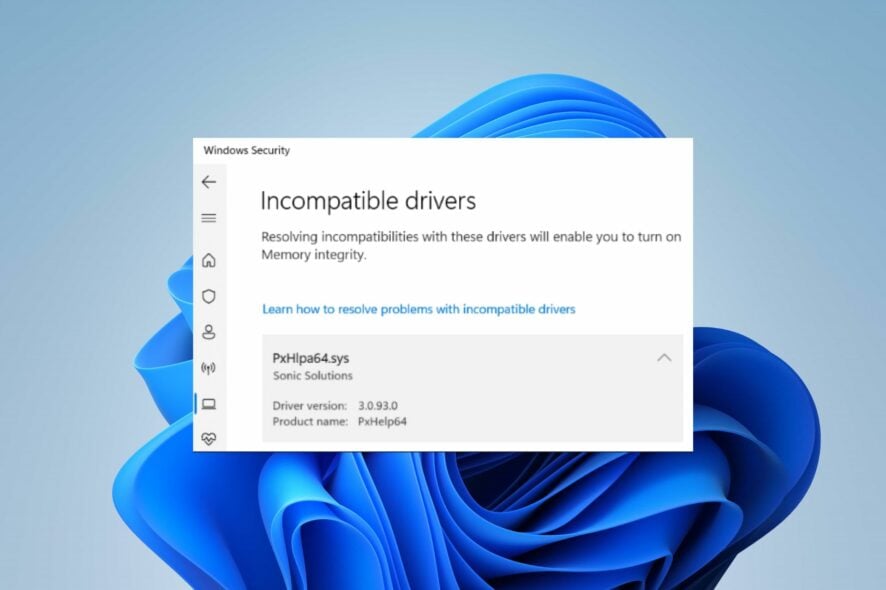
Turning on the Memory Integrity helps prevent malicious code from accessing high-security components in the event of an attack. However, enabling Core isolation on Windows 11 can be challenging due to the PxHIpa64.sys Memory Integrity error users encounter.
Hence, we will outline various ways to fix this in this guide. Also, we have a similar article about Wdcsam64.sys Memory Integrity error and how to fix it on Windows 11.
What causes the PxHIpa64.sys Memory Integrity?
There could be various causes of the PxHIpa64.sys incompatible driver error on Windows 11. Some popular ones are:
- Interference from programs using PxHlpa64.sys driver – Software like Roxio and others use the PxHlpa64.sys driver to run their processes on the system. These programs can interfere with Windows security, preventing the Memory Integrity feature from working.
- Outdated drivers – Different drivers on your computer are responsible for various components and devices, including the security system. So, the PxHIpa64.sys Memory Integrity error may appear when enabling the Core isolation feature if your system drivers are not updated.
- Corrupt system files – Corrupt system files on your PC can be due to viruses and malware infection. Hence, they can infect other files, including the PxHIpa64.sys location, resulting in the Memory Integrity error whenever invoked.
- Faulty Windows Update – Installing a Windows build that is not stable can prompt a problem with the driver and the Core isolation system.
Other factors not mentioned here can also be responsible for the PxHIpa64.sys Memory Integrity error. Nevertheless, we shall discuss some effective fixes to resolve the error.
How can I fix the PxHIpa64.sys Memory Integrity?
Before attempting any advanced troubleshooting steps, apply the following checks:
- Turn off background apps running in the background on your computer.
- Temporarily disable antivirus software on your PC.
- Restart Windows in Safe Mode and check if the PxHIpa64.sys error persists.
If you can’t resolve the error, proceed with the following solutions:
1. Disable PxHlpa64.sys via Registry Editor
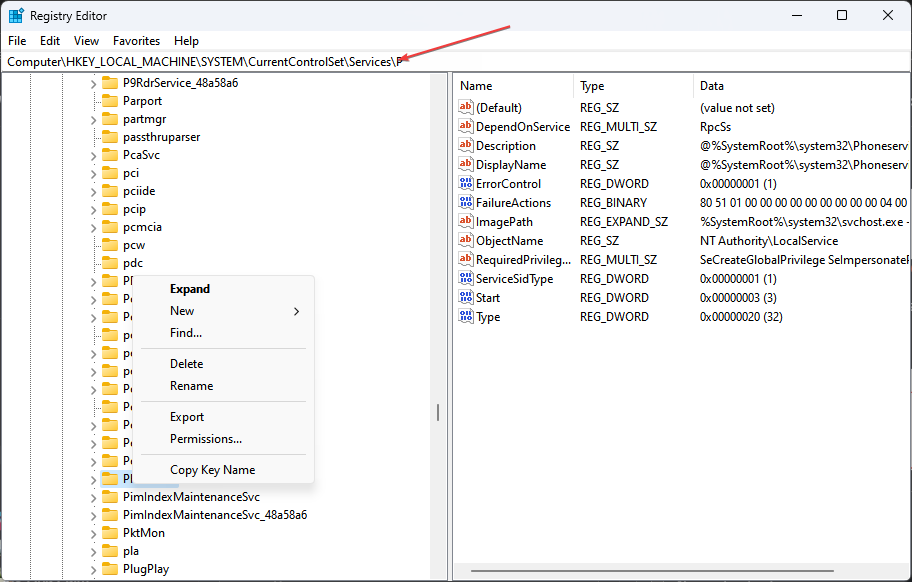
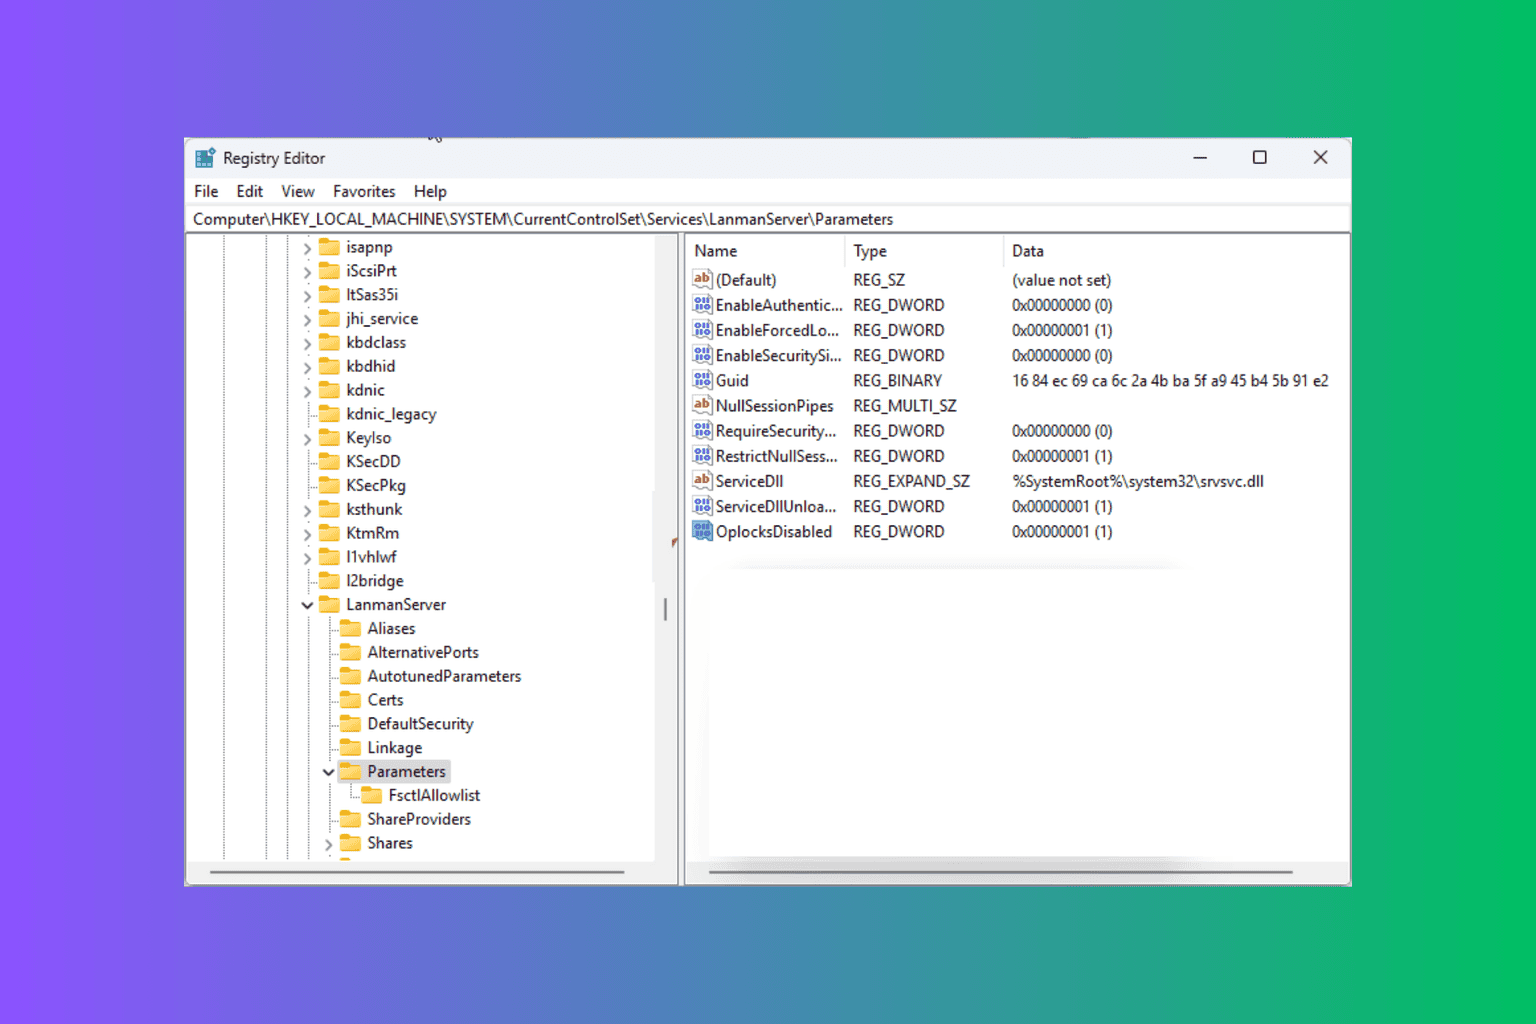
- Press the Windows + R button to open the Run dialog box, type in regedit, and press Ctrl + Shift + Enter to open the Registry Editor with admin access.
- Click Yes when the User Account Control (UAC) is prompted.
- Navigate to the following location:
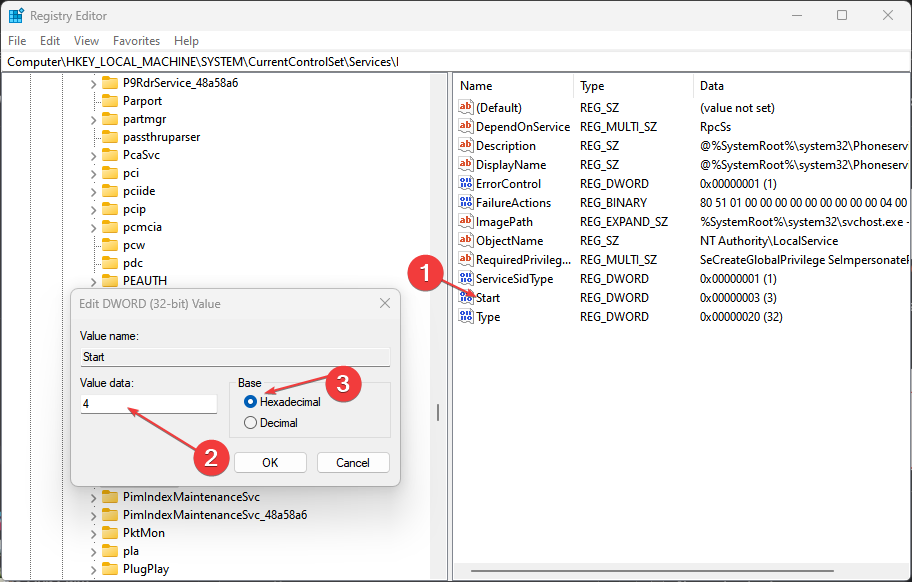
HKLM\SYSTEM\CurrentControlSet\Services\PxHlpa64.sys - On the right side of the screen, double-click on the Start REG_DWORD. Set the base of Start to Hexadecimal, change the Value Data to 4, then click OK to save the changes.
- Restart your PC and check if the error persists.
Tweaking the Registry Editor allows you to access data you can use to modify and stop the activities of the PxHIpa64.sys file on your computer. Check how to fix a corrupt registry if you encounter issues with it.
2. Run DISM and PNPUtil tools in CMD
- Left-click the Start button, type Command Prompt, and click the Run as administrator option.
- Click Yes on the User Account Control (UAC) prompt.
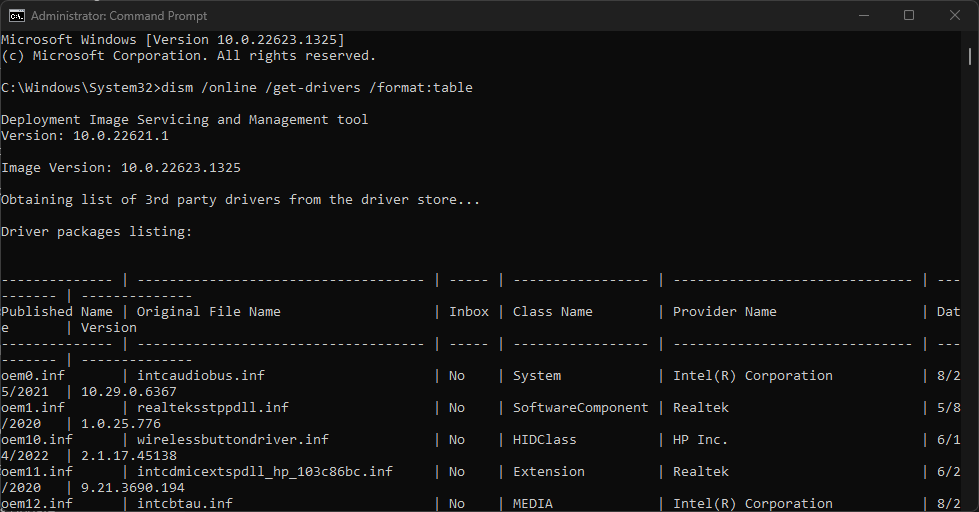
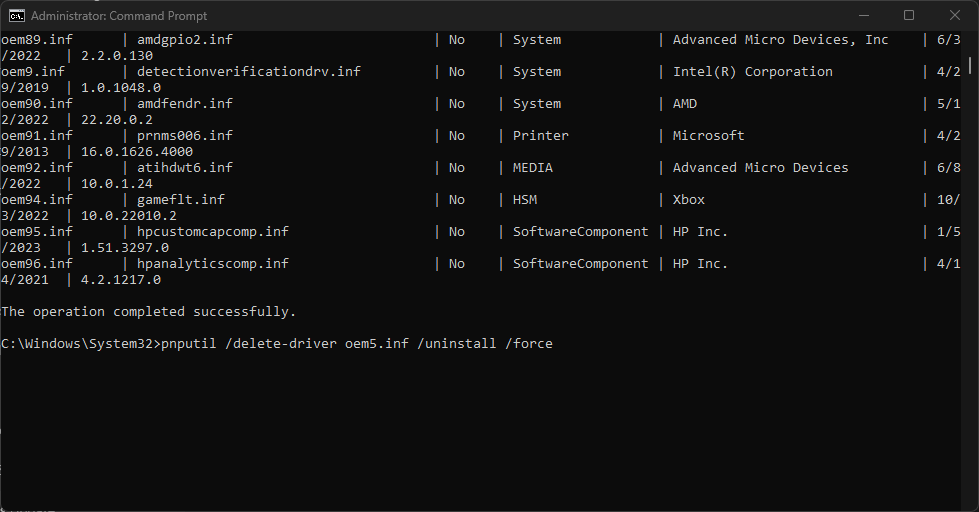
- Copy this command and paste, then press Enter after each one:
dism /online /get-drivers /format:table - Under the Provider Name table, find the line containing the PxHIpa64.sys, then take note of the Published name.
- Type in the following command, replacing the Published name with the driver name, then press Enter:
pnputil /delete-driver oem5.inf /uninstall /force - Restart your PC and check if the error persists.
Uninstalling the driver will remove any form of interference it is causing the Memory Integrity feature on your computer.
Meanwhile, if the Command Prompt is not working on your PC, do not hesitate to check for fixes in this guide.
3. Update Windows drives
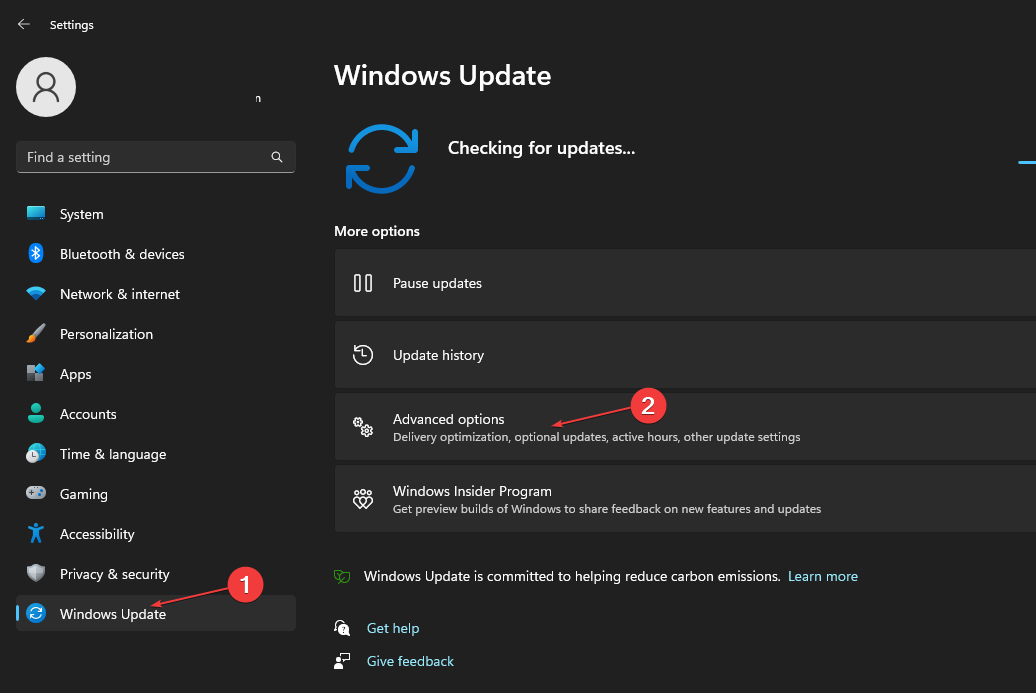
- Press the Windows + I key to open the Windows Settings.
- Navigate to the Windows Update tab and select the Advanced options.
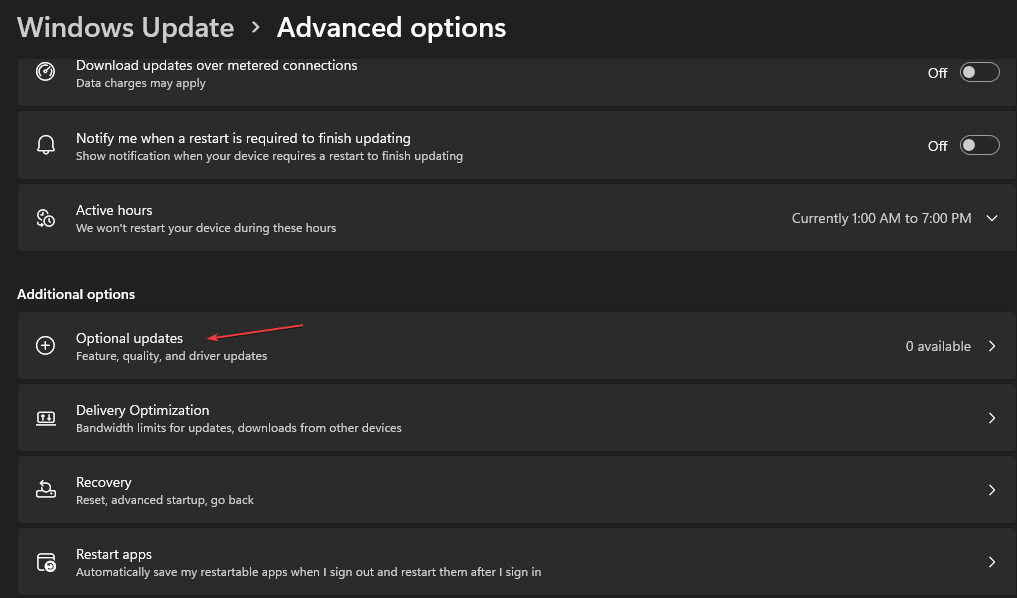
- Select Optional Update.
- Click the drop-down button on the Driver Update and checkmark the list of updates available.
- Click the Update and Install button and wait for the drivers to install.
Installing driver updates will fix compatibility issues caused by outdated drivers. Further, you can read more on how to update system driver packs on Windows here.
If you want to act fast and get the latest Windows drivers, you can quickly perform this with PC HelpSoft Driver Updater, dedicated software that can scan your PC and update drivers on short notice.
⇒ Get PC HelpSoft Driver Updater
4. Uninstall recent Windows updates
- Press Windows + I key to open the Settings app.
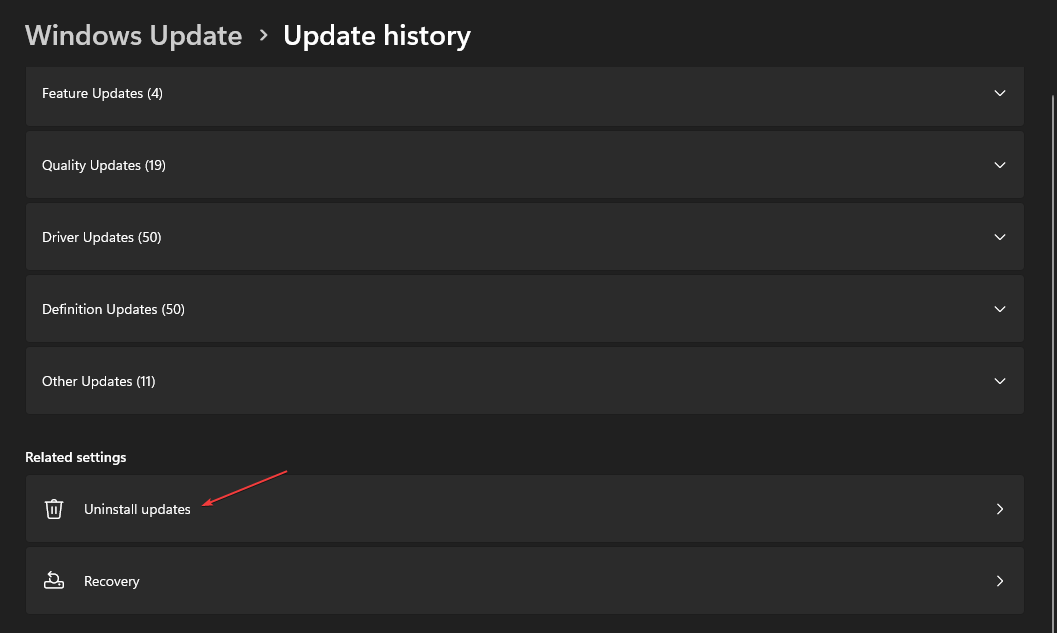
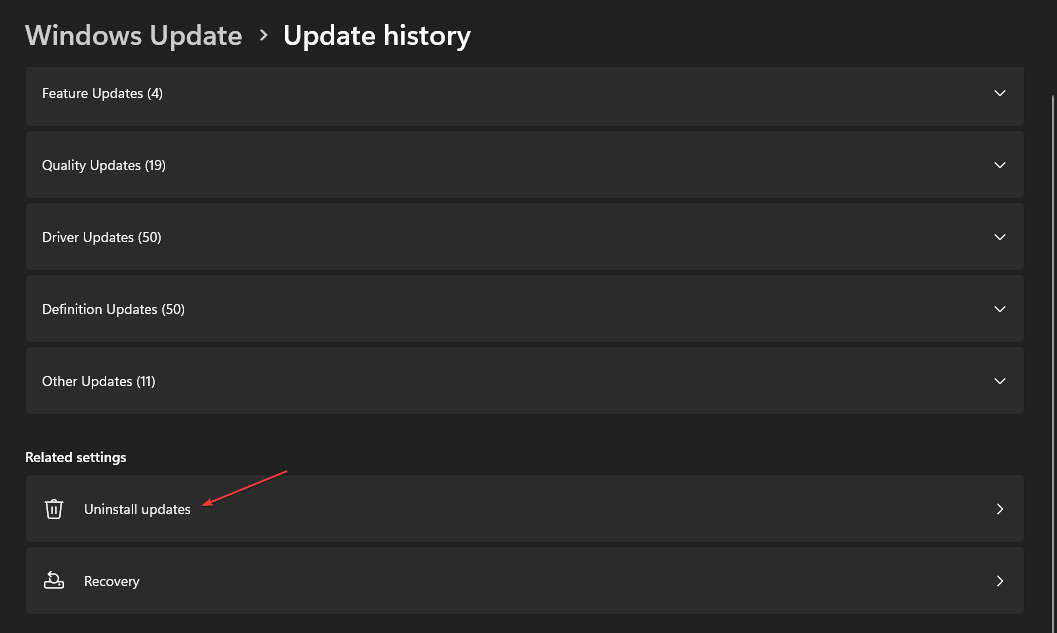
- Click Windows Update and select Update history.
- Tap the Uninstall updates button and select the most recent update.
- Click on Uninstall.
Uninstalling the recent Windows update will delete the recently installed build causing the PxHIpa64.sys Memory Integrity error.
Read our guide on how to uninstall updates on Windows 11 for more steps.
In addition, do not hesitate to check our detailed guide about the Brusbsib.sys incompatible driver error and how to fix it. Also, you can read about fixing Win32kfull.sys BSOD errors on Windows 11.
If you have more questions or suggestions, kindly drop them in the comments section.


User forum
0 messages