PHASE0_INITIALIZATION_FAILED Blue Screen Error [Solved]
Performing a Startup Repair is the quickest fix
5 min. read
Published on
Read our disclosure page to find out how can you help Windows Report sustain the editorial team. Read more
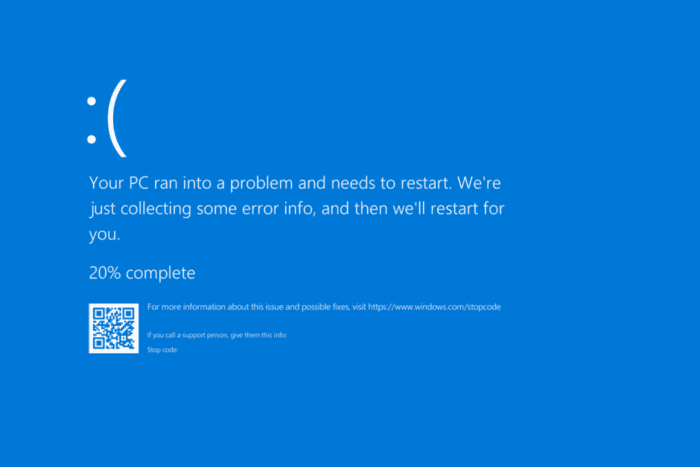
The PHASE0_INITIALIZATION_FAILED BSOD (Blue Screen of Death) has a value (bug check) of 0x00000031 and is usually encountered during the startup phase of the PC. While its occurrences are limited, I have seen several reports of the error over the years, all of which were easily fixable!
The PHASE0_INITIALIZATION_FAILED is usually caused by corrupt system files, buggy startup programs, outdated drivers, major OS misconfiguration, and faulty hardware.
To start with, install pending Windows updates, disconnect non-critical peripherals from the PC, and check for overheating. If none work, move to the solutions listed next!
How can I fix PHASE0_INITIALIZATION_FAILED?
1. Perform a Startup Repair
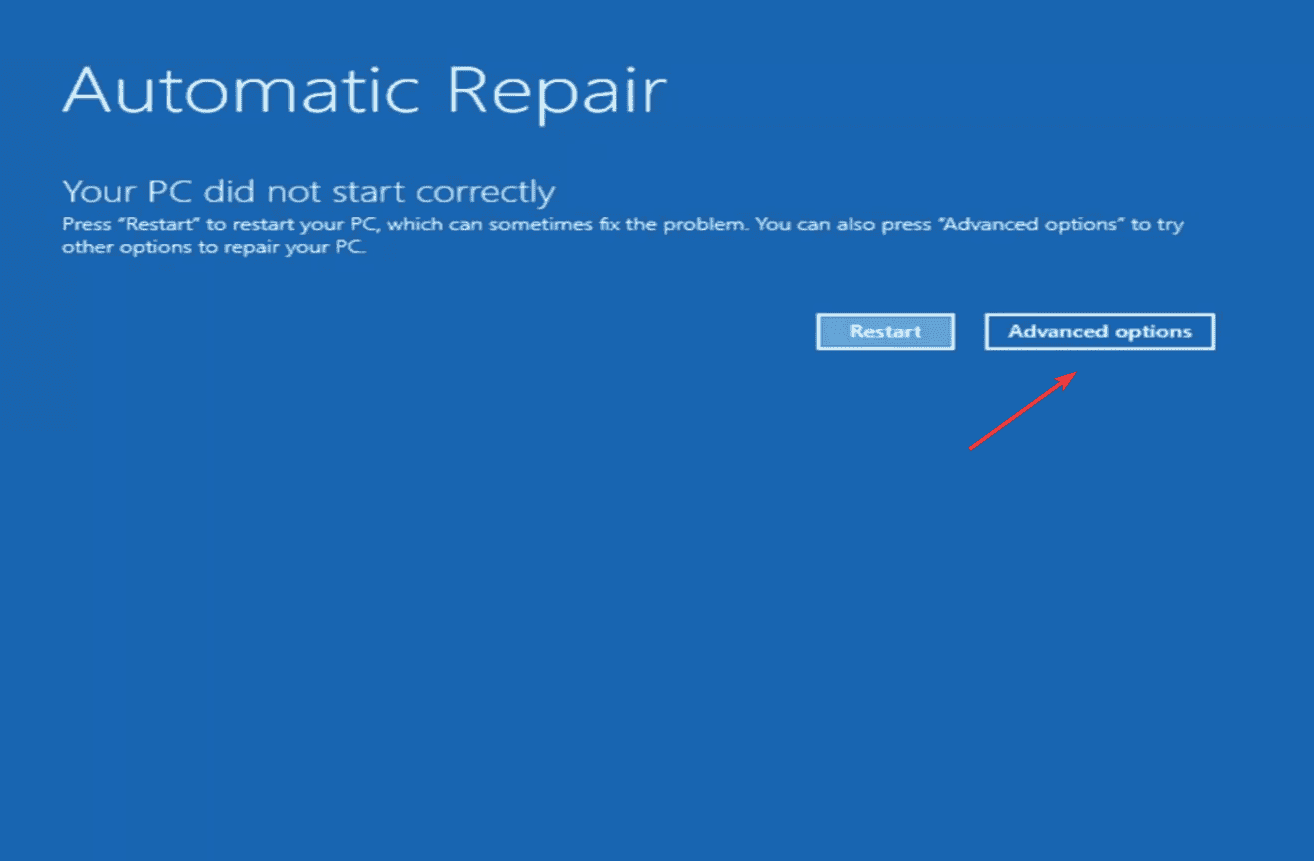
- Turn on the PC, and as soon as the Windows logo appears, power it off. Repeat this thrice, and on the fourth attempt, Windows should initiate an Automatic Repair. If it doesn’t, repeat the process a few more times.
- In all likelihood, Automatic Repair won’t be able to fix the problem. Click on Advanced options to proceed.
- Click on Troubleshoot.
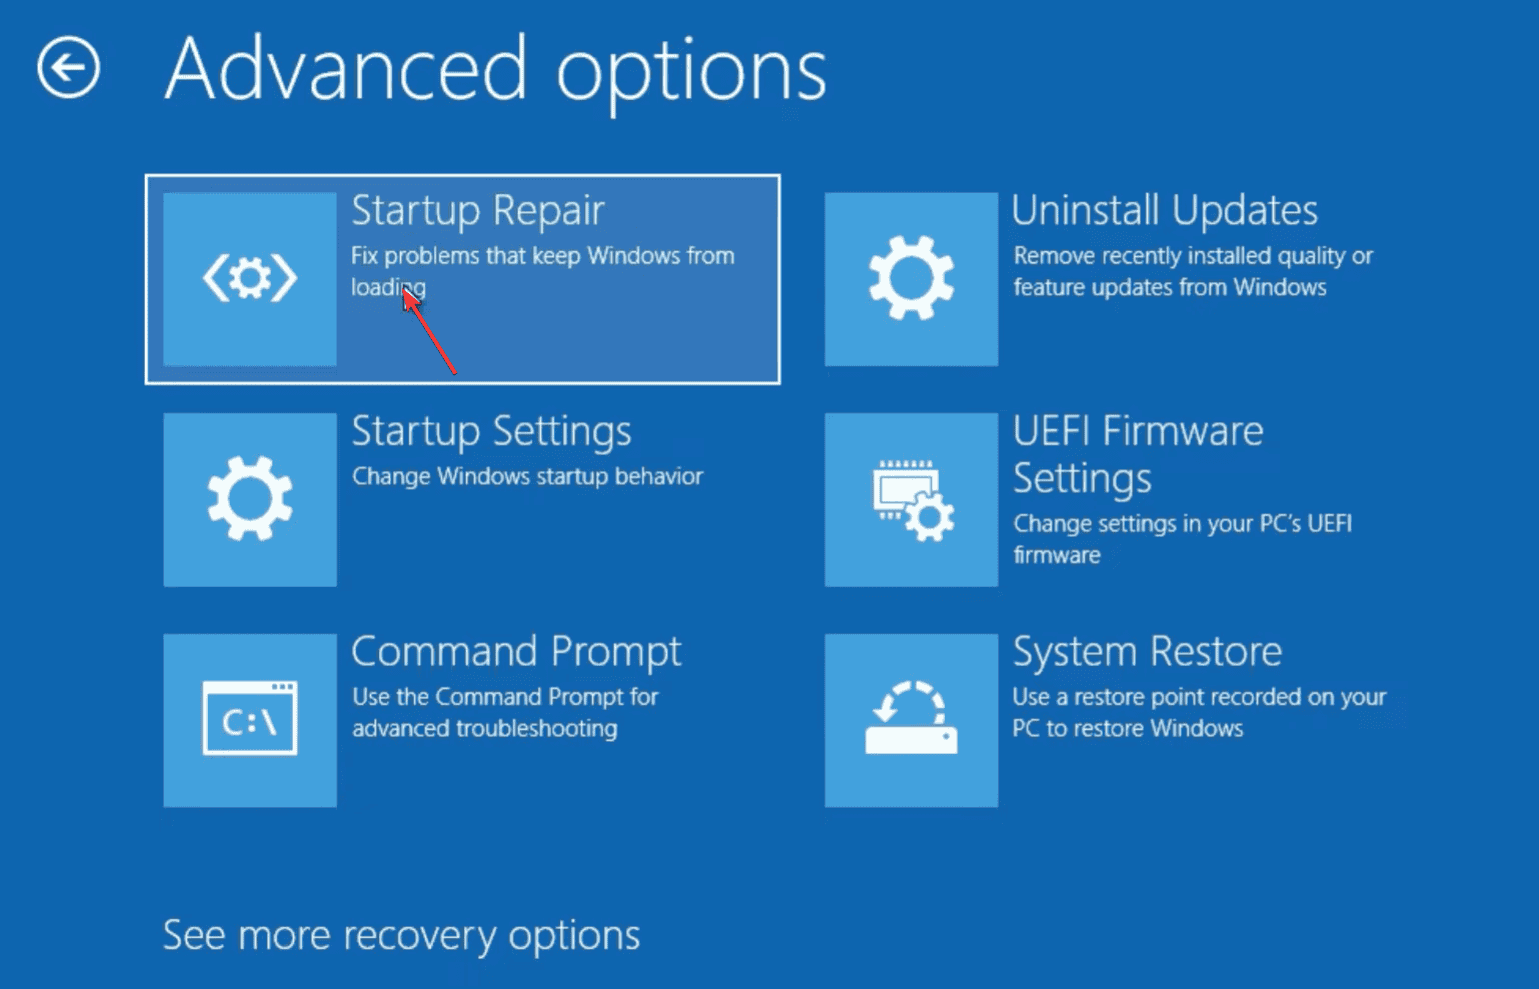
- Again, click on Advanced options.
- Now, choose Startup Repair.
- Enter the password for your user account, and click on Continue.
- Let Startup Repair diagnose and fix problems. Once it’s complete, restart the PC normally and check for improvements.
Since the PHASE0_INITIALIZATION_FAILED error is encountered at startup, the built-in Startup Repair utility, accessible via the Windows Recovery Environment, helps fix it in 7 out of 10 cases!
2. Repair the corrupt system files
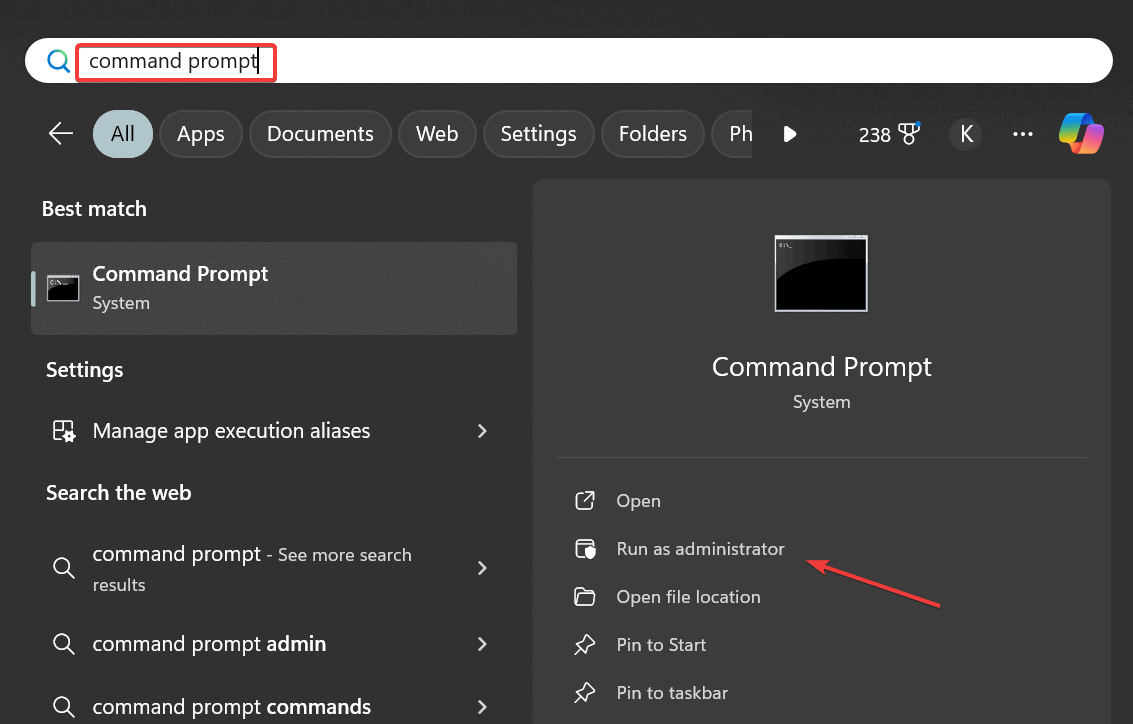
- Press Windows + S to open Search, type Command Prompt in the text field, and click on Run as administrator.
- Click Yes in the UAC prompt.
- Paste the DISM commands individually and hit Enter after each:
DISM /Online /Cleanup-Image /CheckHealthDISM /Online /Cleanup-Image /ScanHealthDISM /Online /Cleanup-Image /RestoreHealth - Next, paste the following command and hit Enter:
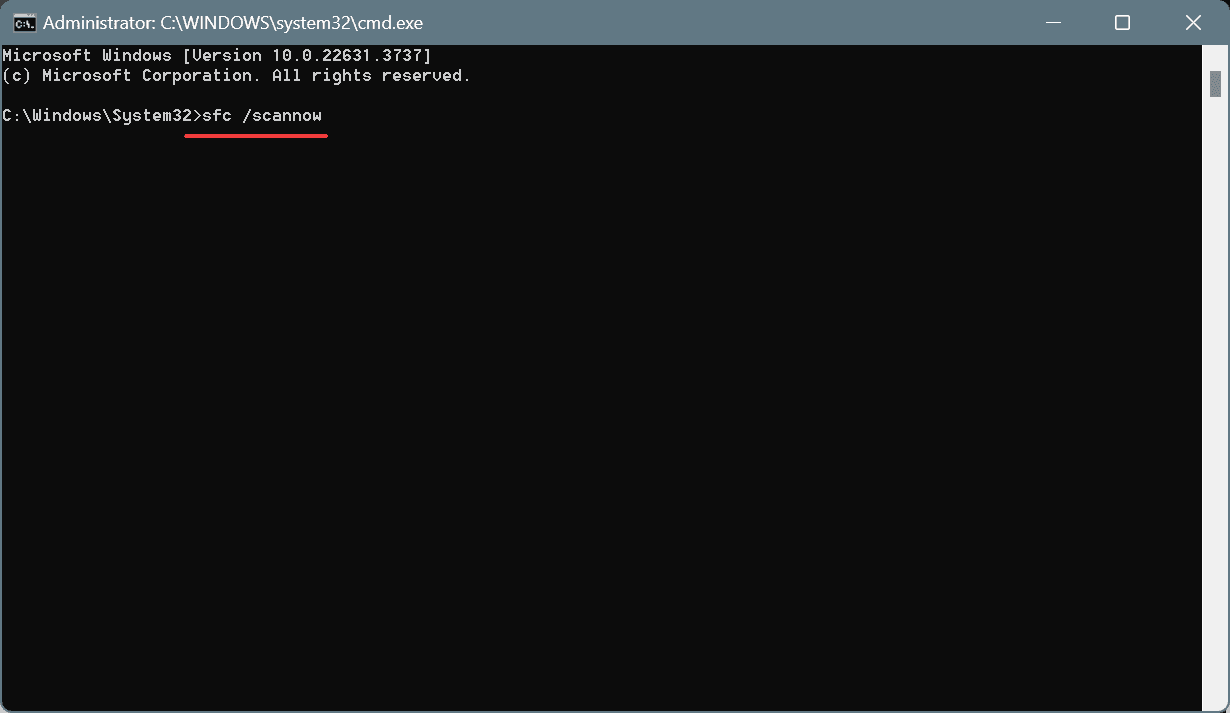
sfc /scannow - Finally, reboot the PC to fully apply the changes.
One of the most common reasons behind BSODs is the presence of corrupt system files in Windows 11. To fix them, you must run the DISM commands and the SFC scan, which will replace the corrupt files with their cached copy.
3. Update the outdated drivers
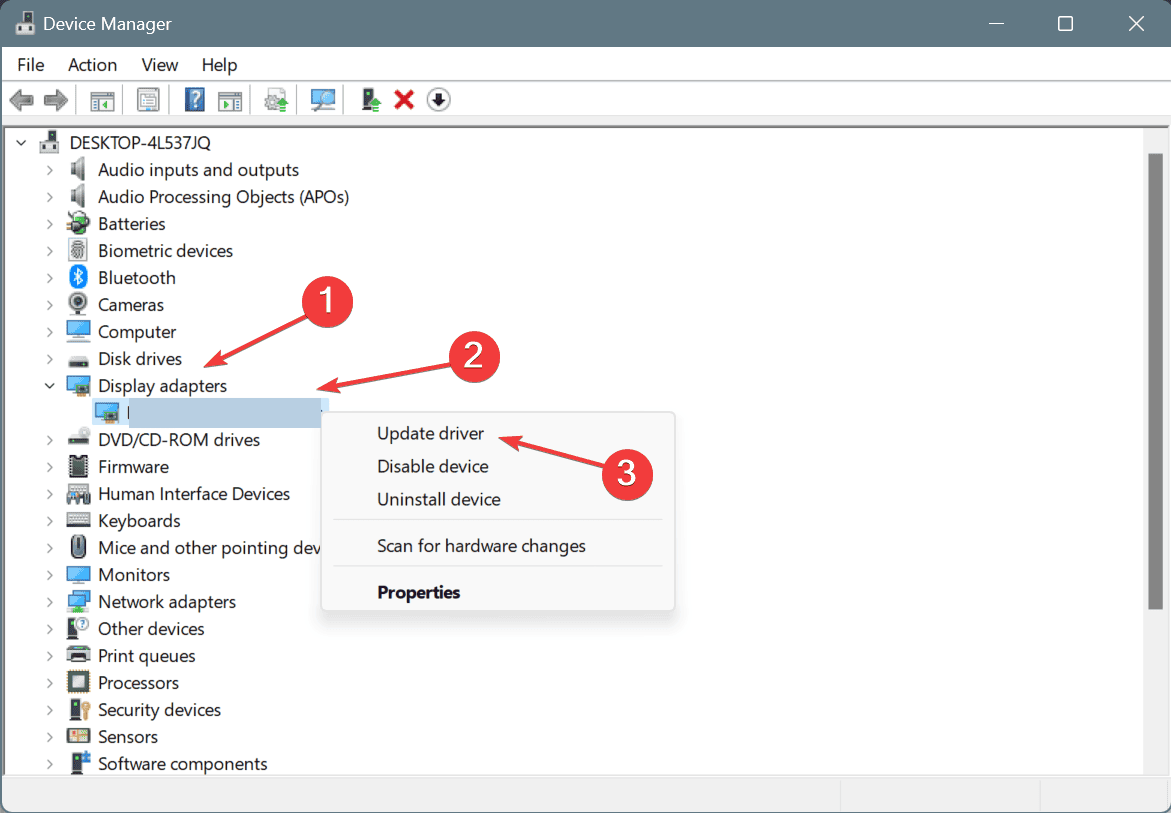
- Press Windows + X to open the Power User menu, and select Device Manager.
- Expand all the entries individually, right-click on the devices under each, and choose Update driver. I am starting with the graphics driver here.
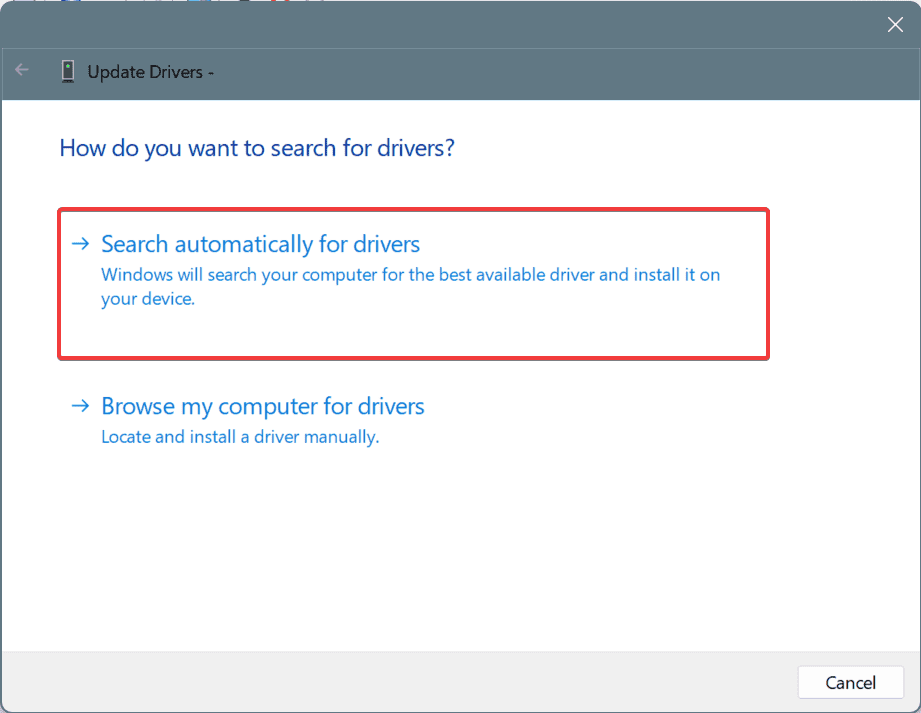
- Click on Search automatically for drivers and let Windows install the best locally available driver version.
When you let Windows take over the driver update process, it doesn’t search for drivers online. So, you should check the manufacturer’s website and manually install the latest driver version.
Or, to automate the process, you can get a top-rated driver updater tool, which will automatically identify the connected devices, search the web for the latest drivers, and install them.
4. Disable startup programs
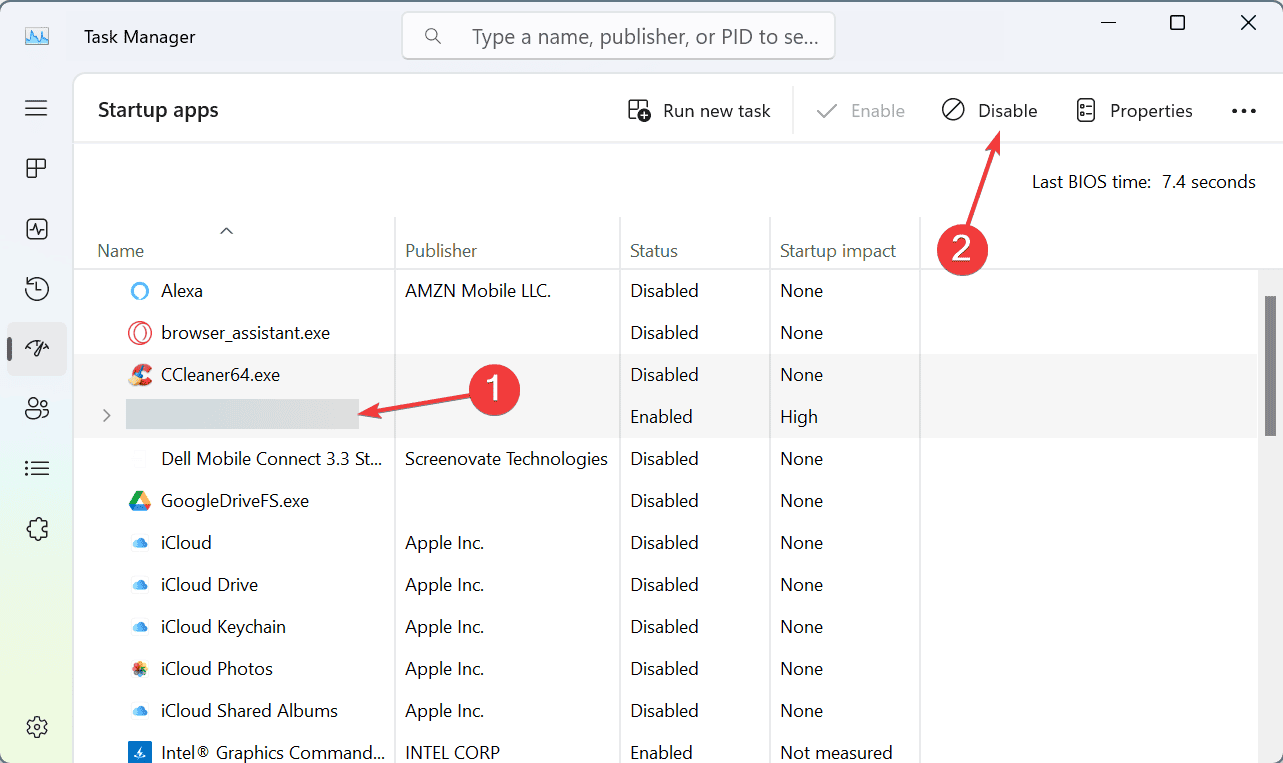
- Press Ctrl + Shift + Esc to open the Task Manager, and go to the Startup apps tab from the left pane.
- Now, identify any apps that read Enabled under the Status column, select them individually, and click on Disable.
- Restart the computer and check whether you still encounter the PHASE0_INITIALIZATION_FAILED BSOD.
- If not, re-enable the startup apps one by one, reboot the PC after each, and as soon as the error re-appears, the app enabled last was the culprit. You can now safely uninstall the app.
5. Modify the Registry
- Press Windows + R to open Run, type regedit in the text field, and hit Enter.
- Click Yes in the UAC prompt.
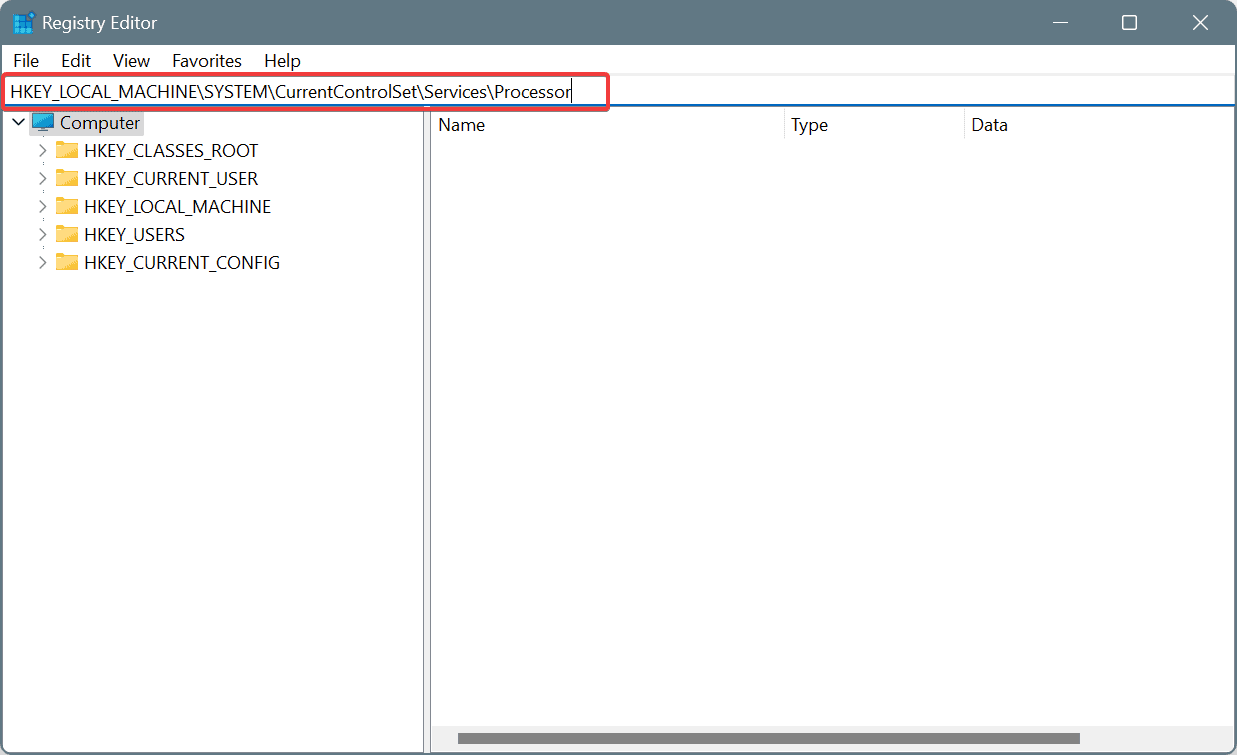
- Paste the following path in the address bar and hit Enter:
HKEY_LOCAL_MACHINE\SYSTEM\CurrentControlSet\Services\Processor - Double-click the Start DWORD on the right.
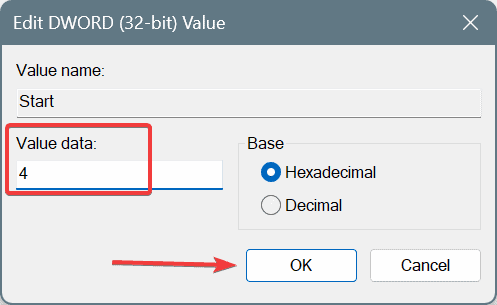
- Enter 4 under the Value data field, and click OK to save the changes.
- Now, go to this path:
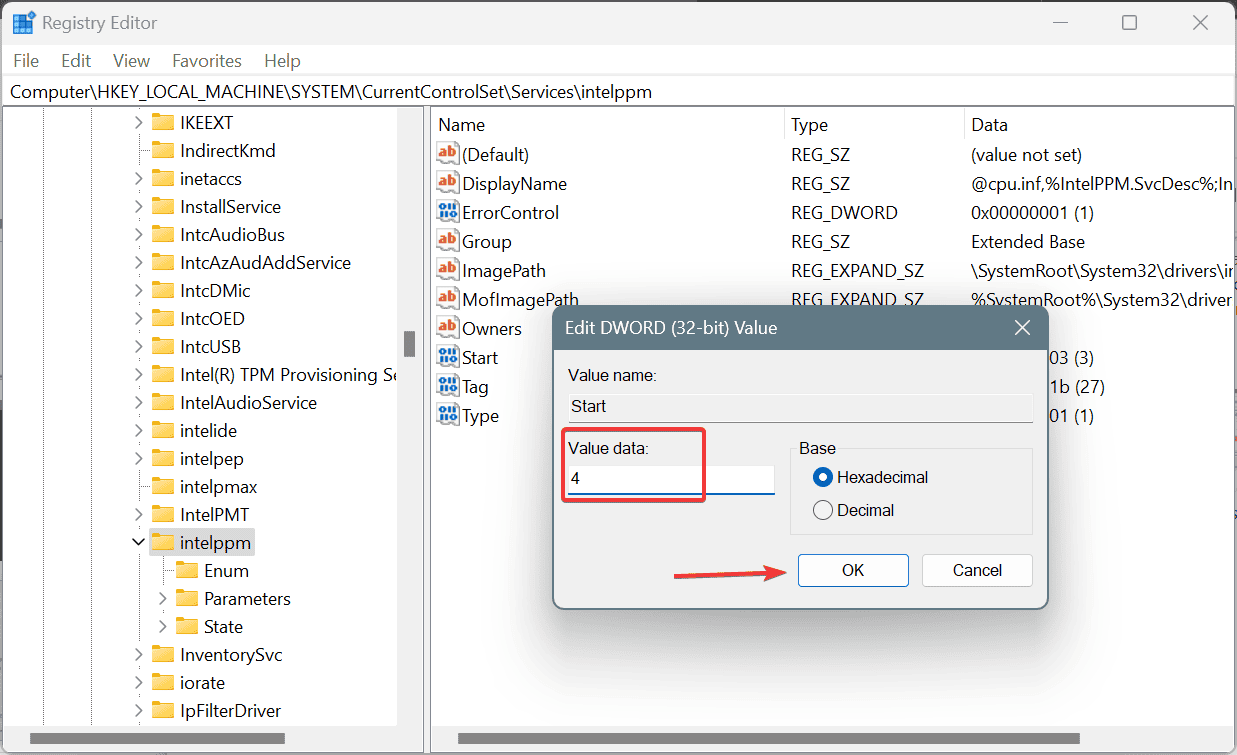
HKEY_LOCAL_MACHINE\SYSTEM\CurrentControlSet\Services\Intelppm - Again, select the Start DWORD, enter 4 under Value data, and click OK to save the changes.
- Restart the PC and check for improvements.
If the PHASE0_INITIALIZATION_FAILED error is faced alongside IRQL_NOT_LESS_OR_EQUAL and the problematic file is intelppm.sys, modifying the Registry Editor fixes them all in one go!
6. Reset Windows to factory defaults
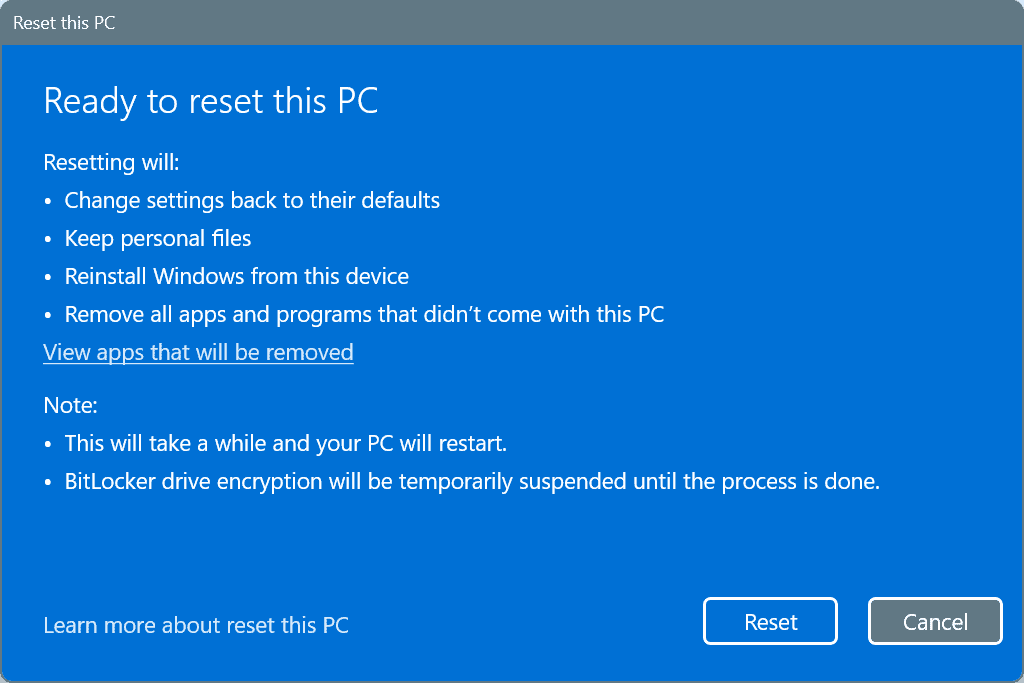
As a last resort to fix software-based issues, you can always reset Windows to factory defaults. I recommend you let it delete all the stored data, both files and apps, to eliminate even the smallest of the conflicts. As for the critical files, you can move them to an external drive before the reset.
Also, some suggest running a repair upgrade after downloading the Windows ISO from Microsoft’s official website. So, you can try that as well!
7. Check for faulty hardware or visit a repair shop
If nothing works, it’s likely a malfunctioning hardware to blame for the PHASE0_INITIALIZATION_FAILED blue screen error in Windows. So, if you can, check for faulty hardware.
However, I recommend taking the PC to a repair shop at this point, having all the components thoroughly inspected for issues, and getting the faulty one repaired or replaced!
One of these solutions should have helped fix the BSOD. In my experience, the PHASE0_INITIALIZATION_FAILED error usually has to do with a software or driver conflict unless it starts to appear right after a Windows reinstall or reset, in which case, it’s the improper OS installation at fault.
If the problem persists, check the BSOD error logs, try identifying the underlying cause, and then manually rectify it!
For any queries or to share what worked for you, drop a comment below.



User forum
0 messages