9 Ways to Fix 0x800f0922 Windows Update Error
This error means that the system can't load the new update
9 min. read
Updated on
Read our disclosure page to find out how can you help Windows Report sustain the editorial team. Read more
Key notes
- The 0x800f0922 error was initially an update issue for Windows 8.1.
- Now, users often get error 0x800f0922 when performing regular Windows 10 updates.
- The issue appears often when your PC can’t connect to an update server or when you have less than 500 MB in the system reserved partition.
- So if you’re notified that Windows update failed with a 0x800f0922 stop code, have a partitioning tool at hand.
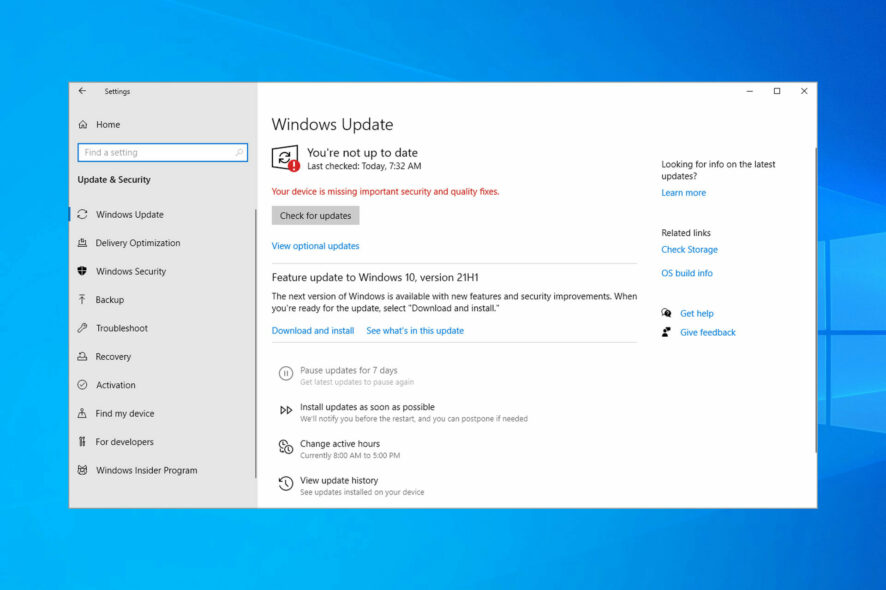
Through frequent Windows updates, customers get improved security and fixes for common system bugs. Sadly, sometimes errors such as 0x800f0922 can prevent you from getting those updates.
Why is that so? Well, the reasons are similar. But, instead of upgrading to the new OS, the error occurs with the new build.
- Low space on the System Reserved partition – As we mentioned above, you probably don’t have enough space to load the new update; you will need at least 500 MB for Windows 10
- Can’t connect to the update server – Connection problems may be the root of this problem; the servers are not available at the moment or your local connection is not strong enough
Now, there is no shortage of problems when trying to install updates. But some issues are more stubborn than others.
Usually, running a Windows Update repair tool should suffice. So let’s see what 0x800F0922 is all about.
What does error code 0x800f0922 mean?
Error code 0x800F0922 means that the system couldn’t download the newest OS update.
That is in fact a consequence of the fact that there isn’t enough System Reserved partition space for installing the new update or you just can’t connect to the Windows Update server.
Sometimes you might get Windows Update Error 0x800f0982 but this one is just as easy to fix.
Here are some similar issues that users reported:
- Error 0x800f0922 Windows Server 2012 r2 – Even if this is an issue with Windows Server, you might be able to fix this problem with one of our solutions.
- Windows 8.1 update error 0x800f0922 – This can appear on Windows 8.1 as well but our solutions are universal, and they will work with older versions of Windows.
- Windows failed to install the following update with error 0x800f0922 – This is just a variation of the original error. If you encounter this issue, try disabling your antivirus and check if that helps.
- 0x800f0922 Framework 3.5 – This issue is caused by the .NET Framework. If the .NET Framework 3.5 is missing from Windows, enable this feature and try to update again.
- 0x800f0922 Secure Boot – This error can appear due to the Secure Boot feature. However, you can fix the problem simply by disabling this feature in BIOS.
We prepared a few workarounds that should resolve this issue in no time. You can check them out below. Update errors 0xc1900104 and 0x800F0922 sometimes go together, but this solution should work for both of them.
How can I fix the Windows update error 0x800f0922?
1. Turn off your firewall
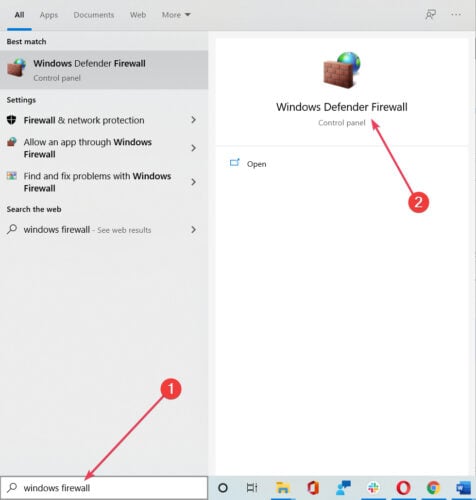
- Search for windows firewall and select Windows Defender Firewall from the results.
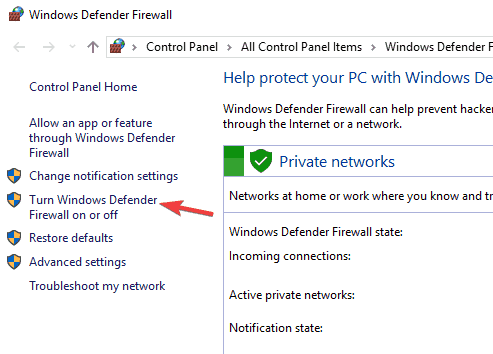
- Open Turn Windows Firewall on or off.
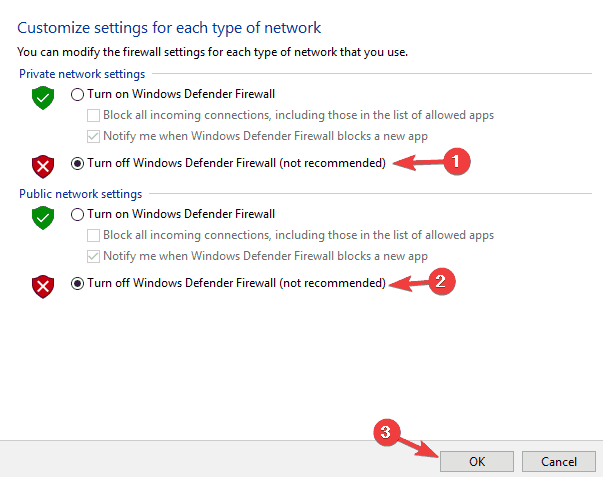
- Turn off the firewall for both private and public networks.
- Save your selection.
- Try updating now.
Note: Remember to enable the firewall before proceeding to install the updates. Additionally, your security may be endangered, and we don’t want that for sure.
In addition to Windows Firewall, your antivirus software can also cause this issue to appear. To fix the problem, it’s advised to disable certain antivirus features and check if that helps.
If the issue still persists, you need to completely disable your antivirus.
In the worst-case scenario, you might have to uninstall your current antivirus. If removing the antivirus solves the problem, it’s advised to switch to a different antivirus solution.
2. Repair your installation with SFC and DISM scans
2.1 Run an SFC scan
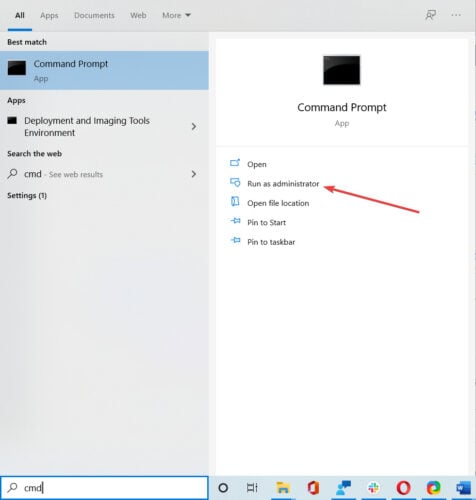
- Search for cmd and click on Run as administrator to open Command Prompt.
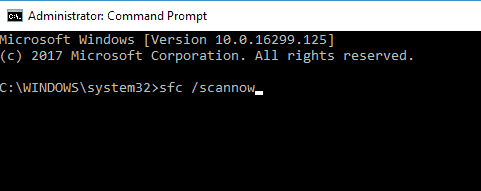
- Enter sfc /scannow and press Enter.
- The scan can take about 15 minutes, so don’t interfere with it.
Note: If you can’t run an SFC scan or if it doesn’t solve the problem, you should use a DISM scan instead.
2.2 Run a DISM scan
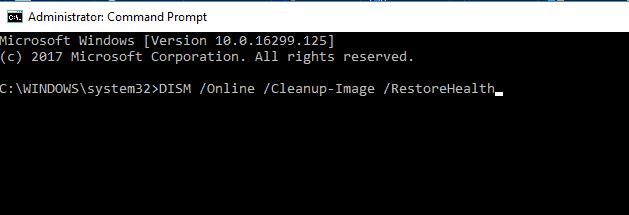
- Start Command Prompt as administrator and run the following command:
DISM /Online /Cleanup-Image /RestoreHealth - DISM scan can take up to 20 minutes, so don’t interrupt it.
Note: Once the DISM scan is finished, check if the problem is still there. If you were unable to run an SFC scan before, or if the DISM doesn’t solve the problem, be sure to repeat the SFC scan again.
An effective solution would be to opt for a reliable third-party tool that removes damage done to your Windows OS and restores its stability by bringing the registry keys to their default settings.
In just a few moments, the software scans your PC and proceeds to fix Windows errors and other issues, like system junk that slows down your device and damaged DLLs.
3. Check your internet connection and switch off the VPN
- Try to connect via a browser. If there is no connection, move on.
- Restart your router and PC.
- Try using a wired connection instead of Wi-Fi.
- Disable VPN if you are using any.
- Run the Troubleshooter.
- Disable bandwidth-hogging programs like a torrent client and download managers.
If your VPN was the problem, you might want to consider switching to a different solution.
Sometimes, VPN tools can interfere with your network connection and cause this issue to appear, therefore it’s important to use a good VPN tool.
There are many great VPN tools available, but be sure to try out a dedicated tool that will provide you a secure IP and will make your PC untraceable while you’re online.
4. Check the .NET Framework
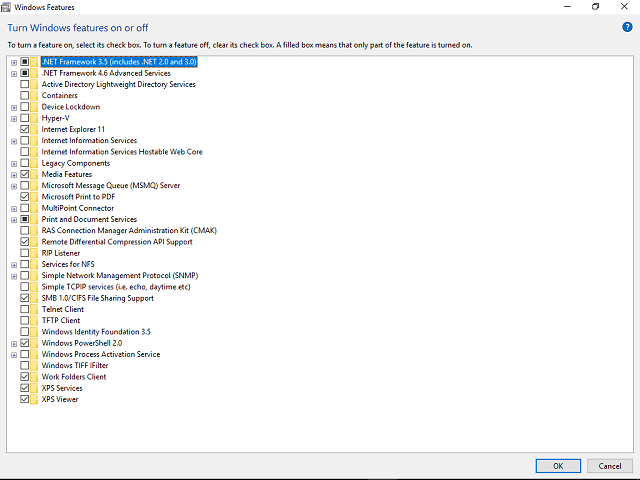
1. Open Windows Search and type Windows Features in the text box.
2. Click on Turn Windows Features on or off.
3. Check any boxes related to .Net Framework.
4. Click on OK.
5. Restart your PC.
Another quick fix for the 0x800f0922 error is to ensure that all .Net Framework related features are turned on, and to manually enable those which currently aren’t.
Note: Use this with caution since there are some essential features. Just enable the .NET Framework and move on. On the other hand, if the update error is relentlessly reappearing, move on to the next steps.
5. Use a third-party partitioning tool to change partition size
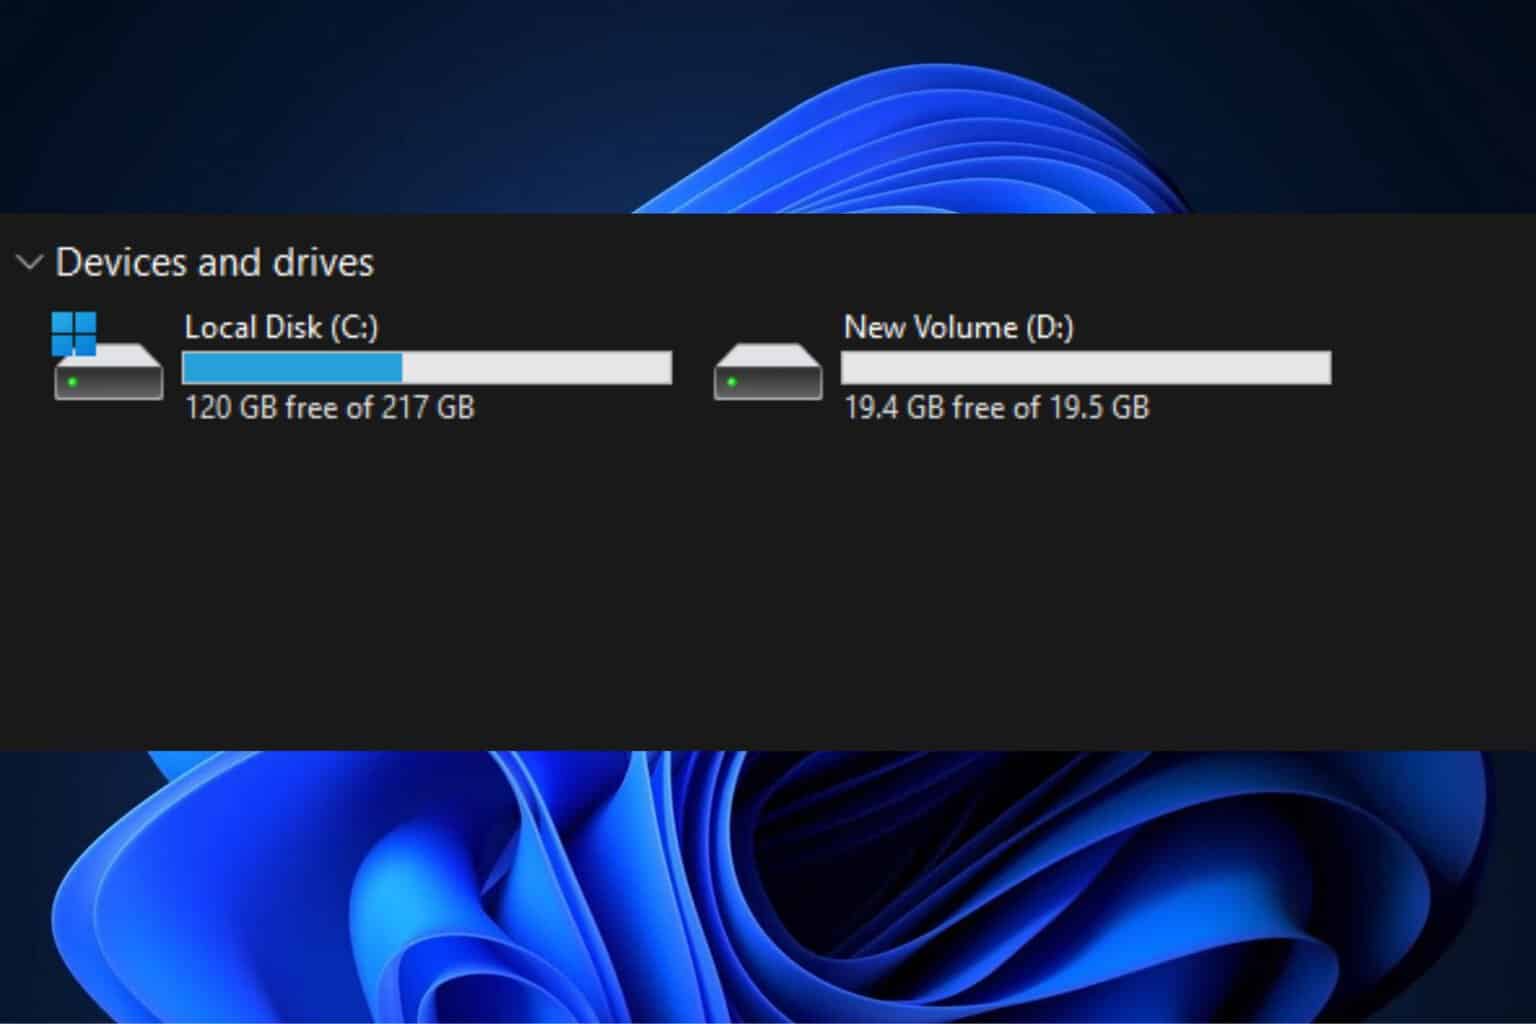
If somehow, due to the excess of data, your system partition lacks space, you may use a third-party tool to extend it. Keep in mind that at all times you’ll need at least 500 MB of free space in order to install updates.
If you have less than that, you can try to delete some files, use a built-in system tool to clean up junk or extend the partition with a third-party partitioning tool.
If you’re looking for good partitioning software, we strongly recommend considering Paragon Partition Manager Advanced. This tool is incredibly simple to use, and it will allow you to modify your partitions any way you like.
Partitioning your drives is not a very simple task for everyone but this professional-grade partitioning tool will help you divide your hard disk extremely easily, making you look like a Pro.
This solution creates partitions quickly, and it will make sure that the storage space is used optimally.
And if you’re worried about risks, Paragon comes with built-in backup functions that help you save the current configuration before working on a hard drive.
That means that in case you run into any possible problems, you won’t suffer any damage and the built-in recovery wizard will restore your system immediately.
6. Delete certain registry values
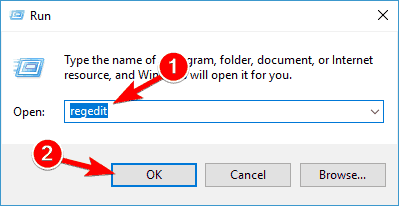
- Search for regedit and press Enter or click OK to start the Registry Editor.
- In the left pane, navigate to:
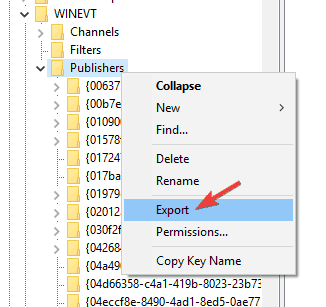
HKEY_LOCAL_MACHINESOFTWAREMicrosoftWindowsCurrentVersionWINEVTPublishers - Right-click the Publishers key and choose Export from the menu.
- Select the location where you want to export this key and enter the desired file name.
- Click Save (in case anything goes wrong after modifying your registry, you can simply run the file created in this step to restore it).
- Locate the following keys and delete them:
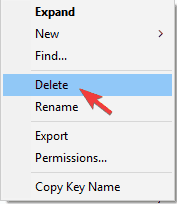
HKEY_LOCAL_MACHINESOFTWAREMicrosoftWindowsCurrentVersionWINEVTPublishers{e7ef96be-969f-414f-97d7-3ddb7b558ccc}HKEY_LOCAL_MACHINESOFTWAREMicrosoftWindowsCurrentVersionWINEVTPublishers {8c416c79-d49b-4f01-a467-e56d3aa8234c}To delete a key, simply right-click it, choose Delete from the menu, and click Yes to confirm.
Note: If you can’t access the Registry Editor, we can help you solve the issue quickly and easily with an expert guide.
7. Remove all your temporary files
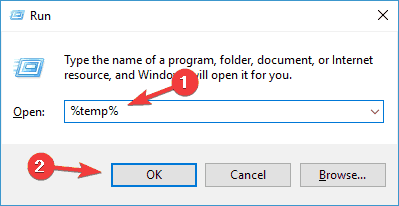
- Press the Windows Key + R, enter %temp%, and press Enter or click OK.
- Delete all its content.
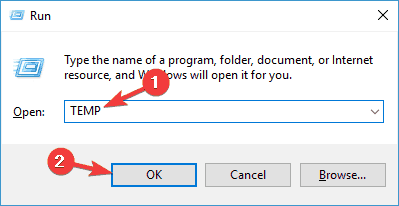
- Press the Windows Key + R, enter TEMP, and press Enter or click OK.
- Delete the contents of the TEMP folder.
8. Disable the Secure Boot
The Secure Boot is a useful feature that can protect your PC from certain malware, but this feature can also cause problems with certain updates.
Many users reported that they encountered error 0x800f0922 due to the Secure Boot feature.
In order to fix the problem, it’s advised to temporarily disable it. To do that you just need to enter BIOS and disable Secure Boot from there.
To see how to perform this procedure, we strongly advise you to check your motherboard manual for detailed instructions.
You can get the necessary information about your motherboard if you use a third-party motherboard information tool.
Once you disable the Secure Boot, try to install the update again. Once the update is installed, you can go back to BIOS and enable the Secure Boot again.
9. Perform a Repair Upgrade
- Download the Media Creation Tool and run it on the affected device.
- During the initiation process, choose Upgrade this PC now.
- Then, select Keep personal files and apps.
- Wait for the process to finish and reboot.
As you can imagine, this is actually a reinstallation of the Windows 10 OS without affecting your files and apps.
Since it’s a fresh copy, it should be void of glitches and bugs and you should be able to freely use your device.
How can I fix Windows 11 update error 0x800f0922?
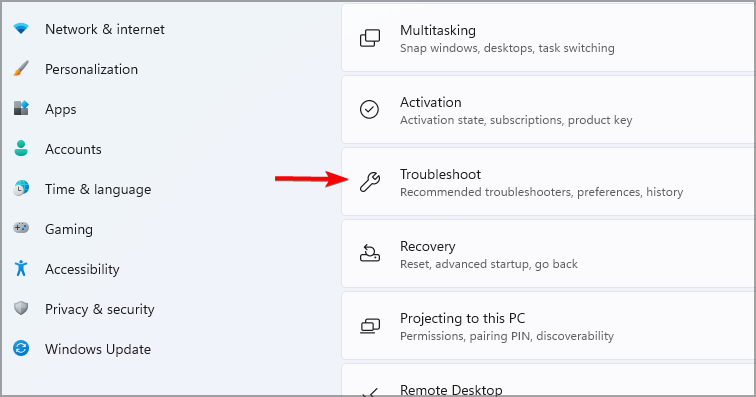
- Press the Windows key + I to open the Settings app.
- Navigate to Troubleshooters in the right pane.
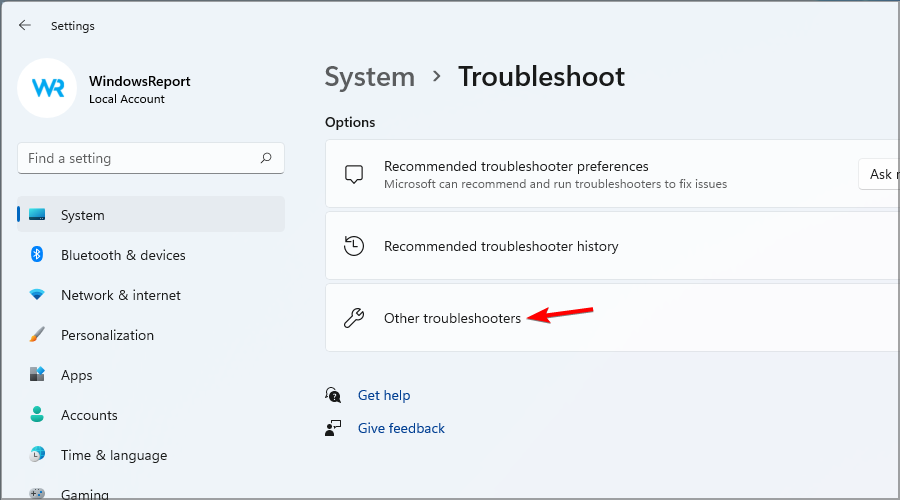
- Now click on Other troubleshooters.
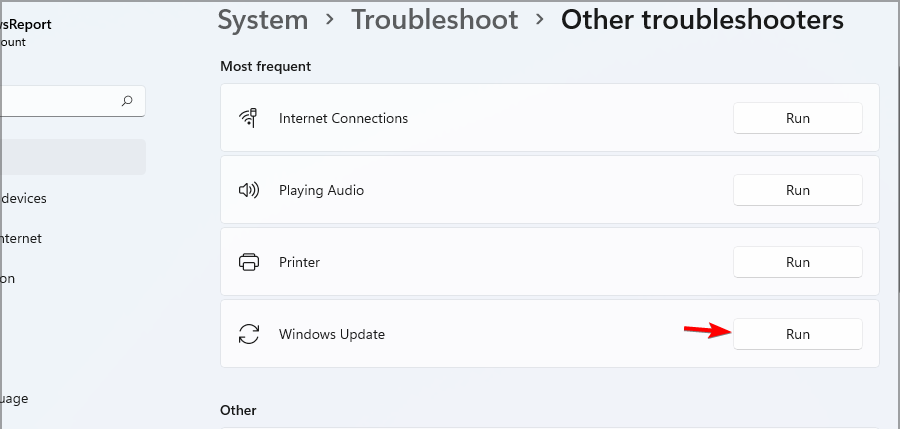
- Locate Windows Update and click Run next to it to run the troubleshooter.
If running the troubleshooter does not pay off, we have more easy tricks for you to try in order to fix the Windows 11 update error 0x800f0922.
And that’s it. We hope you’ll manage to resolve your update error 0x800f0922 with these workarounds. If you are having any questions or suggestions on your mind, the comment section is always open.








User forum
1 messages