Fix: Apps crash after Windows 10 Anniversary Update install
3 min. read
Updated on
Read our disclosure page to find out how can you help Windows Report sustain the editorial team. Read more

The Windows 10 Anniversary Update is not a bug-free OS, although Microsoft hoped it would. Every day, new reports emerge about the issues users have encountered after installing Windows 10 version 1607.
The latest reports reveal that apps immediately crash after the Anniversary Update is installed. Users simply click on the apps to launch them, the app logo is visible for one second and then the apps crash. It appears that all the Windows apps are affected by this issue, and the problem is not limited to a particular app.
Users are complaining about app crashes in Anniversary Update
“UWP apps immediately closes, Anniversary Update.”
“Having exact same problem, Facebook, Messenger, Fresh Paint, and a host of other apps crash upon opening.”
“Same here on 2 PCs – some apps like Baconit and Readit work on my Surface Pro 4 but not on my desktop.”
Apps immediately crash upon opening – how to fix this
Solution 1 – Clear & Reset the Windows Store Cache
- Type cmd in the search box > select Command Prompt
- Type WSReset.exe
- Allow the process to complete > restart your computer.
Solution 2 – Reset the app settings
- Go to Settings > System > Apps & features
- Select the app which won’t start -> Click on Reset. Reset is under Advanced Options after clicking on the app.
Solution 3 – Take ownership of all the WindowsApps files
- Go to C:\Program files using the File Explorer
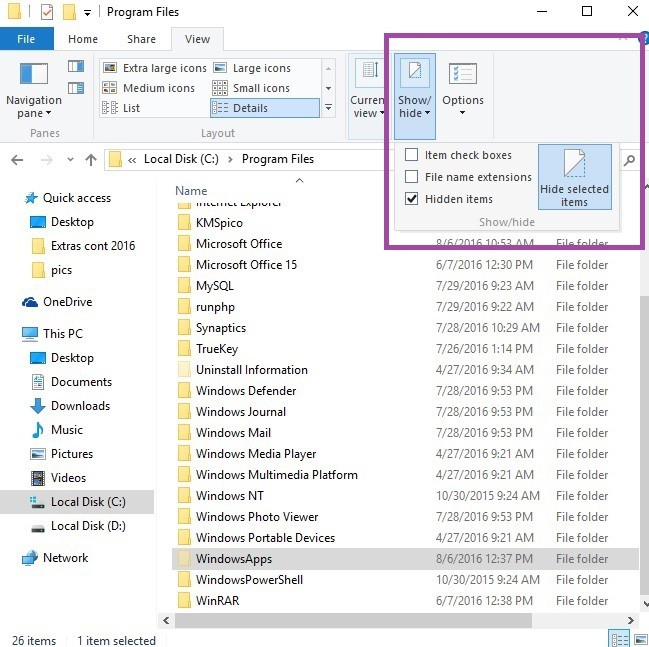
- Change the File Explorer settings temporarily to show hidden files and folders.
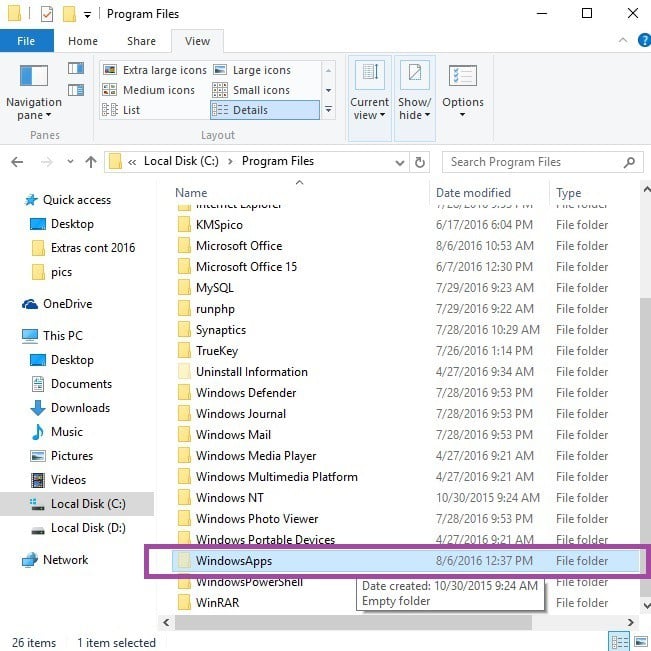
3. Select the WindowsApps directory > right-click on it > select Properties
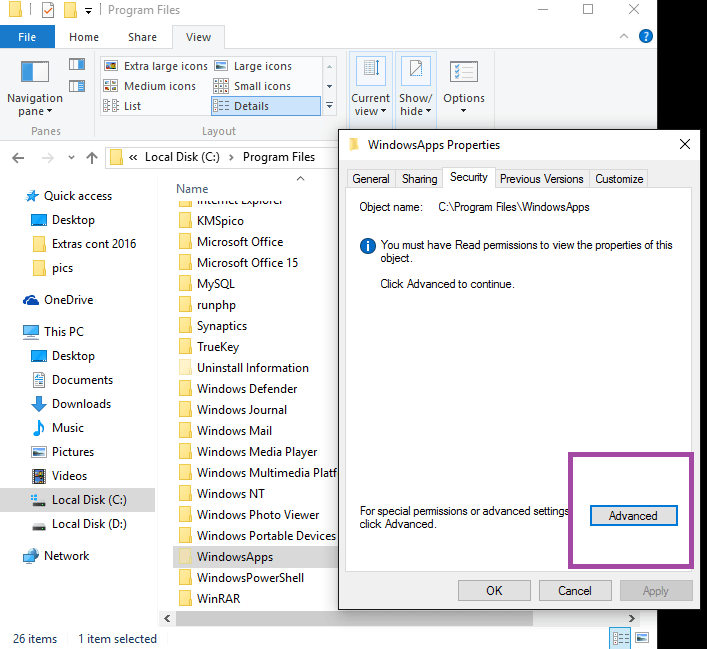
4. Go to the Security tab > click on Advanced
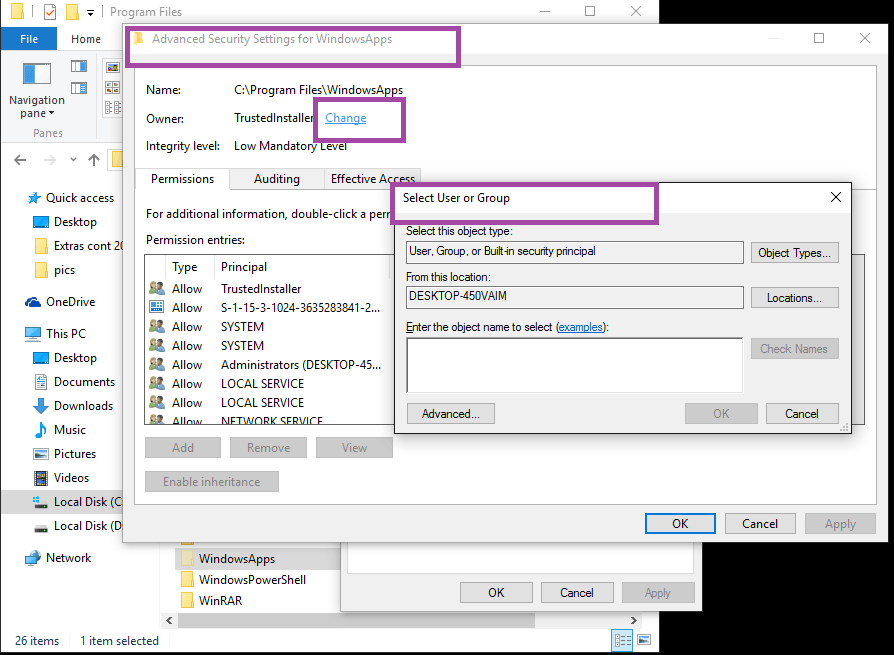
5. The window “Advanced Security Settings for WindowsApps” is now visible
6. Click on the Change link next to the Owner label.
7. The window “Select user or group” is now available
- Type your user account in the area “Enter the object name to select” > click OK.
- Set full access to the app folder for your account. Right-click on the WindowsApps folder > Properties > Security > Add.
- The window “Permission entry for data” is now visible.
- Click on “Select a principal” > add your account.
- Set permissions to “Full control”.
- Run PowerShell as an admin and re-register all of the packages by typing the command Get-AppXPackage | Foreach {Add-AppxPackage -DisableDevelopmentMode -Register “$($_.InstallLocation)\AppXManifest.xml”}
If you’ve found other workarounds for this issue, list them in the comment section below.
RELATED STORIES YOU NEED TO CHECK OUT:


User forum
2 messages