How to Fix BIOS ID Check Error Message
A BIOS updater utility could save you the manual work

A BIOS ID check error is a common problem that occurs when your system fails to detect the motherboard while installing your OS or updating the BIOS.
Often, your computer hardware configuration does not match the requirements of Windows, or your BIOS is corrupted.
This can also happen if you change your motherboard and/or processor without updating the BIOS first or overclocking your system. Here’s how to fix it:
What can I do to fix the BIOS ID check error?
If you get this error, start by removing all storage devices such as USB drivers and external hard drives. Also, check for pending updates and make sure there are no loose connections between the power supply and your PC’s components.
Should you not have succeded after doing all of these, try the more advanced steps below:
1. Reset BIOS and reinstall it
 NOTE
NOTE
1.1 Reset BIOS
- Restart your computer and repeatedly press ESC/F1/F2/F8 or F10 during the startup to get into the BIOS menu.
- Hit the Windows + I keys to open the Settings app and click on System>Recovery>Advanced startup. Go to Troubleshoot > Advanced Options > UEFI Firmware Settings and click on Restart.

- Once you are in the BIOS menu, press F9 to open the Load Default Options dialogue box.
- Select Yes using the arrow keys to reset BIOS settings to factory default.
- Exit and restart the computer and check for any improvements.
Resetting your BIOS to default settings can also help you fix issues like removing your BIOS password on Windows 11; read this guide to learn more.
1.2 Check the BIOS version
- Open the Start menu by pressing the Windows key.
- Type System Information and open the top result.
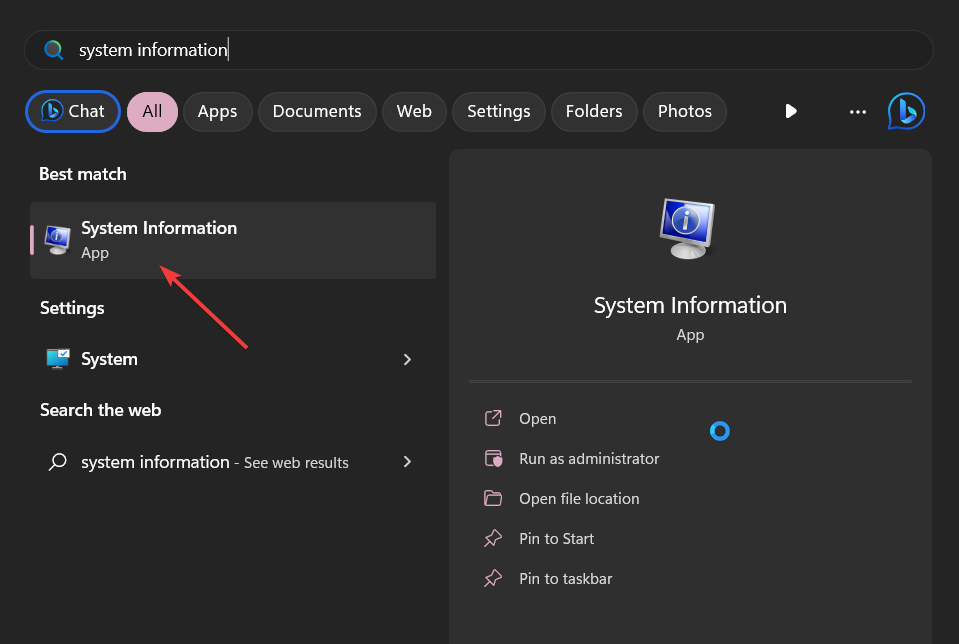
- Locate BIOS Version/Date section on the right side.

1.3 Update BIOS
- The process of updating BIOS will differ depending on your motherboard. For this step, we shall be updating the HP motherboard.
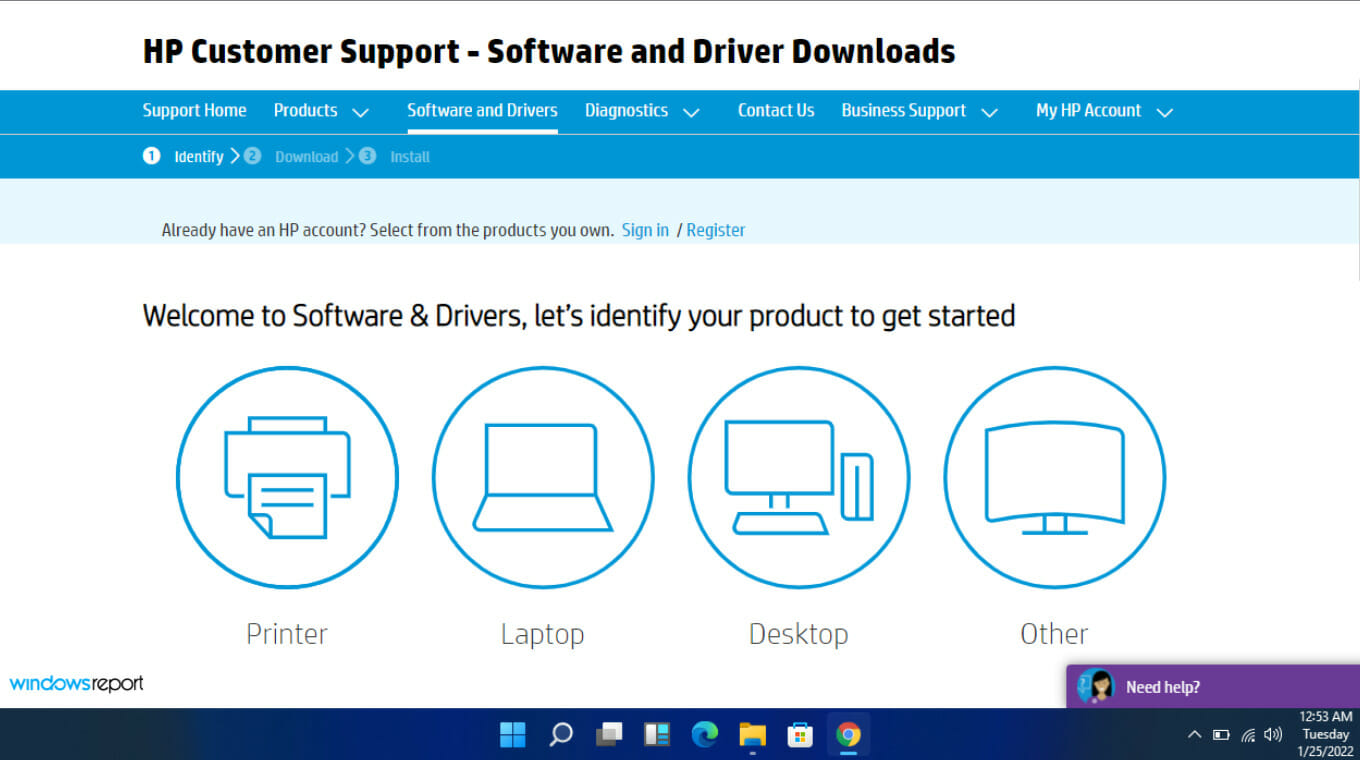
- Navigate to the HP driver and software download website.
- Choose laptop or desktop, depending on the type of computer you’re using.
- Enter your exact serial number or your exact computer model.
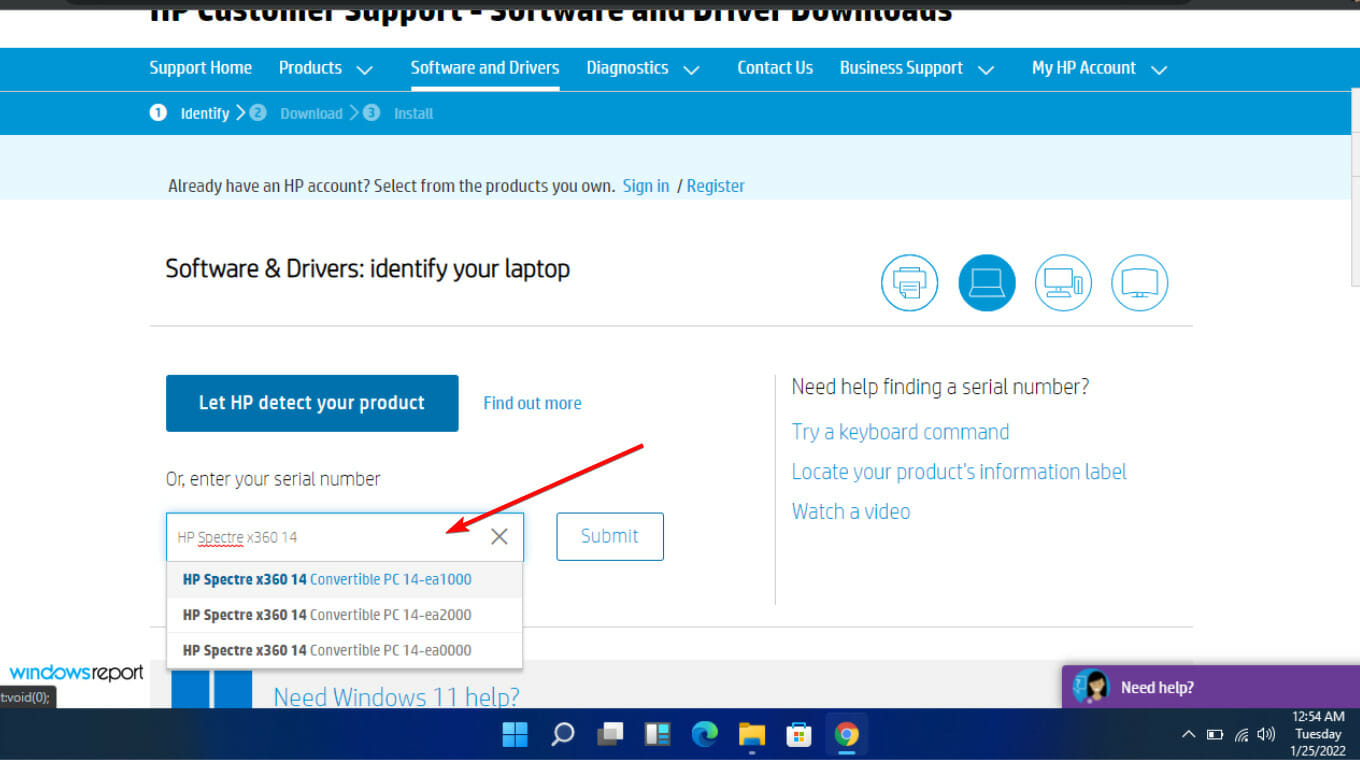
- Select your OS and OS version, then click Submit.

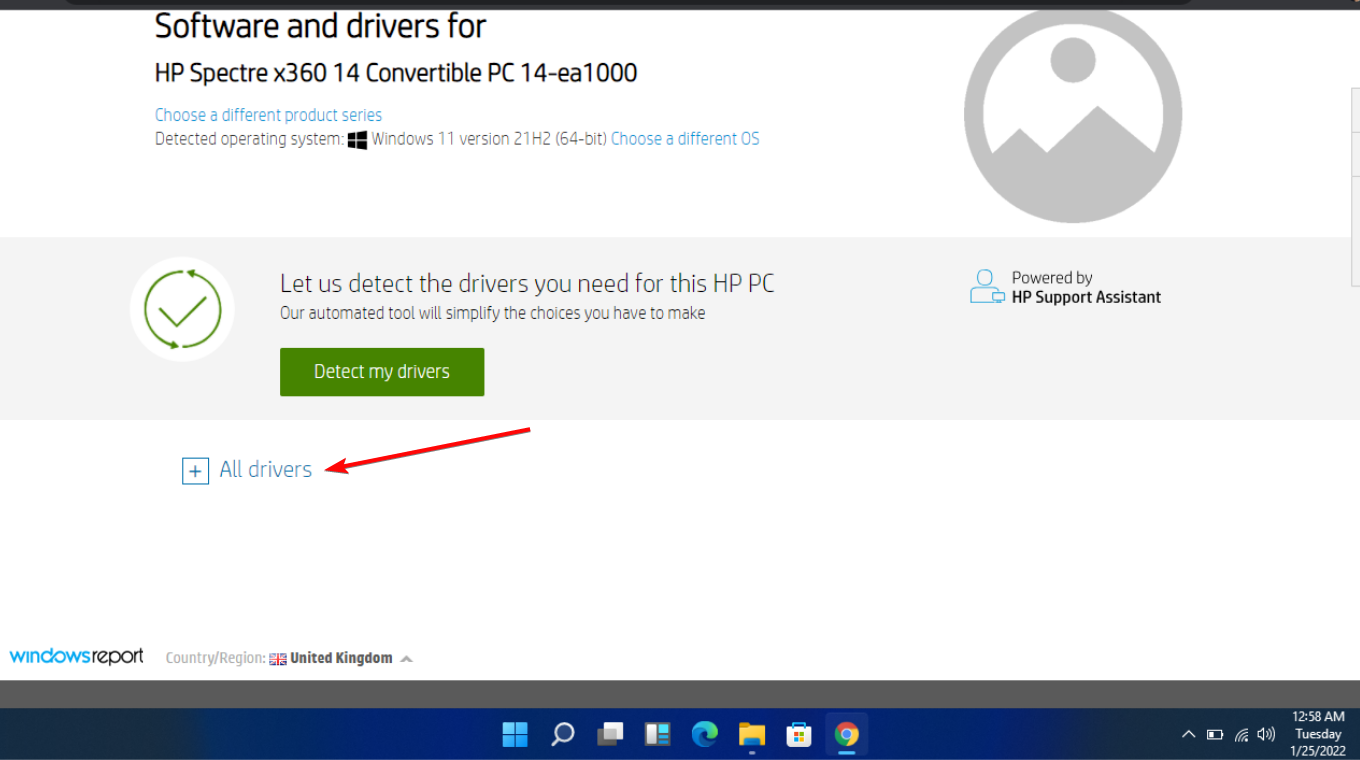
- Click on All drivers and then expand BIOS to see available updates.
- Click the download icon.
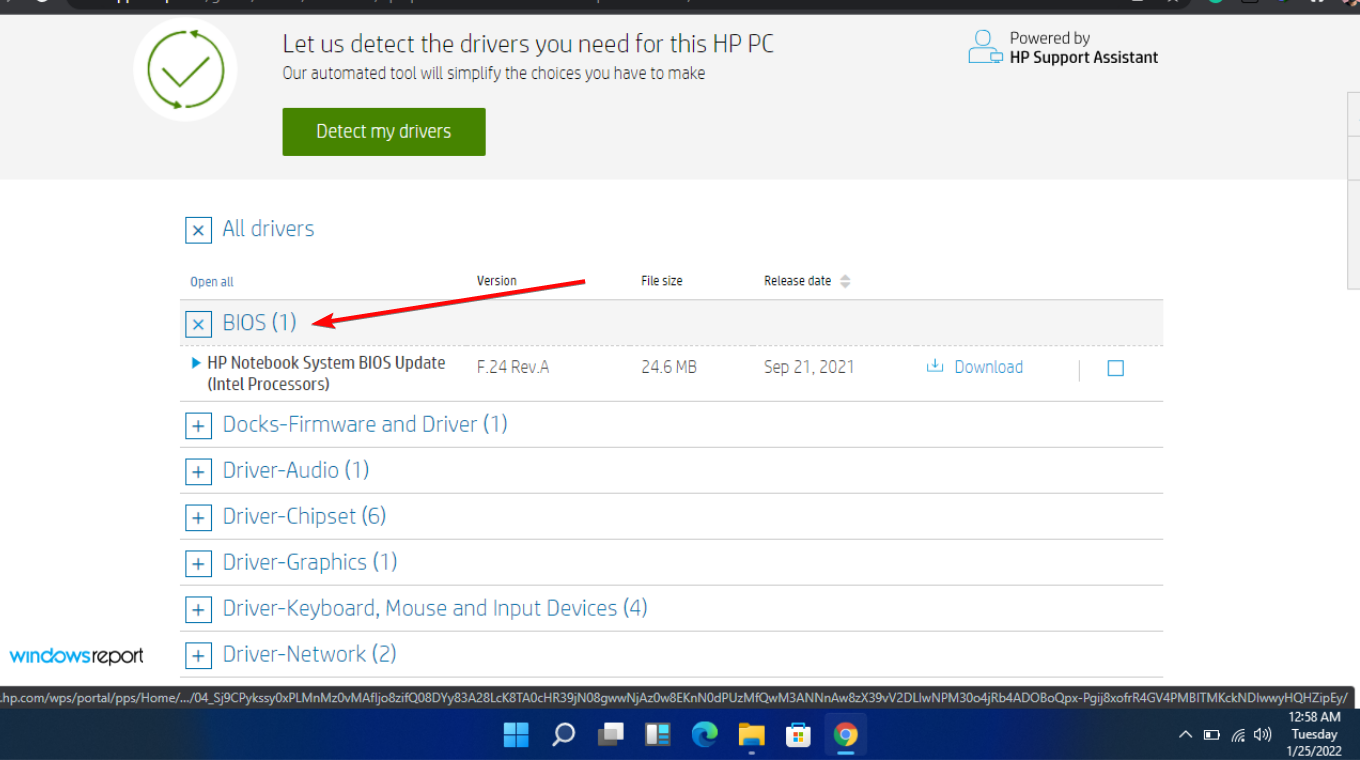
- Install the .exe file, following the on-screen instructions.
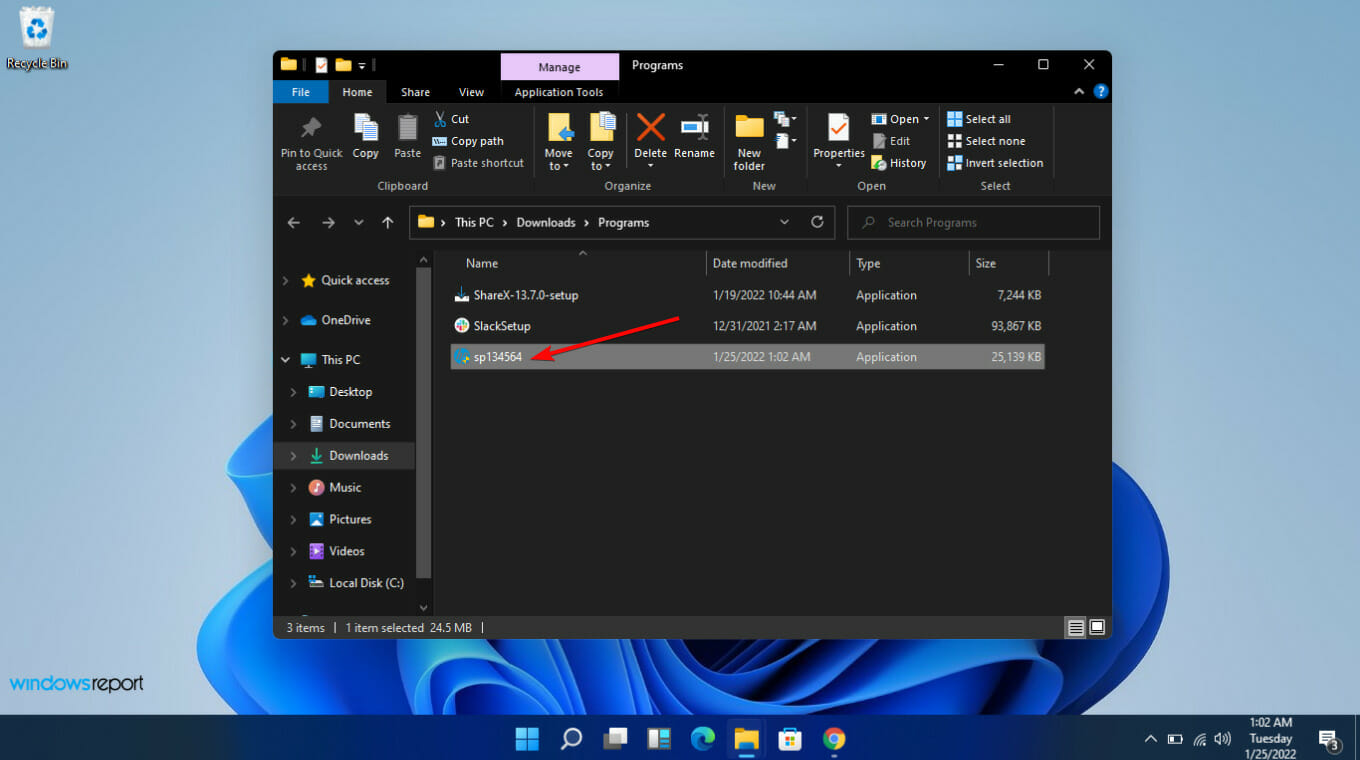
- Restart your PC.
The BIOS update should include all the latest drivers and firmware available for your system. It might also resolve any compatibility issues between the CPU and motherboard that you may be experiencing.
If you have upgraded your motherboard, make sure that the new motherboard has the same model number as the old one. This was one of the biggest issues as users ended up downloading the wrong version. Pay particular attention to the manufacturer, model, and revision.
2. Flash or update BIOS from a bootable USB
- Using another computer or laptop, visit your motherboard’s or computer’s manufacturer’s website and look for a support page.
- They should have your motherboard or laptop model listed. In our example, we go to the HP website and type our motherboard model.
- Then download the BIOS file.
- If the downloaded file is a ZIP file, extract the contents.
- Look for the BIOS file in the contents of the unzipped file and make a note of where this BIOS file is located.
- Before beginning the BIOS flash process, save the BIOS file to an external device like a USB drive.
- Boot your faulty computer after ensuring that it is plugged in or that your laptop is completely charged and plugged in.
- Enter the BIOS screen by pressing the key specified by the manufacturer’s instructions for a BIOS update as soon as the computer starts. F1, F2, Delete, F8, Esc, or another key could be used.
- Start the update process based on your computer’s model once you’re on the BIOS panel. (To complete the upgrade, you may need to look at different tutorials on the manufacturer’s website.)
- The BIOS flash can take anywhere from a few minutes to several hours, and your system will restart after the BIOS update is completed.
3. Use a BIOS updater utility
- Disable your firewall temporarily as it may flag off this program as malware and prevent it from installing or making any changes on your PC.
- Navigate to your browser and download the HP Support Assistant.
- Open the HP Support Assistant. and log in with your account or continue as a guest.
- Right under your device picture, you will find an Updates option.

- Click on it to check if you are up-to-date or have any pending updates.

- If you see a new BIOS update available, click Download and install.
- Wait for the Support Assistant to finish the job and close the application.
These programs are often made by companies that manufacture motherboards. This means they can address a wide range of issues like the BIOS ID check error.
NOTE
4. Reset CMOS
- Shut down your PC completely.
- Unplug the power cord and remove the battery if it’s a laptop.
- Hold the power button for 60 seconds to completely discharge your PC.
- Open the PC case and touch a metal surface to discharge your static electricity.
- Remove the CMOS battery; it should be a 3V standard flat wristwatch battery.
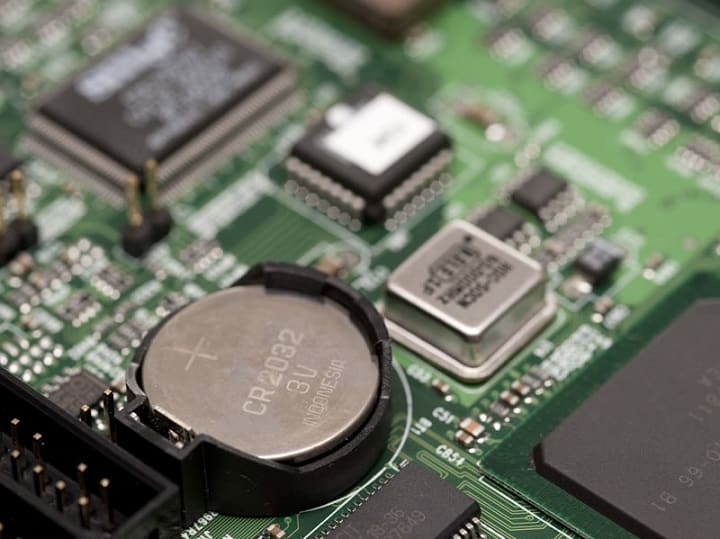
- Please wait for a few minutes and place it again carefully.
- Power On your PC and look for changes.
CMOS is like a backup battery for your computer’s BIOS. If power is lost suddenly, the CMOS may become corrupt and it cannot keep track of these things and your computer will not start.
Some contain batteries that must be removed from the motherboard before they can be replaced or recharged, while for others, simply disconnecting from their power source will reset the CMOS.
5. Change your BIOS boot mode
- Enter BIOS Setup with the corresponding key on the screen.

- Look for the Secure Boot option. In most situations, it will be under the Boot or Security tabs, though the location will change based on your PC.
- Change BIOS from Legacy to UEFI.

- Enable Secure Boot in user mode (UEFI).
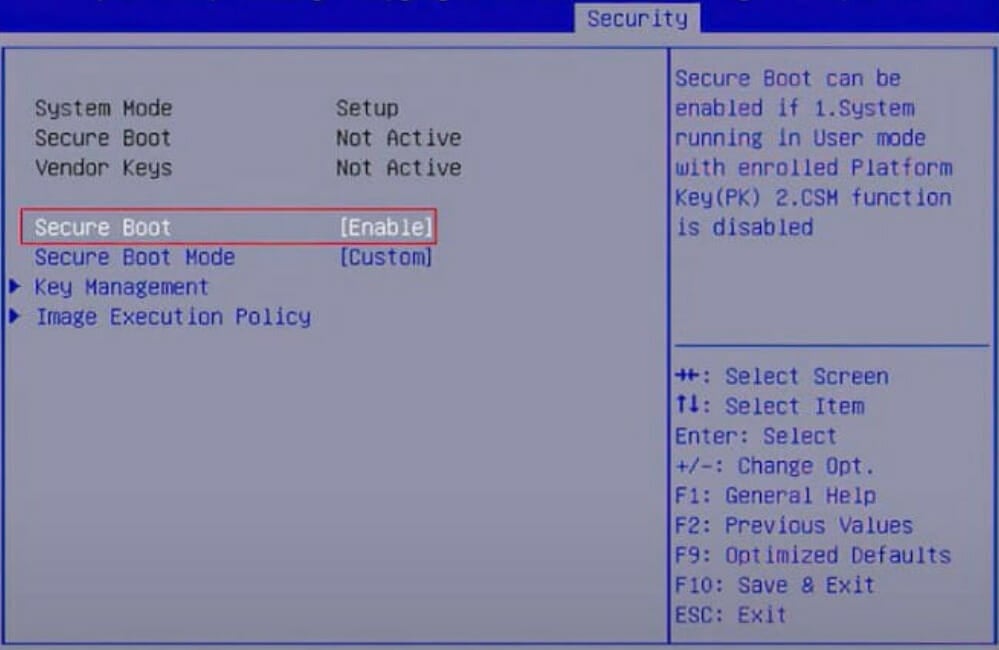
- Press the Save & Exit corespondent key on the screen, and you are done.
UEFI replaced the old BIOS system in PCs. It is more secure and reliable than legacy BIOS and also has a faster start-up time than its counterpart.
6. Upgrade your motherboard
Finally, if you’ve tried all the above but the BIOS ID check error is persistent, you may have to upgrade your motherboard. With time, your hardware will give in and succumb to wear and tear or become damaged due to a power surge or some other reason.
Unfortunately, this isn’t always as easy as it sounds. The first issue is that not all motherboards are compatible with your specific PC model but if you look hard enough, you’ll find a perfect match.
Tips to ensure successful BIOS ID verification
- Check for any prerequisites for updating your system’s BIOS before downloading the files to ensure your system passes the compatibility test.
- Use a reliable source for your BIOS files. Avoid third-party vendors as they often have not tested the BIOS for compatibility with your system.
- Make sure that you download only the version of the BIOS that matches your computer’s model number.
- Always update your firmware regularly. This will ensure that any vulnerabilities are patched before attackers can exploit them.
Unfortunately, you may successfully get rid of the check ID error but your PC might fail to boot after a BIOS update. This should not be alarming as the steps above can remedy the problem, particularly by flashing your BIOS.
In another scenario, your PC may automatically go to the BIOS menu instead of booting up normally, but this too is an easy fix.
We hope we have comprehensively examined the different ways to fix this error message. There are more causes than those listed above, but they can usually be broken down into some of the categories mentioned.
If you have had any trouble with a BIOS ID check error, feel free to tell us about it in the comments below and how to bypass it.
Read our disclosure page to find out how can you help Windows Report sustain the editorial team. Read more


Improve this guide


User forum
0 messages