Steam Games Won't Launch on Windows 10: Easily Fixed
These tested solutions will make Steam games work again in no time
![]() 5 min. read
5 min. read
![]() Updated on
Updated on
Share this article
Improve this guide
Read our disclosure page to find out how can you help Windows Report sustain the editorial team. Read more

A few users have complained that Steam games are not launching on Windows 10; we present all you need to know to resolve this error on your device.
Microsoft made the latest Windows OS a gamer-friendly operating system with game streaming, recording, and a great Xbox One app.
But this Steam issue, among a few others, may reduce or ruin the experience.
Why are Steam games not working in Windows 10?
When Steam games are not working, we first recommend you verify if the servers are working fine using a dedicated website like SteamStatus, though it’s not the official one.
Also, it could be that you are trying to play a game during Steam Maintenance Tuesday, which is not working.
If the servers are doing fine and others can play the game, check the game files. Corruptions with these affect the game’s performance; in some cases, the fun won’t launch.
If you run the game through the standalone launcher, it could lead to issues, though unlikely. But try running the game from the Steam app itself to be sure.
Besides, outdated drivers, misconfigured settings, running an older version of the game, Steam, or the OS, are all possible reasons why Steam games won’t launch on Windows 10.
Does Windows 10 affect Steam games?
The OS is a very gaming-friendly Windows edition. With that said, you do not expect any adverse effect on games, even though manufacturers are always likely to fine-tune their applications for new updates.
What can I do if Steam games are not launching on Windows 10?
1. Update your drivers and DirectX
It won’t do any harm if you head to Device Manager, right-click on the graphics card under Display Adapter, and see if there are any driver updates.
The same goes for DirectX, as you can check if the latest version is installed. However, updating drivers manually can be a long process, especially if you are a newbie.
Powerful driver updating software, such as PC HelpSoft Driver Updater allows you to scan for outdated drivers, download fresh ones, and ensure they never go out of date again by notifying you about this as soon as it finds new driver versions.
⇒ Get PC HelpSoft Driver Updater
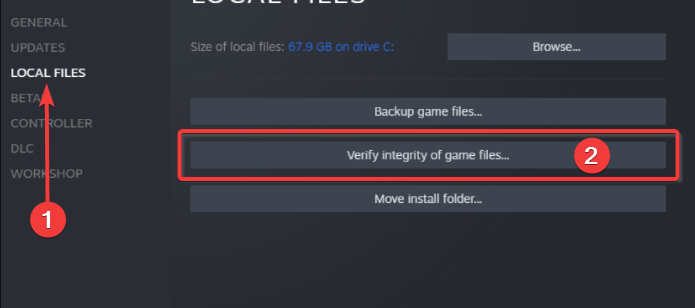
2. Verify the integrity of all game files
- Launch Steam.
- Go to Library, right-click on a game, and select Properties from the menu.

- Select the Local files tab and click the Verify integrity of game files button.

- Wait for the process to finish and re-launch Steam.

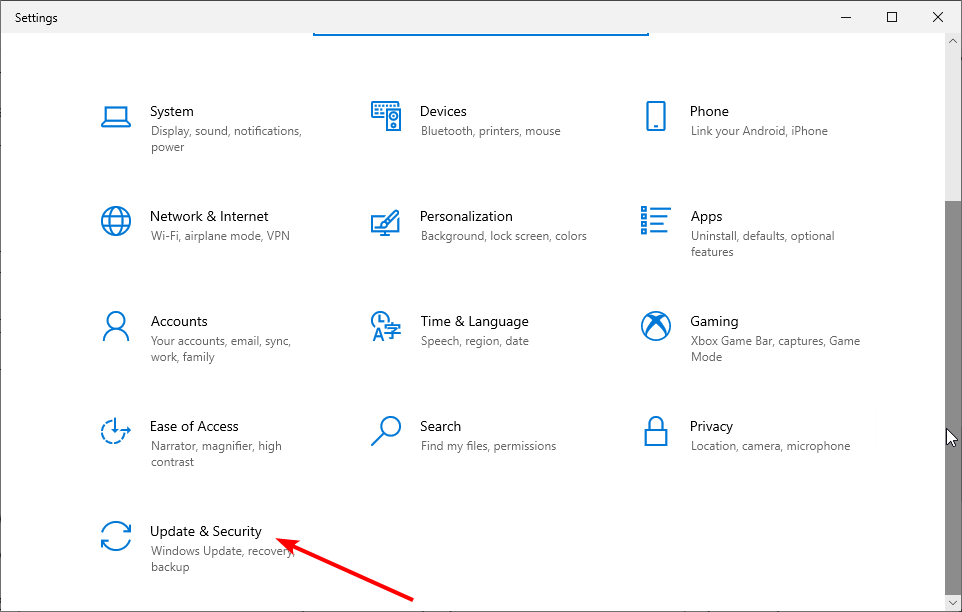
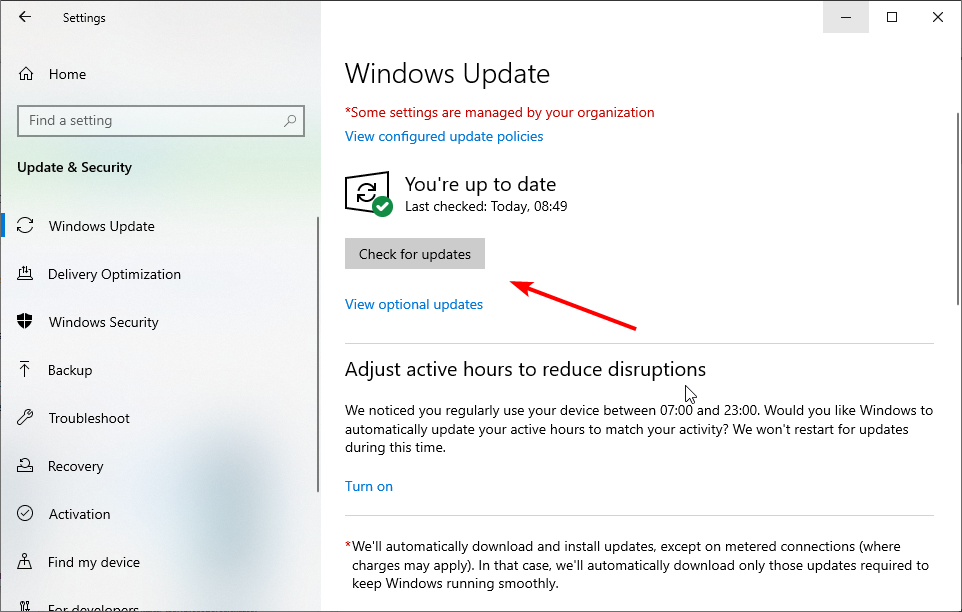
3. Update Windows
- Press the Windows key + I to open the Settings app and select Update & Security.

- Click the Check for updates button.
- Now, download and install any available update.
Microsoft pays much attention to gaming and considers gamers a valuable part of the Windows community.
Therefore, the company includes some threats for gamers in every major update for Windows 10.
Are you having trouble updating your Windows 10? If you don’t know what to do about the missing Check for updates button, our tips will help you solve the issue in no time.
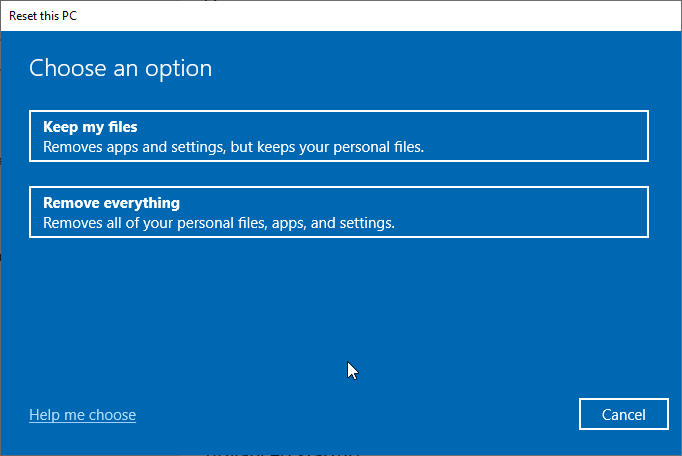
4. Reset PC
- Open the Settings app and select the Update & Security option.
- Select Recovery in the left pane and click the Get Started button under Reset this PC.
- Choose whether to keep your files or not and click the Next button.

- Now, follow the simple onscreen instruction to complete the process.
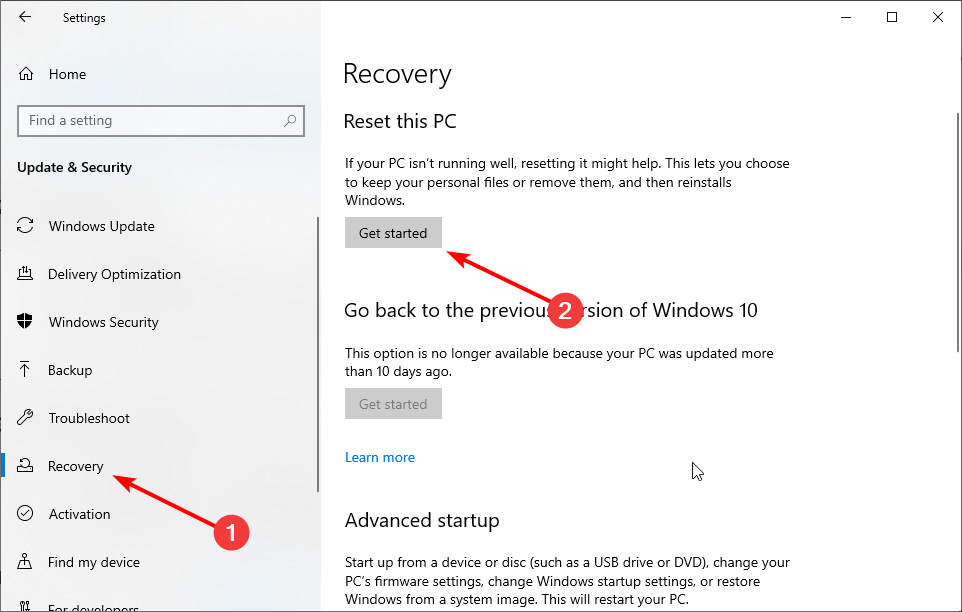
Verify that the Steam games not launching has been fixed on your Windows 10 device.
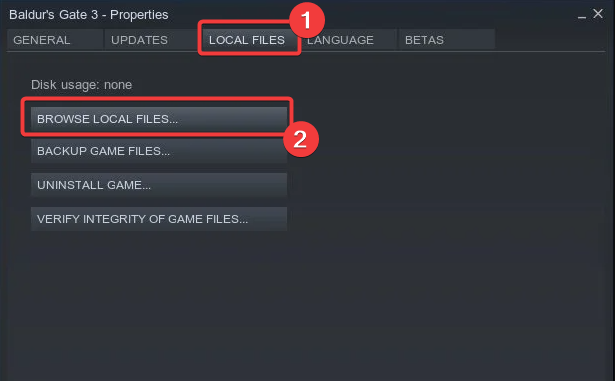
5. Run the game as Administrator
- Go to the Steam Library.

- Locate the game you want to run.
- Right-click the game title, and go to Properties.
- Head over to the Local Files tab, and click Browse Local Files.

- Find the game executable, right-click it, and go to Properties
- Head to the Compatibility tab, and check Run this program as Administrator.

- Save the changes and try to run the game.

Verify that the Steam games not launching has been fixed on your Windows 10 device.
These few fixes may help if nothing happens when you click on the Run as administrator.
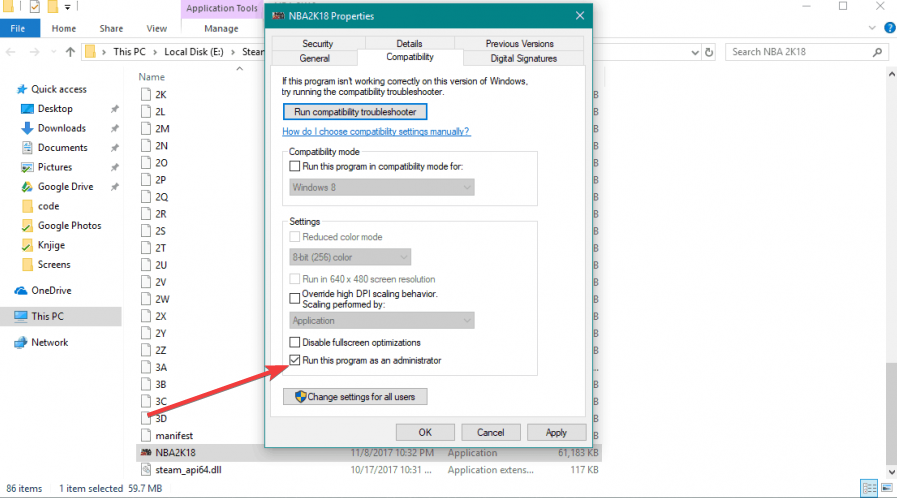
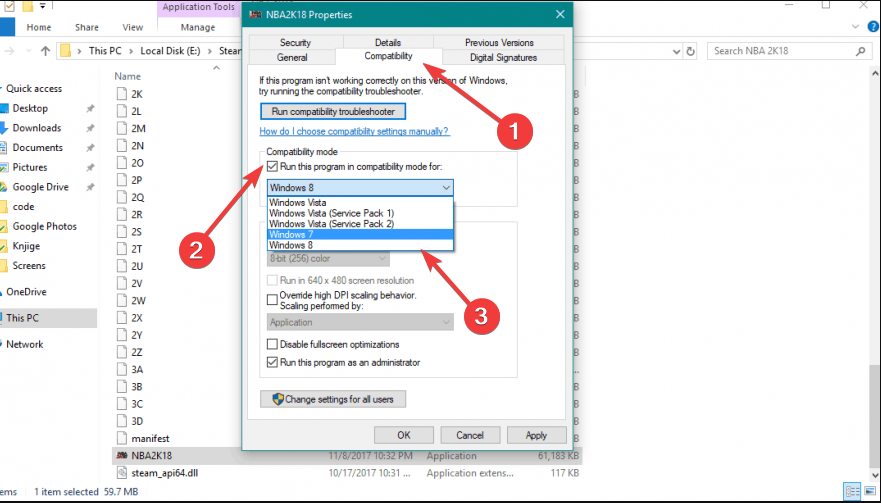
6. Run games in the compatibility mode
- Go to the Steam Library.
- Locate the game you want to run.
- Right-click the game title and select Properties.
- Head over to the Local Files tab, and click Browse Local Files.
- Find the game executable, right-click it, and go to Properties.
- Head over to the Compatibility tab. Check this program in compatibility mode, then choose the operating system.

- Save the changes.
That’s it! If Steam games don’t launch in Windows 10 earlier, they will now.
If you encounter any other Steam errors, we recommend you look at this in-depth guide dedicated to fixing common Steam errors on Windows. We also have a great guide on error code 20 on Steam, so feel free to visit it.
How is your gaming experience in Windows 10 after applying the above troubleshooting tips? Share that with us in the comments area below.


User forum
3 messages