FIX: VPN error 868 connection failed on Windows 10/11
Key notes
- Error 868 is a message you receive when trying to connect to a VPN. It says that the remote connection was not made because the name of the remote access server did not resolve.
- You can get rid of this error message and establish a successful VPN connection on Windows 10 by following our step-by-step instructions below.
- Visit our Windows 10 section to master this operating system.
- Join our VPN Troubleshooting Hub for more useful VPN guides.


World-class 24/7 support with 82% for a 2 years plan and 2 months free
70% of our readers choose Private Internet Access
70% of our readers choose ExpressVPN
Amazing connection speed with 61% off and 4 months free for the 2-years plan.
Best security protocols with 83% off and 2 months free for a 2-year plan.
If you’re trying to connect to a VPN on Windows 10 but get error 868, it means that the connection failed.
Here’s the complete message:
Error 868: The remote connection was not made because the name of the remote access server did not resolve.
It can quickly become irritating if you keep receiving this error message.
But don’t worry since you can get rid of it and establish a successful VPN connection on Windows 10 by following the steps below.
How do I fix VPN error 868 on Windows 10?
Check the IP address or domain name of the remote server

- Right-click the Windows 10 Start button and select Network Connections
- Select VPN on the left side of the Settings window
- Select your VPN connection and click Advanced options
- At Connection properties, click Edit
- Make sure that the Server name or address is correct
Perhaps you accidentally entered the wrong server name or address. Or, maybe the remote server changed this information in the meantime.
It could be the reason why you keep seeing VPN error 868 connection failed whenever you attempt to connect on Windows 10.
Change your DNS settings

- Right-click the Windows 10 Start button and select Network Connections
- Click Change adapter options
- Right-click your Internet connection and select Properties
- Double-click Internet Protocol Version 6 (TCP/IPv6)
- Select Use the following DNS server addresses
- Set Preferred DNS server to 8.8.8.8
- Set Alternate DNS server to 8.8.4.4
- Click OK
If the VPN error 868 connection failed is caused by incorrect DNS settings on Windows 10, then you can try changing your DNS configuration. It will fix the incorrect DNS resolver problem.
You can quickly test this theory by setting the IP address in the VPN connection properties instead of the domain name (see the previous solution for more details).
The preferred and alternate DNS servers we mentioned in our example above are free, public, and belong to Google Public DNS. But you can also try Cloudflare or OpenDNS.
Or, if you’re using a premium VPN service like Private Internet Access (buy here), you don’t have to worry about manually changing your DNS configuration.
The app runs its exclusive DNS servers every time you connect to the VPN.
Use a VPN client instead of a manual VPN connection

Instead of setting up a manual VPN connection for every server you want to connect to, use a commercial VPN client. It’s prone to less errors.
Take Private Internet Access, for instance. It automatically installs the required TAP drivers and adds an exception to your firewall on setup. It even has private DNS servers to fix any DNS resolver issues.
PIA has a native app ready for all major operating systems: Windows, Mac, Linux, Android, and iOS. With one paid subscription, you can connect up to 10 simultaneous devices.
More about PIA:
- OpenVPN and WireGuard fast and secure protocols
- A zero-logging privacy policy
- 24/7 live chat support
- 30-day money-back guarantee
- No free trial

Private Internet Access
Eliminate VPN errors on your PC by turning to a reliable VPN service instead of setting up manual VPN connections.Open ports in the firewall for VPN traffic

- Press the Win key, type firewall, and select Firewall & network protection
- Click Advanced settings and Yes if prompted by User Account Control (UAC)
- Select Inbound Rules
- Open the Action menu and select New Rule
- Set Rule Type to Port
- At Protocol and Ports, here’s what you have to do:
- For PPTP: port 1723 over TCP and protocol 47 GRE*
- For L2TP/IPsec: ports 500, 1701 and 4500 over UDP
- For IKEv2: ports 500 and 4500 over UDP
- For SSTP: port 443 over TCP
- For OpenVPN: ports 53, 1194, 1197, 1198, 8080 and 9201 over UDP + ports 80, 110, 443, 501 and 502 over TCP
- For WireGuard: port 51820 over UDP
- Set Action to Allow the connection
- At Profile, select Domain, Private and Public
- Enter a name and click Finish
- Head over to Outbound Rules and repeat these steps
*For protocol 47 GRE, set the Rule Type to Custom (instead of Port). Then, select Protocol and Ports and set Protocol type to GRE.
If you’re an advanced PC user, you can open a CMD window with admin rights and use the netstat -a command to check if the ports are opened or closed.
Find out more about how to open firewall ports on Windows.
Add an exception to the Windows firewall
- Head over to Firewall & network protection
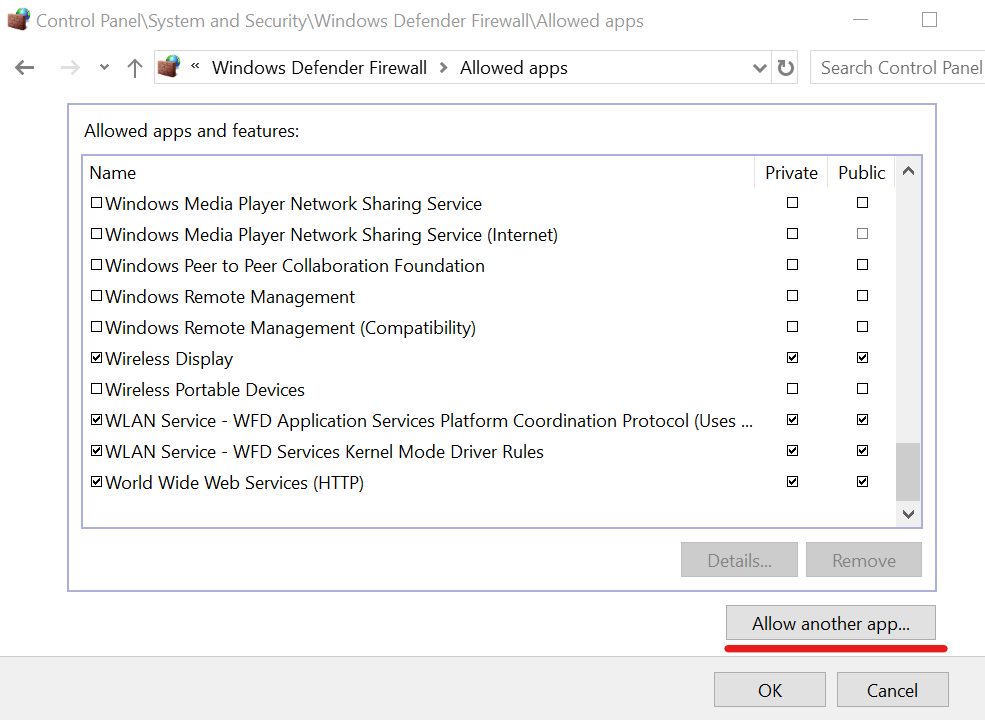
- Click Allow an app through firewall
- Click Change settings (admin rights needed)
- Find your VPN app on this list, then enable the Private and Public associated boxes
- If your VPN isn’t here, click Allow another app to locate it
Another reason why you could be seeing VPN error 868 connection failed message on your Windows 10 computer is that your firewall is blocking VPN traffic.
You can easily check this by temporarily disabling the Windows firewall and trying to connect to the VPN again.
Nevertheless, we strongly recommend re-enabling the firewall and adding an exception instead, due to security reasons.
When using a premium VPN service like Private Internet Access (buy here), you don’t have to worry about this problem since PIA makes all the necessary firewall changes on setup.
Check if your antivirus is blocking VPN traffic

If you don’t have a third-party anti-malware solution installed on your PC, then you can skip this step.
It means that Windows Defender is responsible for your security, and you already added an exception to the firewall if you tried the previous solution.
Otherwise, your anti-malware tool might be the culprit for VPN error 868. You can easily tell if it shows a notification message every time you try and connect to the VPN.
You can quickly fix this problem by finding the whitelist (exception) settings of your antivirus software solution and adding your VPN service there.
Enable VPN passthrough on your router

Your router has its own firewall, depending on its firmware. As such, you should access the admin panel of your router, head over to the advanced settings section, and check the VPN passthrough settings.
Keep in mind that the configuration is different for each VPN protocol, such as PPTP and L2TP. So, make sure to only enable VPN passthrough on the protocol you need.
It’s not a good idea to enable this open for all VPN protocols just to be sure. Because you would expose your home network to hacker attacks.
We also suggest checking out routers with built-in VPN functionality.
Refresh your network settings
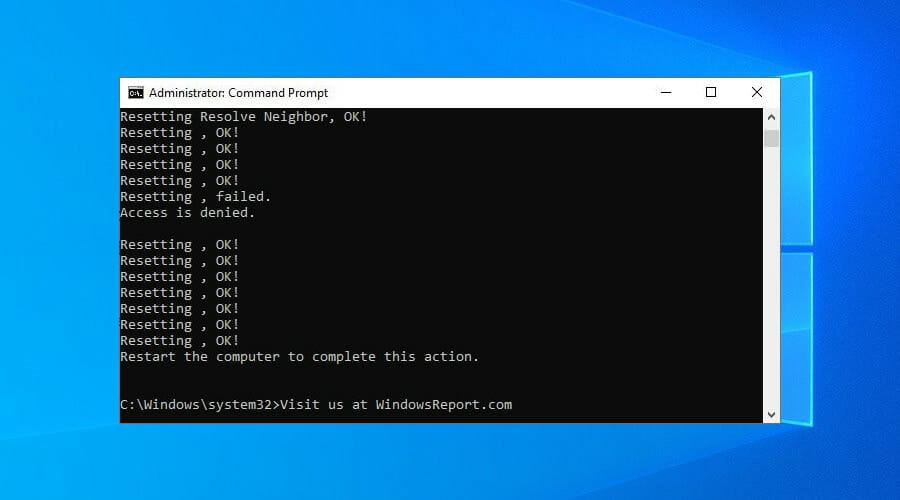
- Run Command Prompt with elevated rights: press Ctrl + R, type cmd, hold Ctrl + Shift and press Enter
- Copy and paste the next lines (press Enter between each line)
ipconfig /flushdns

ipconfig /registerdns

ipconfig /release

ipconfig /renew

NETSH winsock reset catalog

NETSH int ipv4 reset reset.log

NETSH int ipv6 reset reset.log

exit
Restart your computer to finalize the process.
By flushing your DNS and resetting Winsock, you are refreshing your network connectivity settings. It could help fix VPN error 868 connection failed on Windows 10.
Reset the TAP drivers

- Right-click the Start button and select Device Manager
- Expand the Network adapters menu
- Find any TAP drivers, right-click each entry, and select Uninstall device
- Open the Action menu and select Scan for hardware changes
Most VPN apps require TAP driver. So, if there’s anything wrong with it, the TAP driver can cause various errors.
But you can quickly repair this problem by uninstalling the TAP device from Device Manager. It should get automatically reinstalled after scanning your PC for hardware changes.
With Private Internet Access (buy here), you just have to visit the help menu to reinstall the TAP drivers with one click.
More solutions worth trying
- Update system drivers for network connectivity
- Restart the RasMan service in CMD using net stop RasMan and net start Rasman
- Disable any proxy servers you might be using on Windows 10
- Try connecting to the VPN from another network (e.g. public WiFi, 4G)
- Update your router’s firmware to the latest version
- Set up port forwarding on your router
- Check the quality of your Internet connection by running a speed test
Conclusion
To recap, you can fix VPN error 868 connection failed on Windows 10 by verifying the IP or domain name of the remote server, changing your DNS settings, and opening ports in the firewall.
You can also check if your antivirus is blocking VPN traffic, enable VPN passthrough on your router, and try other solutions.
However, we also recommend using a premium VPN service like Private Internet Access (buy here). It’s a more reliable solution than setting up manual VPN connections or using free VPNs that compromise your security.
Read our disclosure page to find out how can you help Windows Report sustain the editorial team. Read more


Improve this guide


User forum
0 messages