Fix: Control Panel is Not Showing All Programs on Windows 11
Incomplete installations do not make it to the Control Panel
![]() 5 min. read
5 min. read
![]() Updated on
Updated on
Share this article

Improve this guide
Read our disclosure page to find out how can you help Windows Report sustain the editorial team Read more
Key notes
- The Control Panel is used to configure and manage all the programs installed on your system.
- If some programs are missing, we show you different ways to make them reappear.
- Keep reading to find out how to easily restore this functionality.
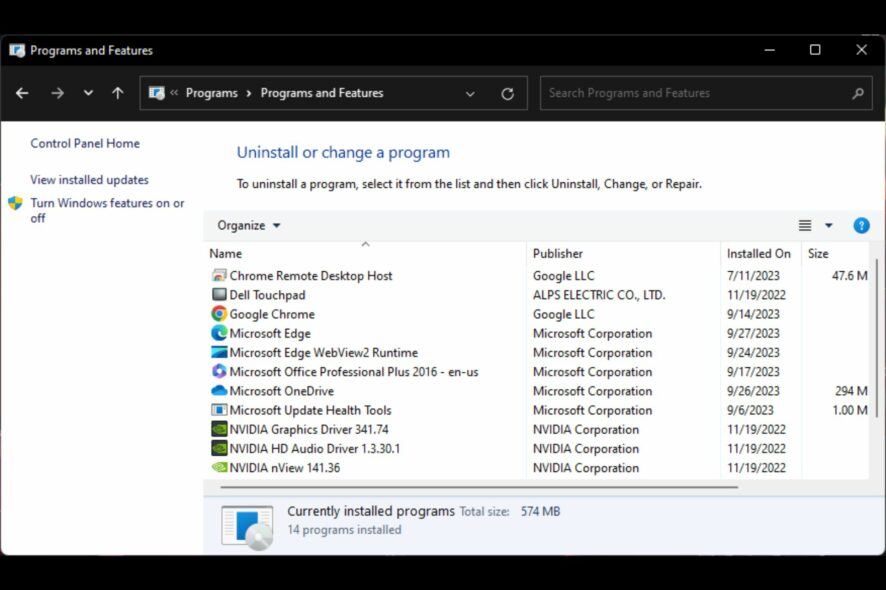
Picture a situation where you want to uninstall an app, and it’s not there when you go to the Control Panel. This is your one-stop shop for managing apps where you can change, repair, uninstall, or adjust related settings so you can imagine how this can be annoying.
In most cases, it’s just a system glitch that can be quickly resolved, but if not, we have some upvoted solutions that are bound to come to your rescue.
Why are some apps not showing in the Control Panel?
- It’s possible the application is not installed properly or is corrupted.
- The application may be installed successfully, but it’s not in the standard location that Windows looks for them.
- You may have disabled the application.
- Downloading illegal third-party and pirated software may be incompatible with Windows and hence can’t be recognized.
How do I see all programs in Windows 11’s Control Panel?
First, check off the following prerequisites before moving on to the somewhat technical solutions below:
- Verify that you are using a user account with administrative privileges.
- Ensure that the program is not blocked by your firewall.
- Check to see if there’s an update available for Windows.
- Uninstall and reinstall the app from a verified source like Microsoft Store.
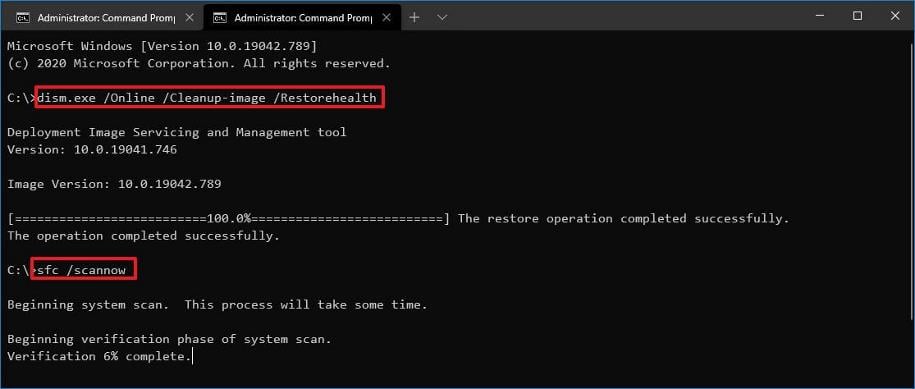
1. Run the DISM and SFC scans
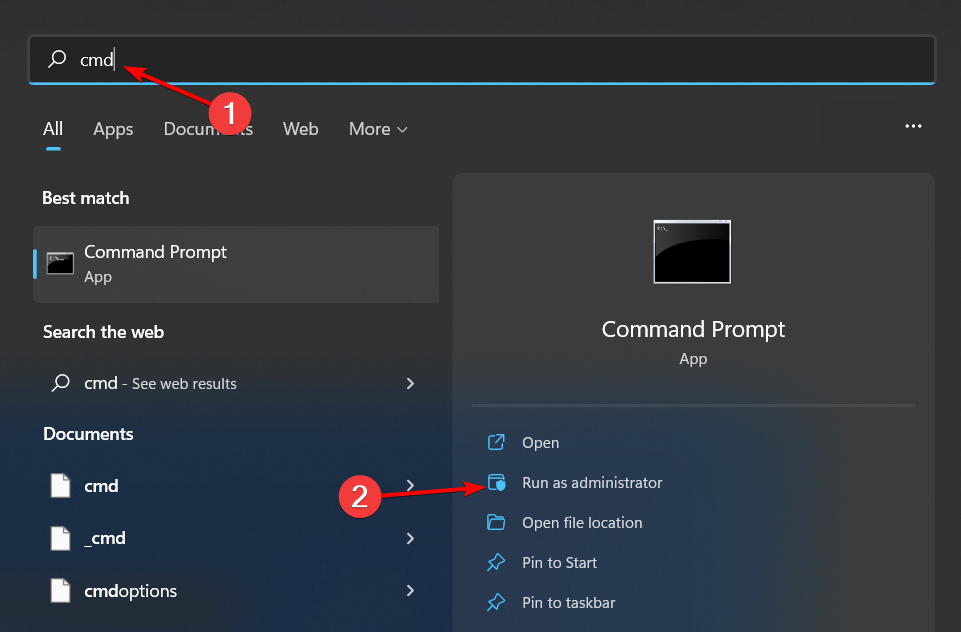
- Hit the Start Menu icon, type cmd in the search bar, and click Run as administrator.

- Type the following commands and press Enter after each one:
DISM.exe /Online /Cleanup-Image /Restorehealthsfc /scannow
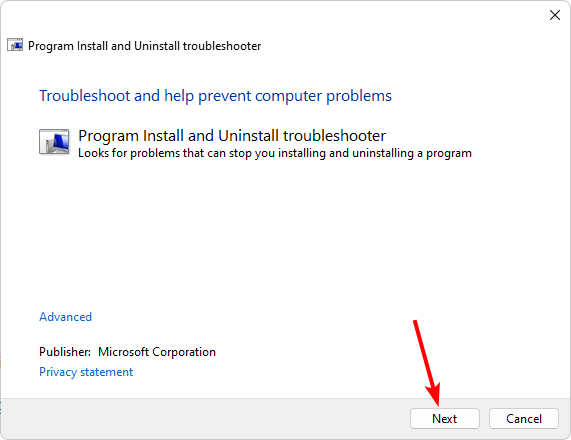
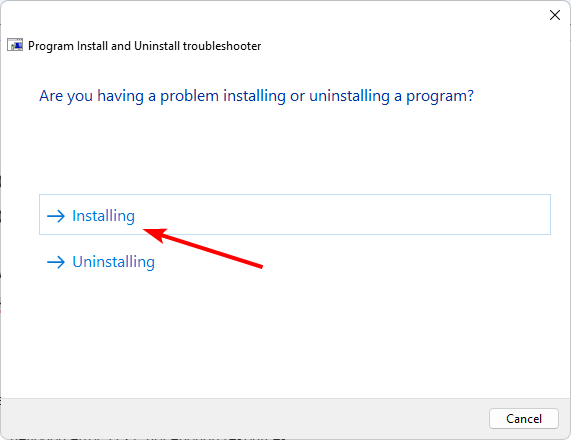
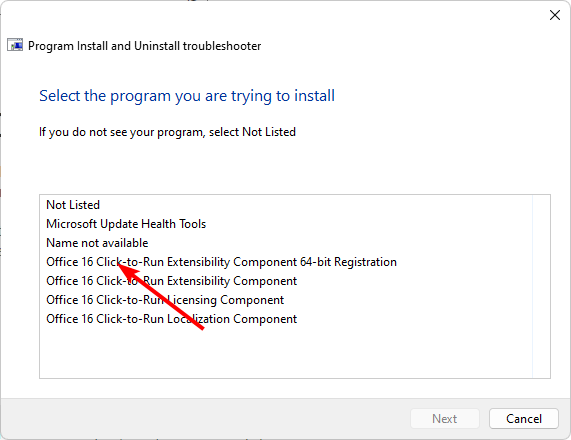
2. Run the Program Install and Uninstall troubleshooter
- Download the Program Install and Uninstall troubleshooter and install it.
- Open it and click on Next.

- You’ll be asked whether you have a problem installing or uninstalling a program. Select one option.
- Next, you’ll be asked to select the program that is not installing. Pick the problematic program from the list.
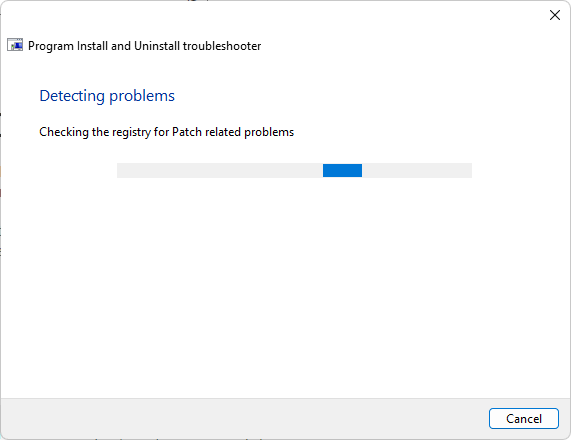
- The troubleshooter will start scanning for problems.
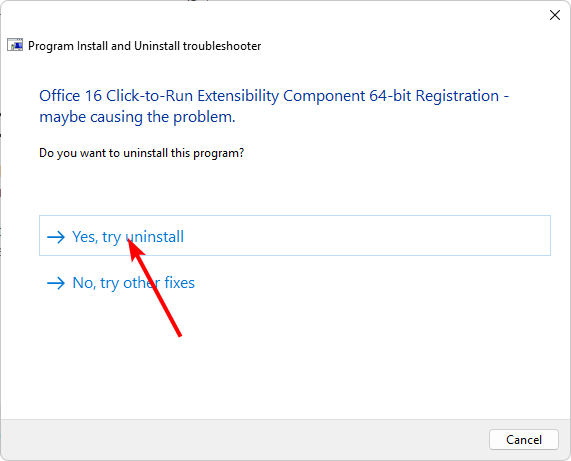
- Once it completes, you’ll be presented with two options. Pick either and wait for the troubleshooter to recommend fixes.

3. Install the problematic app in compatibility mode
- Locate the .exe file of the problematic problem usually in one of the following paths depending on your version of Windows:
C:\Program Files (x86)orC:\Program Files - Scroll down until you find the program you’re looking for.
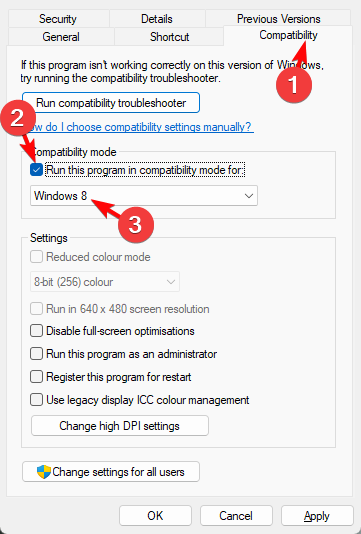
- Right-click on the .exe file of the program and select Properties.
- Navigate to the Compatibility tab, check the Run this program in Compatibility mode option, and select Windows 8 from the drop-down menu.

- Allow the program to finish installing, then check whether the error persists.
4. Scan for viruses
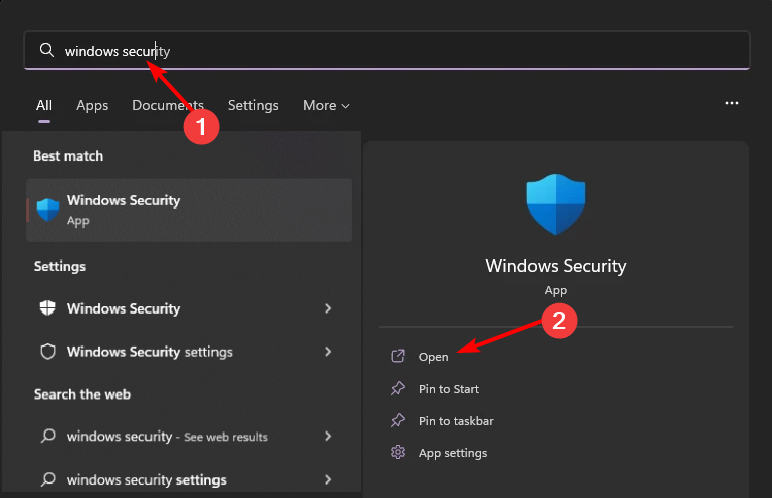
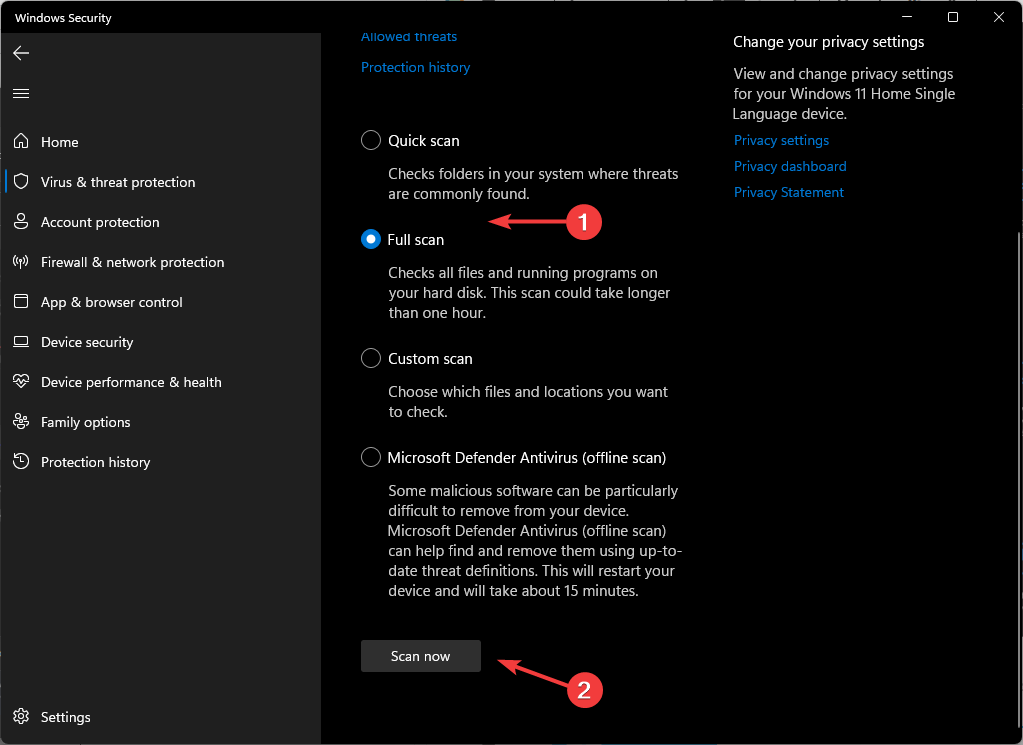
- Press the Windows key, search Windows Security, and click Open.

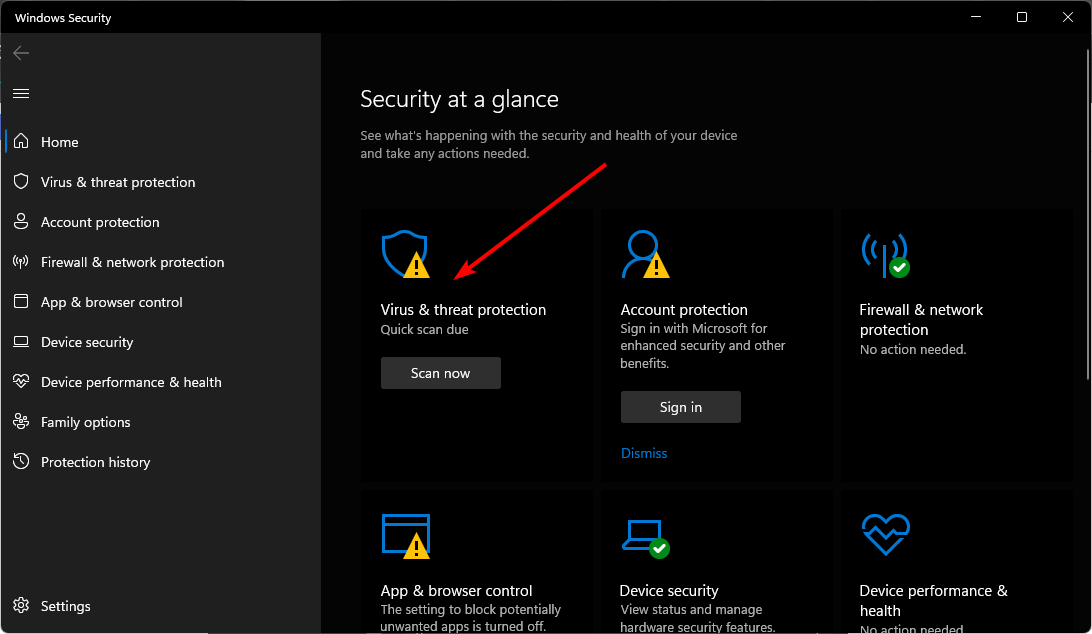
- Select Virus & threat protection.

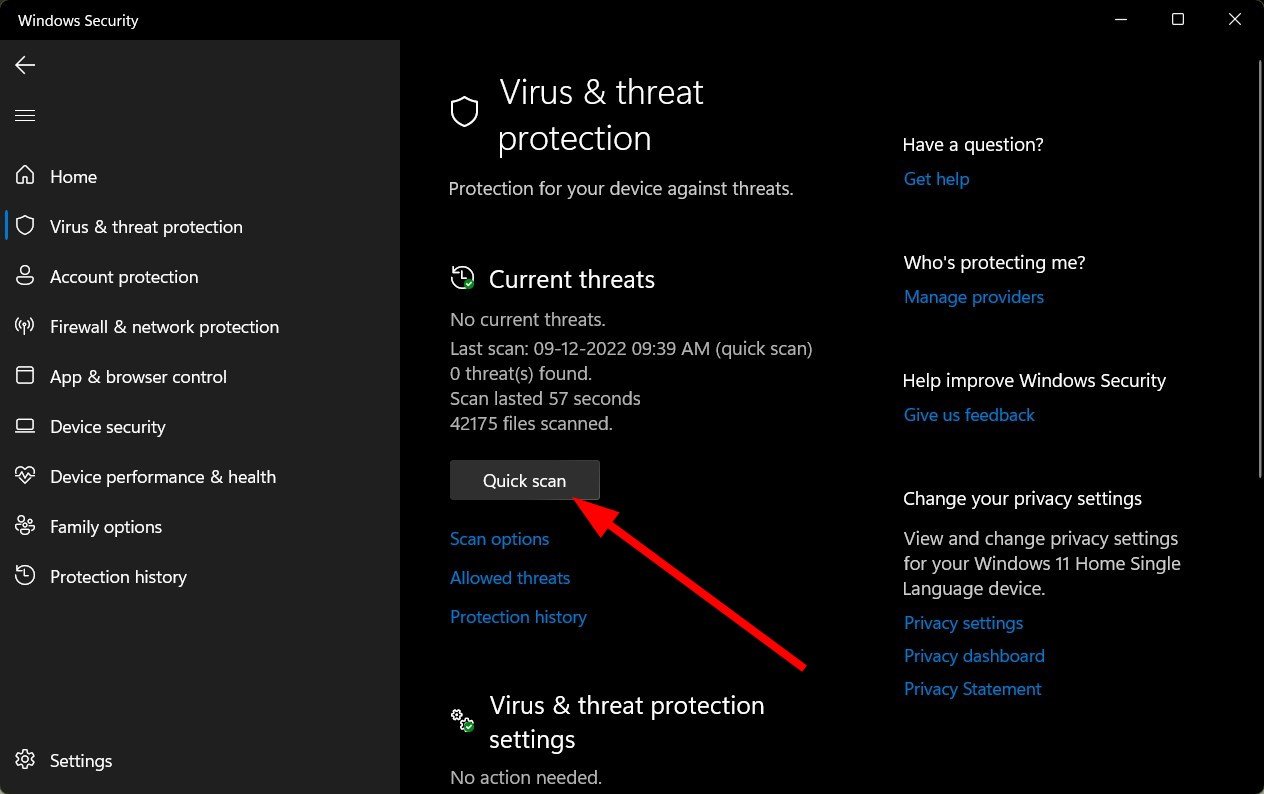
- Next, press Quick scan under Current threats.

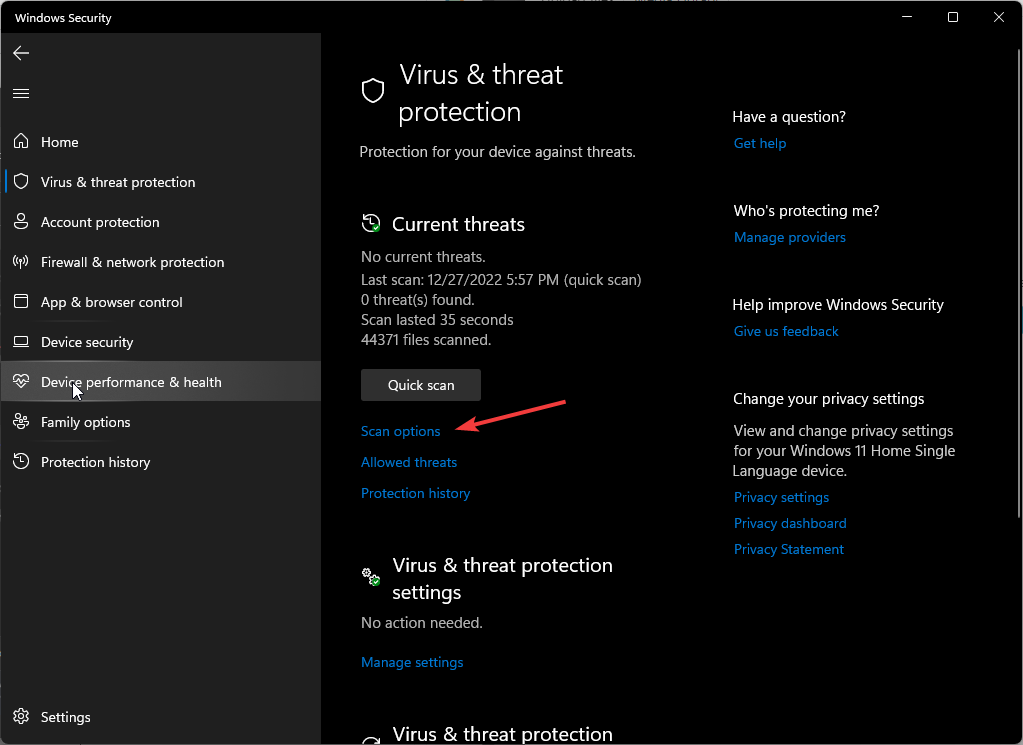
- If you don’t find any threats, proceed to perform a full scan by clicking on Scan options just below Quick scan.

- Click on Full scan, then Scan now to perform a deep scan of your PC.
- Wait for the process to finish and restart your system.
5. Create a new user profile
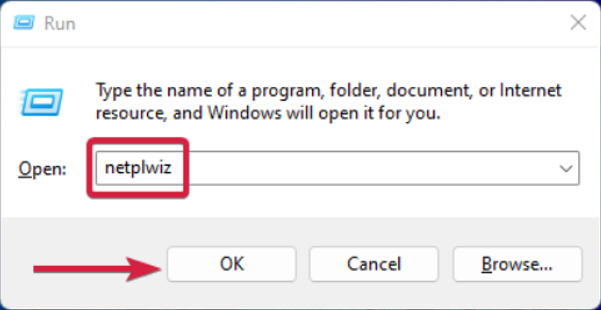
- Press Windows + R to launch the Run console, enter netplwiz in the text field, and click OK.

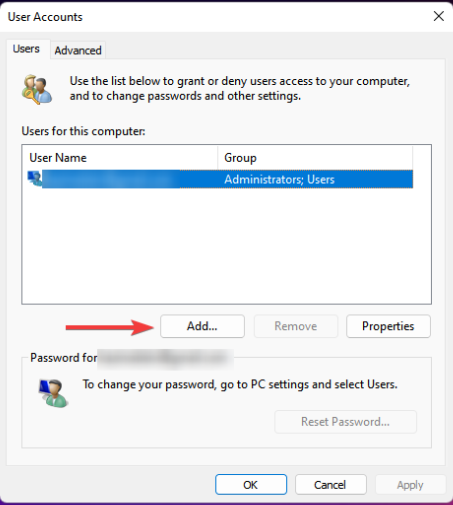
- Click Add in the User Accounts window.

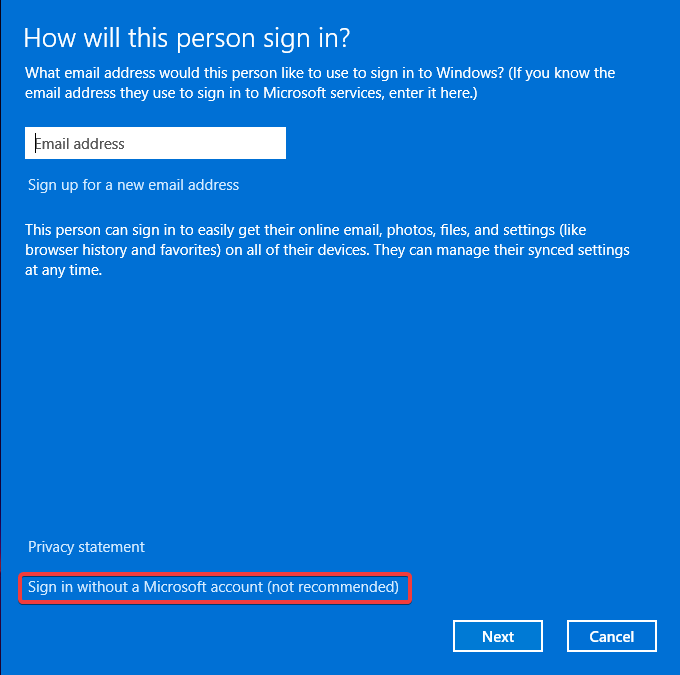
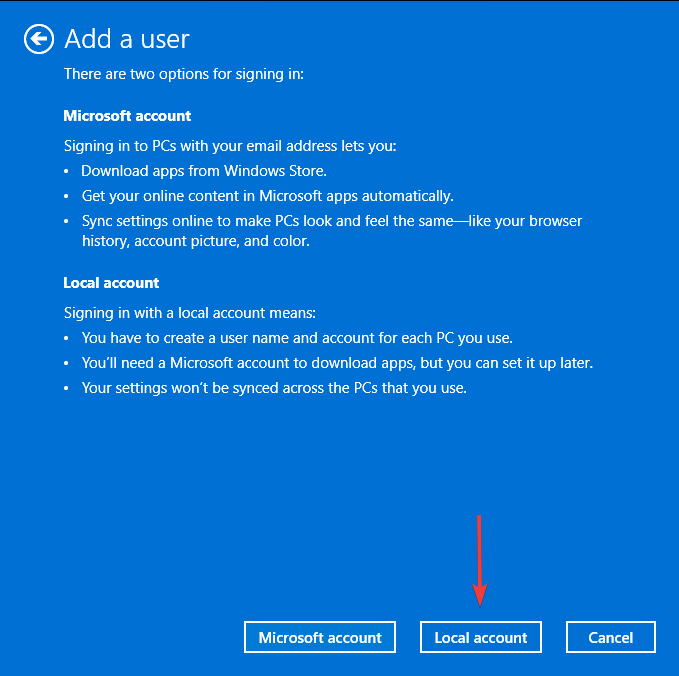
- Select Sign in without a Microsoft account (not recommended).

- Click on Local account button.

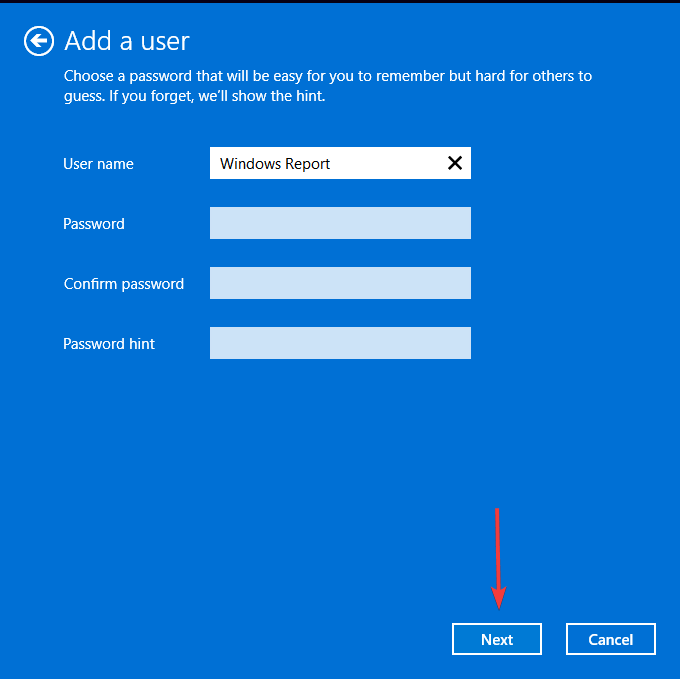
- Enter a username and password (optional) for the new user account, and a hint, in case you set a password. Once done, click on Next.

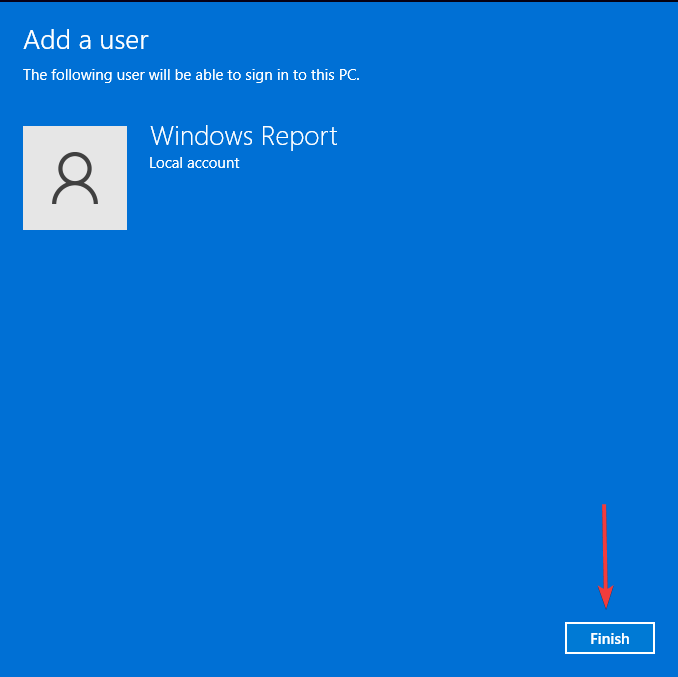
- Click on Finish to create the Local account.

Creating a new user profile will not fix the issue, but if programs disappeared in one profile but show up in the new one, you can conclude that you have a corrupt user profile and take steps to repair it.
Such issues can cause apps to act abnormally. You may be running the programs, but your Task Manager shows no instances of active apps.
How to uninstall programs not listed in the Control Panel on Windows 11
- Use the Settings app – Go to Apps > Apps & features, locate the app, right-click on the three ellipses, and then select Uninstall.
- Use the app’s uninstaller – Locate the program’s uninstaller. It’s usually in C:\Program Files or C:\Program Files(x86) and run it.
- Use the Registry Editor – Navigate to the following location, locate the UninstallsString entry, and double-click on it. Copy the Value data entry to a Run command, and hit Enter to uninstall the program.
HKEY_LOCAL_MACHINE\SOFTWARE\Microsoft\Windows\CurrentVersion\Uninstall\ProgramName - Use uninstaller software – This is one of the most comprehensive methods, as most uninstaller software also gets rid of corrupt remnant files.
We’d recommend you stick to the more straightforward uninstallation methods and only use the Registry Editor if absolutely necessary. This is because editing the registry manually can have dire consequences unless you create a restore point.
Hopefully, this article was able to help you get your list of programs back to your Control Panel as it should be. If you were having issues other than just the programs not showing, such as default apps missing, we have an answer in our detailed article.
Have you encountered this problem before? If so, which method helped you get your programs back? We’d love your feedback so drop us a comment down below.