How to create slicers in Power BI [EASY GUIDE]
![]() 2 min. read
2 min. read
![]() Updated on
Updated on
Share this article
Improve this guide
Read our disclosure page to find out how can you help Windows Report sustain the editorial team. Read more

Creating slicers in Power BI is one of the most used functions of this tool, but sometimes, people are encountering an issue with this feature, as one user described:
I wanted to make the slicers look as a button that can be pressed. I tried following previous advice on here but I couldn’t find a Settings>General>Orientation option.
So, the OP didn’t find the Orientation option, which definitely makes work harder. Fortunately, there are quite a few solutions available.
Steps to create slicers in Power BI
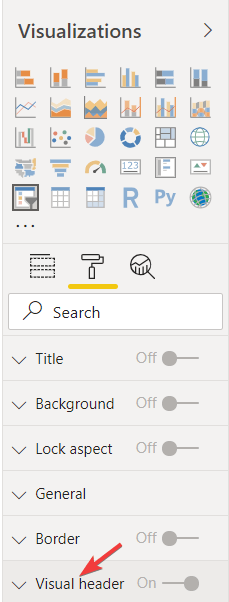
1. Enable the header
- Go to Visualizations
- Enable Visual Header

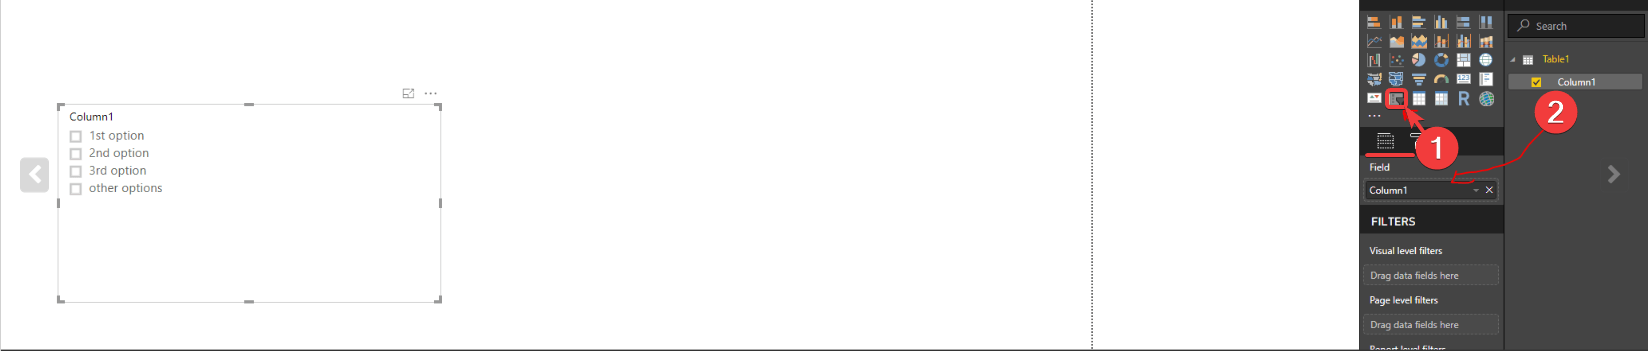
2. Change type
- Go to the upper-right area of the slicer.
- Change type as List.
This guide will help you become an expert in Power BI!
3. Select a slicer visual
- Select the slicer visual.
- Move the column that you have the names to filter.

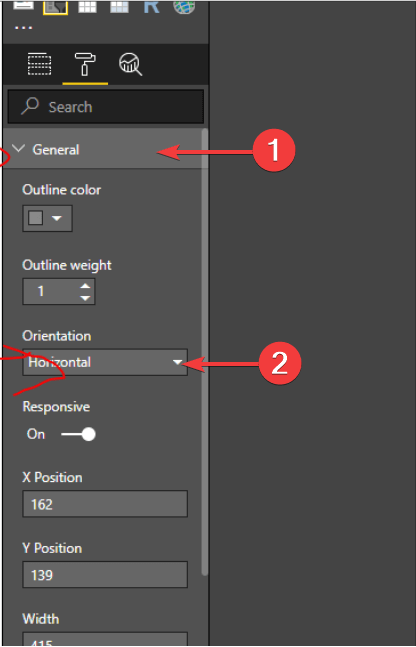
- Edit the properties of the slicer in General and change Orientation from vertical to horizontal.

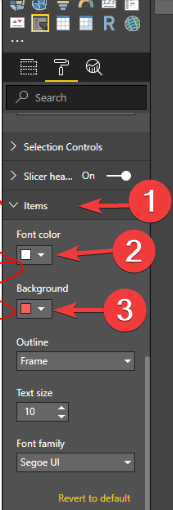
- Go to Items and change the font and background of the bottoms.

- Modify the size of the slicer visual.
Conclusion
So, there are many ways to create slicers in Power BI, and each method is designed for the needs of each user. Also, these are easy steps that any beginner can understand.
Did you find these methods useful? How do you create slicers in Power BI? Let us know in the comments section below!
RELATED ARTICLES YOU NEED TO CHECK OUT:


User forum
0 messages