How to open .cue files in Windows 10
4 min. read
Updated on
Read our disclosure page to find out how can you help Windows Report sustain the editorial team. Read more
Key notes
- A cue file is a disc image format that stores all the information and contents of a CD or DVD.
- This guide will show you how to play video from a .cue file or how to open and see the actual contents from the .cue image.
- We think you should check out the Tech Buying Guides for recommendations on multimedia products and more.
- Visit the File Opener section to find the proper software solution for your specific file type.

A cue file is a disc image format that stores all the information and contents of a CD or DVD as a file image. It is a metadata file that describes how the tracks of a CD or DVD are organized. Since most modern-day laptops lack CD and DVD drives, disc images have become very useful.
If your computer doesn’t have a disc drive, you don’t have to cut yourself from performing certain functions or listening to your old Audio CDS.
Just create ISO files or other types of disc images and mounting then will let you access the virtual discs just as you would access the physical discs inserted in your computer.
These disc files contain a complete representation of a disc. But how do you open these files? Before we get to that, let us first touch on the most common file formats for disk images.
Common file formats for disk images
- ISO – The term ISO is an abbreviation for “ISO-9660 file system image”, and is currently the most common disc image file format. It is good for data files and video content. However, it is not the best for Audio CDs.
- BIN & CUE – These are disk images split into different files. The formats were developed to fix the Audio CDs archiving problem with ISO. BIN is a binary file that contains the actual data burned to discs while .cue is a metadata file that describes how CD tracks are set up.
- IMG file – The .img file is a sector-by-sector binary copy of the source optical disk or hard drive. It relates to binary files that contain raw information. These files store all the track information as well as error correction information and control headers.
- MDS – MDS is commonly used for storing copy-protected DVDs. BIN/CUE and ISOs do not have the feature to store copy-protected information within the image file.
The modern versions of Windows, i.e. Windows 10, Windows 8.1, and Windows 8 have the built-in ability to mount both ISO and .IMG image files without the need for third-party software. However, Windows doesn’t have inbuilt support for other file formats such as BIN/CUE, MDS, CCD, and others. You will need third-party applications such as Roxio Toast to open BIN/CUE files.
How to mount an ISO image file in Windows 10
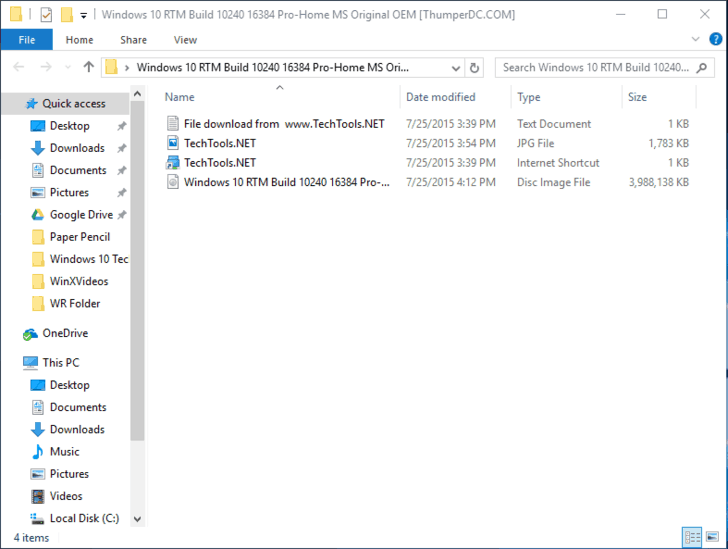
If the disk image is in the ISO file format, you won’t need to install a third-party application. Simply follow the steps below to mount it.
Step 1: Double-click the ISO file to mount it. Ensure that the ISO file is not associated with any program in your system.
NB: If the ISO file is associated with any program in your system, mounting will not work.
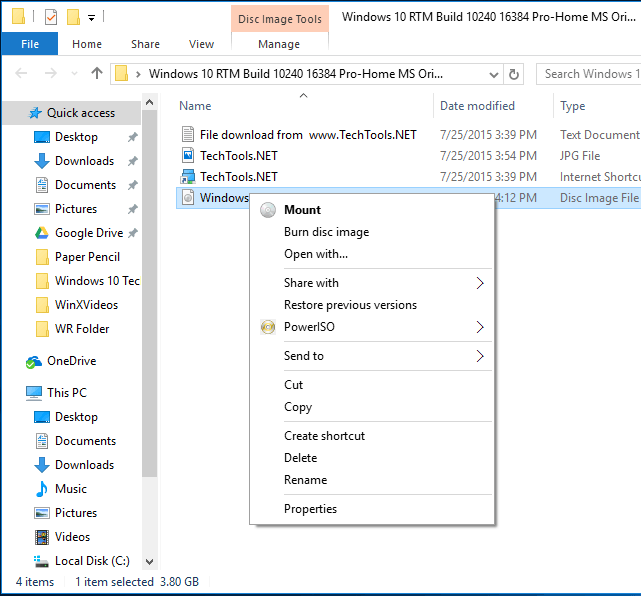
Step 2: Right-click the ISO file and select the ‘mount’ option. Once you have mounted the disk file, it will appear as a new drive under ‘this PC’
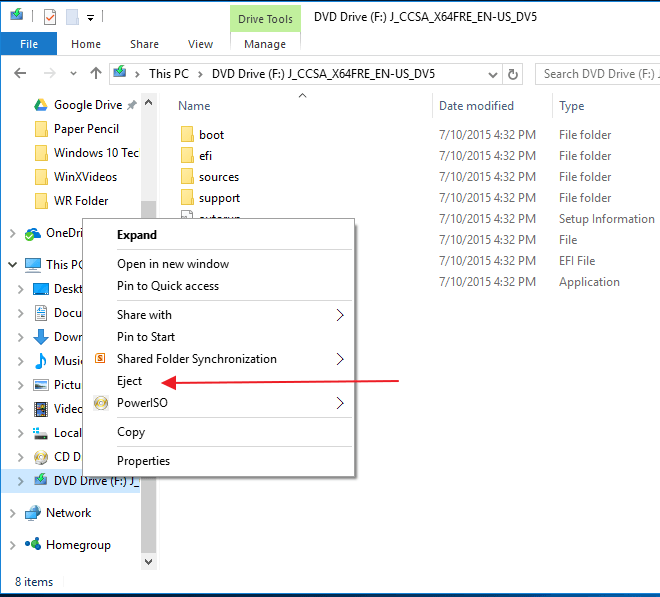
Step 3: To unmount the disk file, right-click the drive and select ‘Eject’.
If you are using Windows 7, Vista, or any other older version of Windows, then you will need to install a third-party application to mount.
If you require a specialized program but you don’t know where to find it, we recommend the most popular file image mounting software namely PowerISO
How to open BIN / CUE files with PowerISO
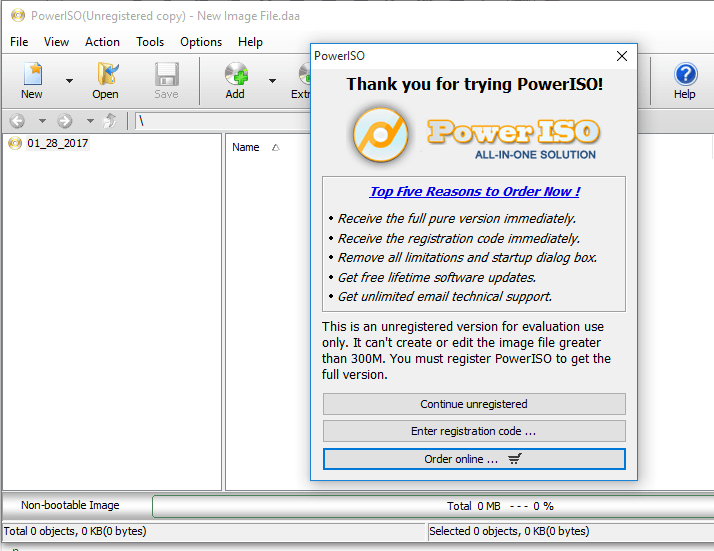
Step 1: Download and install the PowerISO application. Once installed, click to launch the application.
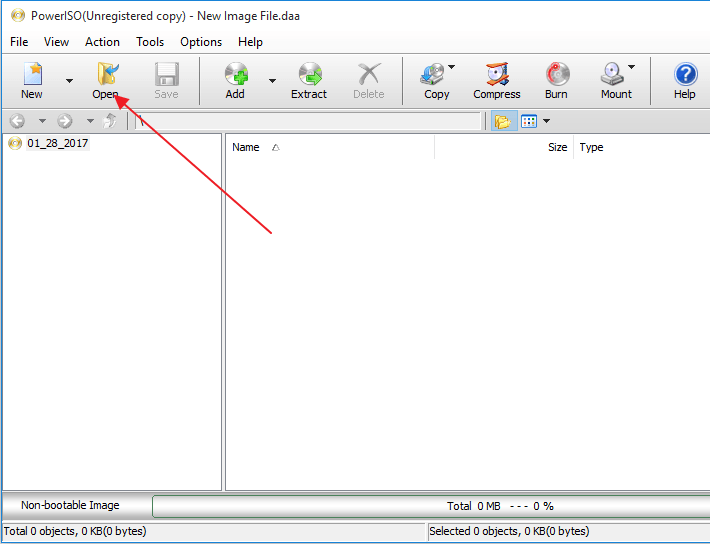
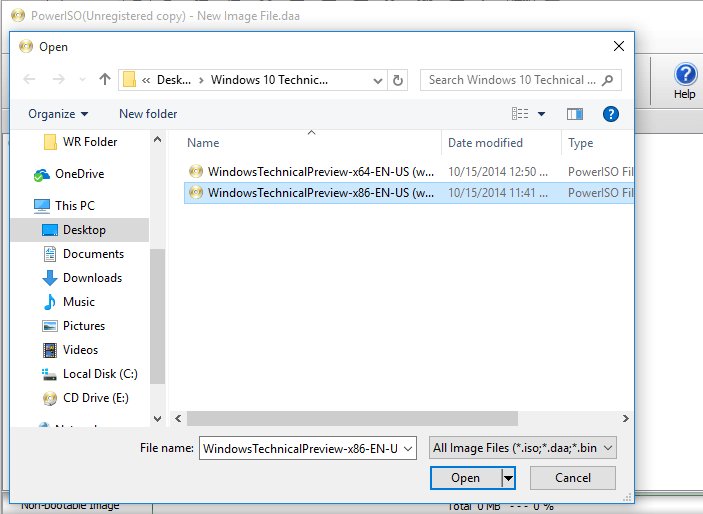
Step 2: Click the File button in the tools bar and choose open. Select the BIN or CUE file you want to open. The program will automatically list the CUE files for you.
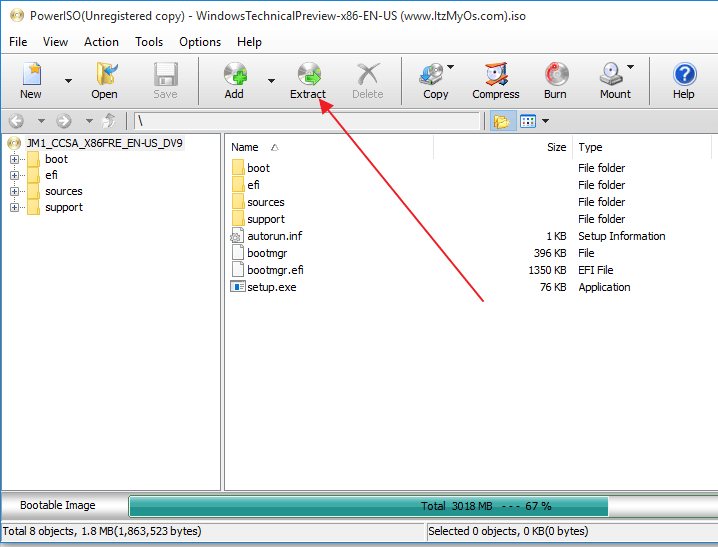
Step 3: Click open. PowerISO will automatically list all the files within them.
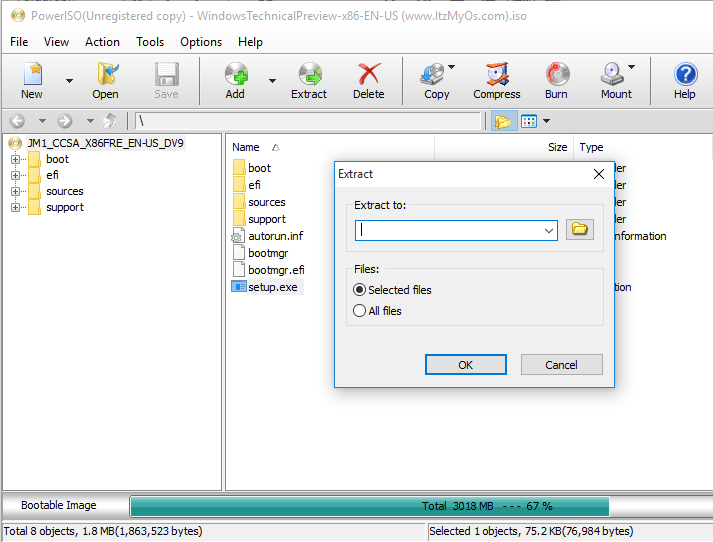
Step 4: To extract the BIN file, locate and click on the ‘Extract’ button on the tools bar. This will open an extract dialogue box.
Step 5: Choose the destination directory for extraction.
Step 6: Select ‘All files’ if you want to extract them all and click okay to start the extraction process.
Was the information helpful? Feel free to comment and share.
[wl_navigator]



User forum
0 messages