Edit Group Policy in Windows 10: Everything You Need to Know
Admin users can modify the Group Policy on a device
2 min. read
Updated on
Read our disclosure page to find out how can you help Windows Report sustain the editorial team. Read more
Key notes
- Group Policies are an excellent method through which Network Administrators can manage and modify the system settings on all PCs connected to the network simultaneously.
- Editing a Group Policy isn't all that simple, and that is why we will cover the steps you will need to go through in the article below.
- You can use two built-in tools to edit it: Local Security Policy and Local Group Policy Editor.

You may need to edit Group Policy in Windows 10. So, in this guide, we will explore the best options to go about this.
What is group policy in Windows 10? Group Policy is a feature of MS Windows operating systems that allows administrators to centrally manage and configure settings for users and computers within an Active Directory environment.
In addition, it provides a way for administrators to define and enforce policies and settings for groups of users or computers.
In Windows 10, Group Policy manages various settings, including security, network, application, and many other system settings. For example, with Group Policy, administrators can configure password policies, user rights and permissions, software installation and updates, and more.
Group Policy settings are in Group Policy Objects (GPOs) and apply to users or computers based on their membership in Active Directory groups.
You may apply them at the local, domain, or organizational unit (OU) levels, allowing administrators to target specific groups of users or computers with different policies. The utility is a powerful tool for managing and configuring Windows 10 environments consistently and efficiently.
How can I edit the Group Policy in Windows 10?
1. Use Local Security Policy
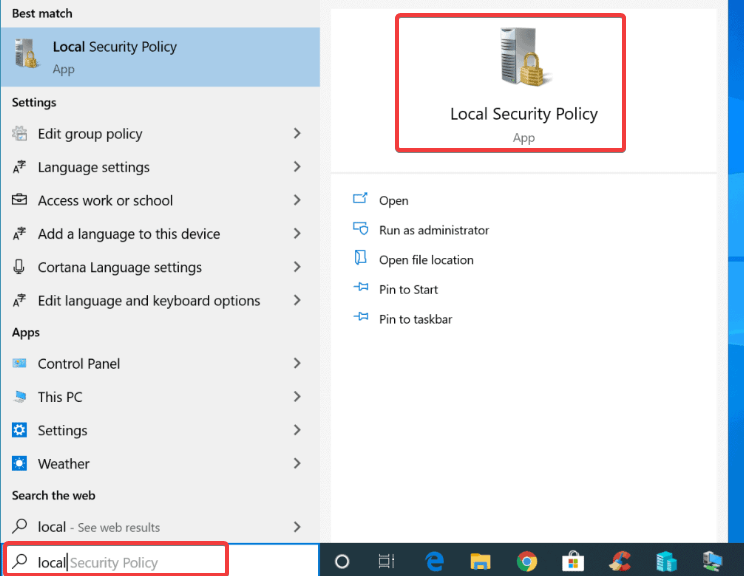
1. Press the Windows key on your keyboard. This will open the search box.
2. Type secpol.msc or Local in the search box.
3. Now left click on the Local Security Policy result to open the app.
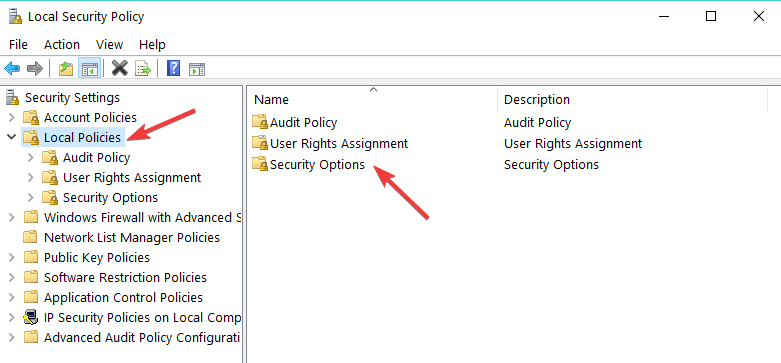
4. In the Security settings folder you will find Local Policies. Double click on it.
5. Select one of the categories you wish to edit by double-clicking on it. For example, you can edit Security options.
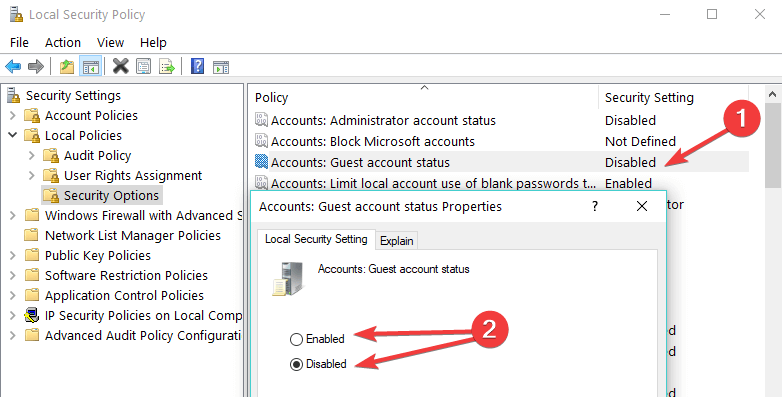
6. On the right side of the window you will have there two tabs: Policy and Security settings.
7. In order to disable or enable the group policies, you just need to double click in the box next to the policy under the Security setting tab and select from there the option you want.
For example you can choose Disable or Enable.
Normally, the use of the Group Policy could be accessed via the Gpedit option but in Windows 10 Enterprise and Windows 10 Pro we have something similar to this option, called Local Security Policy, or Secpol.
This tool controls the security of the local Group Policy. Therefore, you can edit the Group Policy through Secpol.
In the basic edition, you can edit the Group Policy via Gpedit.msc by following the steps above and replacing secpol.msc with Gpedit.msc.
Also, note that in the basic edition of Windows, you do not have the Secpol tool.
2. Use Group Policy Editor
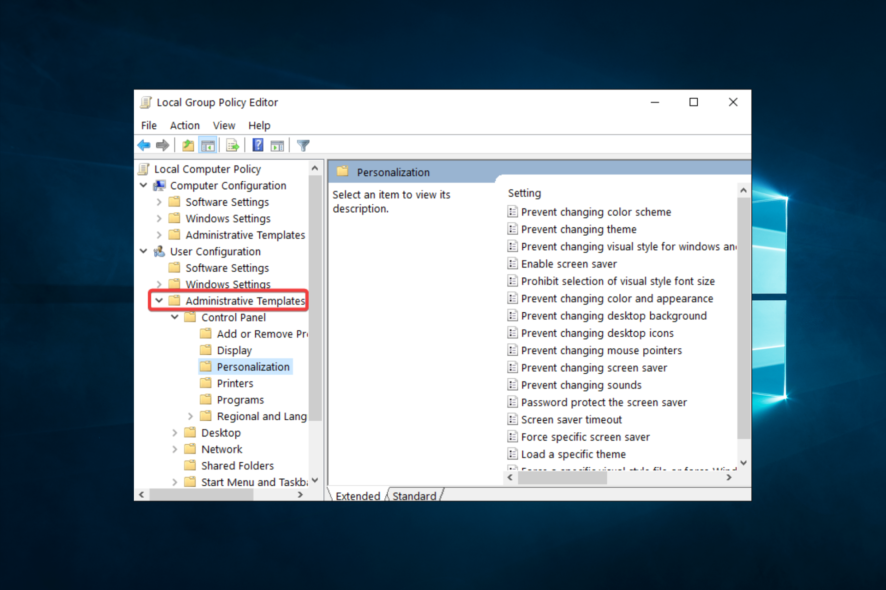
- To limit other users’ access to particular Windows components, go to Administrative Templates under the User Configuration section.
- Select the feature you want to edit, and enable or disable access to the respective feature.
There you have a few short steps to edit the group policies in Windows 10.
You will succeed using any of the methods covered in this guide. However, note that you will not have access to Group Policy on the Home edition of the OS.
Lastly, if you have anything to add to this article or if you find it useful, let us know below.


User forum
1 messages