How to Enable the New Windows 11 Start Menu
Windows 11 KB5067036 introduces a redesigned Start menu with layout and visual improvements. If it’s hidden, you can enable it manually using ViVeTool. Follow the steps below to unlock the new Start experience.
You can also read more about the Windows 11 Start menu redesign in KB5067036 for a detailed look at the visual changes.
Table of contents
How to Enable the New Start Menu in Windows 11?
1. Install the Required Windows Update
Before using ViVeTool, make sure you’ve installed the correct Windows 11 build.
- Go to Settings > Windows Update.
- Click Check for updates.

- Download and install KB5067036 or any newer cumulative update.
- Make sure your build number is 26200.7019 or 26100.7019+.
- Verify this from Settings > System > About > Windows specifications.
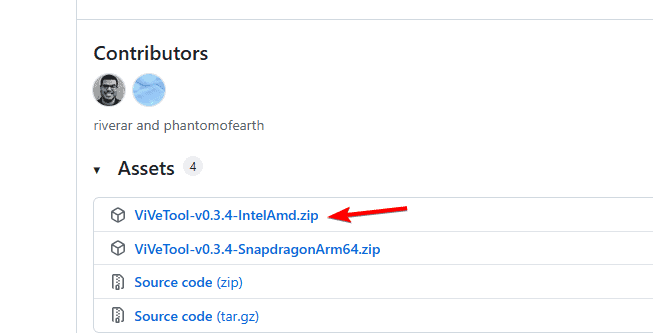
2. Download ViVeTool
Next, download the ViVeTool package needed to enable hidden Windows features.
- Visit GitHub and download the latest ViVeTool ZIP package for Windows 11.
- Right-click the ZIP file and select Extract All.
- Save the extracted folder somewhere easy to find, such as the Desktop.
3. Open Command Prompt as Administrator
You’ll need administrative rights to run ViVeTool successfully.
- Press Windows + S, type cmd, and select Run as administrator.

- In File Explorer, open the folder containing ViVeTool.
- Copy the folder path from the address bar.
- In Command Prompt, type cd path_location and press Enter (replace path_location with the folder path).
4. Enable the New Start Menu
Now, use the ViVeTool command to activate the hidden Start menu.
- Type the following command and press Enter:
vivetool /enable /id:47205210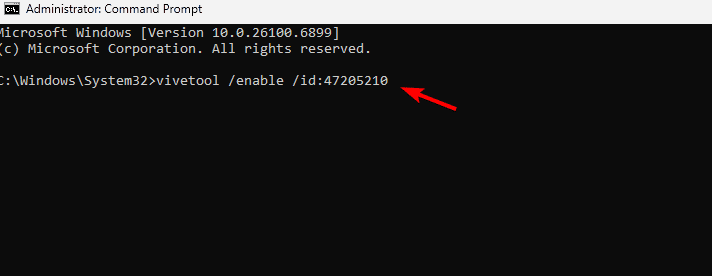
- Wait for the confirmation message in Command Prompt.
- Restart your computer.
Vive ID Source: Windows Latest
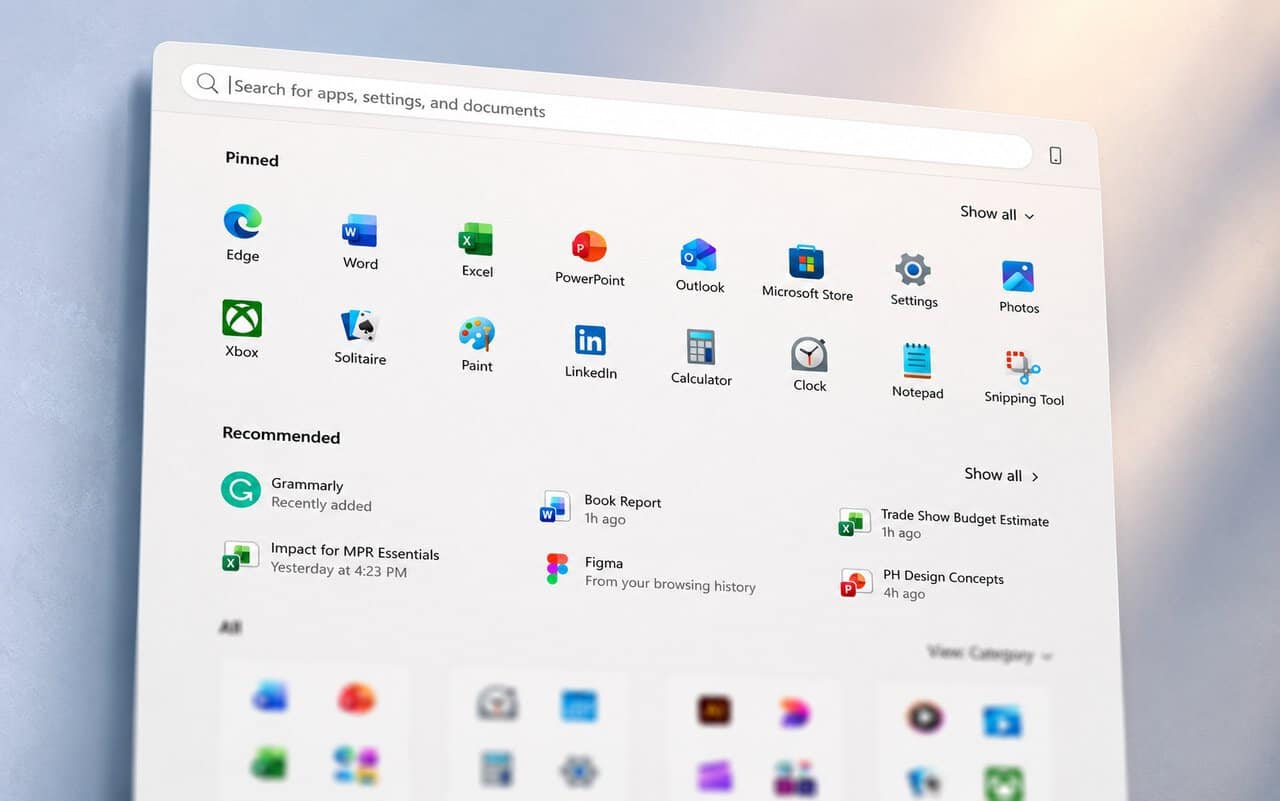
After reboot, you’ll see the new Windows 11 Start menu activated.
If you want to customize its layout afterward, check out this detailed guide on Windows 11 Start menu customization for additional tips.
5. (Optional) Restore the Default Start Menu
If you prefer the older Start layout, you can easily switch back.
- Open Command Prompt as admin.
- Type the following command and press Enter:
vivetool /reset /id:47205210 - Restart Windows.
Why Use the New Start Menu?
The updated Start menu provides smoother animations, improved search integration, and better grouping for pinned apps. It’s part of Microsoft’s continued effort to modernize Windows 11’s interface.
FAQs
Yes. It’s an official cumulative update released by Microsoft for Windows Insider and stable channels.
No. Once applied, the feature remains active until you manually reset it or install a major version change.
If the new layout doesn’t appear, double-check that your Windows build is 26100.7019 or newer. If needed, re-run the ViVeTool command and restart again.
Conclusion
Enabling the new Start menu in Windows 11 only takes a few minutes. Once you install KB5067036 and activate the feature with ViVeTool, you’ll enjoy Microsoft’s latest design improvements.
If you ever want a nostalgic feel, you can follow this tutorial on making the Windows 10 taskbar and Start menu look like Windows 7 to personalize your setup even further.
Read our disclosure page to find out how can you help Windows Report sustain the editorial team. Read more


Improve this guide


User forum
0 messages