How to Resolve Firewall Blocking Printer on Windows 11
4 min. read
Updated on
Read our disclosure page to find out how can you help Windows Report sustain the editorial team. Read more
Key notes
- If the Windows 11 firewall is blocking your printer, you might have to adjust your settings.
- Installing the latest drivers can also help you ensure maximum compatibility with your system.
- Opening certain ports on your PC is one of the best ways to fix this problem.
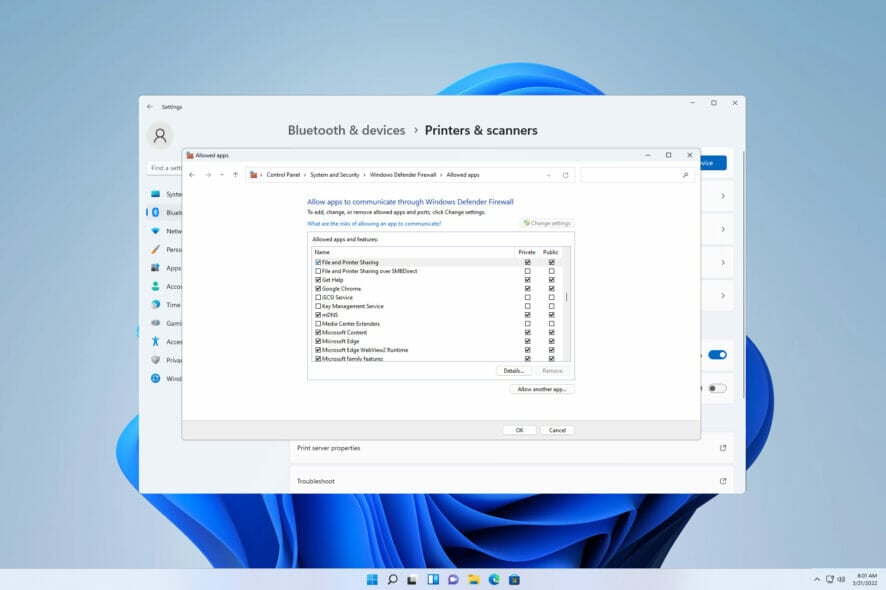
Firewalls monitor network traffic and can block network connections for some programs and hardware.
Windows 11 includes its own Windows Defender Firewall that might block printers from accessing the Web.
Thus, the affected users can’t utilize their Brother printers when firewalls block them. Keep in mind that this issue affects other brands as well, but today we’re going to show you how to fix that.
Why is my Brother printer blocked by the firewall?
There are multiple reasons for this issue, and it’s rather likely that you need to open certain ports before your printer can access the web.
The printer software can also cause problems, so be sure to update it as well as your printer drivers. Keep on reading to find out how to do that.
What can I do if the Windows 11 firewall is blocking my printer?
1. Turn Off the Windows Firewall
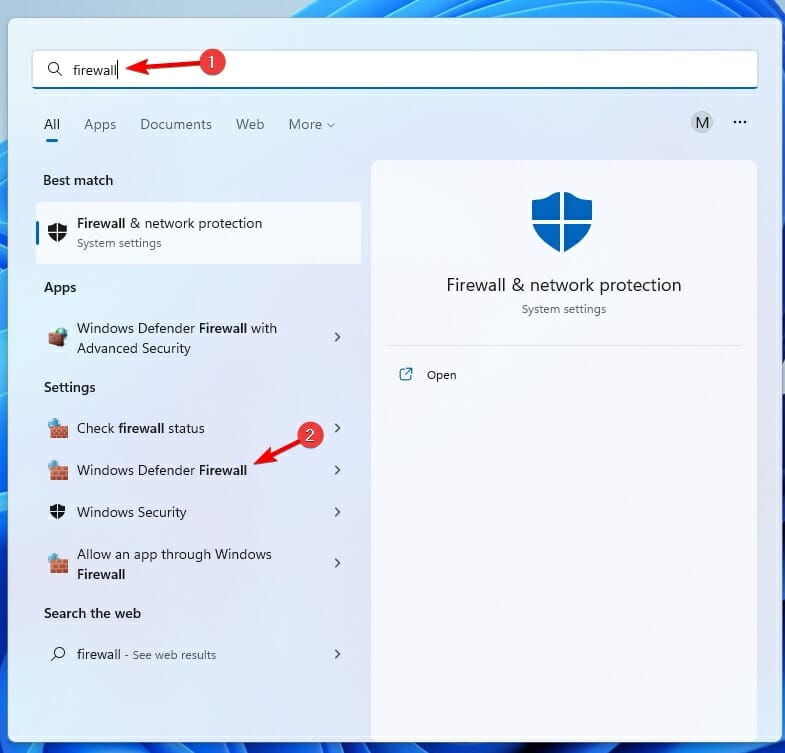
- Open Windows Search.
- Type firewall and select Windows Defender Firewall.
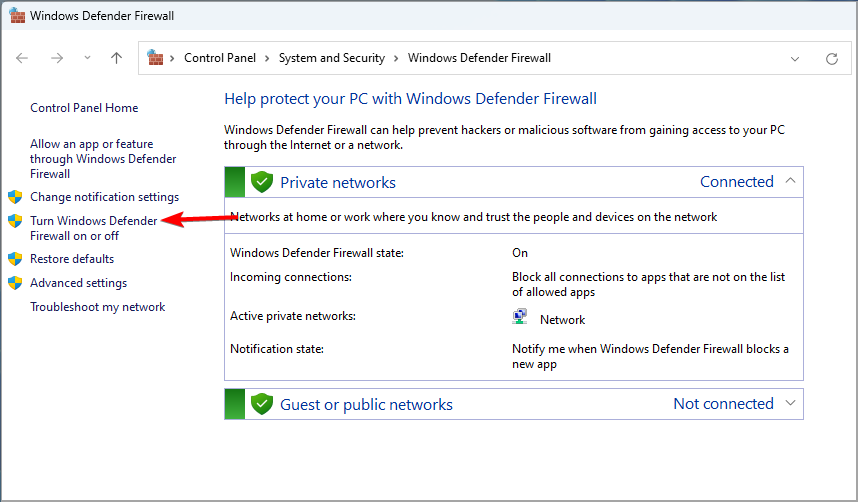
- Click Turn Windows Defender Firewall on or off to open the options shown directly below.
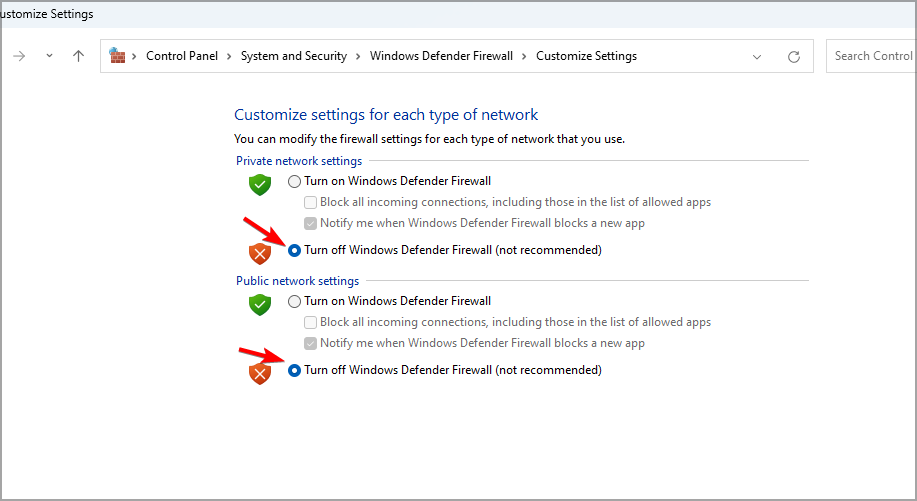
- Then select the two Turn off Windows Defender Firewall radio buttons to turn off the WDF.
- Press the OK button.
2. Set Up Inbound Rules for printer ports
- Open Windows Search.
- Type firewall and select Windows Defender Firewall with Advanced Securirty.
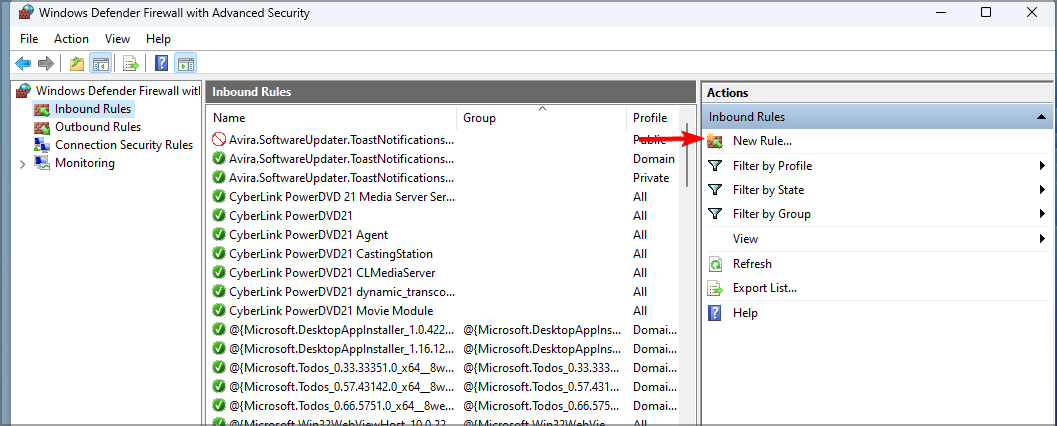
- Next, click Inbound Rules on the window shown directly below.
- Select New Rule on the right to open the New Inbound Rule Wizard.
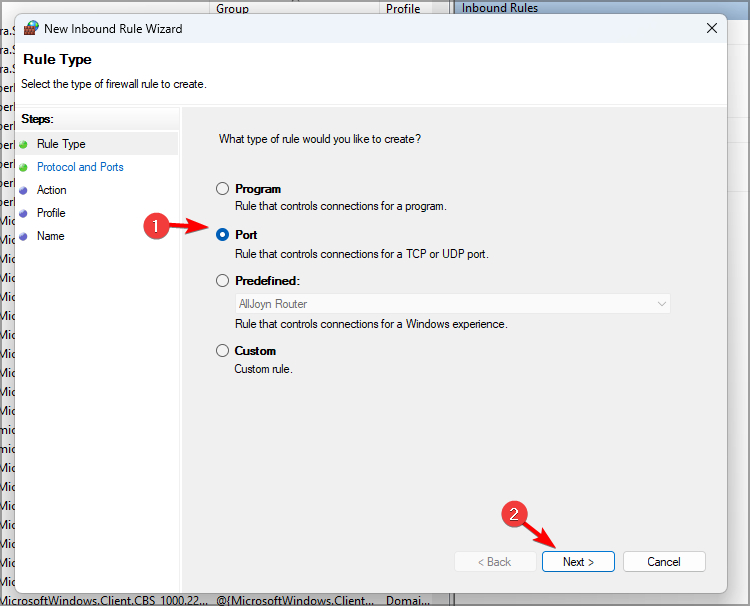
- Select the Port option, and click the Next button.
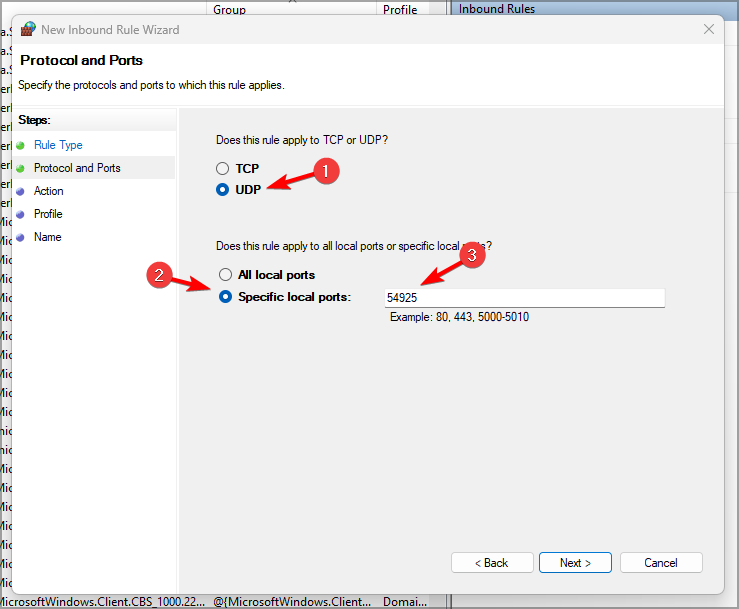
- Select the UDP and Specific local ports. Enter 54925 as the desired port.
- Press the Next button.
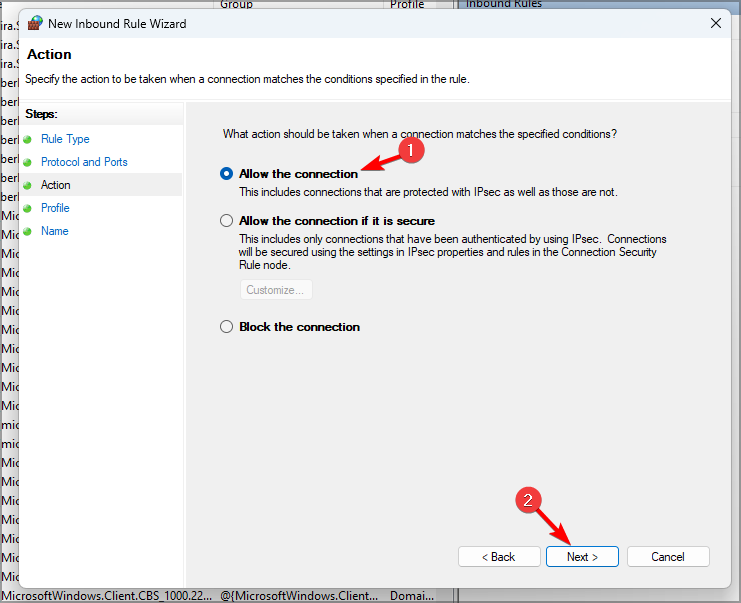
- Select the Allow the connection option, and click the Next button.
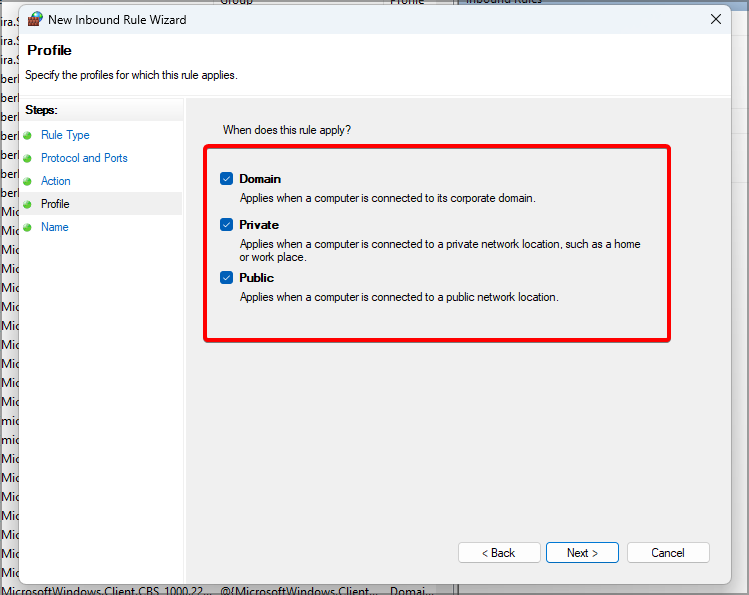
- Select all the profile check boxes, and click the Next button.
- The enter a title for the new rule. Users can also add some extra rule details in the other text box.
- Press the Finish button.
- Repeat the above steps to set up two more inbound rules for Brother port numbers 137 (for printing and remote setup) and 54926 (network PC fax).
 NOTE
NOTE
3. Install the latest printer software and drivers
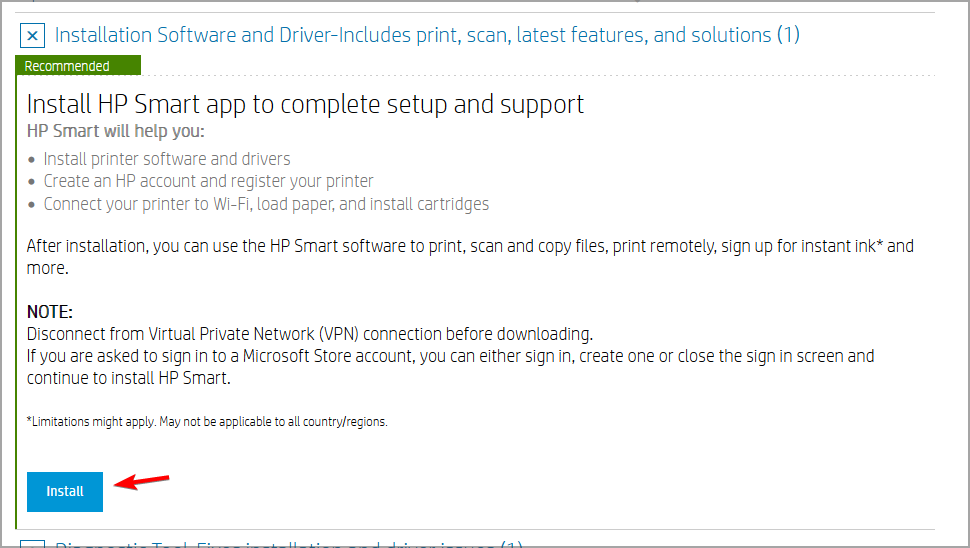
- Visit your printer’s manufactuer’s website.
- Locate your model on the website.
- Now download the latest drivers.
- Once the drivers are downloaded, install them.
Downloading drivers manually can be a tedious process, especially if you don’t know the printer model or how to download the latest drivers.
Luckily, there are tools such as Outbyte Driver Updater that can help you with that. This software will scan your system for any outdated or missing drivers and let you update them with a single click.
By using this software, you can rest assured that all your devices will function properly and always be up to date.
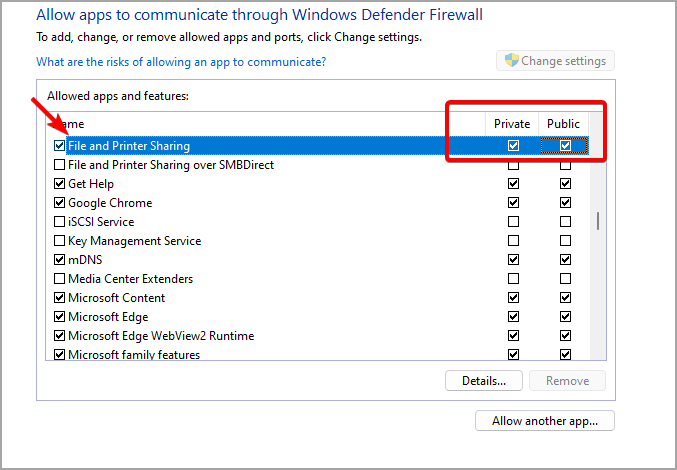
4. Check the File and Printer Sharing Firewall Permission Setting
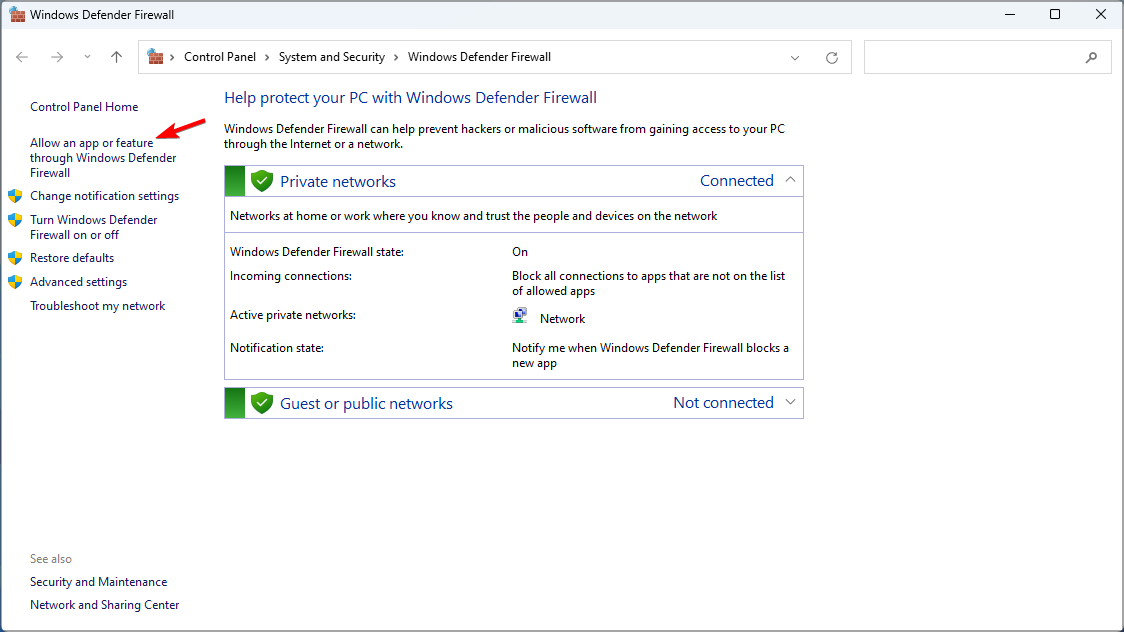
- Open Windows Firewall.
- Click Allow an app or feature through Windows Defender Firewall.
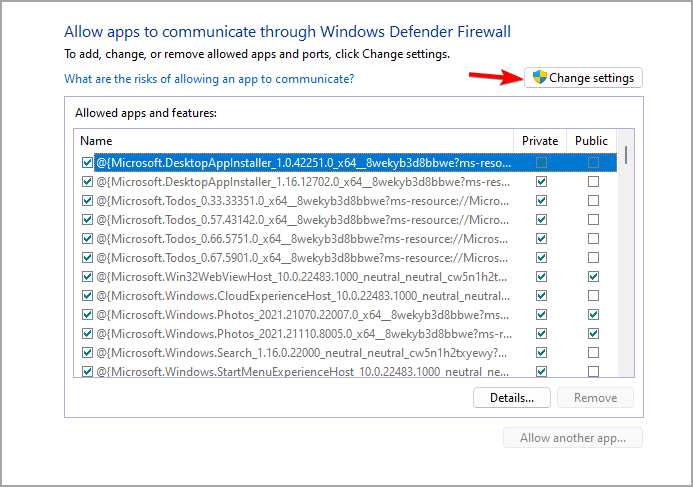
- Press the Change settings button.
- Select all the check boxes for the File and Printer Sharing setting.
- Select the OK option.
How can I allow printer through Firewall on Windows 11?
To allow the printer through the firewall, it’s crucial to know the ports that your printer is using. You can find this information in your printer manual.
After doing that, you just need to create a custom rule in your firewall, and allow those ports to access the web.
If Windows 11 firewall is blocking your printer, you should be able to fix this issue by following the instructions mentioned in this guide.
There are other issues that you can experience with your printer, and to fix this issue, visit our printer not working on Windows 11 guide.
Did you manage to fix this problem on your PC? Let us know which solution worked for you in the comments section below.






User forum
5 messages