Windows 10/11 Ubuntu Dual Boot Not Working [Quick Solutions]
Give a try to these quick solutions now

Depending on their requirements and needs, many people use a dual boot setup on their PCs. Some use Ubuntu and Windows 10 because both have pros and cons.
Ubuntu, like many other non-Windows operating systems, does support dual booting. Windows 10, on the other hand, usually ships with settings that are not optimal for dual boot setups.
GRUB (the acronym for GRand Unified Bootloader) is the bootloader that Ubuntu uses to manage the operating systems installed on your computer.
The software looks at the operating systems installed on your PC and allows you to choose which one to start after switching on the machine.
Most of the problems are related to GRUB, so if you cannot boot into Grub and the system boots directly to Windows repeatedly, you will find some solutions below.
You can use this guide to fix the following Windows 10-Ubuntu issues:
- Dual boot option is not showing in Windows 10
- GRUB menu not showing in Ubuntu
- Ubuntu won’t dual boot with Windows 10
What can I do if there is no GRUB on Windows 10 Ubuntu dual boot?
1. Repair from Windows – Command Prompt
The simplest way to solve this issue is using the Command Prompt from Windows. In order to do this, please use the steps described below:
- In Windows, go to menu and search for Command prompt
- Right click on Command Prompt and choose the option Run as administrator
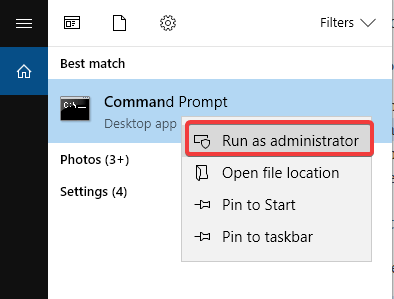
- Copy and paste the command bcdedit /set {bootmgr} path EFIubuntugrubx64.efi

- Restart your computer
If you’re having trouble accessing Command Prompt as an admin, then you better take a closer look at this guide.
2. Disable Fast Boot
You can also try deactivating fast boot function of Windows 10 to access the GRUB menu. To do so, please follow the steps below:
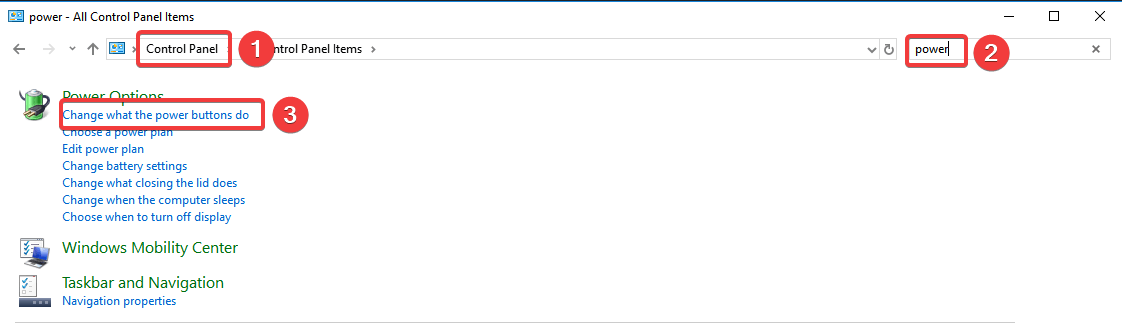
- Access Control Panel
- Search for the term power in the search bar at the top right
- Click on Change what the power buttons do
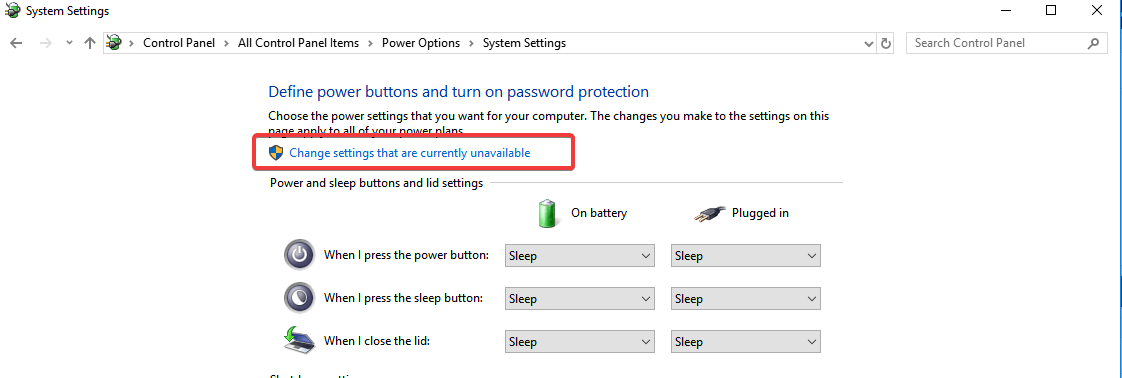
- Click on the Change settings currently unavailable
- Uncheck the item Turn on fast start up (recommended)
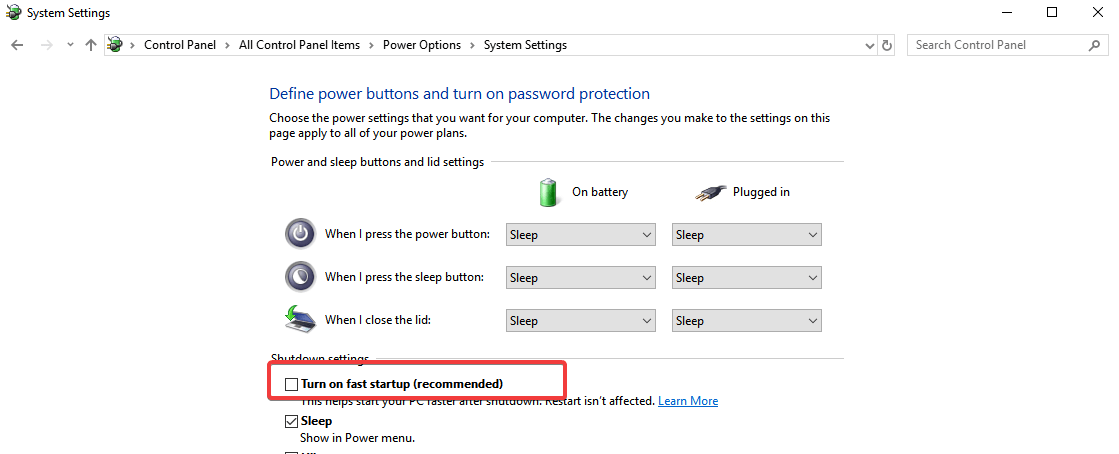
- Press Save Changes to save the settings
You can’t open Control Panel? Take a look at this step-by-step guide to find a solution.
3. Use the Boot Repair Tool
The Boot Repair Tool is a small software that can solve most of the boot-related problems. In order to install it and use it:
- Boot into your operating system
- Enter the following commands:
sudo add-apt-repository -y ppa:yannubuntu/boot-repair
sudo apt-get update
sudo apt-get install -y boot-repair && boot-repair - After the installation is complete, you can launch Boot Repair tool from the apps menu
- It will do some scanning so let it finish its job
- Then a screen will appear which will be saying recommended repair based on the scan
- After choosing recommended updates, it will start the repair
- Open the terminal and copy and paste the highlighted command in terminal one by one.
- Select yes by using arrow keys or tab buttons and hit enter to select
- in Boot Repair Tool screen hit forward
- Copy the command mentioned there and paste it into terminal and hit enter and let it do the job
- If prompted some options to configure where to install GRUB Choose yes and then hit enter
- Use spacebar to select an option and TAB to navigate through options
- After you finish installing GRUB, you can close Terminal
- Select the forward option in Boot Repair Tool screen
- Select Yes for every option regarding confirmation
- A successful confirmation message will appear on the screen
- Restart your computer
4. Windows and Ubuntu are installed in different modes
It is impossible to dual boot two operating systems if installed in different modes – one in UEFI mode and the other in BIOS Legacy mode.
Therefore, to solve the problem and restore the dual boot, you have to convert the installation of Ubuntu to the same mode in which Windows is installed.
In order to solve this, you can use the Boot Repair Utility and you will need a live bootable DVD of your installed operating system. Afterwards, you can follow one of the steps below, depending on your situation.
- To convert Ubuntu to UEFI mode you need to start Boot Repair and activate the panel with the Advanced options, then select the GRUB Position tab, put the check on separate Partition/boot/efi and click Apply.
- To convert Ubuntu to BIOS Legacy mode, start Boot Repair and activate the panel with Advanced Options, then select the GRUB Position tab, uncheck the separate Partition/boot/efi item, and click Apply.
Afterwards, enter into the UEFI firmware configuration panel and choose whether to start the computer in UEFI or Legacy mode.
Most users don’t know how to enable Legacy Boot on Windows. Check out this guide and be a step ahead. If you’re having UEFI boot problems on Windows, this article should help you solve them quickly.
We hope one of the solutions described above helped you solve the dual booting problems, and now you are welcomed by the familiar Grub screen.
Now with Windows 11 Insider Preview Build 26052, you can use Sudo command in Windows 11, check out this guide to learn how to do that.
This issue can be associated with Grub rescue message on Windows 10, so don’t miss it.
If you have any more questions, feel free to post them in the comments section below.
Read our disclosure page to find out how can you help Windows Report sustain the editorial team. Read more


Improve this guide


User forum
4 messages