Freevee Error Code ITV-101: How to Fix it
Switching to a paid VPN could be the breakthrough you need
Key notes
- To address common streaming errors like the Freevee error code ITV-101, always ensure your TV firmware is up-to-date.
- We found that your location could also be a sell-out to the connection issue so try updating your region or using a reliable VPN.
- Stay tuned as we uncover more causes of this error and its subsequent solutions.

The error code ITV-101 with the message Failed to load Watch may appear on your Freevee app when you attempt to stream content. Like many such errors, it can be an internet-related or service-provider issue.
Whatever the case, the resolution is fairly easy, and you should be able to get back to enjoying premium content on your TV once again.
What is Error Code ITV-101 on Freevee?
This error code can occur on your TV, Roku device, or Firestick when you attempt to stream content on the Freevee application. Usually, it can be caused by geographical restrictions that prevent you from accessing content.
How do I fix Error code ITV-101 on Freevee?
Begin by checking off the following prerequisites:
- Ensure that you are using the latest version of the Freevee app and your country is set correctly.
- Test your Internet connection and ensure its speeds are at optimal levels, and power cycle your modem if necessary.
- Check all physical ports for loose connections, obstructions, or damage to cables/connectors.
- If you are using Freevee with a Wi-Fi connection, switch to an Ethernet cable for better and stable connectivity.
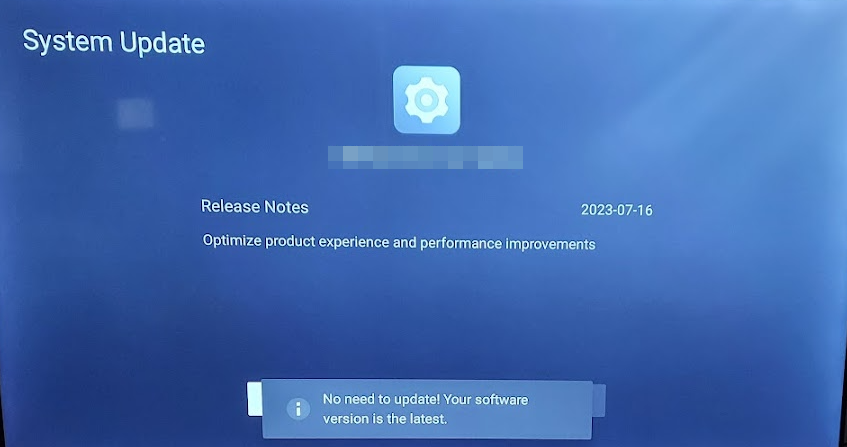
1. Update your TV firmware
- For this solution, we shall be using the TCL model.
- On your TV, find your Settings.
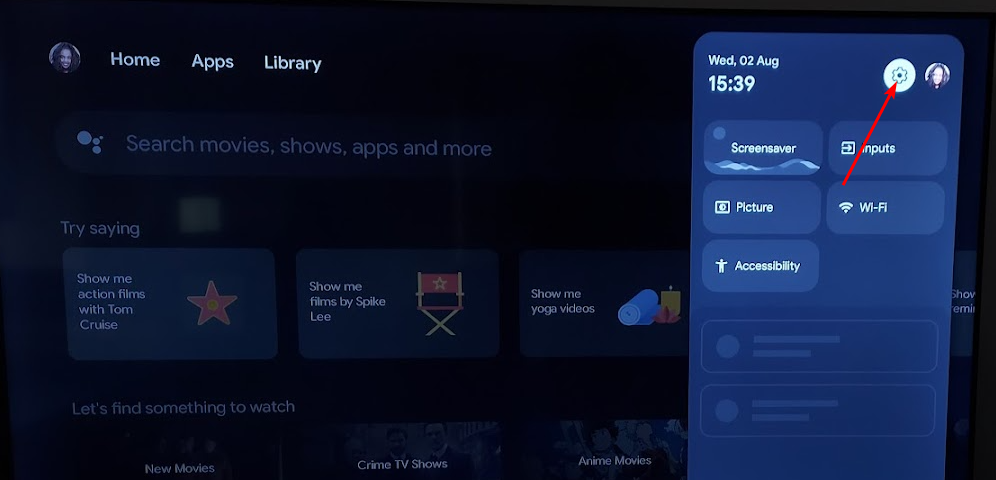
- Go to System.
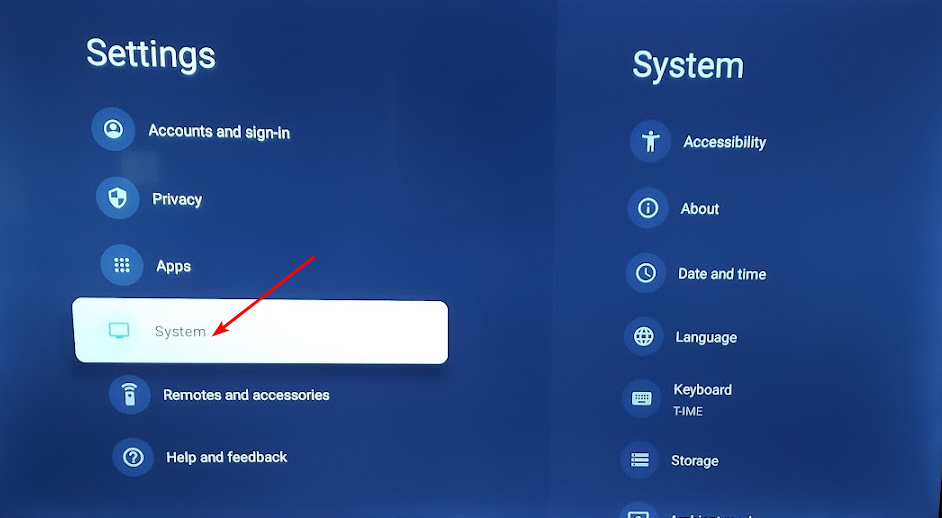
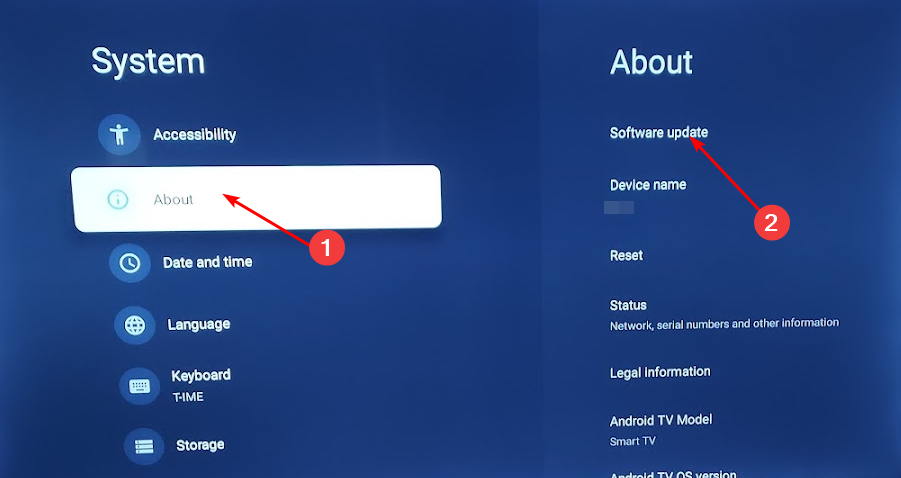
- Click on About then select Software update.
- Select Network update and click on System update.
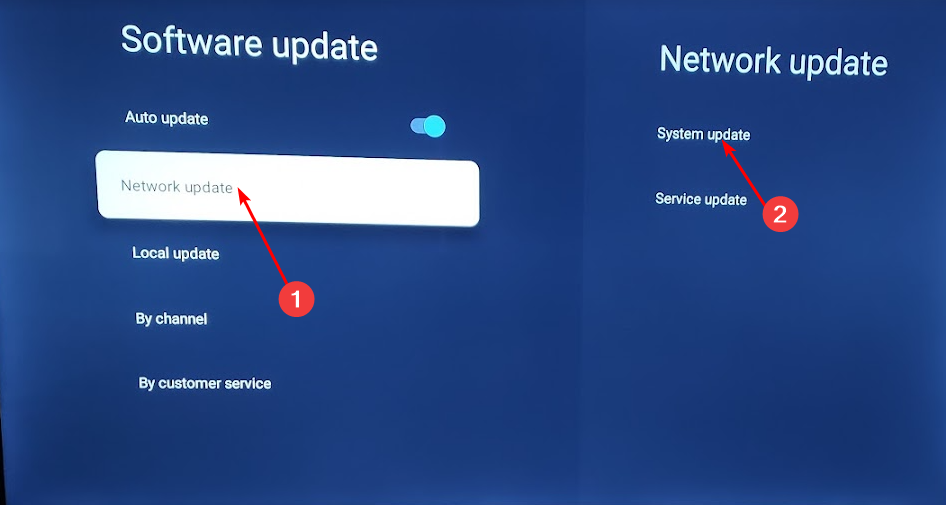
- Now click on Check Update. Your system will scan for any available updates.

- You’ll either start downloading updates or get a message that your TV is already up to date.
2. Clear your device’s cache
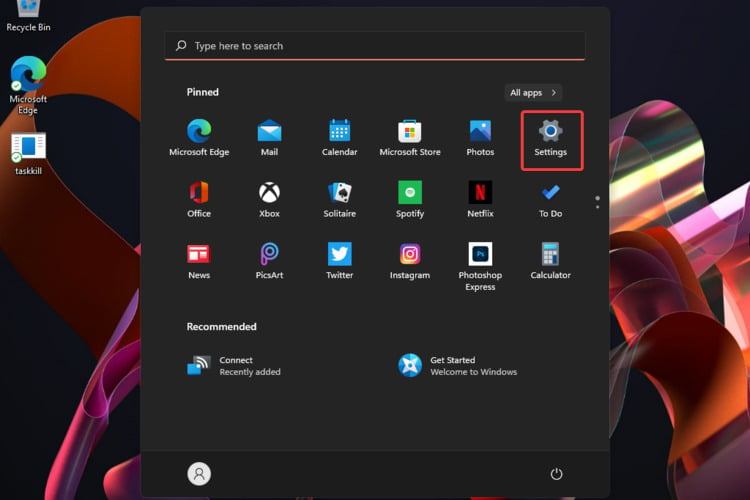
- Hit the Windows key, then click on the Settings menu.

- From the left window pane, select System, then, from the right window side, navigate to Storage.

- Wait for your OS to scan and assess the temporary cache files stored on your system.
- Click on the Temporary files option.

- The various cache files will now be listed.
- Scroll down, then select the files that you want to delete, and click on the Remove files button.

- In the pop-up window, click on Continue to complete the process.

- Now your selected files are deleted.
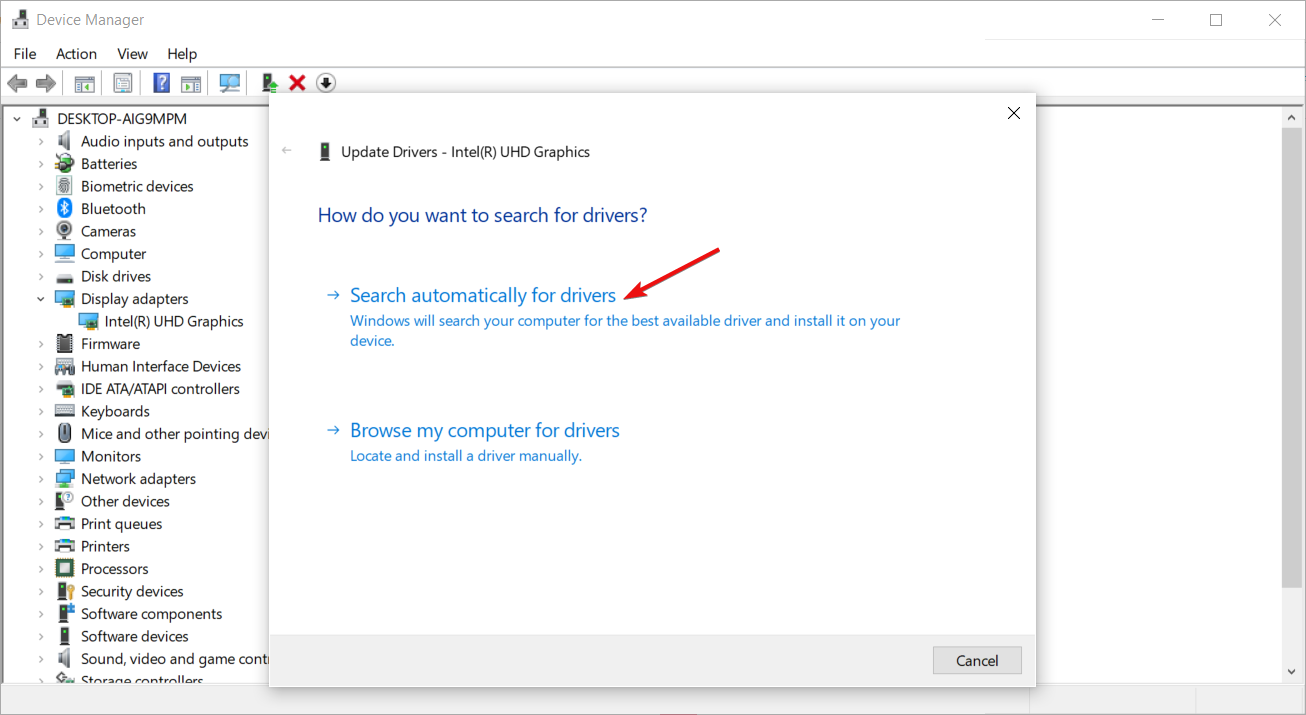
3. Update your display drivers
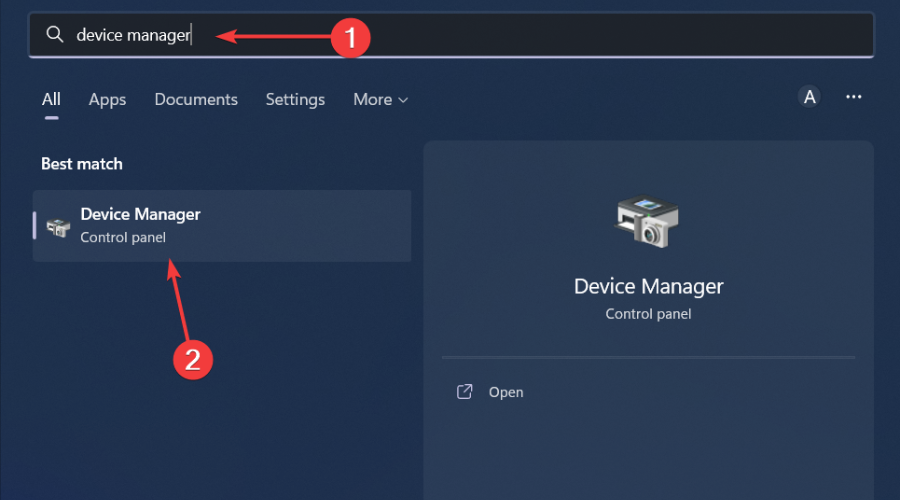
- Hit the Windows key, type Device Manager in the search bar, and click Open.
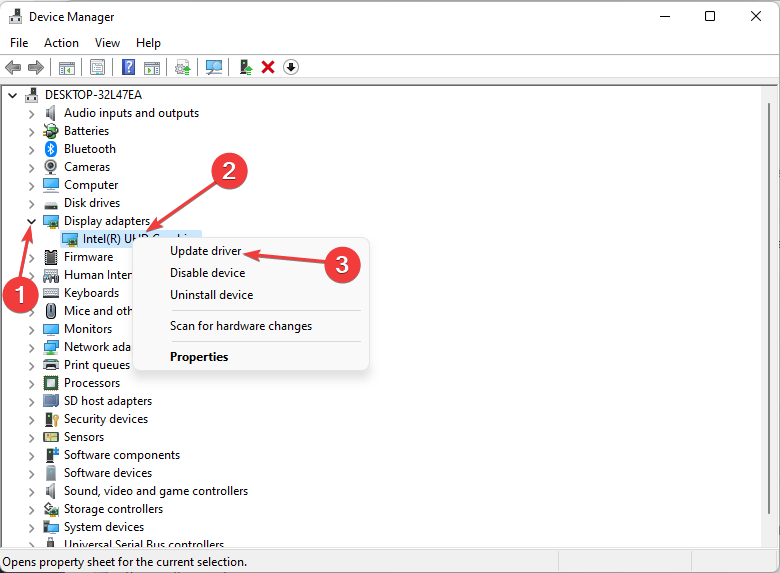
- Navigate to Display adapters to expand, right-click on your graphics card, and select Update driver.
- Select Search automatically for drivers.
- Download and install the Outbyte Driver Updater app.
- Launch the software and wait for the app to detect all incompatible drivers.
- Now, it will show you a list of all faulty drivers to select the ones to Update or Ignore.

- Click on Update & Apply Selected to download and install the newest versions.
- Restart your PC to ensure the applied changes.

OutByte
Keep your GPU in a flawless state without worrying about possible driver issues.4. Disable/Enable your VPN
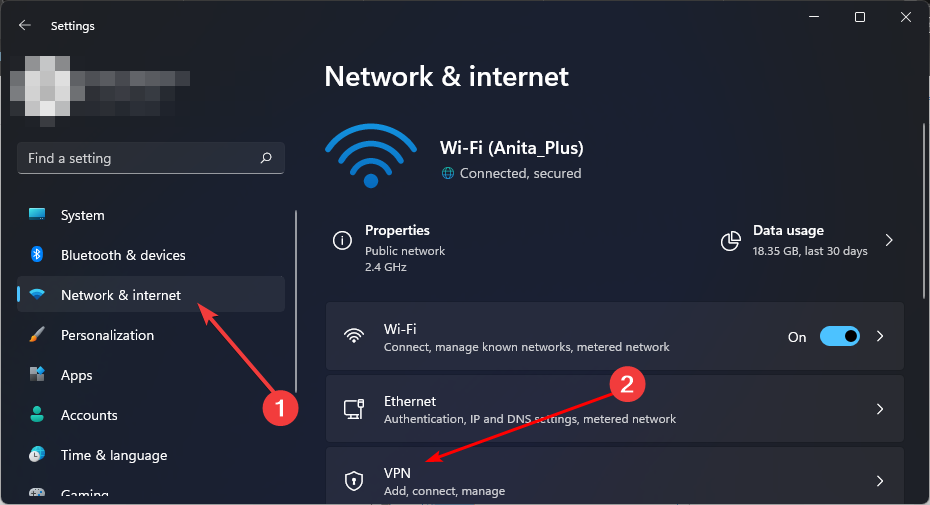
- Press the Windows key and select Settings.
- Next, select Network & internet and click on VPN in the right-side menu.
- Select the VPN connection you want to disable, click on the drop-down, and select Remove.
- To add, follow similar steps.
In some cases, some apps like Freeview Play may not work even with a VPN. Usually, the issue is you’re using a free VPN. We’ve already covered reasons why a free VPN cannot be trusted, so you’re better off getting a paid VPN service that is much more efficient.
5. Disable your Proxy
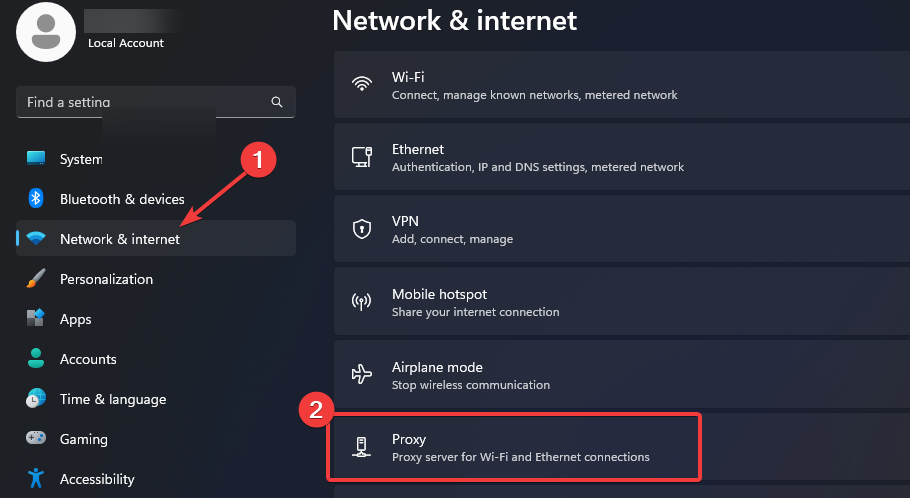
- Press the Start Menu icon and select Settings.
- Click on Network & Internet on the left pane, then scroll down and click Proxy on the right pane.
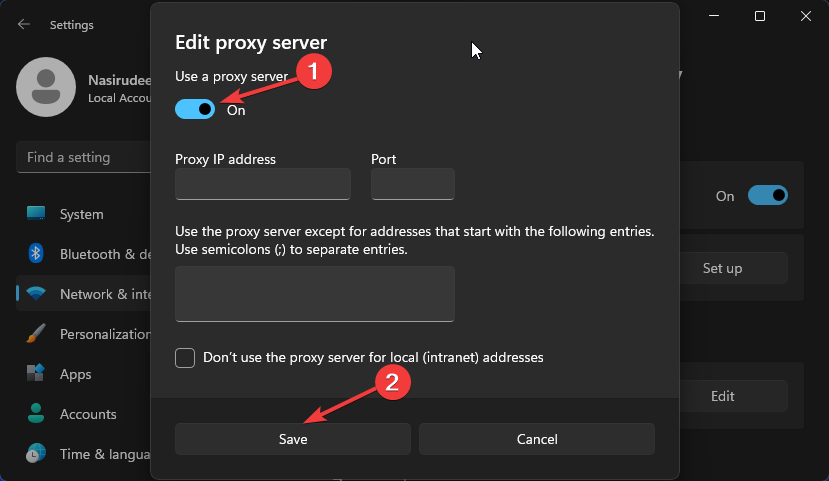
- Select Edit next to Use a proxy server option in the Manual proxy setup section, toggle off Use a proxy server and click on Save.
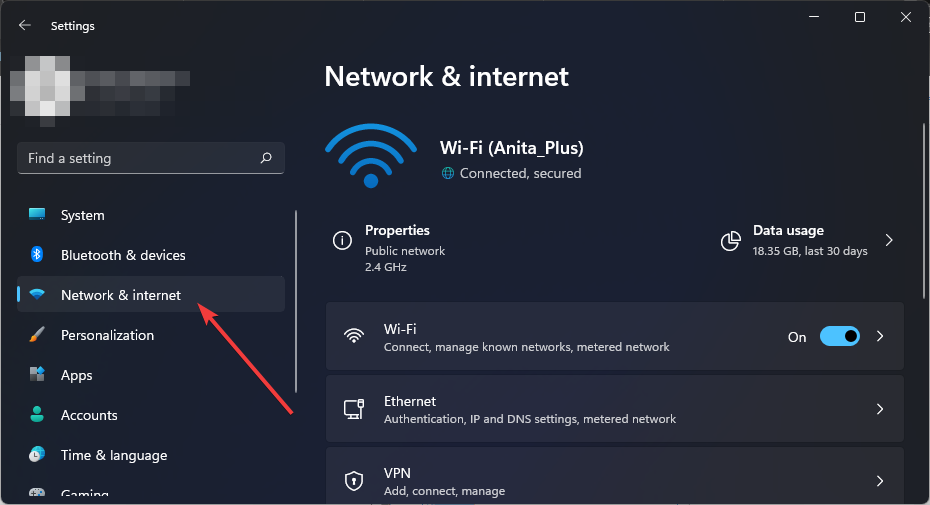
6. Reset your Network
- Hit the Windows key and click on Settings.
- Navigate to Network & internet.
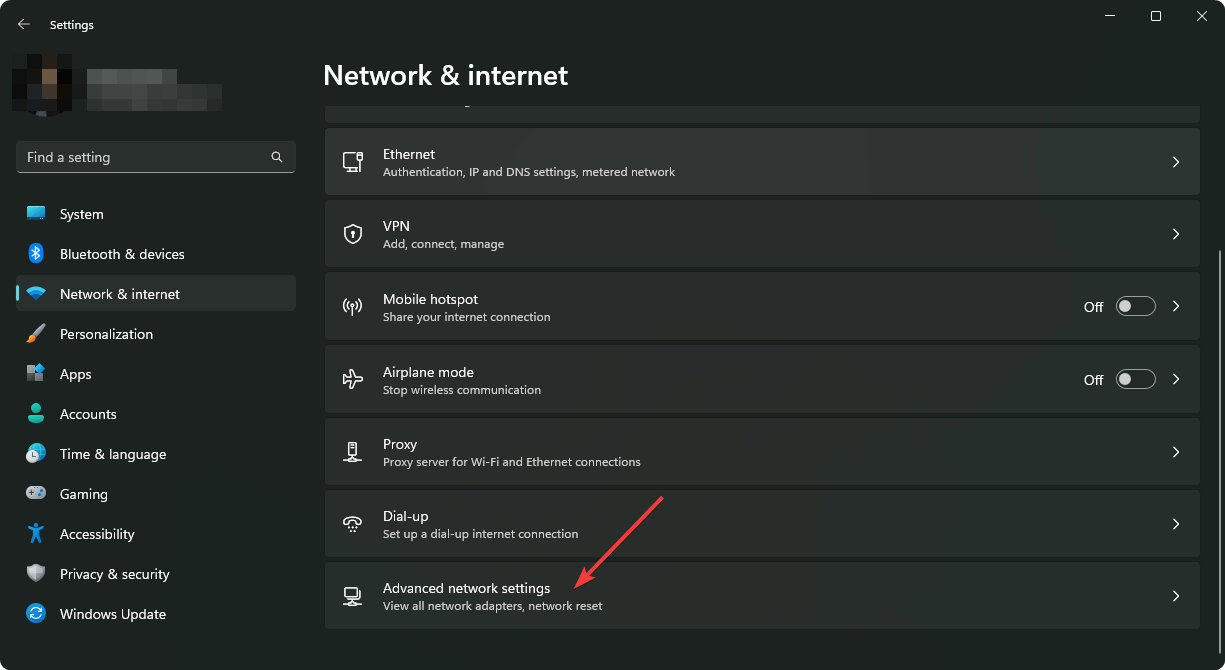
- Select Advanced network settings.
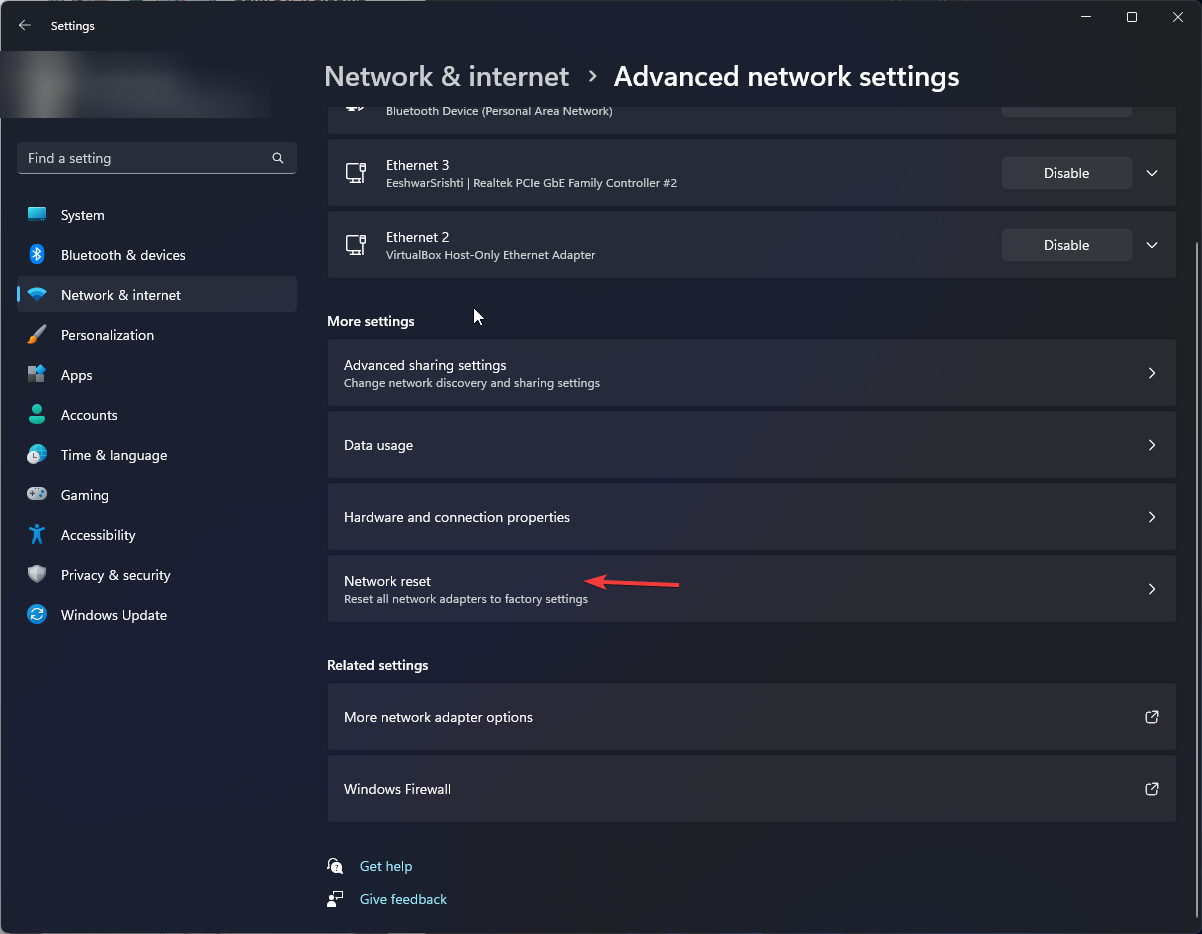
- Click on Network reset.
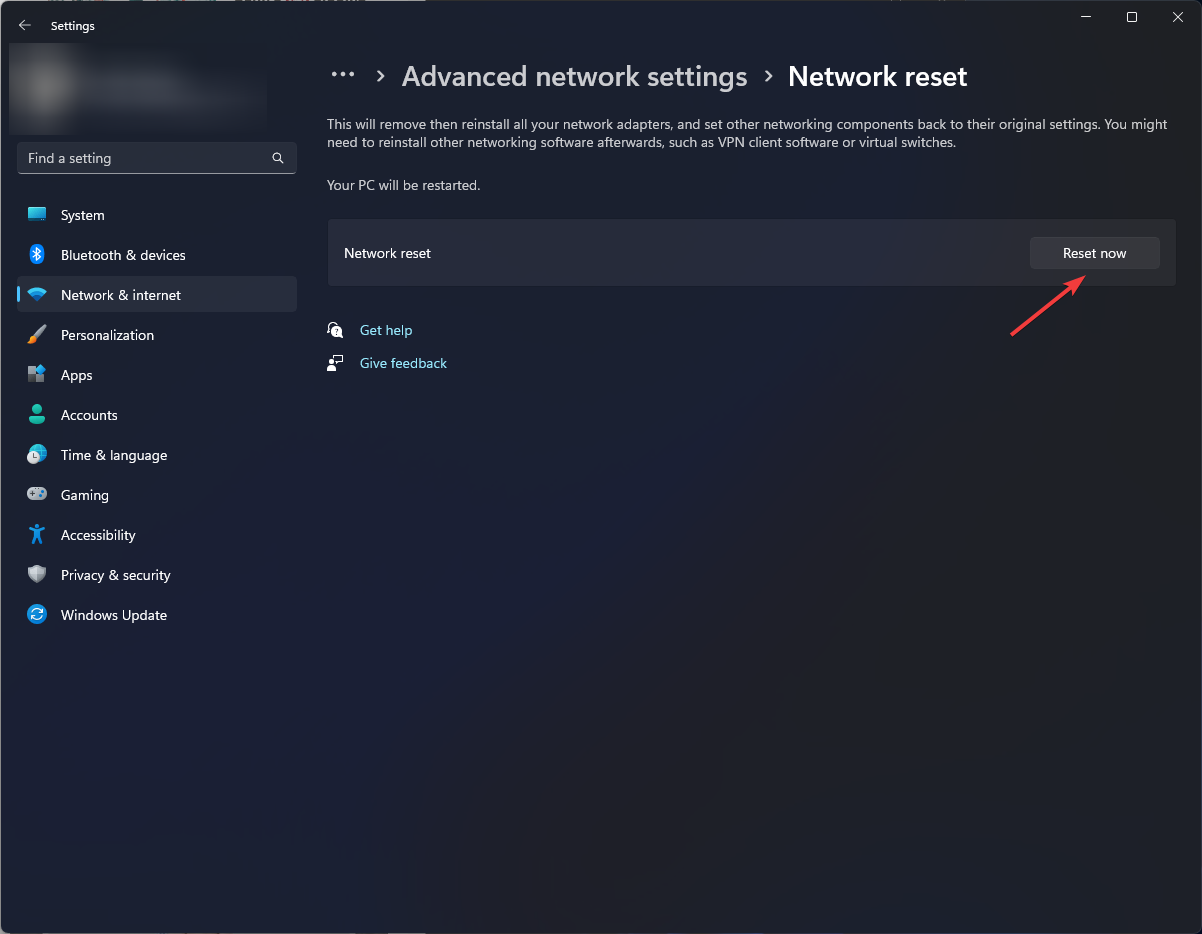
- Next, hit the Reset now button.
7. Repair/Reset Freevee app
- Hit the Start Menu icon on the Taskbar and click on Settings.
- Click on Apps on the left pane, then select Apps & features on the right pane.
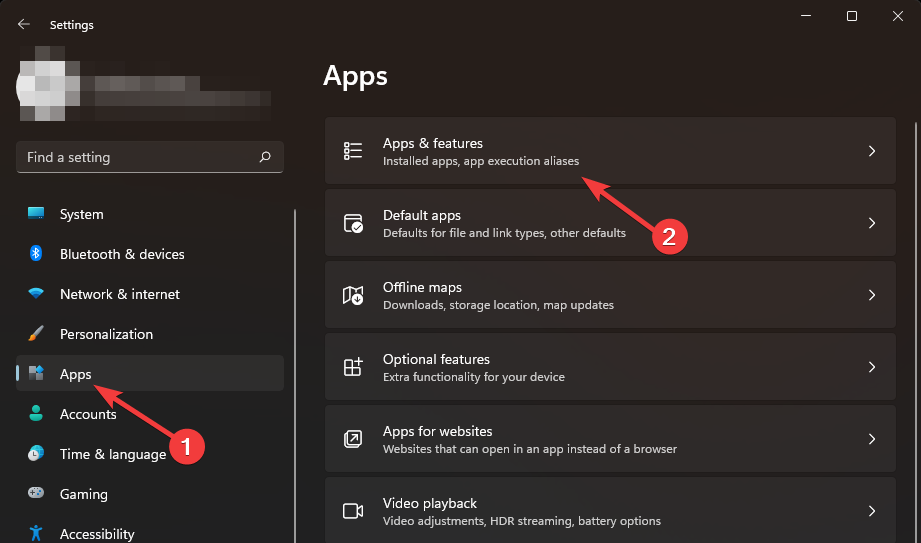
- Navigate to Frevee app, click on the three ellipses, and select Advanced options.
- Scroll down and select Repair.
- If it doesn’t get rid of the error, go back and select Reset.
8. Reinstall FreeVee
- Hit the Start Menu icon on the Taskbar and click on Settings.
- Click on Apps on the left pane, then select Apps & features on the right pane.
- Navigate to Frevee app, click on the three ellipses, and select Uninstall.
- Launch the Microsoft Store, search for the Freevee app and click Get.

- Follow the on-screen prompts and try again.
What are some troubleshooting tips for resolving error codes on Freevee devices?
- Enable automatic firmware updates to avoid compatibility issues, as the Freevee app gets updates frequently.
- Ensure all cables are connected properly from HDMI, Ethernet, and USB. If cables are not connected properly, then this could cause communication issues.
- Always check for hardware compatibility, especially for HDMI cables and ports. For instance, Freevee requires HDCP-compliant cables.
- Regularly clear cache and cookies on your browser and any other apps that might be causing interference with your streaming app.
Aside from the error codes like this and Amazon code 2063, you may also get tired of the unskippable ads. Of course, it’s the price you have to pay for watching content for free but if you’ve had enough of them, you can always block ads on your smart TV.
This concludes our guide to Freevee Error code ITV-101. Before you go, you might be interested in our F1 TV BM1300 error guide as well.
If you have tried any other solutions that worked for you, please feel free to share them with us in the comment section below.
Read our disclosure page to find out how can you help Windows Report sustain the editorial team. Read more


Improve this guide


User forum
0 messages