GeForce Experience Preparing to Install: 7 Ways to Unstuck It
Install driver updates in a jiffy with our solutions
6 min. read
Updated on
Read our disclosure page to find out how can you help Windows Report sustain the editorial team. Read more
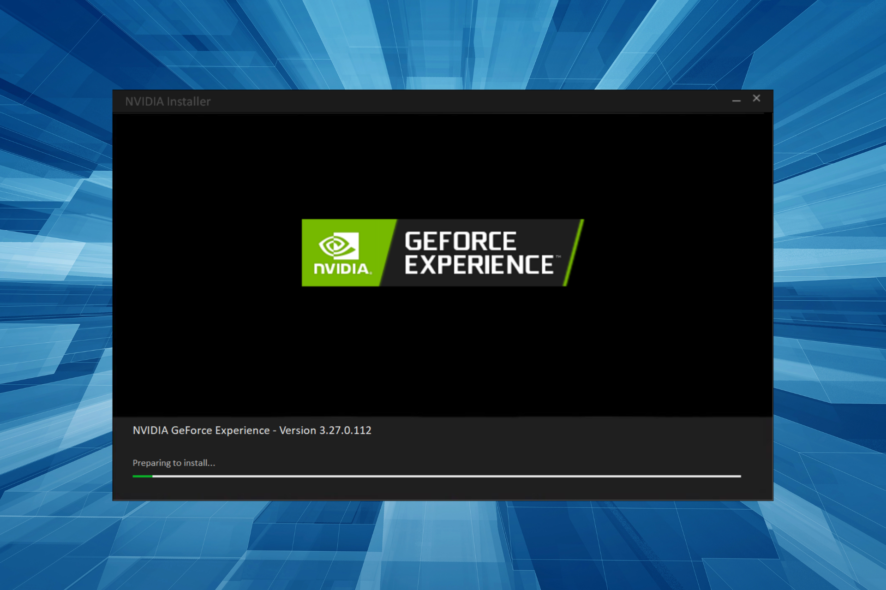
The GeForce Experience app is a dedicated control panel to manage the NVIDIA GPUs. It helps change graphics settings throughout the system and make app-specific changes. Of late, many users reported that GeForce Experience is stuck on the Preparing to install screen.
When this happens, users can’t update the NVIDIA drivers, which greatly affects the Windows experience and might lead to poor gaming performance. So, let’s find out all about the GeForce Experience Preparing to install error and the solutions for it.
Why does GeForce Experience take so long to install drivers?
Here are a few reasons the GeForce driver is taking forever to install:
- Slow Internet connection: Whenever something is to be downloaded off the web, a slow Internet connection will increase the time required for the process to complete.
- Missing permissions: Even missing relevant permissions can affect the effective functioning of the app and be the reason NVIDIA is stuck on installing the graphics driver.
- The update is stuck: In some cases, users found GeForce Experience stuck on the screen. It usually takes a few minutes at max to complete the installation, but if that’s not the case, the update might be stuck.
What can I do if GeForce Experience is stuck on preparing to install?
Before we start with the complex changes, here are a few quick tricks that might help:
- Restart the computer.
- Run GeForce Experience as administrator and check whether you can update the drivers. To do that, right-click on the launcher, and select Run as administrator.
- Disconnect all non-critical devices from the PC, including printers, audio devices, and USB hubs.
- Check if any UAC prompts appear and click Yes on every one of them.
- Re-attempt the driver installation and verify whether GeForce Experience is still stuck on the Preparing to install screen.
- Disable any third-party antivirus, firewall, or similar security software installed on the PC. If that does the trick, we recommend you switch to reliable all-round antivirus.
- Check for Windows Updates and install any that are pending.
- Check for corrupt system files and run the DISM tool and SFC scan to fix them.
If none of these work, move to the solutions listed next.
1. Terminate programs running the driver
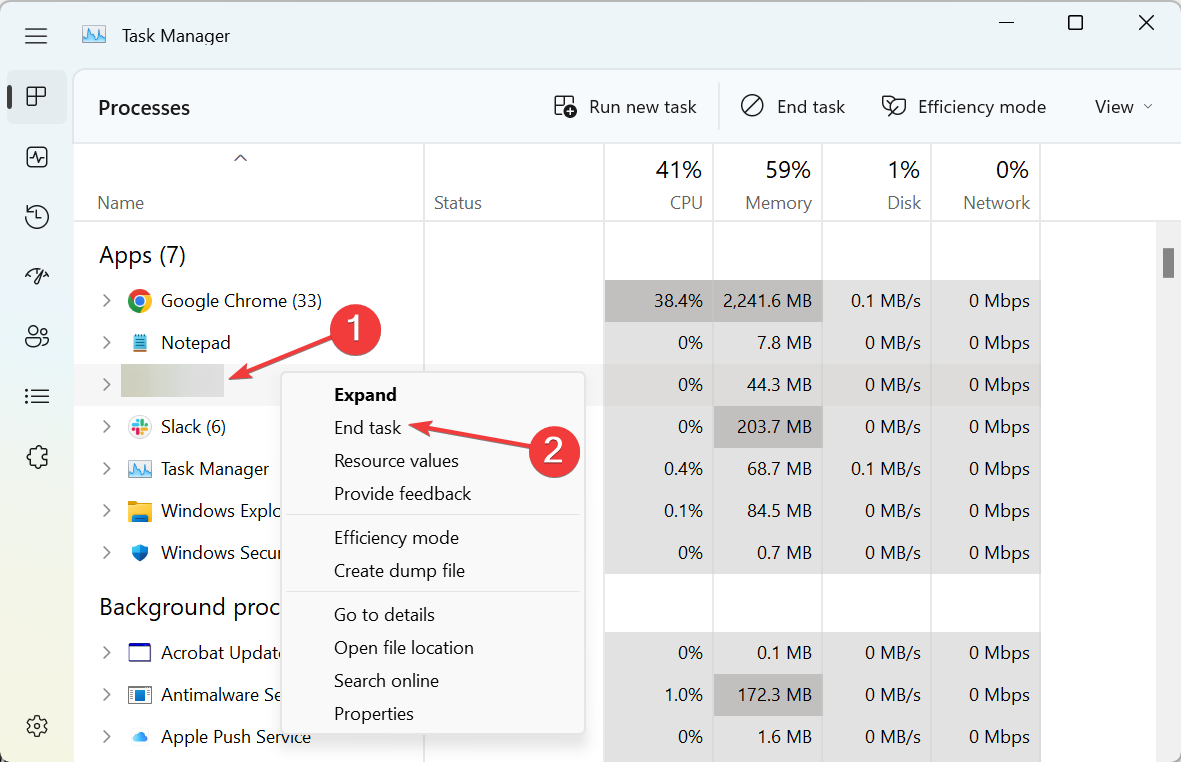
- Press Ctrl + Shift + Esc to open the Task Manager, locate GeForce Experience, right-click on it, and select End task.
- Similarly, terminate the other non-critical apps and processes here.
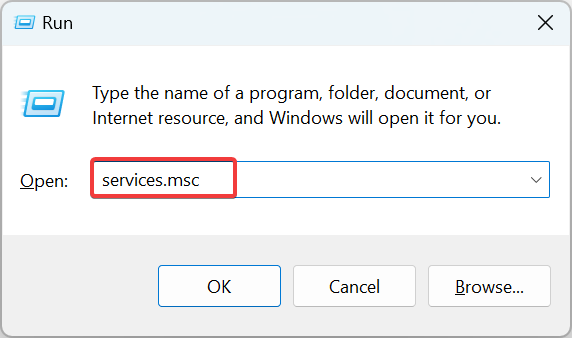
- Now, press Windows + R to open Run, type services.msc, and hit Enter.
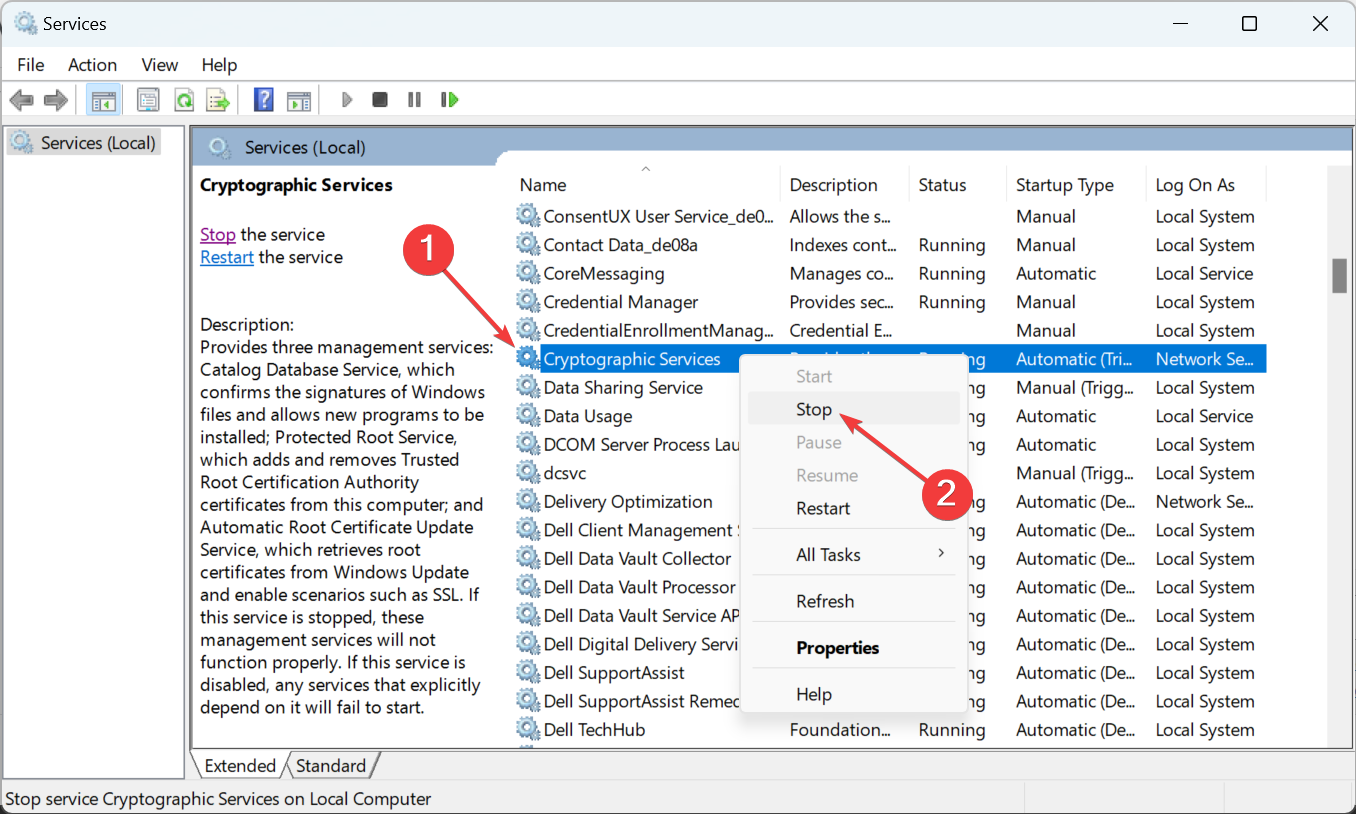
- Right-click on the Cryptographic Services entry, and select Stop from the context menu.
- Once done, again launch GeForce Experience, and then try installing the driver.
Many users managed to fix things when GeForce Driver was stuck on Preparing to install by terminating the processes that were engaging the driver and stopping the Cryptographic Services. Also, if you have Steam or game clients running in the background, terminate them.
2. Modify Windows Security settings
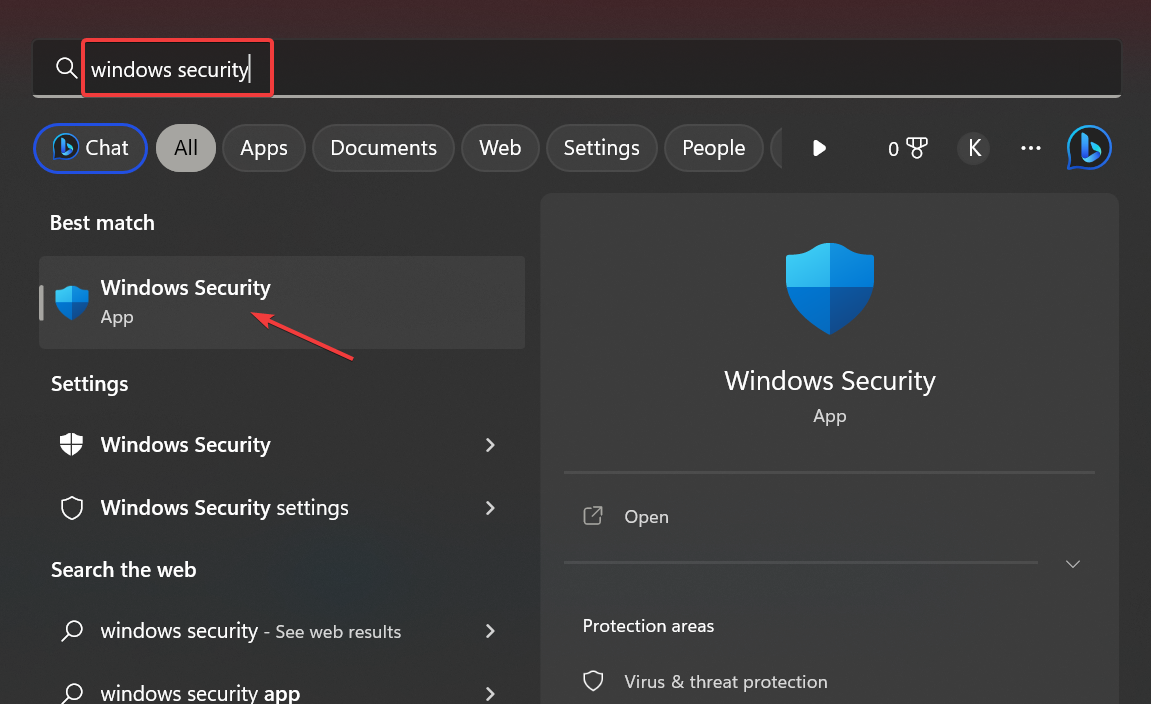
- Press Windows + S to open the Search menu, type Windows Security, and click on the relevant search result.
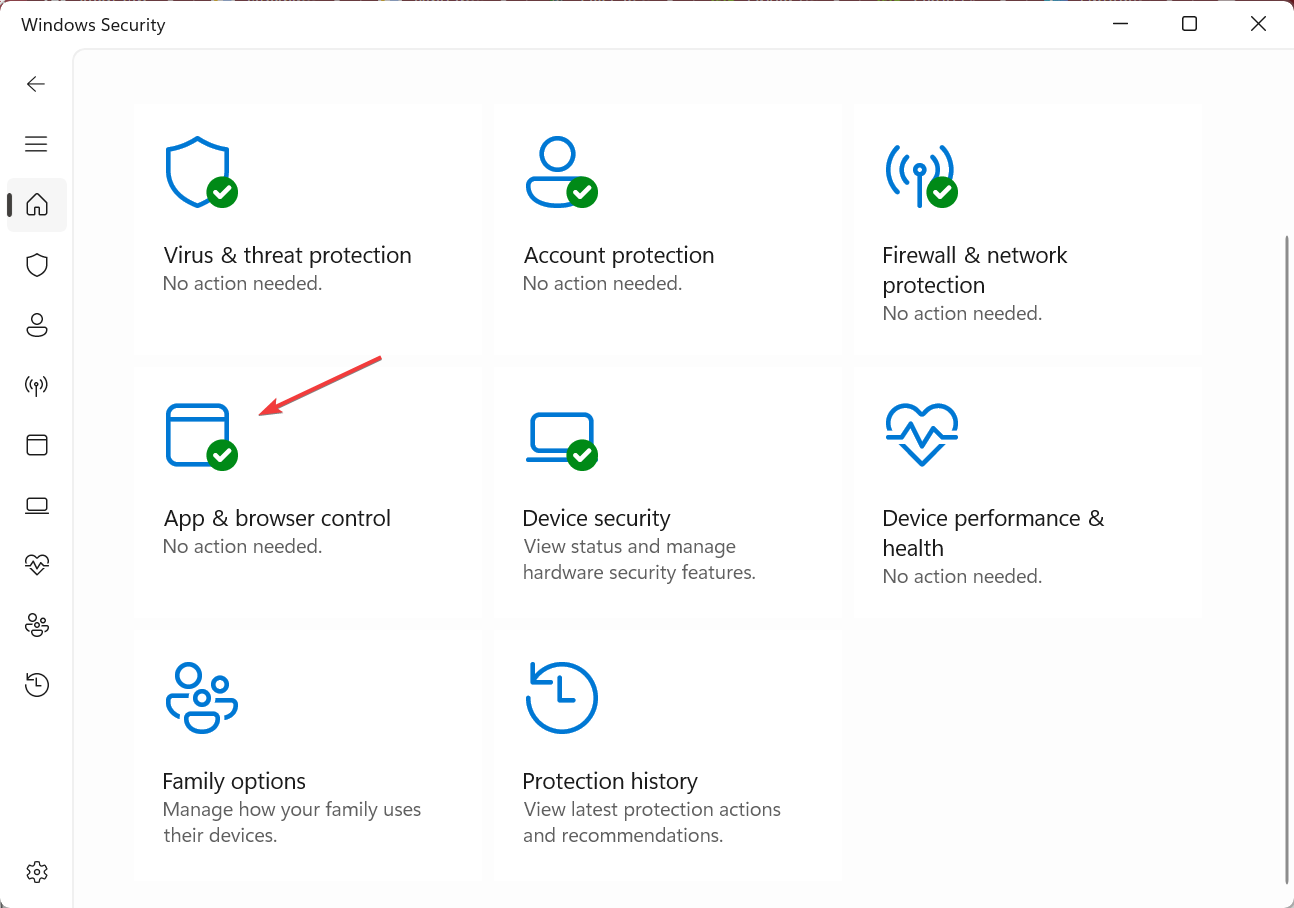
- Click on App & browser control.
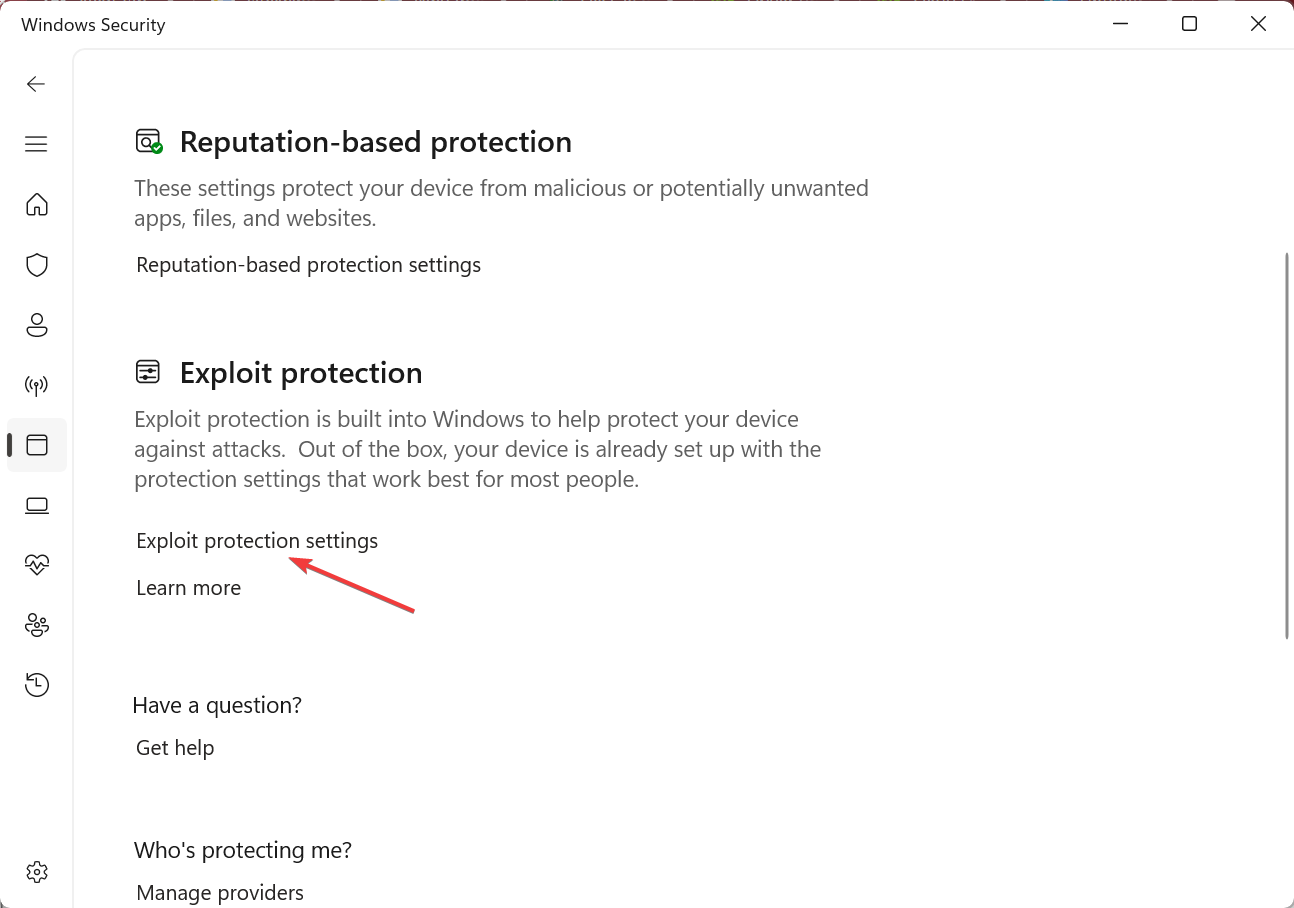
- Now, click Exploit protection settings.
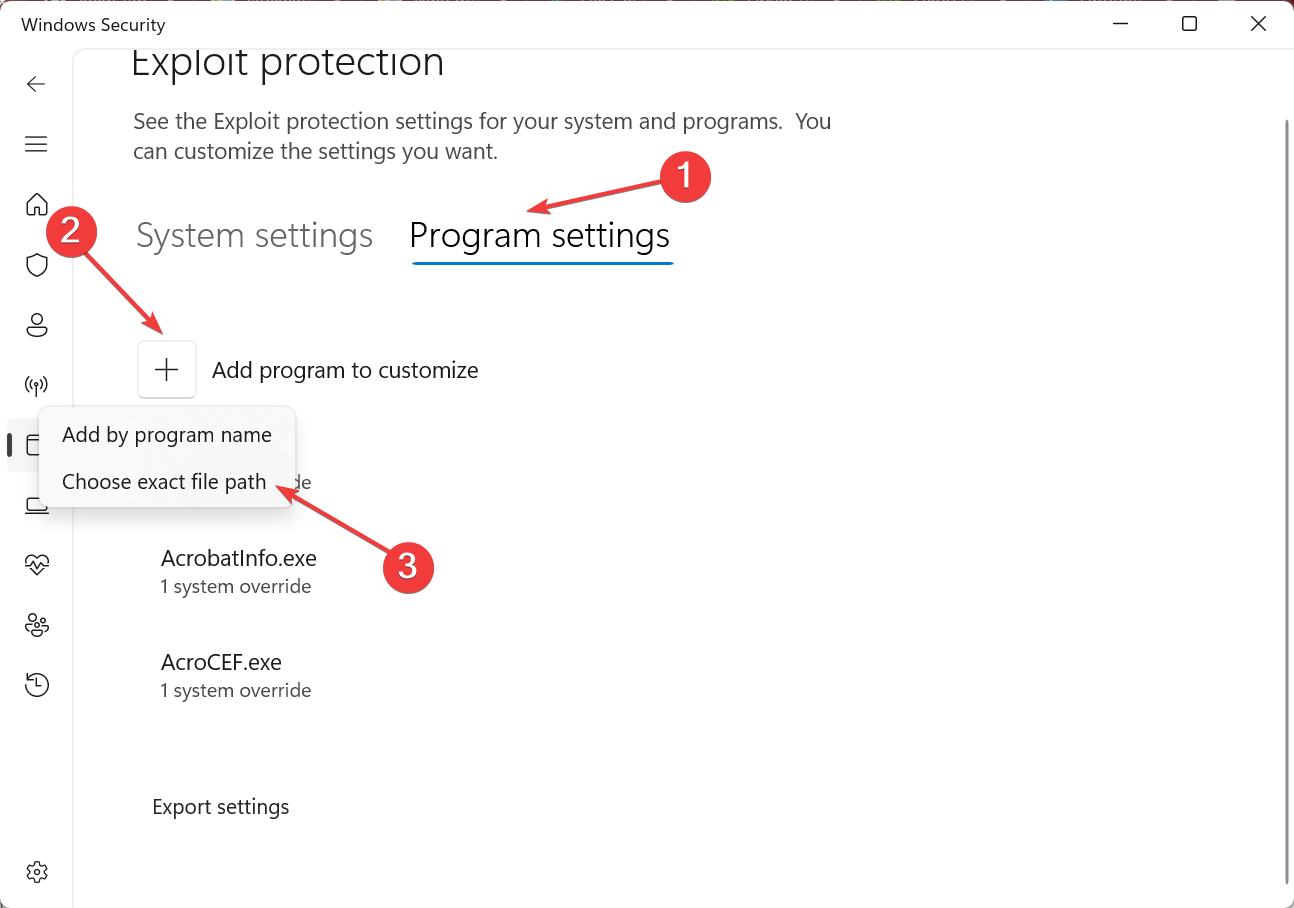
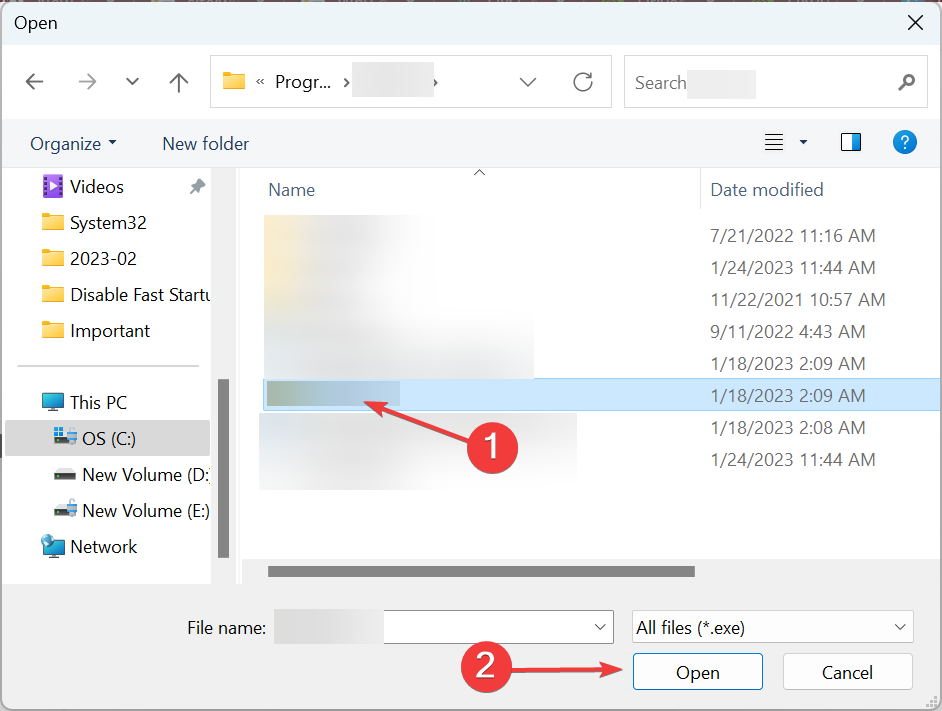
- Go to the Program settings tab, click on Add program to customize, and select Choose exact file path from the flyout menu.
- Navigate to the following path:
C:\Program Files\NVIDIA Corporation\NVIDIA GeForce Experience - Select the NVIDIA GeForce Experience.exe file, and click Open.
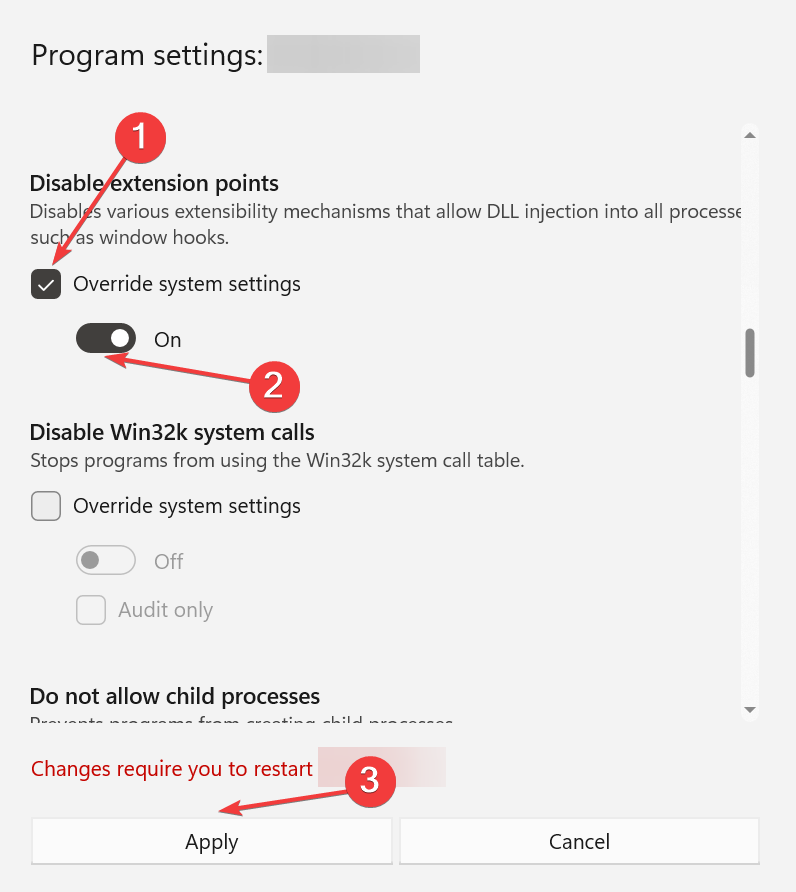
- Finally, scroll down to Disable extension points, tick the checkbox for Override system settings, then enable the toggle under it, and click on Apply to save the changes.
- If GeForce Experience ran all this while, restart the application, and you should be able to install the drivers.
3. Uninstall conflicting applications
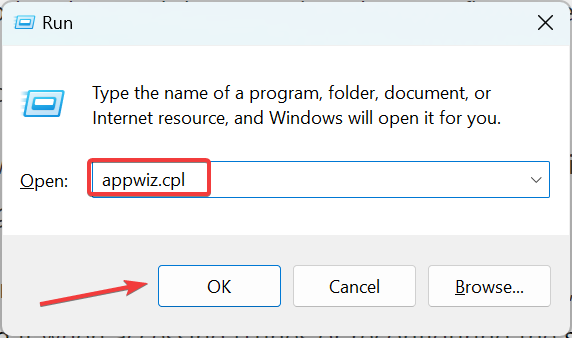
- Press Windows + R to open Run, type appwiz.cpl in the text field, and click OK.
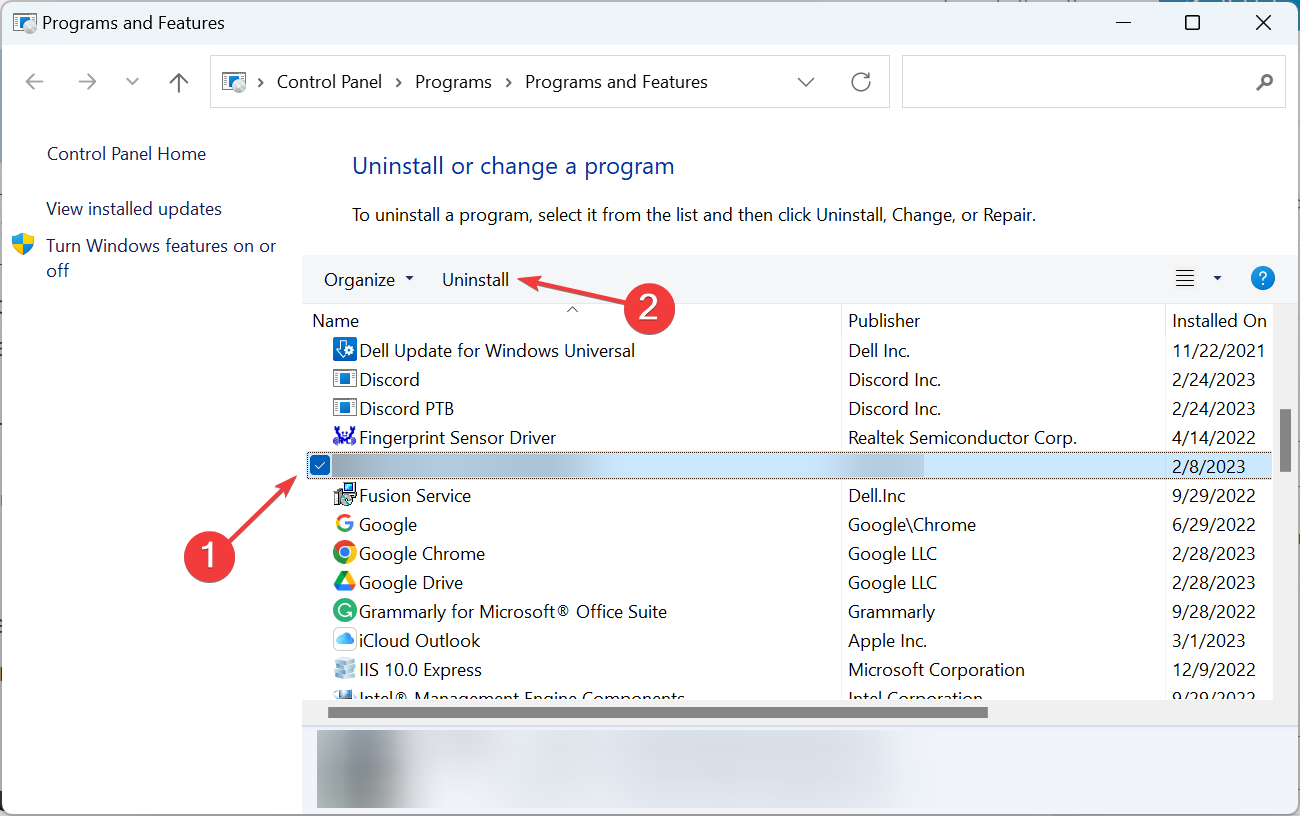
- Locate applications installed around the same time the problem first appeared, select them individually, and then click Uninstall.
- Follow the on-screen instructions to complete the process.
It may take a while to identify the conflicting application, and you may end up removing a few others in the process. Don’t worry! You can always reinstall these once the problematic app is uninstalled.
A few users found out that ZoneAlarm Firewall was the underlying cause when GeForce Experience was stuck at Preparing to install. Look for it and other similar apps.
4. Reconfigure the NVIDIA 3D settings
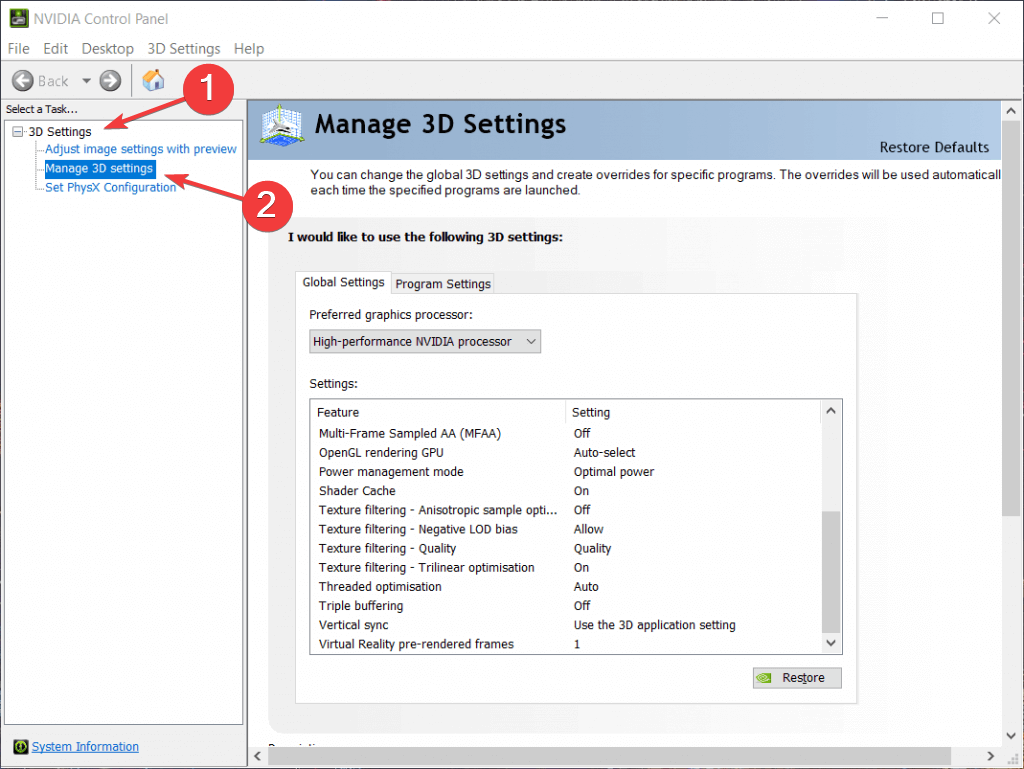
- Open the NVIDIA Control Panel, expand 3D Settings, and then click on Manage 3D settings.
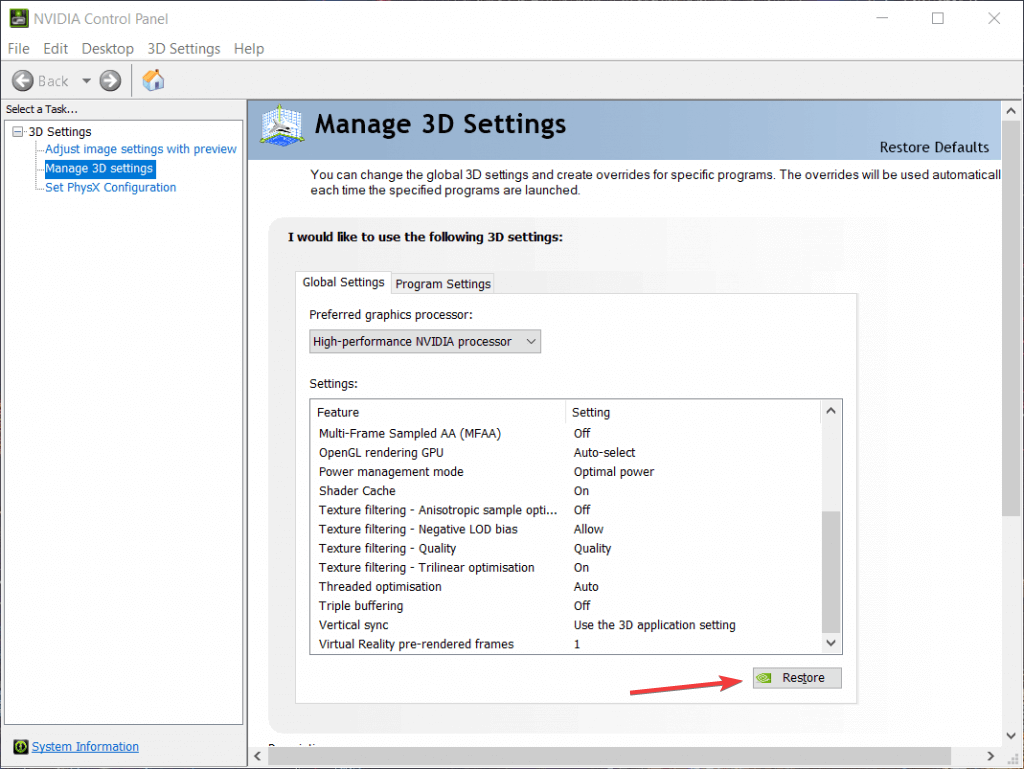
- Click on the Restore button.
- Choose the appropriate response in case a confirmation prompt appears.
5. Reinstall GeForce Experience
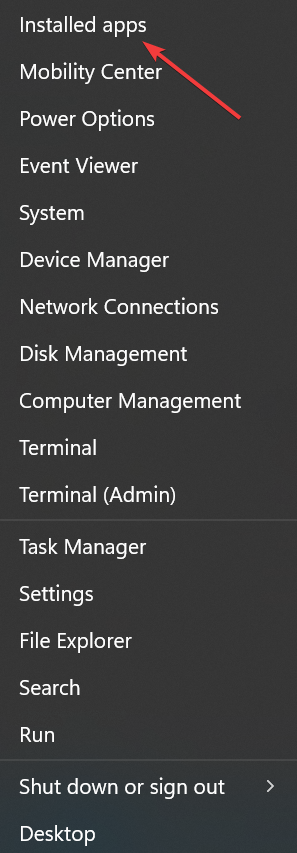
- Press Windows + X to open the Power User menu, and select Installed apps (the option reads Apps and Features in Windows 10).
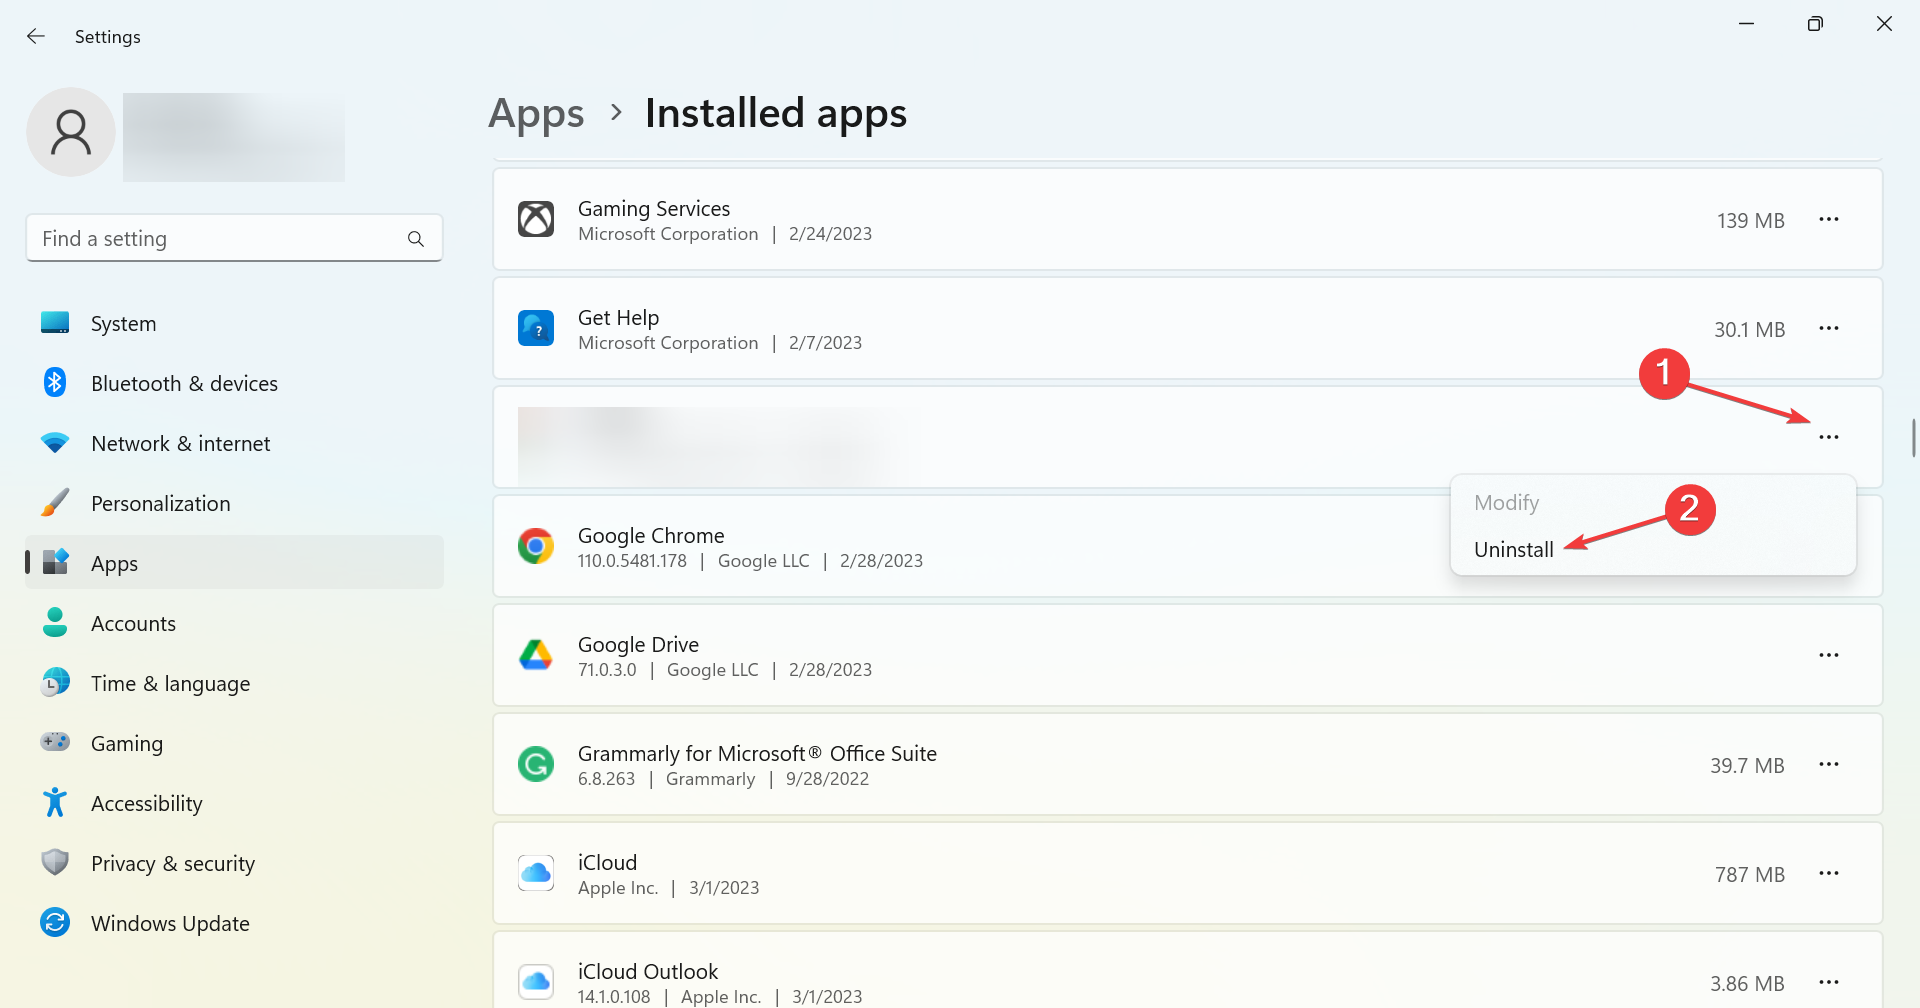
- Locate the GeForce Experience app, click on the ellipsis next to it, and select Uninstall from the flyout menu.
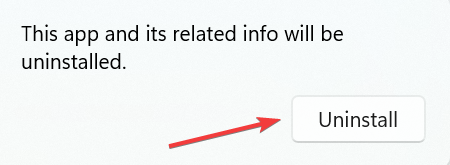
- Again, click on Uninstall in the confirmation prompt.
- Once done, restart the computer.
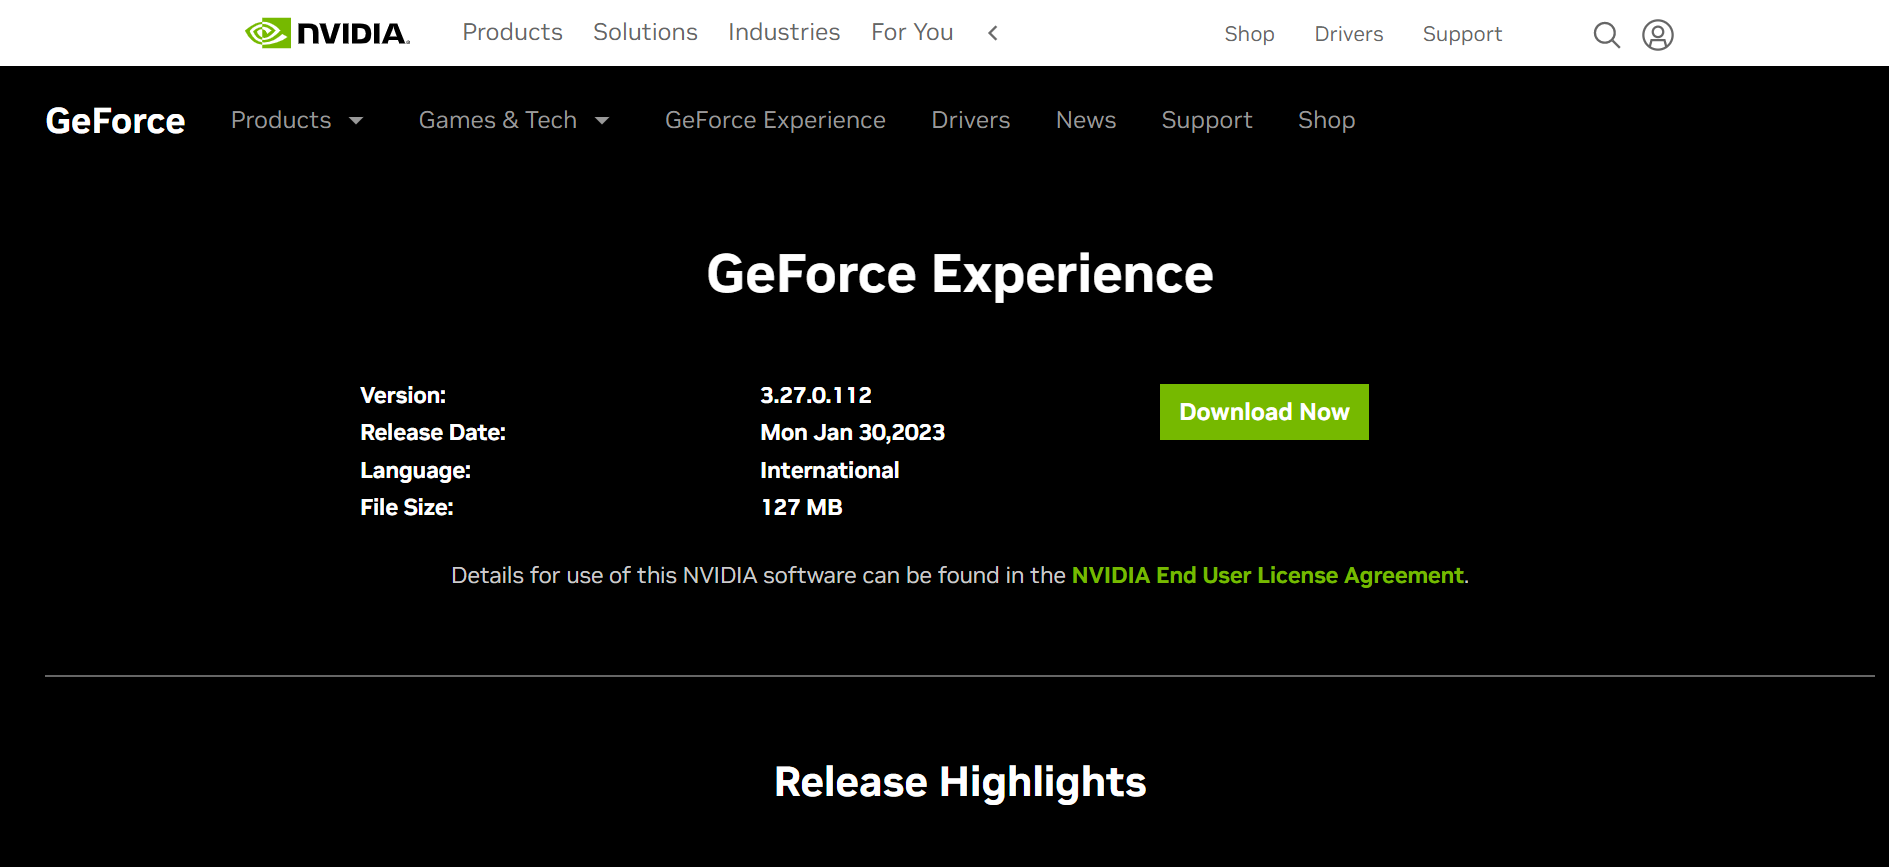
- Now, head to the official website, and download GeForce Experience.
- Run the setup and follow the on-screen instructions to complete the installation process.
After you have reinstalled GeForce Experience, the driver update shouldn’t be stuck on the Preparing to install screen anymore.
6. Manually install the driver
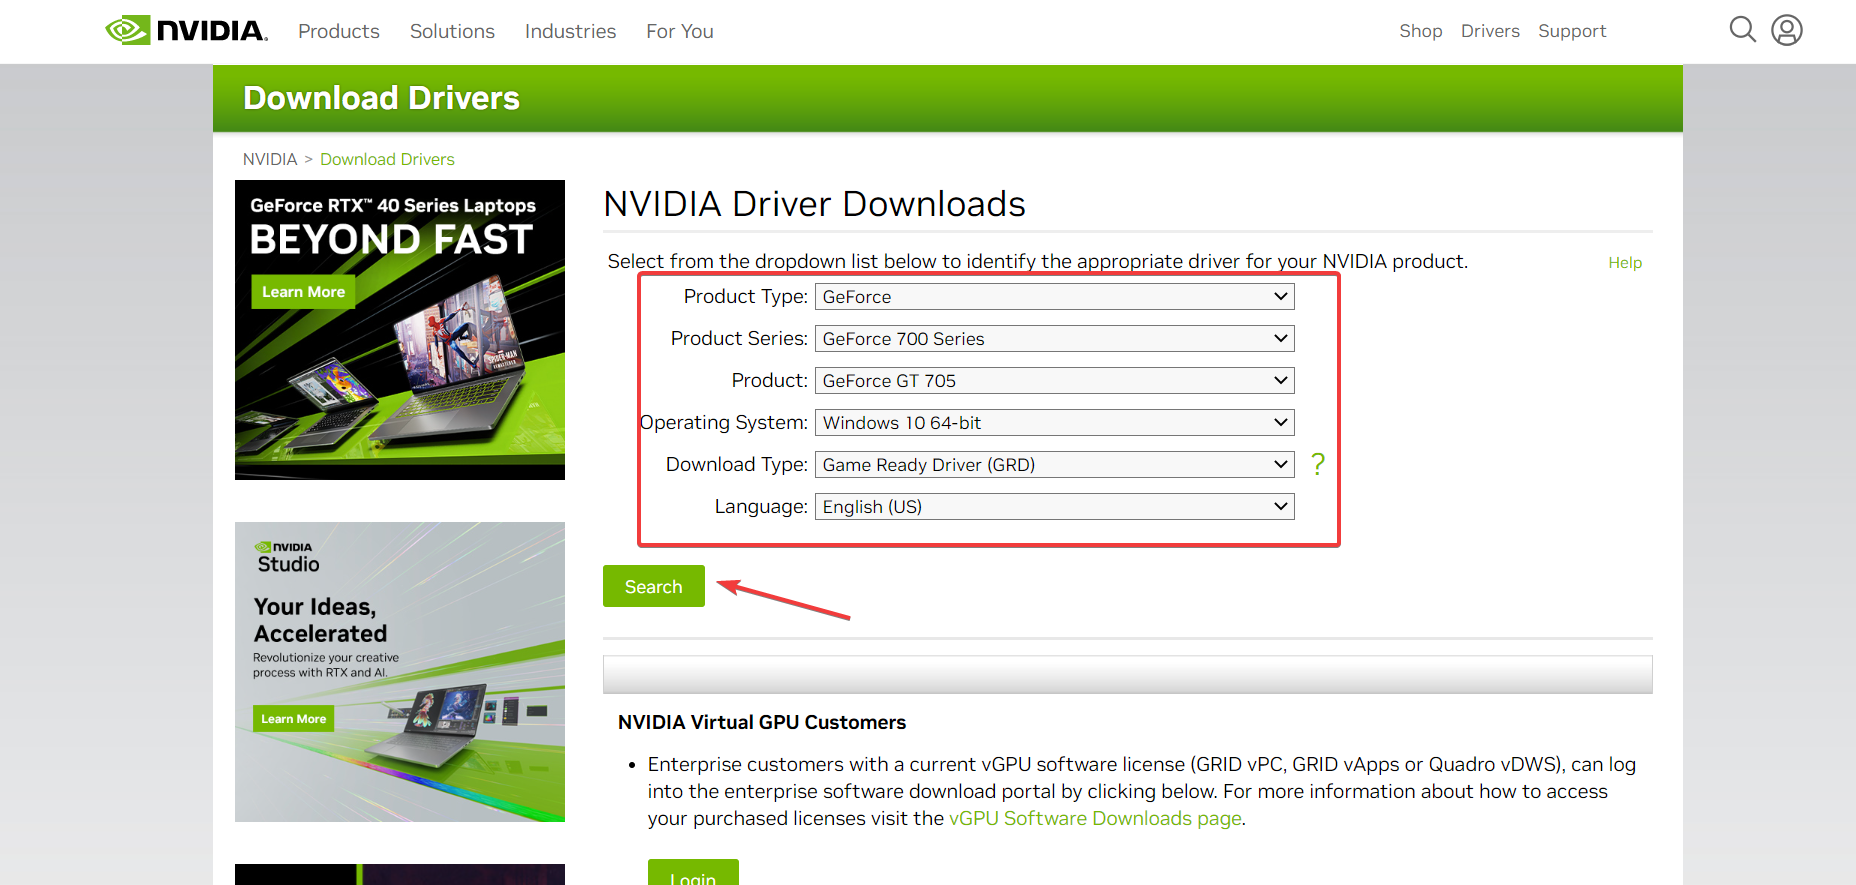
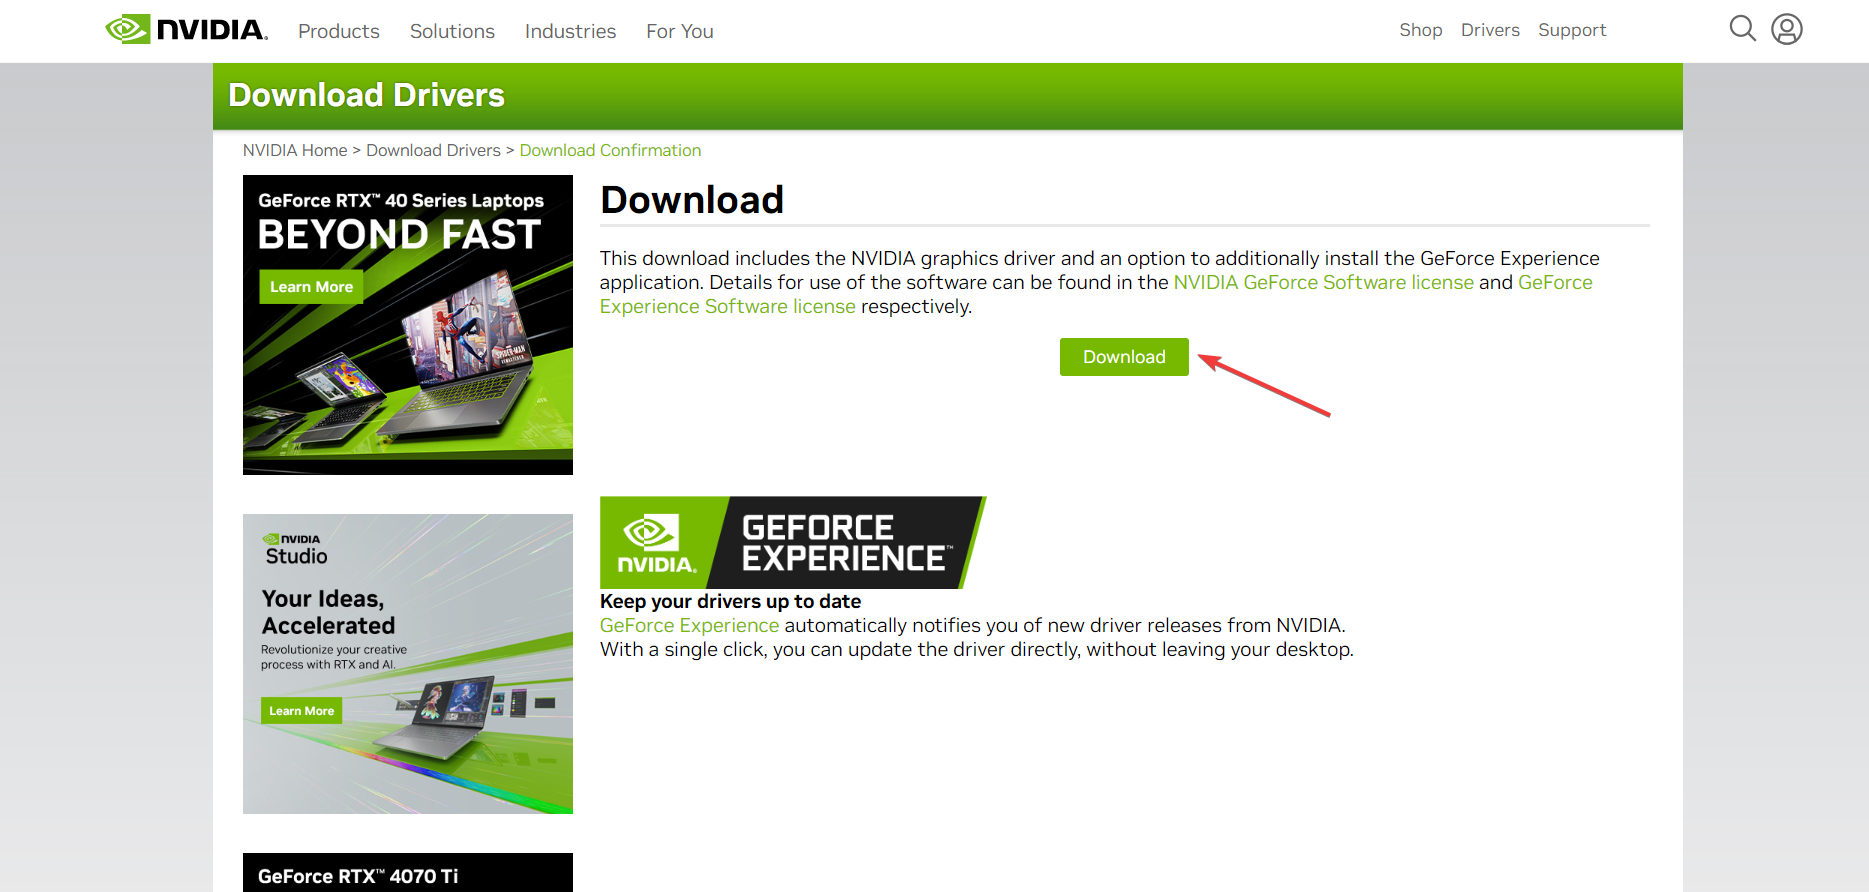
- Go to NVIDIA’s official website, choose the appropriate options to locate your driver, and then click on Search.
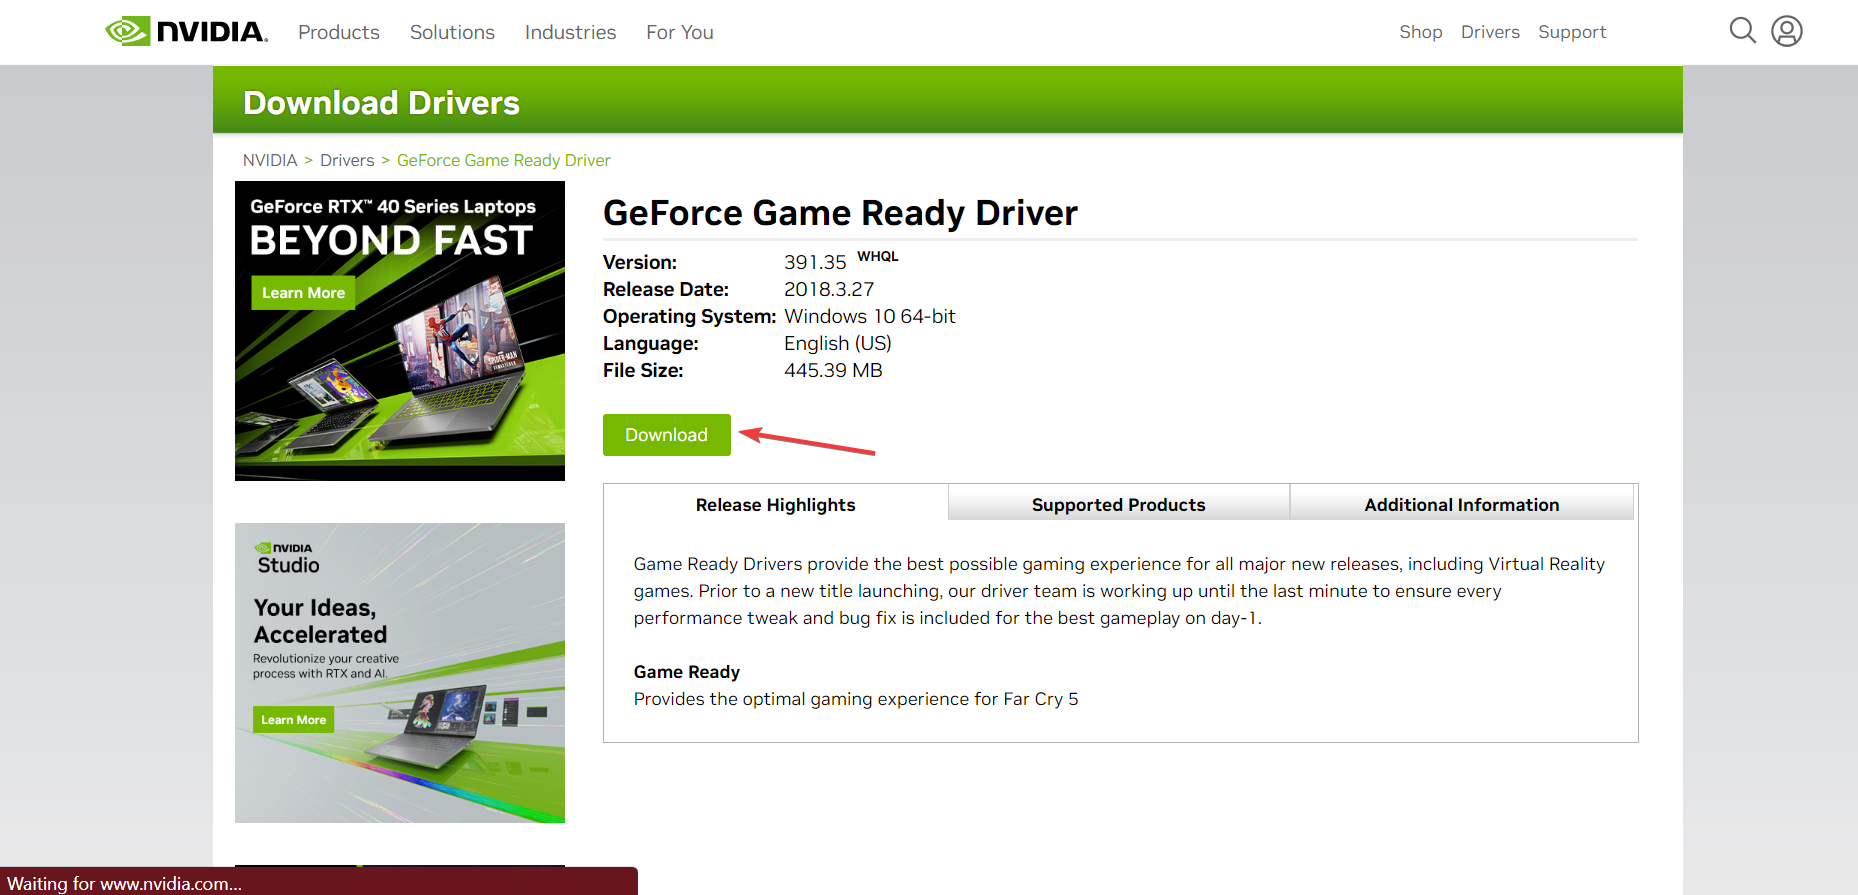
- Click on Download.
- Again, click Download.
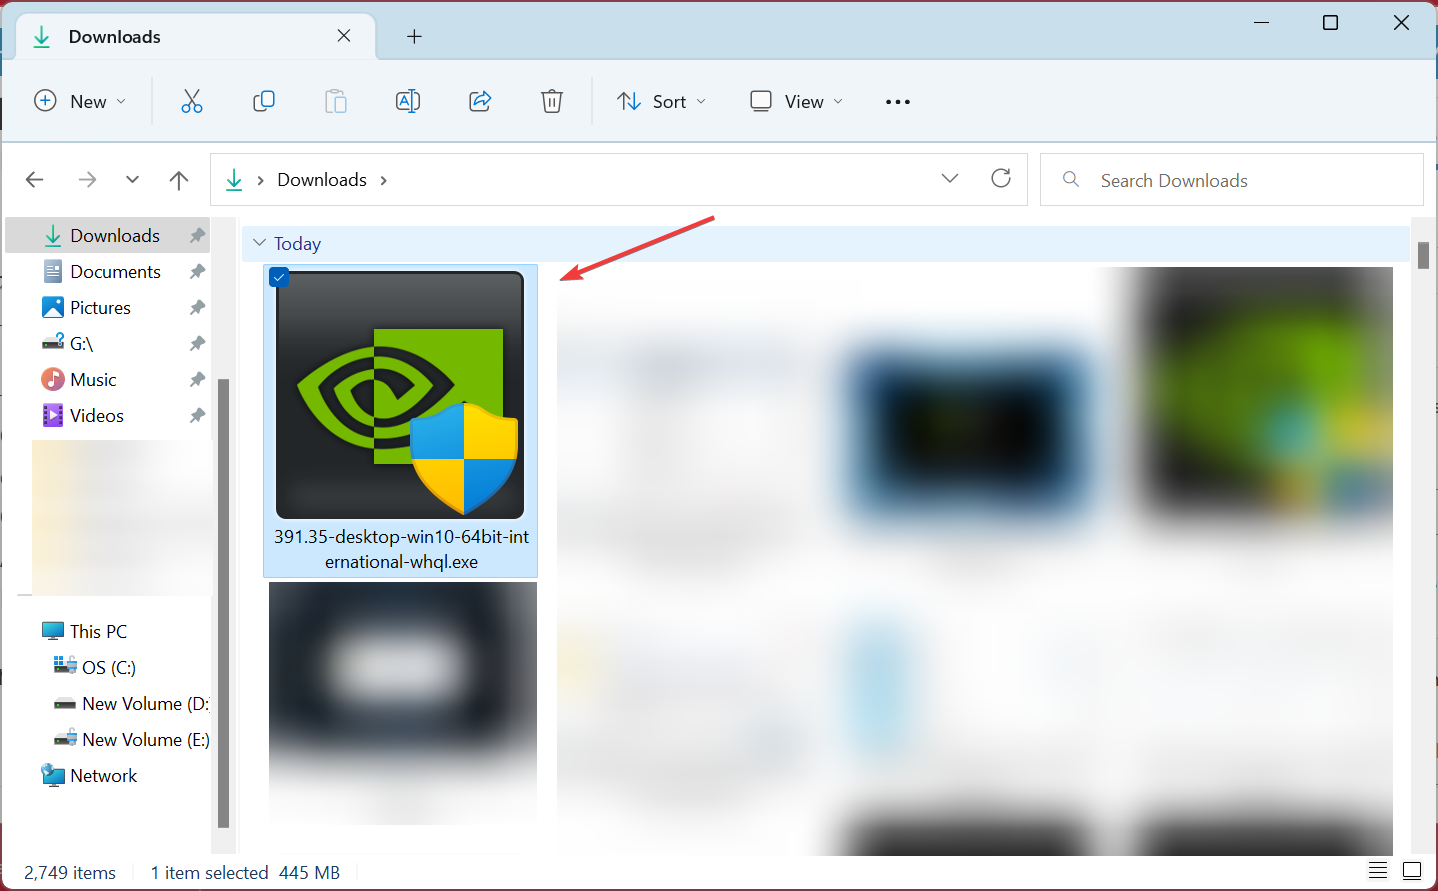
- Run the setup, and complete the driver installation.
If the previous solutions didn’t work, you could manually install the drivers from the official website. The process, though a bit intricate initially, shouldn’t be much of a hassle and will allow you to update the drivers seamlessly.
As an alternative, you can use an automatic tool that will successfully install or update any drivers on your PC much faster and completely securely.
You can prevent these problems by using an automatic tool that will search and install the correct drivers on your computer with just a few clicks. That's why we recommend you use Outbyte Driver Updater. Here's how to do it:
- Download and install the Outbyte Driver Updater app.
- Launch the software.
- Wait for the app to detect all incompatible drivers.
- Afterward, it will show you a list of the drivers found to select the ones to Update or Ignore.
- Click on Update & Apply Selected to download and install the newest versions.
- Restart your PC to ensure the applied changes.

Outbyte Driver Updater
Use this software and solve all driver-related issues from your PC.7. Create a new user account
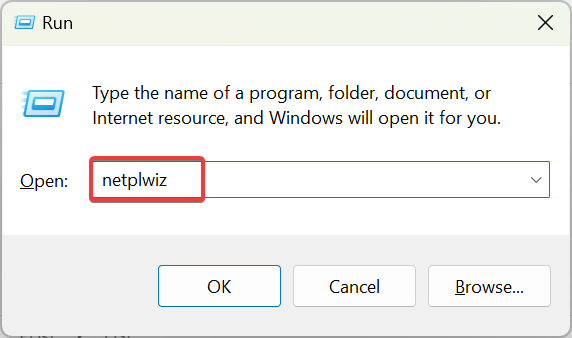
- Press Windows + R to open Run, type netplwiz in the text field, and hit Enter.
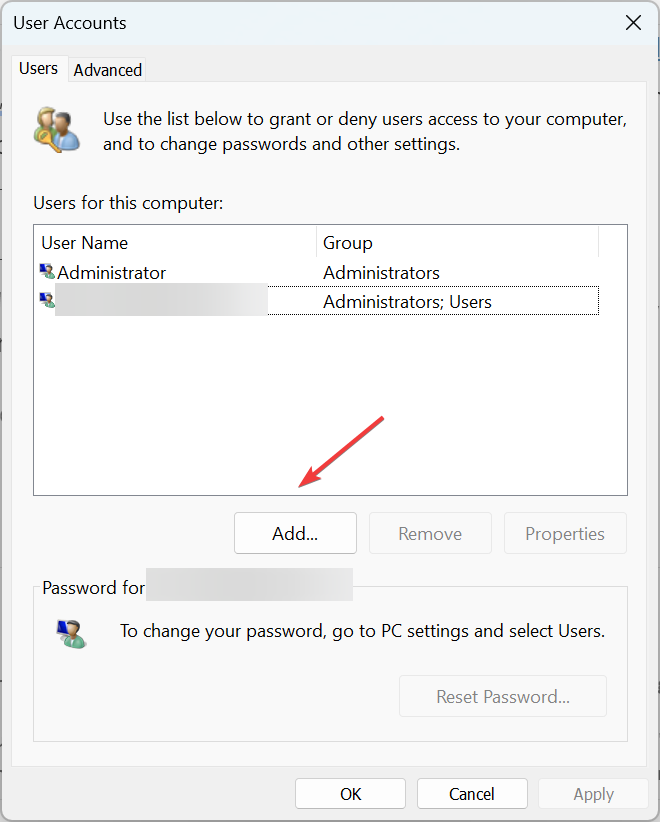
- Click on Add.
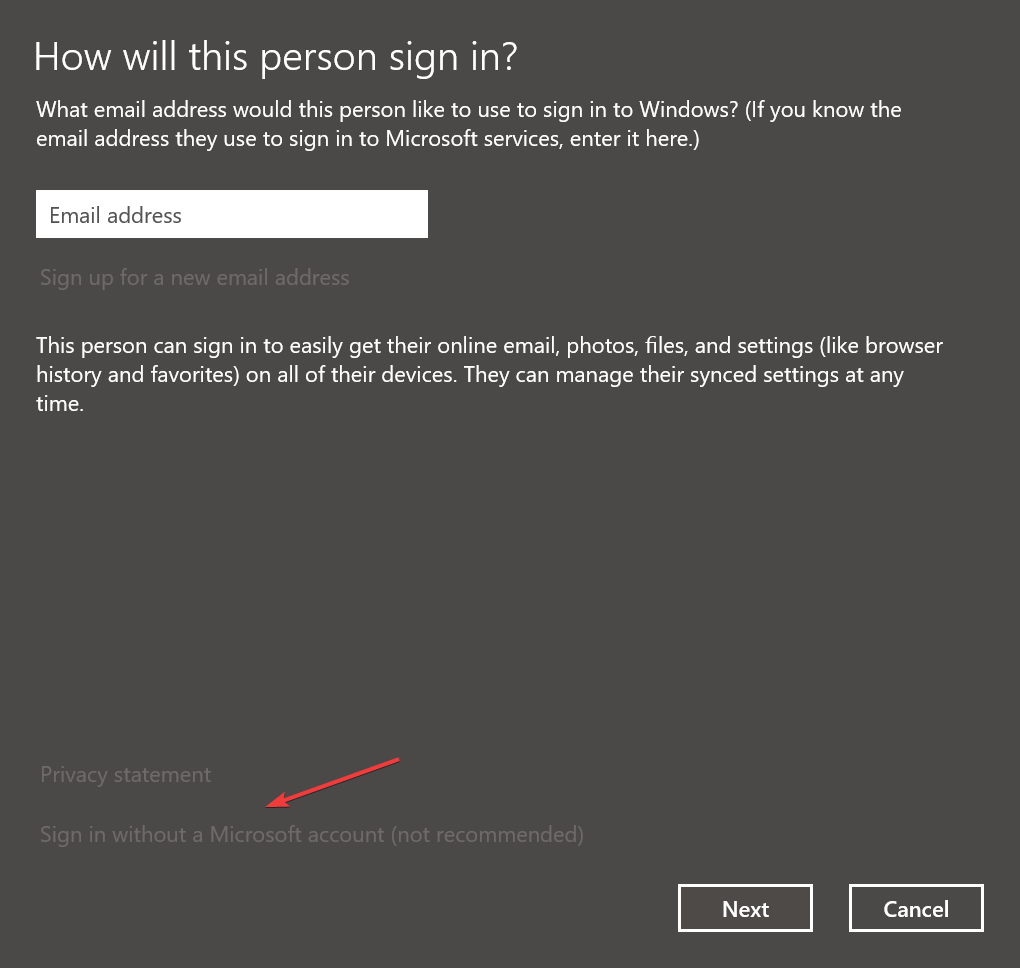
- Select Sign in without a Microsoft account (not recommended).
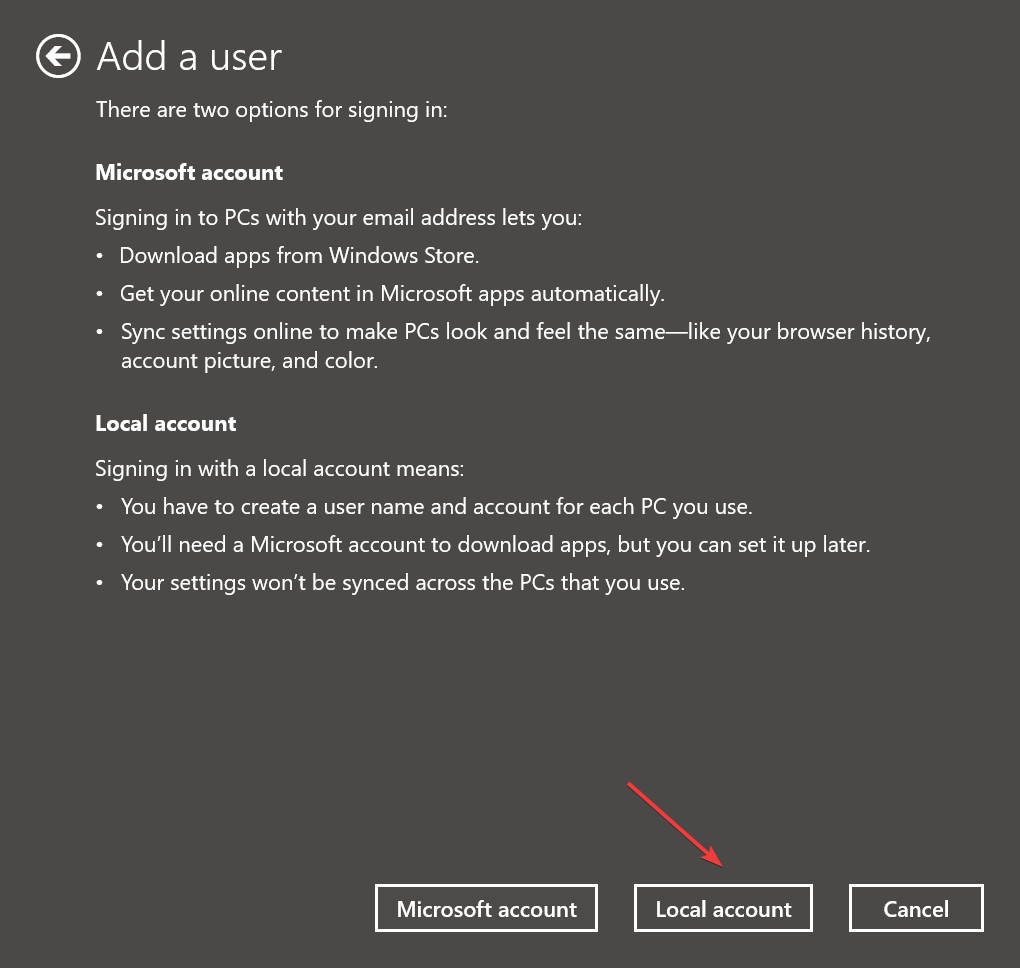
- Click on Local account.
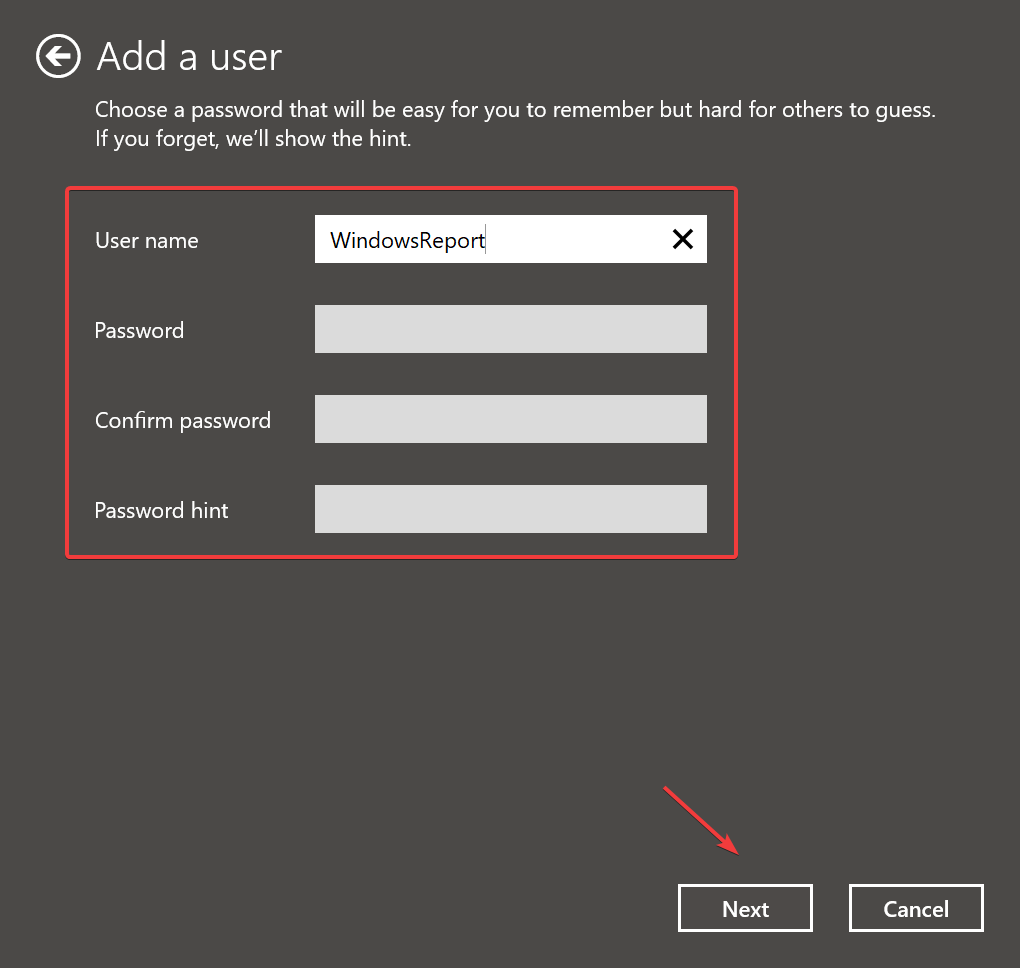
- Enter the username and password (not mandatory for Local Accounts), then click on Next.
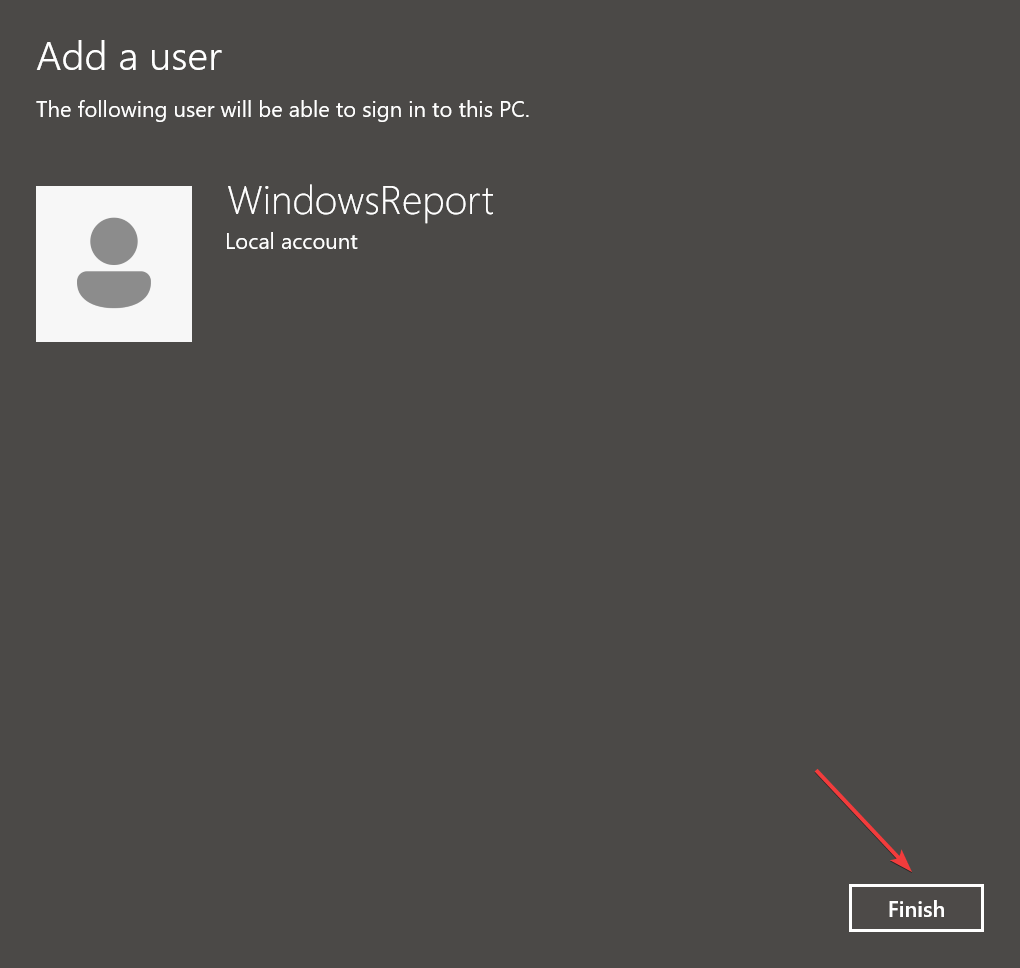
- Click Finish to create the user account.
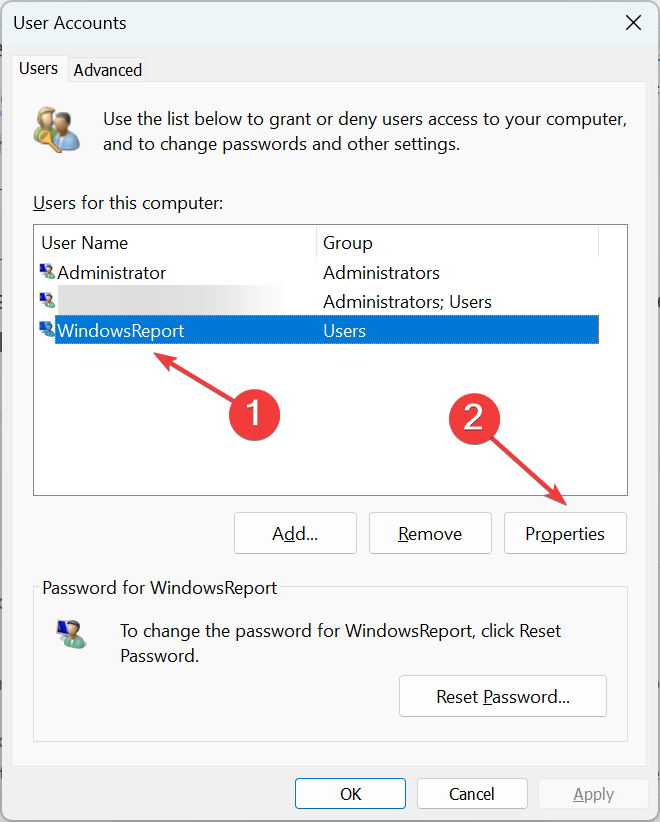
- Select the account you just created and click Properties.
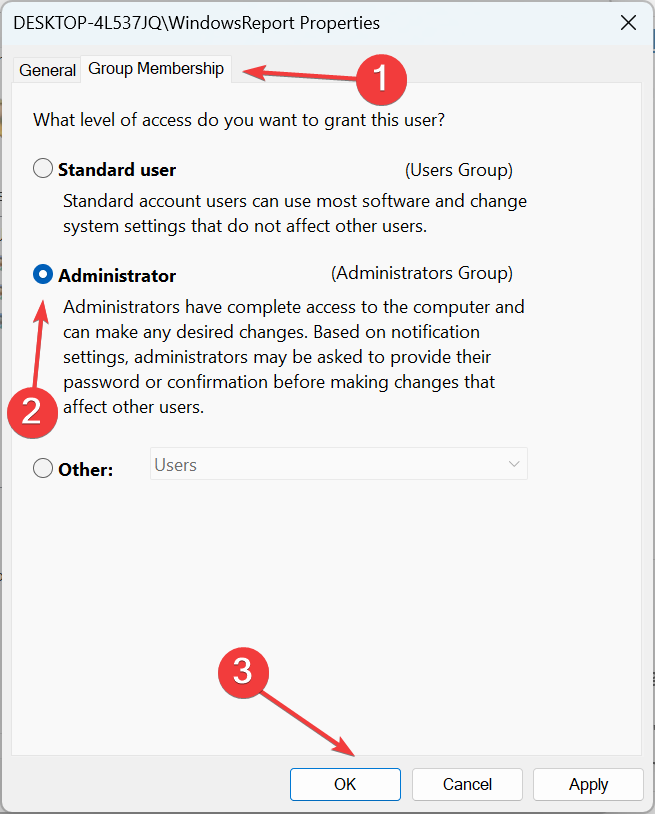
- Head to the Group Membership tab, select Administrator, and click OK to save the changes.
- Finally, sign in with the new user account, install the GeForce Experience app, and you should be able to install the latest drivers.
As a last resort, you can create a new user account to fix things if GeForce Experience is stuck on the Preparing to install screen due to a corrupt user profile. To transfer data between the previous and new account, you can use a reliable backup tool or USB storage device.
Once you have fixed the problem, check the best graphics settings for improved gaming in Windows.
This isn’t the only issue, and many reported that GeForce Experience driver download is stuck at 100%, but we have a guide that addresses that.
Tell us which fix worked for you in the comments section below.

User forum
0 messages