High CPU Usage in Windows Event Log? How to Fix it
Third-party applications can be responsible for performance issues
6 min. read
Updated on
Read our disclosure page to find out how can you help Windows Report sustain the editorial team Read more
Key notes
- If you're getting high CPU usage in Windows Event Log, try disabling your antivirus software.
- Specific power settings can sometimes interfere with the CPU and cause its usage to rise.
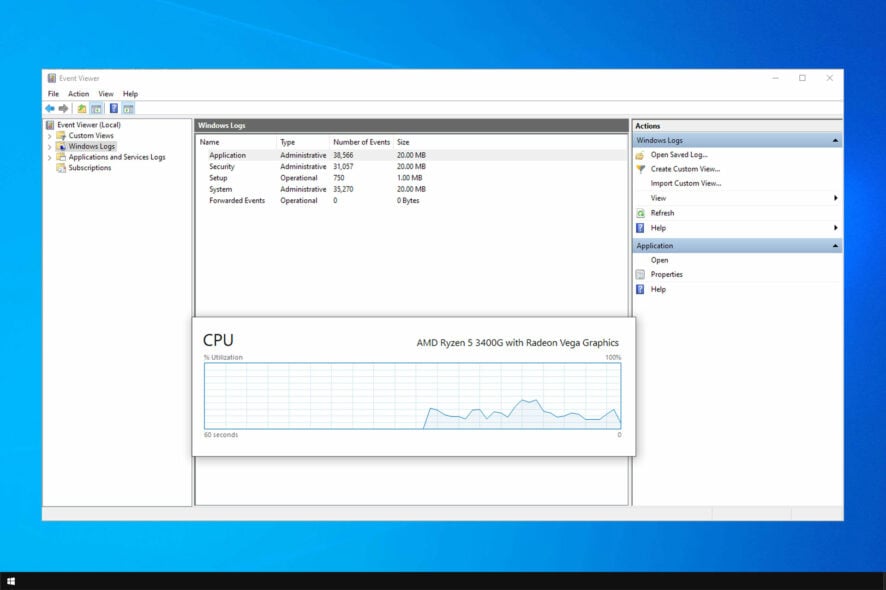
Windows Event Log high CPU usage will negatively impact your performance, and it might make your PC sluggish. It can even cause freezing in some cases.
Since this issue will drastically impact your performance, it’s essential to fix it, and this guide will show you how to do it properly.
Why is my CPU activity so high?
- Your antivirus or firewall might be causing high CPU usage.
- Event log is too large, thus requiring more resources to open.
- Certain power settings are enabled, and they are causing this issue.
- Third-party applications might be interfering with your system.
How can I fix high CPU usage in Windows Event Log?
1 Check your antivirus/firewall
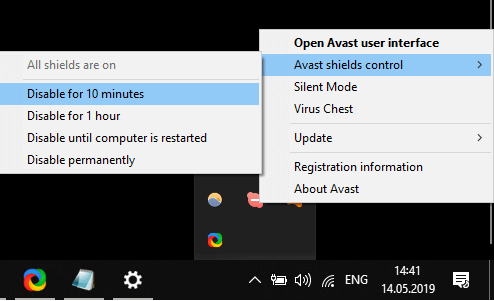
- Locate your antivirus software in the system tray.
- Right-click it and choose the option to disable it.
- After disabling it, check if the problem is still there.
Many great alternatives are accessible online, but we recommend ESET NOD32 Antivirus if you want optimum security that won’t interfere with your computer.
It does the job well for a reasonable price and does not rely on scare tactics to promote subscriptions. The most intriguing aspect of this ESET NOD32 is that it receives continual database subscription updates to provide superior security for your system against the most recent threats.
It removes malware without slowing down your computer, and the interface is straightforward and easy to use for any user.
2. Use Process Explorer
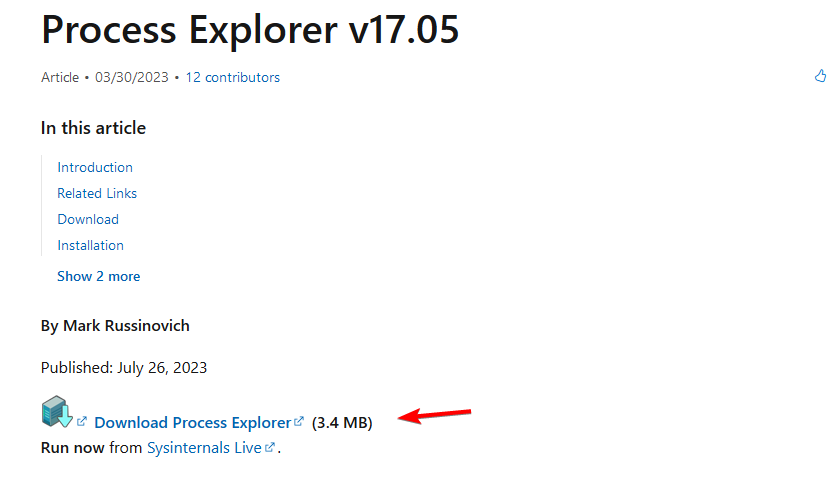
- Visit the Process Explorer download page.
- Click on Download Process Explorer.
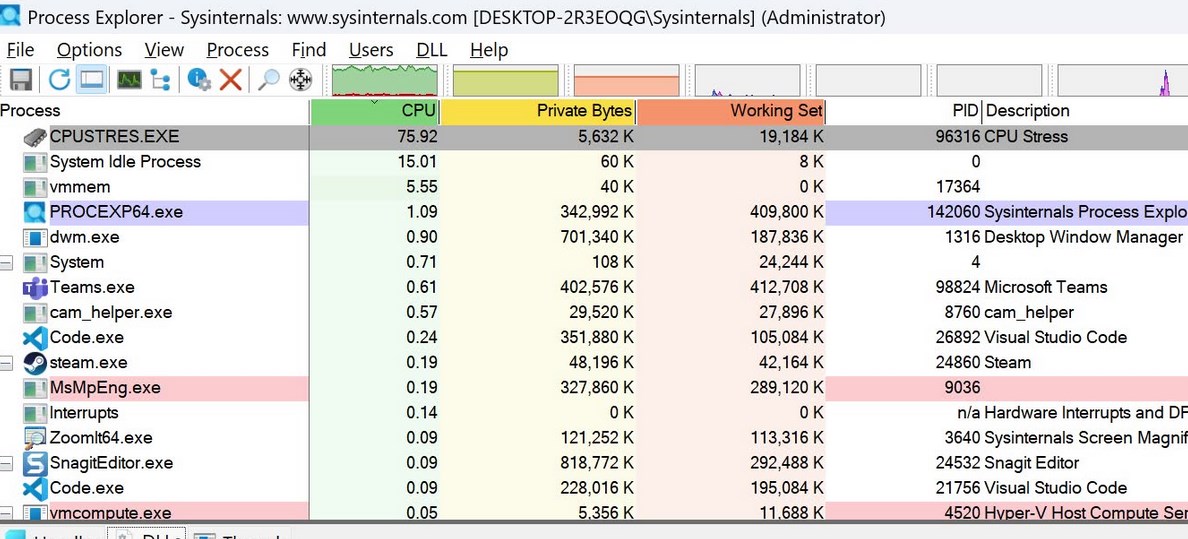
- Once the tool is downloaded, launch it and use it to the cause for high CPU usage.
Do keep in mind that this is an advanced tool, so it might not be as simple to use. To learn more about it, read more about the Windows Sysinternals package.
3. Clear Event Viewer log
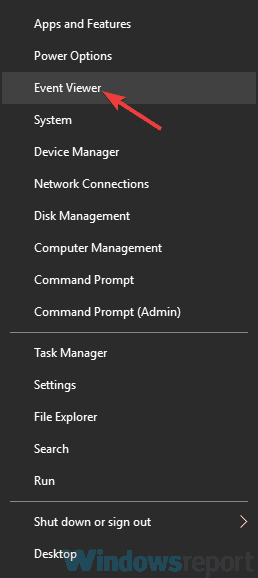
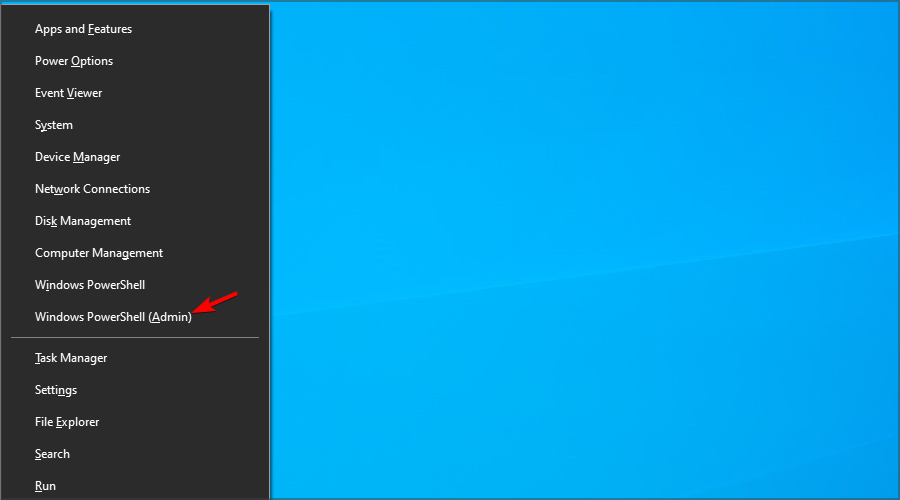
- Press Windows key + X and choose Event Viewer from the list.
- When Event Viewer opens, in the left pane expand the Windows Logs section and select Applications. Now in the right pane, click Clear Log. You can save your logs before removing them if you want.
- Now go back to the Windows Logs section, select the next category on the list and remove its logs as well. Repeat these steps until you clear all logs from Windows Logs section.
4. Enter Safe Mode
- Open the Settings app. The fastest way to do that is to use Windows key + I shortcut.
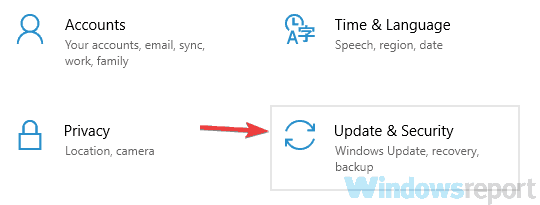
- Now go to the Update & Security section.
- Pick Recovery from the menu on the left. In the right pane, click the Restart now button.
- List of options should now appear. Pick Troubleshoot and then Advanced options. Lastly, choose Startup Settings and click the Restart button.
- Once your PC restarts, you’ll have a list of options. Pick the version of Safe Mode that you want to use by pressing the appropriate keyboard key.
Once you enter Safe Mode, check if the problem is still there. Entering the Safe Mode might not fix the problem, but it’s a great way to troubleshoot your PC, so be sure to try it.
5. Use the command line
- Press Windows key + X and choose PowerShell (Admin).
- Run the following command:
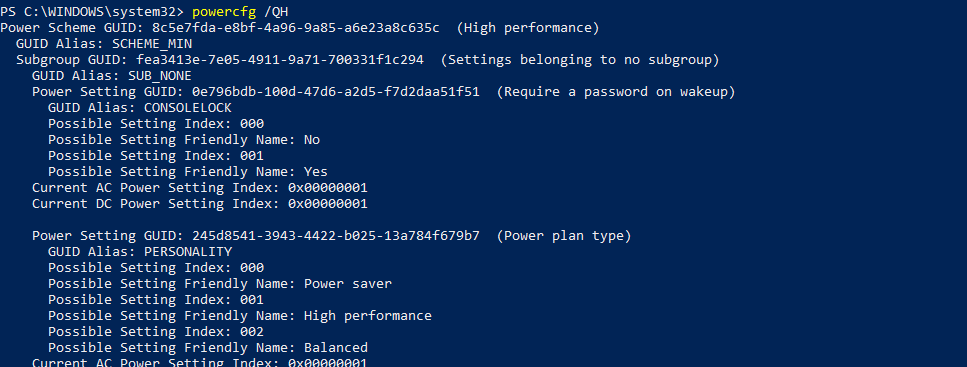
powercfg /QH - Look for IDLEDISABLE value. If it’s enabled, disable it by running these commands:
PowerCfg /SETACVALUEINDEX SCHEME_CURRENT SUB_PROCESSOR IDLEDISABLE 000
PowerCfg /SETDCVALUEINDEX SCHEME_CURRENT SUB_PROCESSOR IDLEDISABLE 000
PowerCfg /SETACTIVE SCHEME_CURRENT - Check if the issue is resolved.
Certain software, such as FlyCapture can enable this feature, so keep an eye out for it.
6. Perform a Clean boot
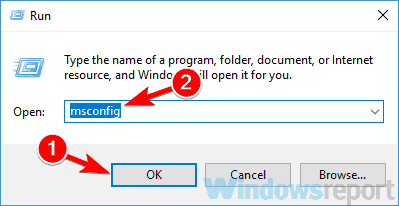
- Press Windows key + R. Now enter msconfig and click OK or press Enter.
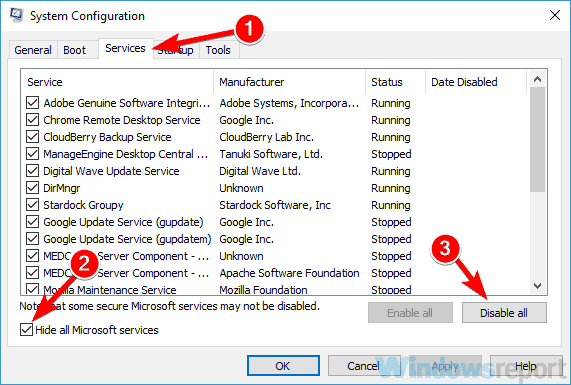
- When the System Configuration window appears, go to the Services tab. Check Hide all Microsoft services option and click the Disable all button.
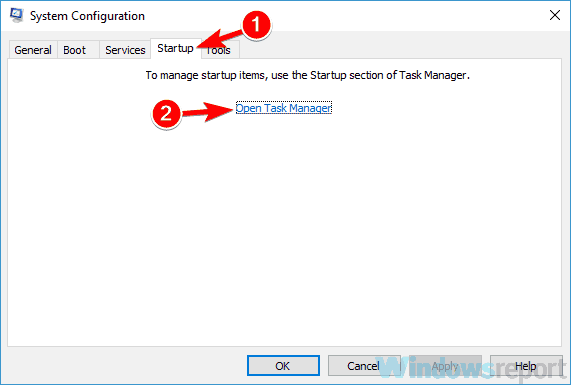
- Go to the Startup tab and click Open Task Manager.
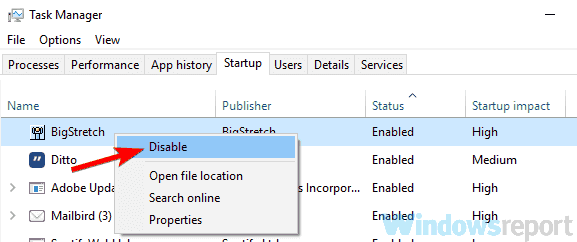
- Task Manager will now appear and you’ll see the list of startup applications. Right-click the first application on the list and pick Disable. Repeat this for all startup applications.
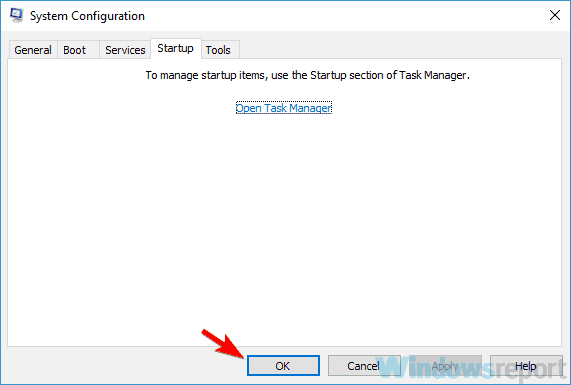
- After you disable all startup applications, head back to the System Configuration window. Click Apply and OK to restart your PC.
Once your PC restarts, check if the issue is still there. If the problem doesn’t appear anymore, it’s certain that one of the disabled applications or services was causing it. To pinpoint the cause, you’ll need to enable applications and services in groups until you find the cause of the problem.
Bear in mind that you’ll need to restart your PC every time after enabling a group of applications or services in order to apply the changes.
7. Create a new user account
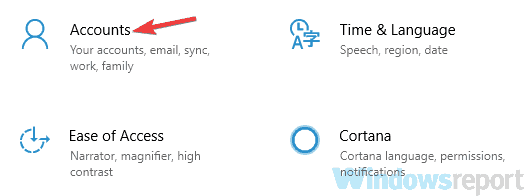
- Open the Settings app and navigate to the Accounts section.
- Now pick Family & other people from the left pane. Now click Add someone else to this PC button.
- Choose I don’t have this person’s sign-in information.
- Select Add a user without a Microsoft account.
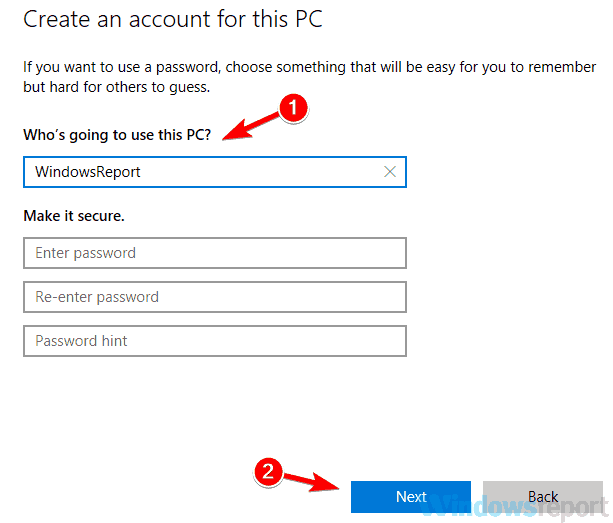
- Set the username and password if you want for the new account and click Next.
After creating a new account, switch to it and check if the problem remains. If the issue doesn’t appear on the new account, you’ll need to move personal files from your old account to the new one and start using it instead of your old account.
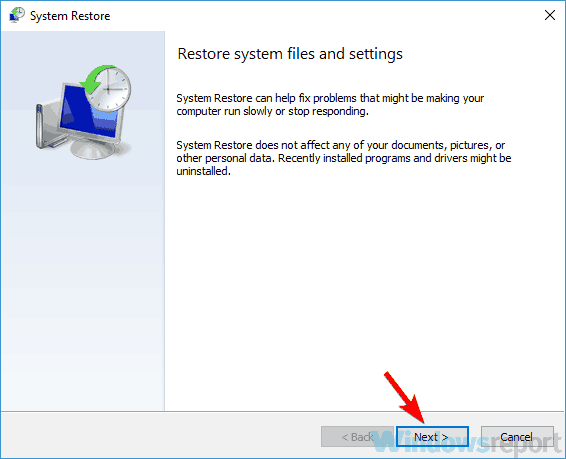
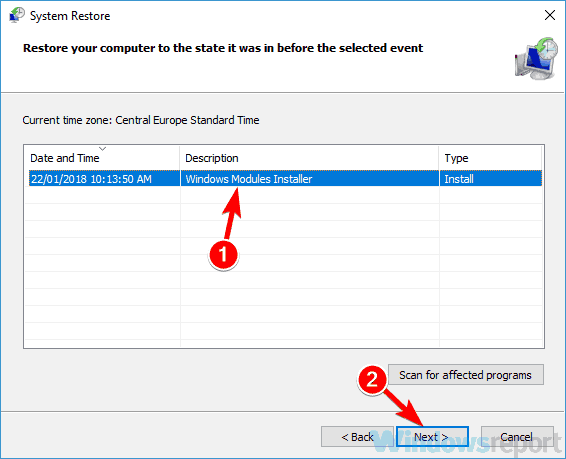
8. Perform a System Restore
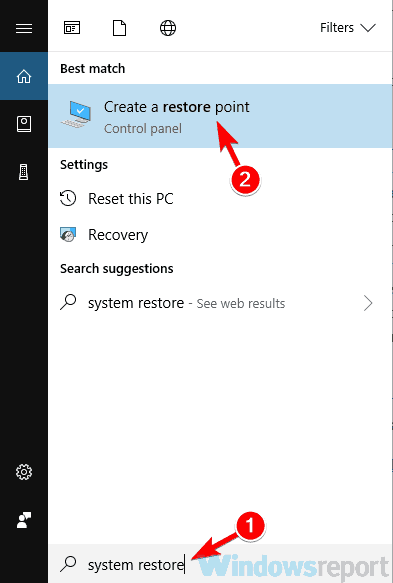
- Press Windows key + S and enter system restore in the search field. Now select Create a restore point from the list of results.
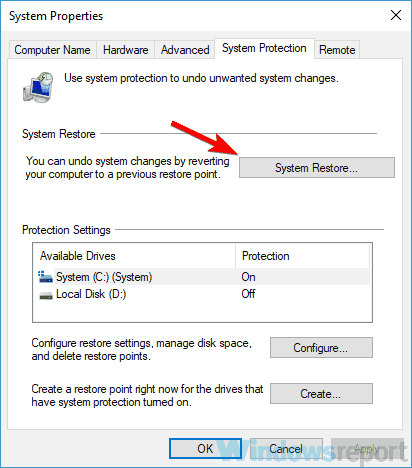
- Click the System Restore button in System Properties window.
- System Restore window will now appear. Click Next to proceed.
- Now check Show more restore points option, if available. Select the desired restore point and click Next.
- The instructions on the screen should guide you through the restoration process.
After your PC is restored, the problem should be completely resolved.
What is the event ID for high CPU usage?
If you open Event Log and notice an ID with the number 3207, your PC has encountered increased CPU usage.
This event appears if the usage jumps several percent in the last few seconds.
Fixing Service Host Windows Event Log high CPU usage requires you to modify certain settings, and sometimes, you will need to disable features or applications that might interfere with it.
This isn’t the only component that suffers from this issue, and many reported high CPU usage in Windows Explorer. Some users encountered high CPU usage in Windows Update, but we covered that in a separate guide.
This issue affects all versions of Windows, and to learn more, we have a special guide on how to fix Windows 11 high CPU usage.
Did you find a different method? If so, share it with us in the comments below!

