Easy steps to fix MS Office error 1713 in Windows 10
4 min. read
Updated on
Read our disclosure page to find out how can you help Windows Report sustain the editorial team Read more
Key notes
- Is error 1713 preventing you from installing the MS Office suite of your choice on Windows 10?
- While this can be annoying, it is certainly fixable. Check out the article below.
- Check out our Microsoft Office page to stay in the loop.
- Make sure to address whatever issue might come your way with the help of our Windows 10 Errors Hub.
Error 1713 arises for some users when they try to install MS Office suites, such as Office 365 or Office 2016.
The error message states: MSI_package_name cannot install one of its required products. Contact your technical support group.
Users can’t install Microsoft Office when that error arises.
How can I fix error 1713 in Windows 10?
1. Thoroughly Uninstall Previous Office Software
- Error 1713 often arises due to an existing or remnants of a previous Office installation that needs removing. So, try uninstalling an existing MS Office suite with Advanced Uninstaller PRO, or another third-party uninstaller.
- Add Advanced Uninstaller PRO to Windows with its installer.
- Open the Advanced Uninstaller PRO window.
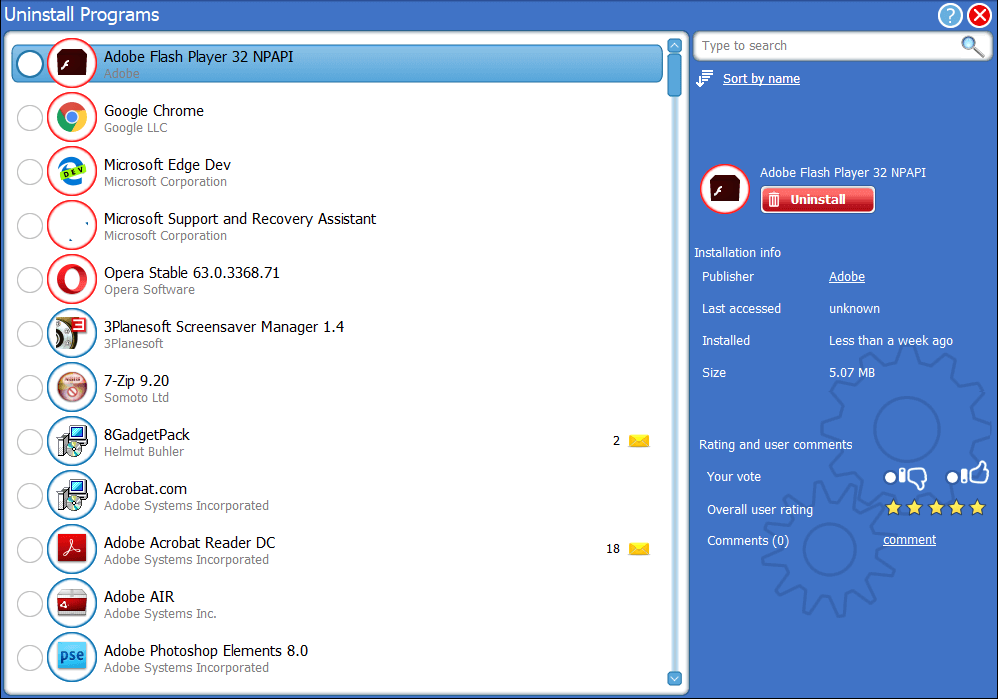
- Click General Tools and Uninstall Programs to open the window shown directly below.
- Select the MS Office suite, and click the Uninstall button.
- Click the Use the leftover scanner option, which will enable users to delete all leftover files and registry entries for MS Office.
- Click the Yes button to confirm.
- Thereafter, select all the leftover files and registry entires listed within the Advanced uninstall clean-up window.
- Press the Done button.
Users who have already uninstalled an MS Office suite can try reinstalling it and then uninstalling it with third-party software.
Alternatively, delete all remaining MS Office folders from File Explorer by right-clicking them and selecting Delete.
Users can also scan the registry with CCleaner to delete leftover Office registry items.
2. Turn Off the Windows 10 Firewall
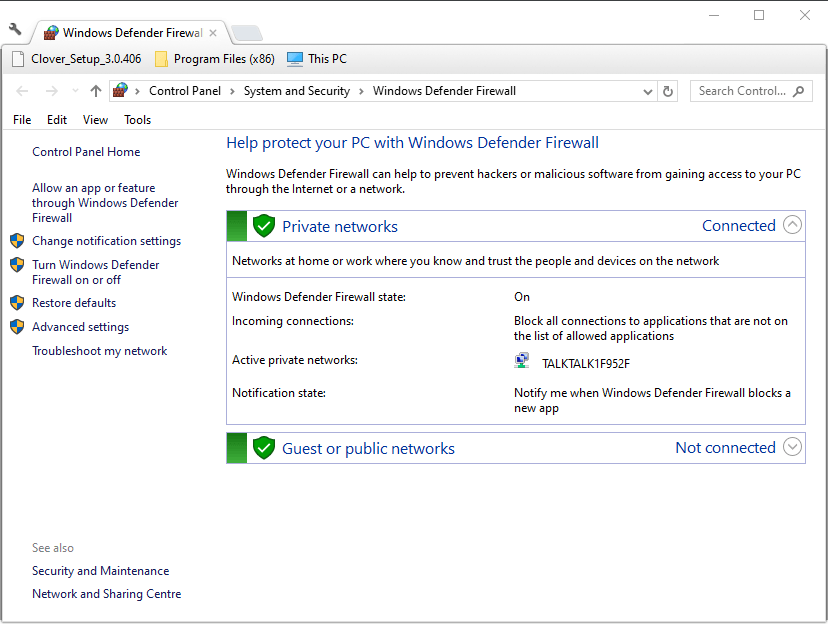
- The Windows Defender Firewall could be blocking an MS Office suite installation when error 1713 arises. To turn off Windows Defender Firewall, click the Type here to search button.
- Enter the keyword firewall in the search box, and click Windows Defender Firewall.
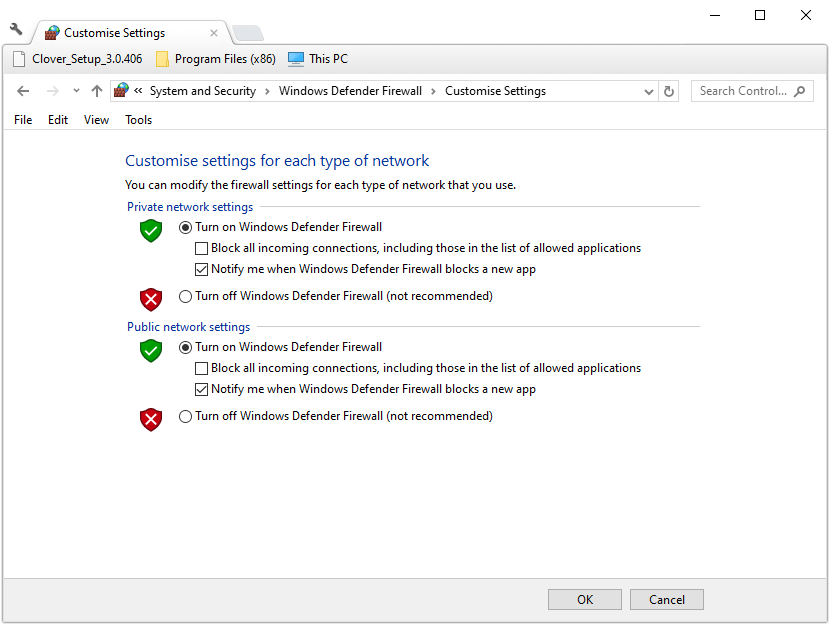
- Click Turn Windows Defender Firewall on or off to open firewall settings.
- Click the Turn off Windows Defender Firewall radio buttons, and select the OK option.
3. Run a Registry Scan
- Error 1713 can also be due to corrupted or leftover registry keys from previous Office versions. To clean and fix the registry, Download CCleaner.
- Add CCleaner to Windows with its downloaded installer.
- Open the CCleaner window, and click the Registry tab.
- Select all the registry checkboxes, and press the Scan for Issues button.
- Click the Fix selected issues button.
- Then click Fix All Selected Issues to confirm.
4. Turn Off Third-Party Antivirus Firewalls
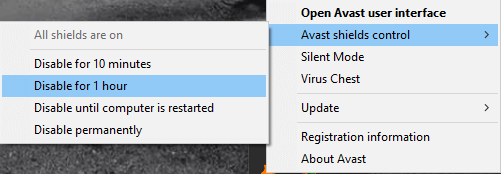
In addition, users might need to turn off third-party antivirus software firewalls. How exactly users can do that varies between antivirus packages.
However, users can expect to find some kind of disable or turn off setting on antivirus utilities’ system tray context menus. So, right-click the system tray icon for an antivirus utility to select an option that will temporarily disable it.
5. Remove Software From the System Startup
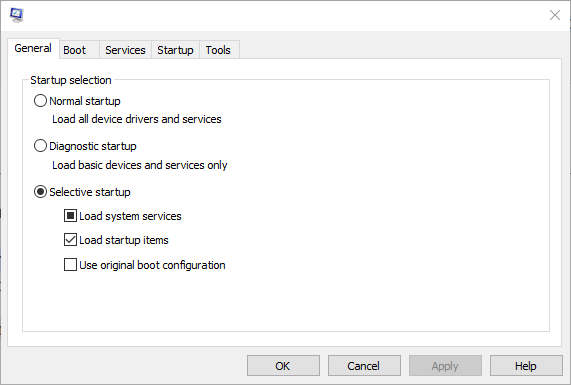
- Some third-party programs can potentially generate MS Office installation conflicts. To remove third-party software from the system startup, open Run with its Windows key + R hotkey.
- Enter msconfig in Run and click OK to open the System Configuration window.
- Click the Selective startup radio button.
- Deselect the Load startup items check box.
- Select the Use original boot configuration and Load system services check boxes.
- Press the Apply button.
- Click OK to exit the System Configuration.
- Select the Restart option to reboot Windows.
- Thereafter, try installing the MS Office software.
- Users can restore the startup software by selecting the Load startup items option on the System Configuration window.
6. Run a System File Scan
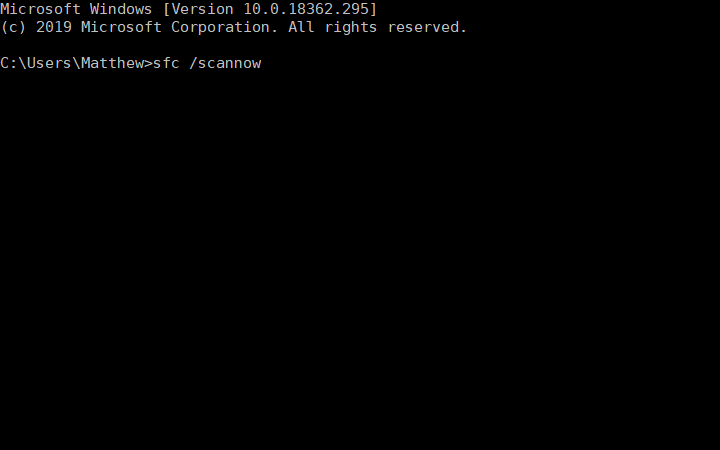
- Software install errors, such as error 1713, can arise due to system file corruptions. To run a system file scan, press the Windows key + X keyboard shortcut.
- Click Command Prompt (Admin) to open an elevated Prompt.
- Enter DISM.exe /Online /Cleanup-image /Restorehealth in the Prompt’s window, and press the Return button.
- Input sfc /scannow and press the Enter key.
- Restart Windows if the scan repairs system files.
Need more details on how to run SFC scannow in Windows 10? Check out this guide.

