How to use Microsoft Planner to keep track of tasks when working remotely

World-class 24/7 support with 82% for a 2 years plan and 2 months free
70% of our readers choose Private Internet Access
70% of our readers choose ExpressVPN
Amazing connection speed with 61% off and 4 months free for the 2-years plan.
Best security protocols with 83% off and 2 months free for a 2-year plan.
Microsoft Planner is a Kanban-style task management system aimed at busy teams and remote workers. Planner can help you to organise, assign and track tasks when you can’t discuss them in-person.
Planner work occurs in “plans” which are tied to Office 365 Groups. When you create a new plan, it will automatically create a new group (unless you add the plan to an existing group). The group exists like any other in Office 365 – it will have its own SharePoint site, OneNote notebook and other resources.
This may sound complicated at first but it helps to power some of Planner’s advanced integrations. In daily use, you shouldn’t need to worry too much about the underlying group model. You can use the Planner interface to create plans and add users to them, without getting involved in Office 365 group management.
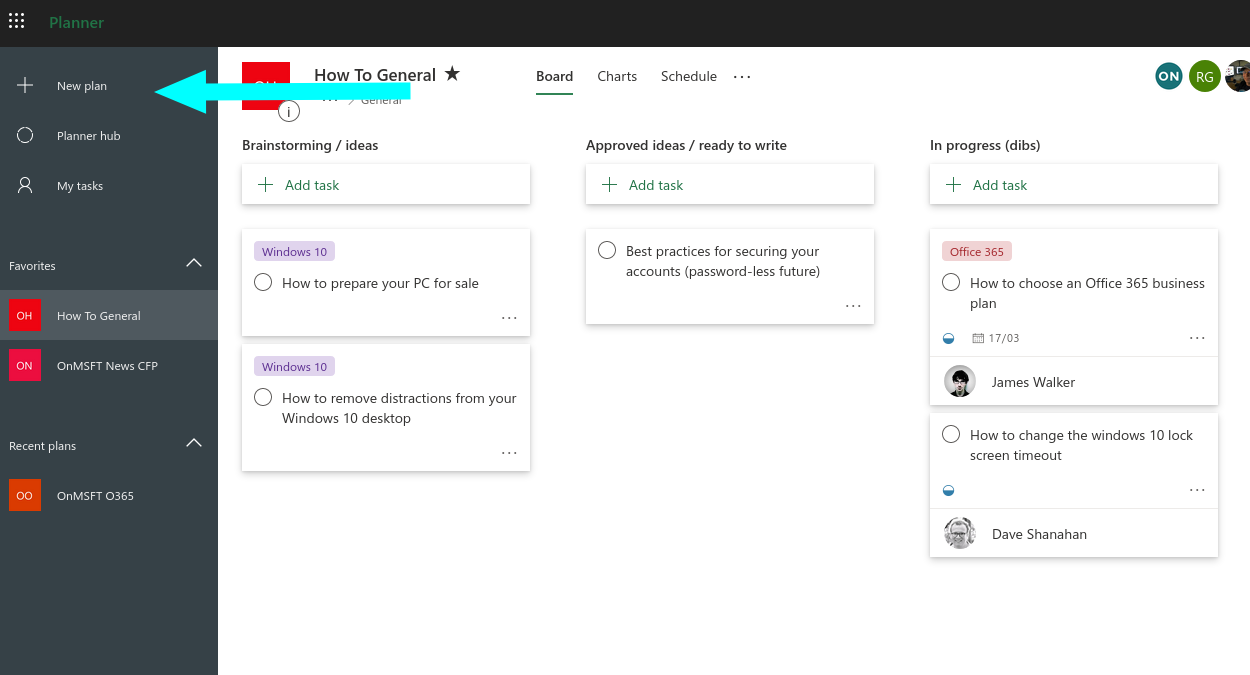
Plans and tasks
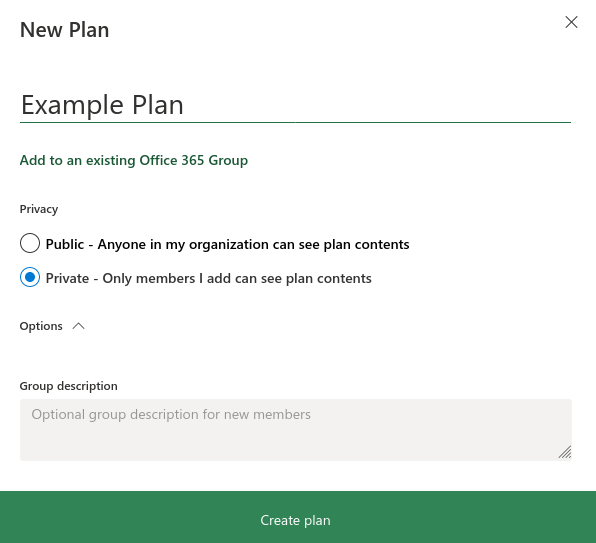
Log in to Planner at tasks.office.com and click “New plan” in the left navigation menu. Name your plan and choose whether to make it public or private. Public plans are automatically visible to everyone in your organisation.
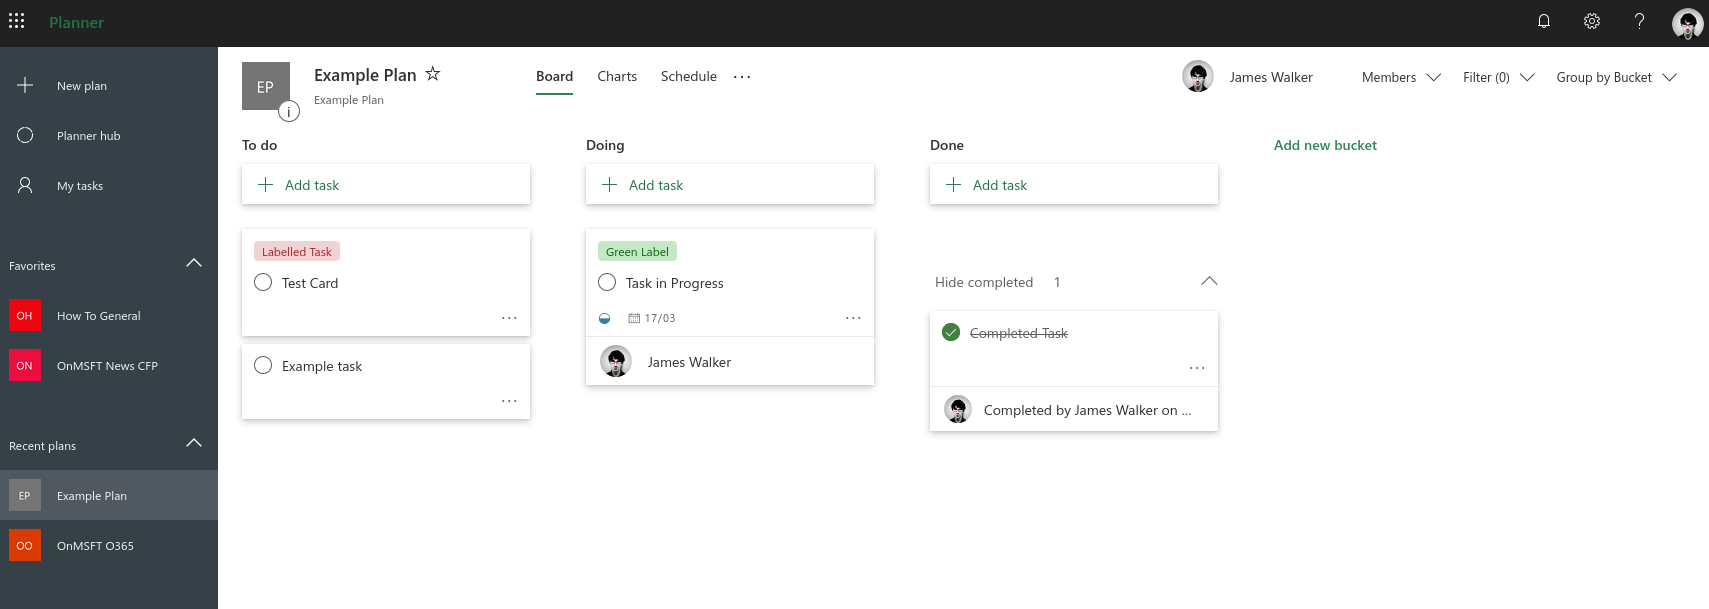
Tasks within plans are arranged into a columnar Kanban structure. They’re represented as vertical lists (“buckets”) of cards which are displayed horizontally across your screen. You can add as many buckets as you need.
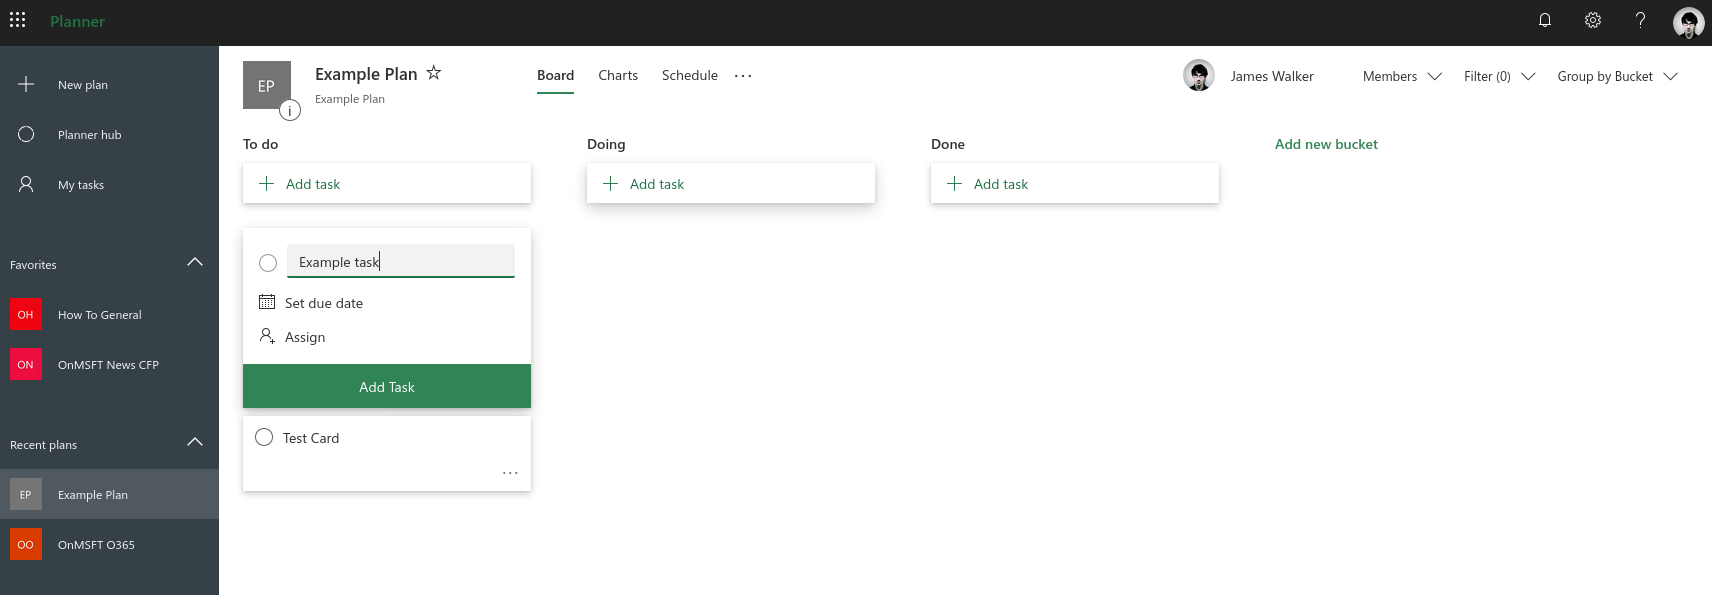
To create a task, click in any bucket and type a name for the task. Optionally, choose a due date and assign the task to a user. It’ll then show up as a task for them to complete.
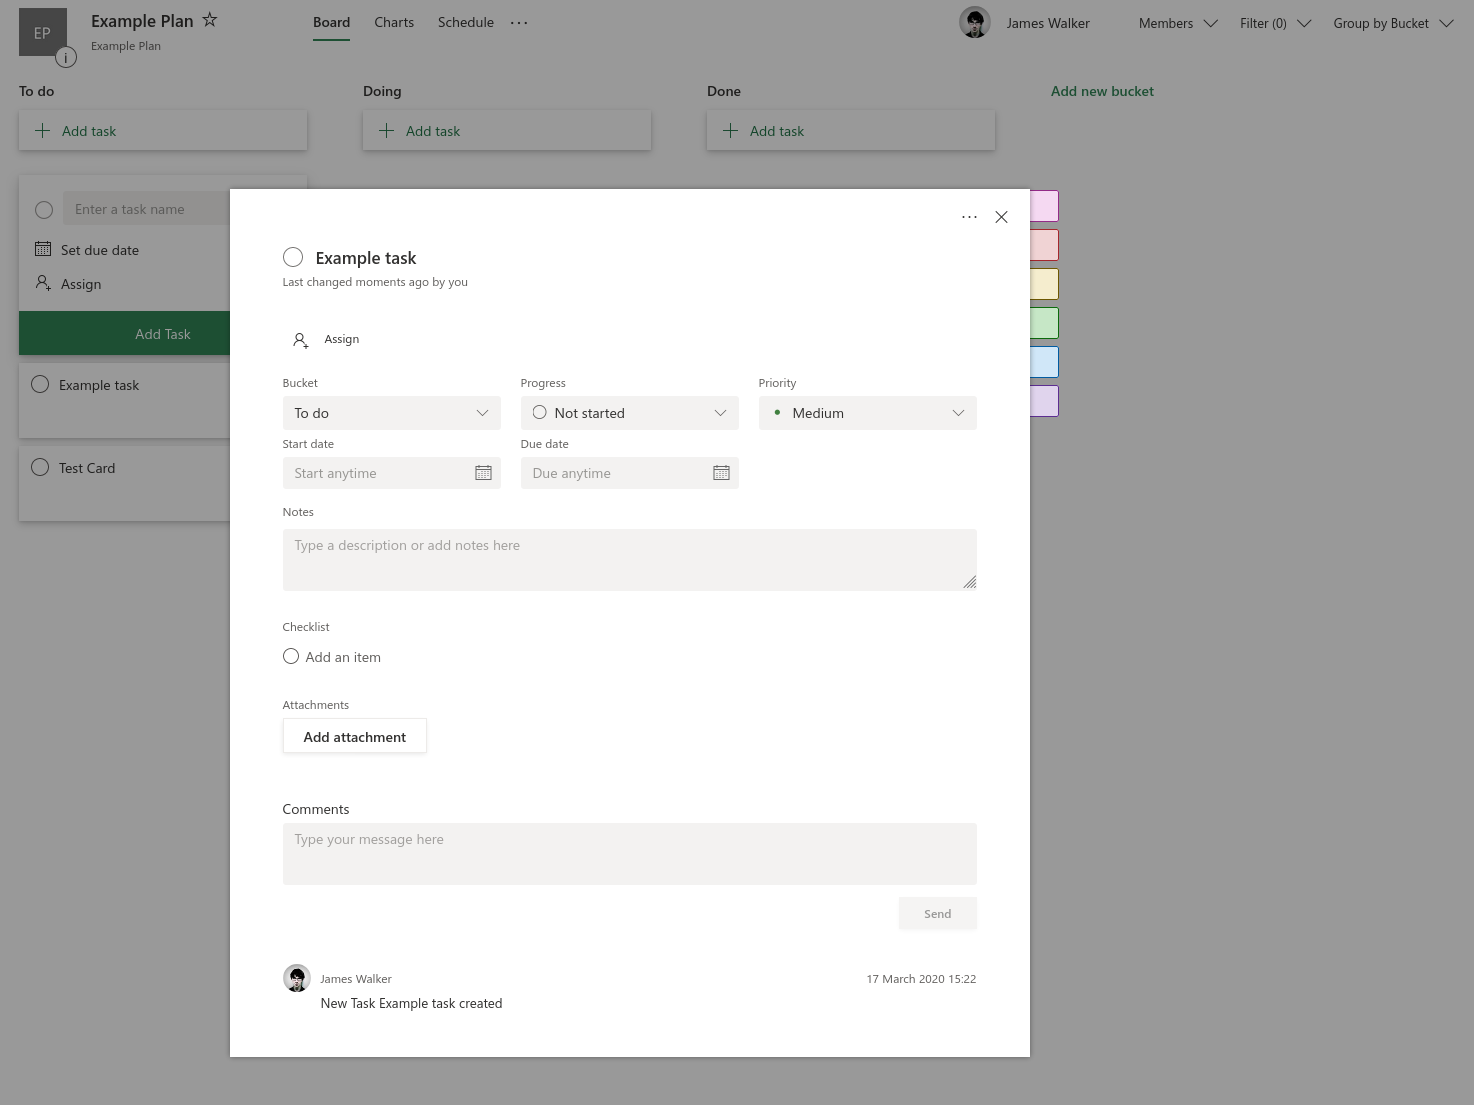
Once a task has been created, you can click it to expose more options. These include the ability to add notes, checklists, comments and attachments. You can also indicate a task’s priority and current progress.
The right side of the pane lets you select from colour-coded labels to add to the task – these will show up on the card back on the board screen. Click any label to change its name. Labels help you to distinguish between different kinds of task.
Using Planner
There’s no set way to use the options which are available. For smaller teams, a simple setup may suffice, with “To do,” “Doing” and “Done” buckets. You can then drag task cards between the buckets to create a clear overview of progress.
Larger teams with a higher volume of tasks may benefit from a more structured approach. Plans which represent a linear process may include a bucket for each stage of the process (such as “Design”, “Develop”, “Test” and “Release” for software development, or “Plan”, “Write”, “Edit”, “Review” for writing). You could then use the “Progress” option on cards to indicate the completion status.
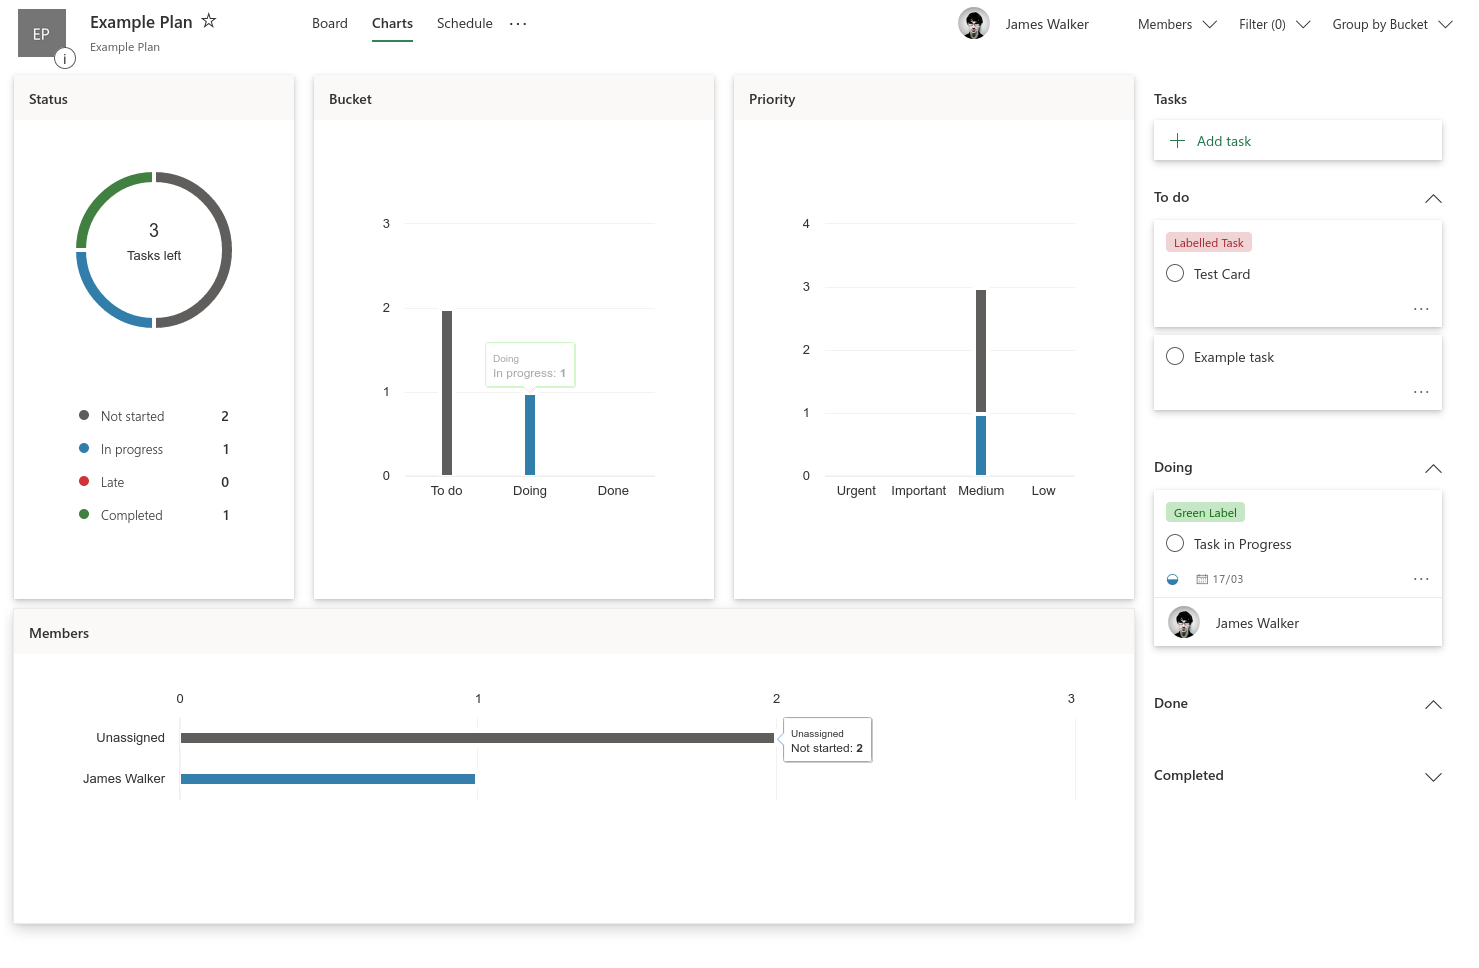
To get more insight into tasks, you can use Planner’s built-in analytics capabilities. Click the “Charts” tab at the top of the display to obtain a visual breakdown of your plan. This reports on task status, bucket and priority, so you can clearly see how work is progressing. The Schedule tab gives you a calendar view that lets you see when work is planned to be completed.
This article has given you a high-level overview of Planner’s basic concepts. We have more detailed guides available on specific features, should you want to learn more. Planner excels at replacing in-office whiteboards covered with columns of sticky notes. You can get an at-a-glance view of your tasks, which keeps everybody informed even in distributed remote-working teams.
Read our disclosure page to find out how can you help Windows Report sustain the editorial team. Read more


Improve this guide


User forum
0 messages