Laptop Battery is Stuck at 0%? Here's How to Fix It!
First step should be to check the battery health
4 min. read
Updated on
Read our disclosure page to find out how can you help Windows Report sustain the editorial team. Read more
If your laptop battery is stuck at 0% you may want to stick around because we’ll help you fix it. This annoying issue that hinders portability usually stems from faulty power adapter or charing cables.
Other possible problems include battery calibration issues, out of date drivers and faulty power management settings.
Regardless of the exact cause, the tricks below will help you charge your battery again. Let’s get right to it.
How do I fix my laptop battery that is stuck at 0?
 NOTE
NOTE
First, try using a different power outlet, check the power cable and adapter for dents and damage, and perform a power cycle. If none of these fix your problem, keep reading.
1. Check the battery health
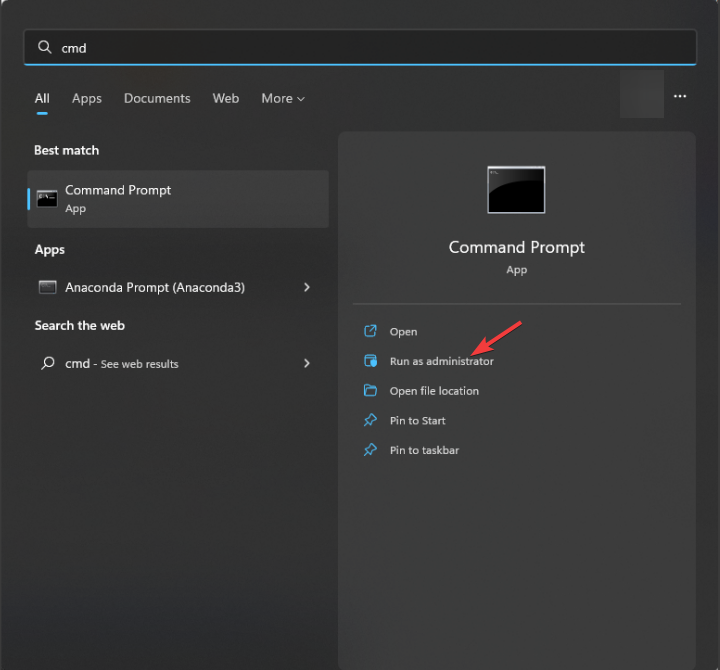
- Press the Windows key, type cmd, and click Run as administrator.
- Type the following command to generate a battery report and hit Enter:
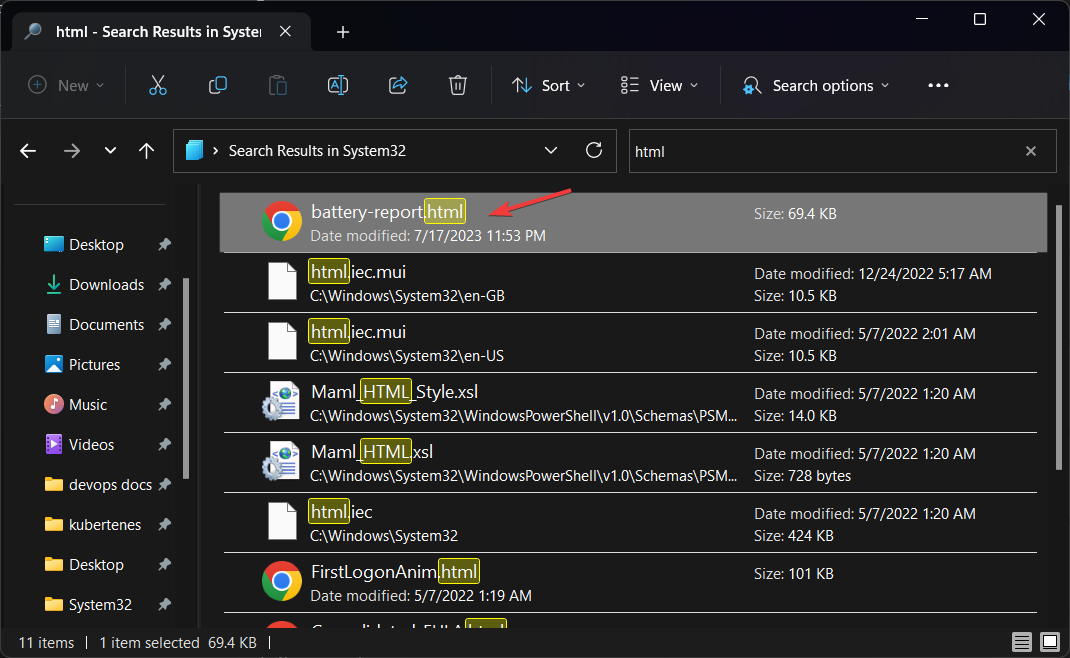
powercfg /batteryhealth - It will display the path where the report is stored.
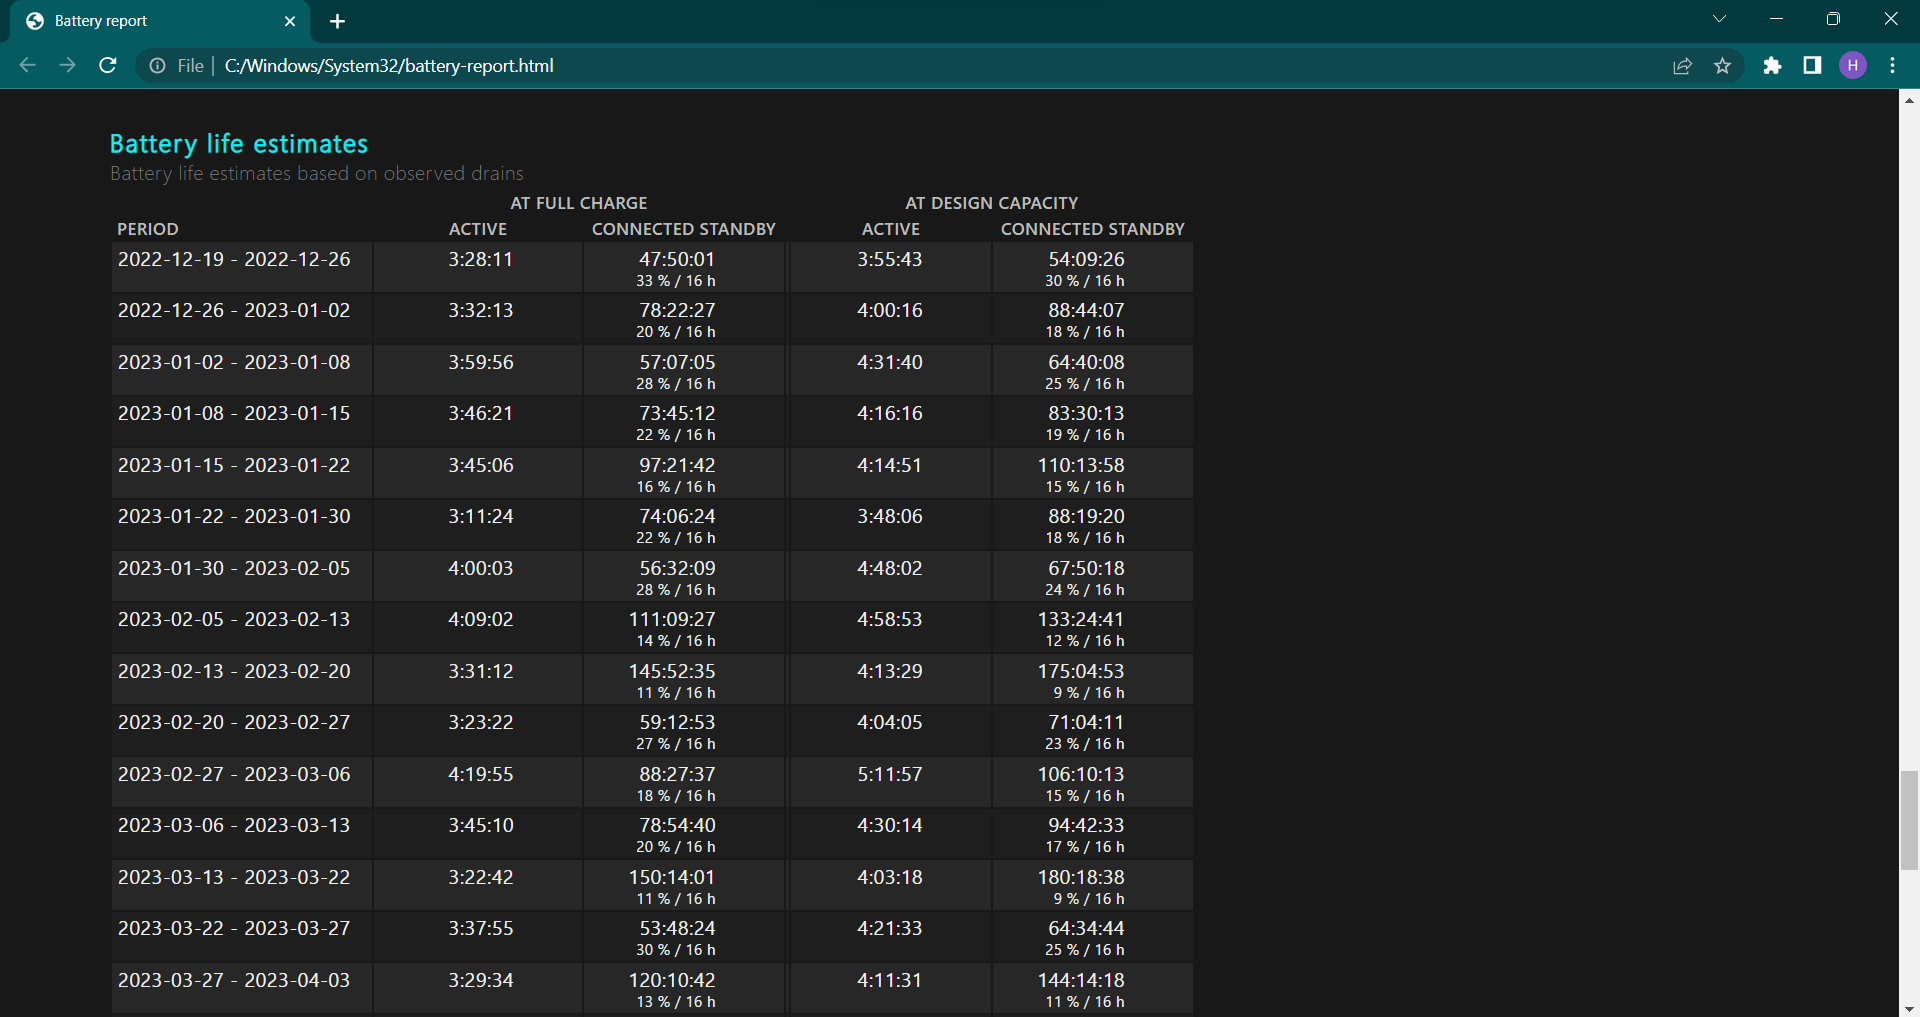
- Locate and double-click it to open it, and it will show you the information on the battery, including the name, Manufacturer, Serial Number, Chemistry, Cycle Count, and Battery life estimates.
- Go to Battery life estimates to check if the battery is working fine or not.
If there is enormous battery drainage, chances are the battery is not working correctly or is at the end of the cycle. If that’s the case, consider replacing it.
However, if it works fine, move to the following method to fix the issue.
2. Run the Power troubleshooter
- Press Windows + I to open the Settings app.
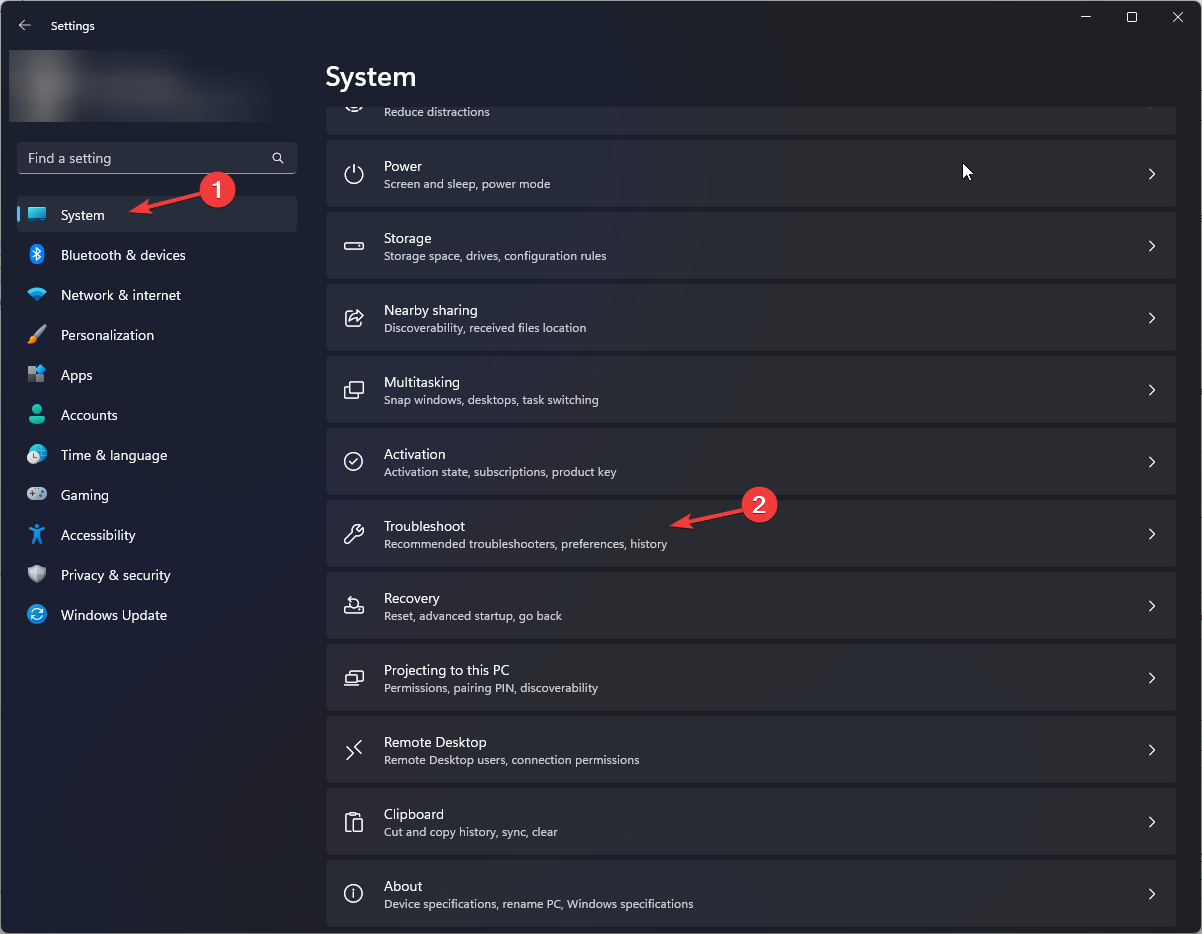
- Go to System, then click Troubleshoot.
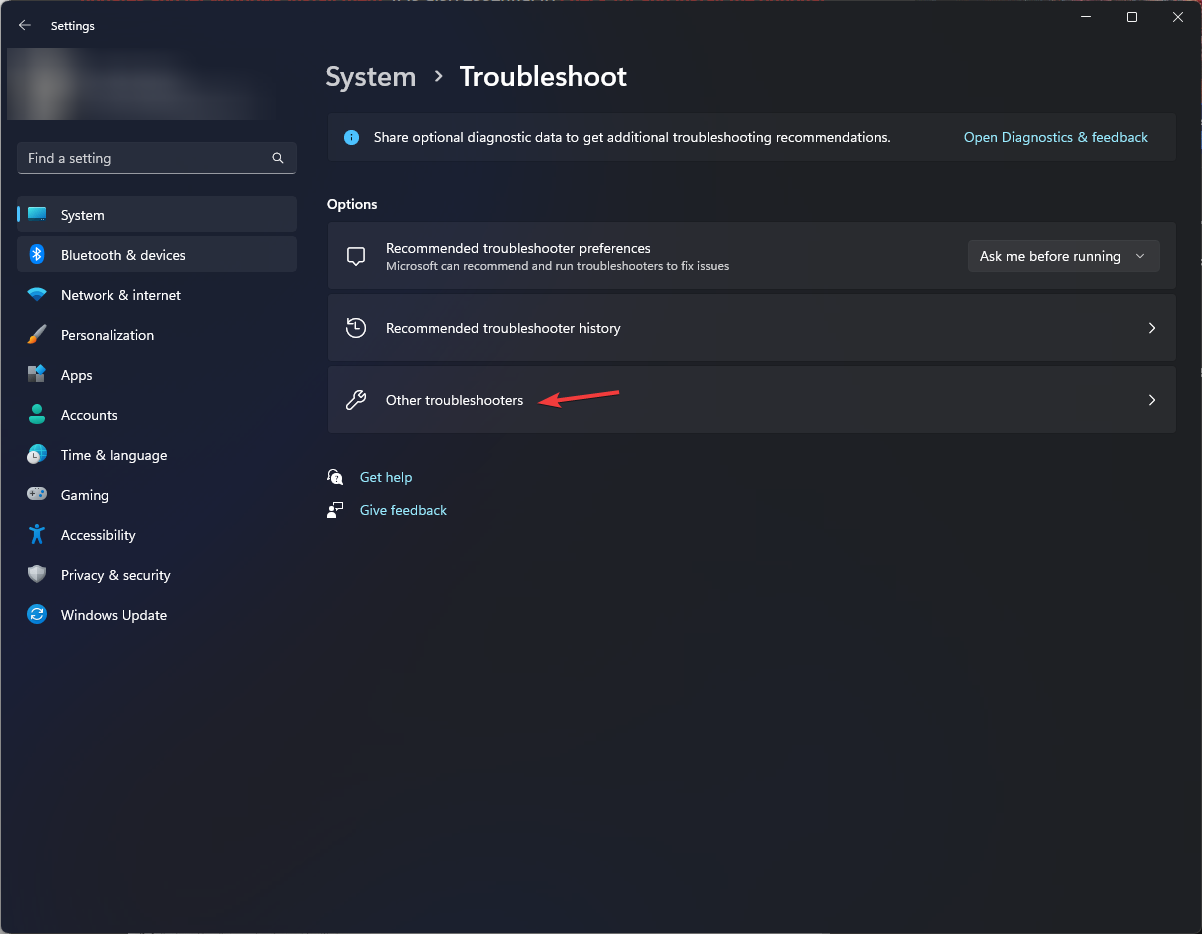
- Click Other troubleshooters.
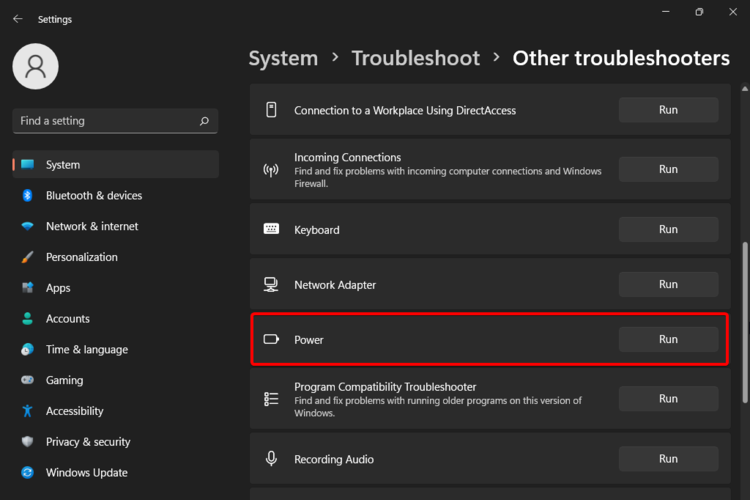
- Now locate Power and select Run.
- Follow the onscreen instructions to complete the process.
3. Reinstall the battery driver
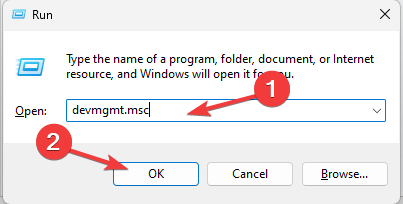
- Press Windows + R to open the Run window.
- Type devmgmt.msc and click OK to open Device Manager.
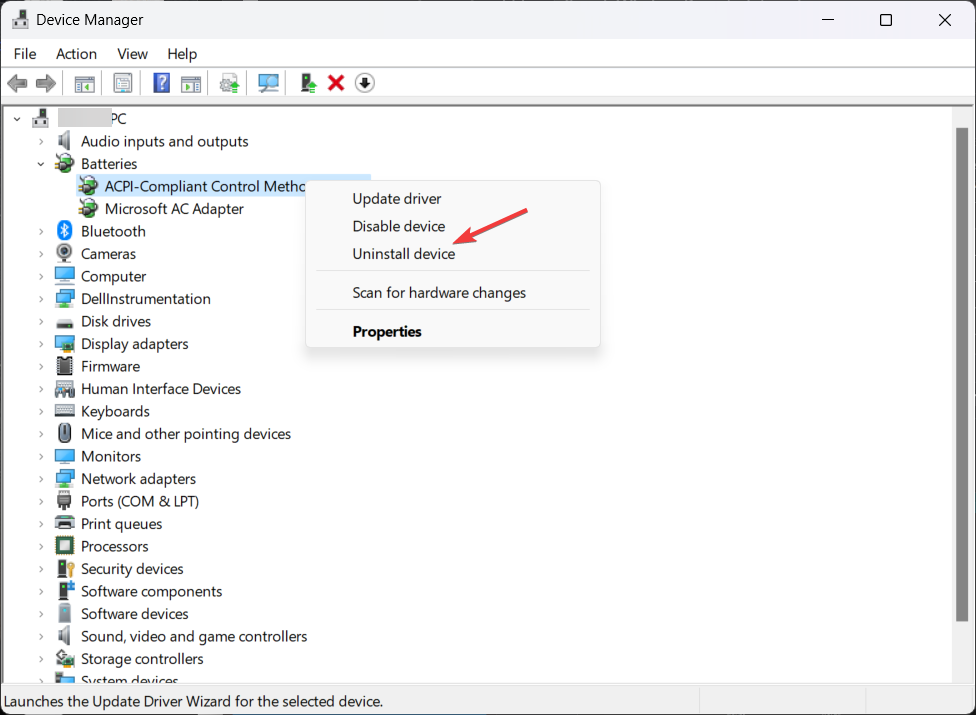
- Locate Batteries, and click it to expand.
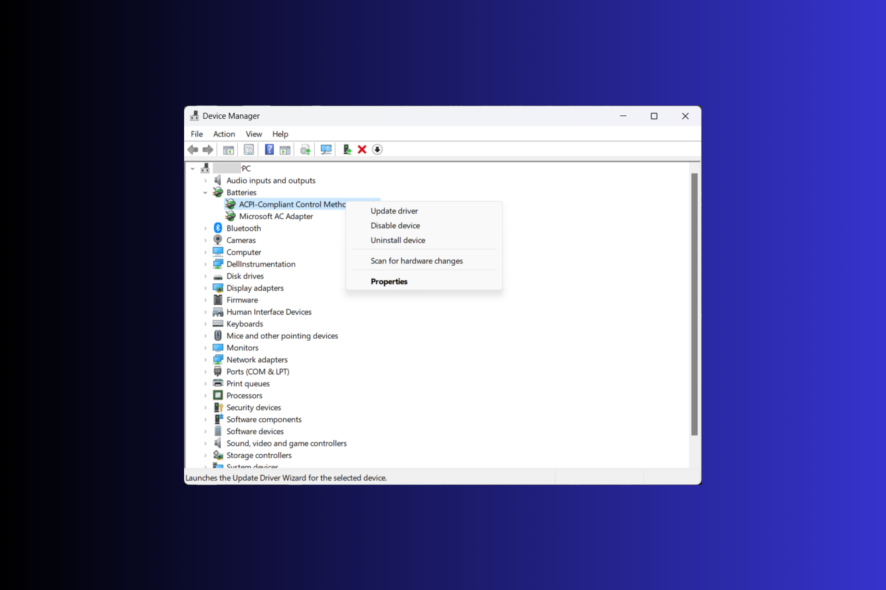
- Go to Microsoft ACPI Compliant Control Method Battery, right-click it and select Uninstall driver.
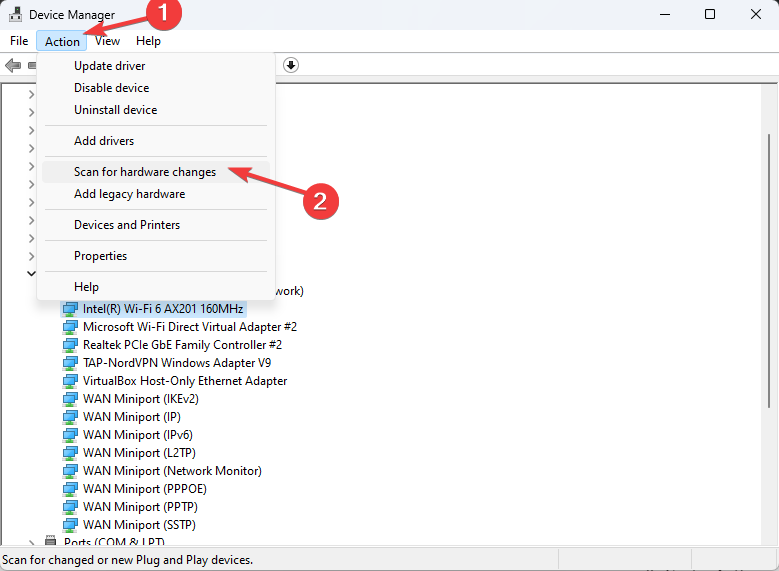
- Once done, click Action and select Scan for hardware changes to reinstall the driver.
Now check if the issue persists; if yes, move to the next method.
Remember, reinstalling the driver also helps if the laptop switches between AC and battery when gaming.
4. Uninstall the recent Windows update
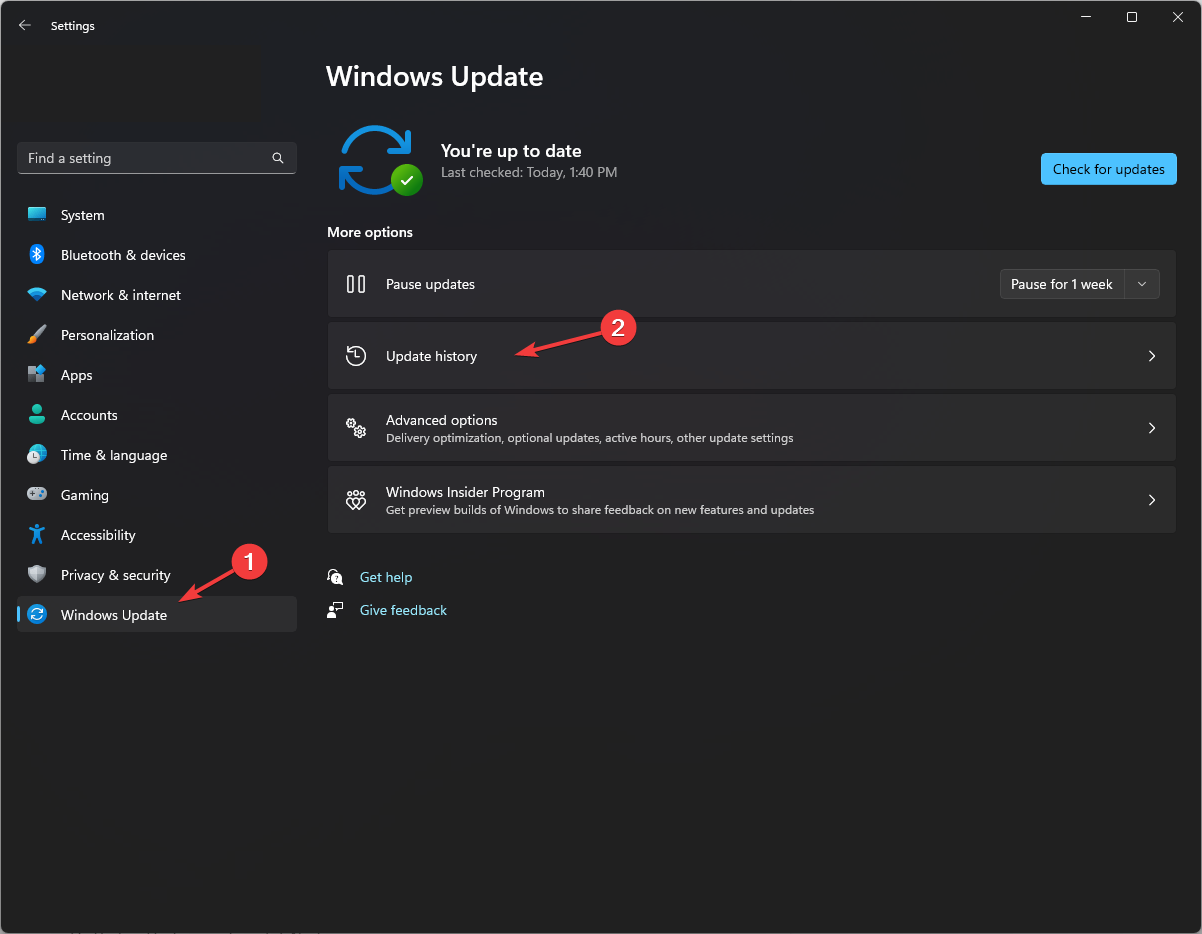
- Press Windows + I to open the Settings app.
- Go to Windows Update, then Update history.
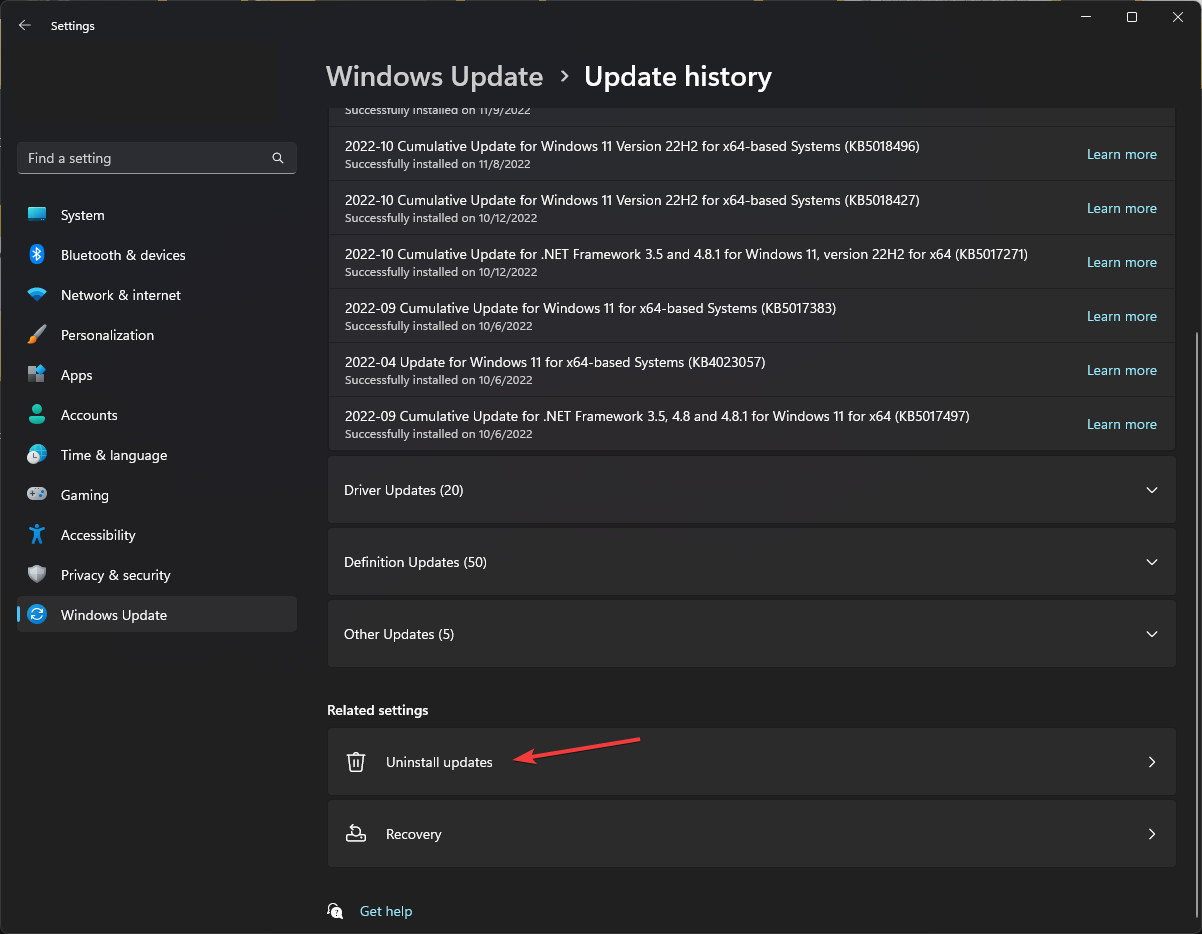
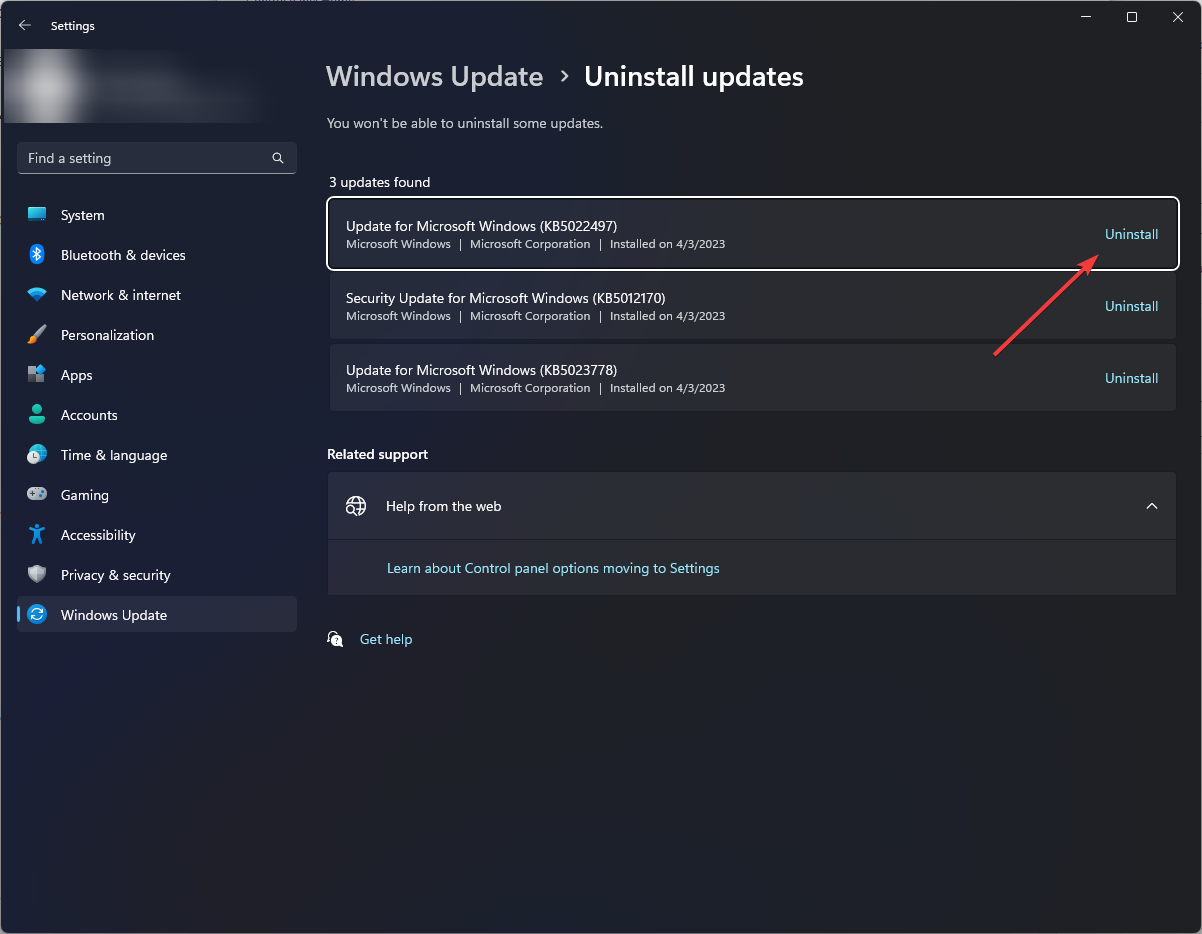
- Under Related settings, select Uninstall updates.
- Go to the recent update and click Uninstall.
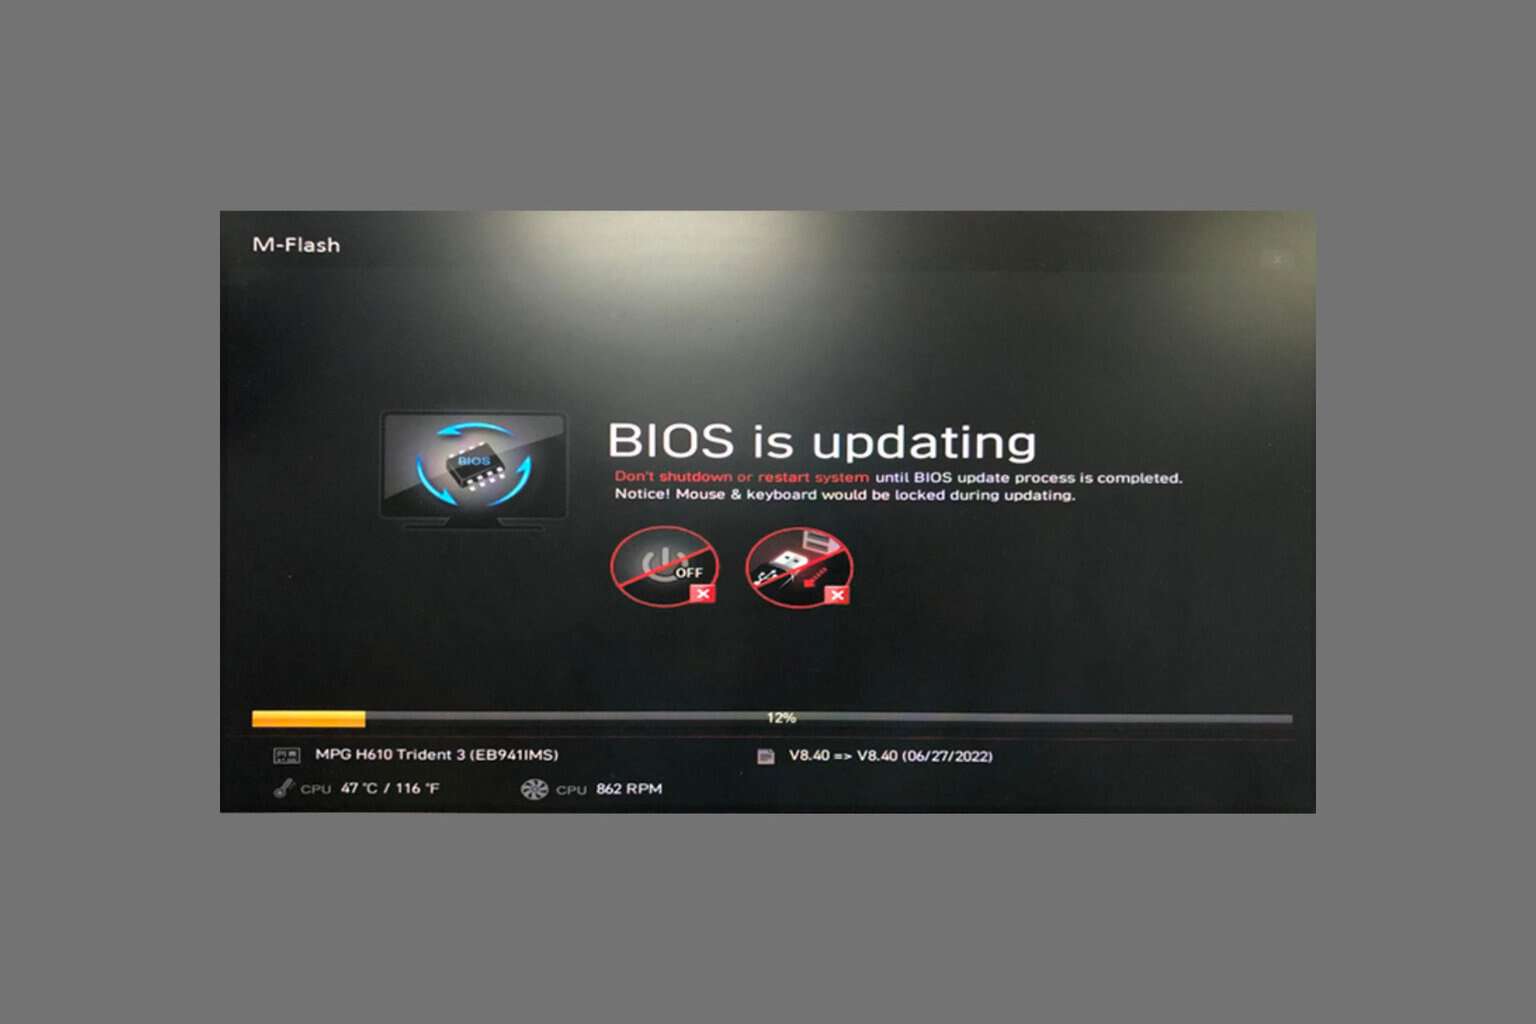
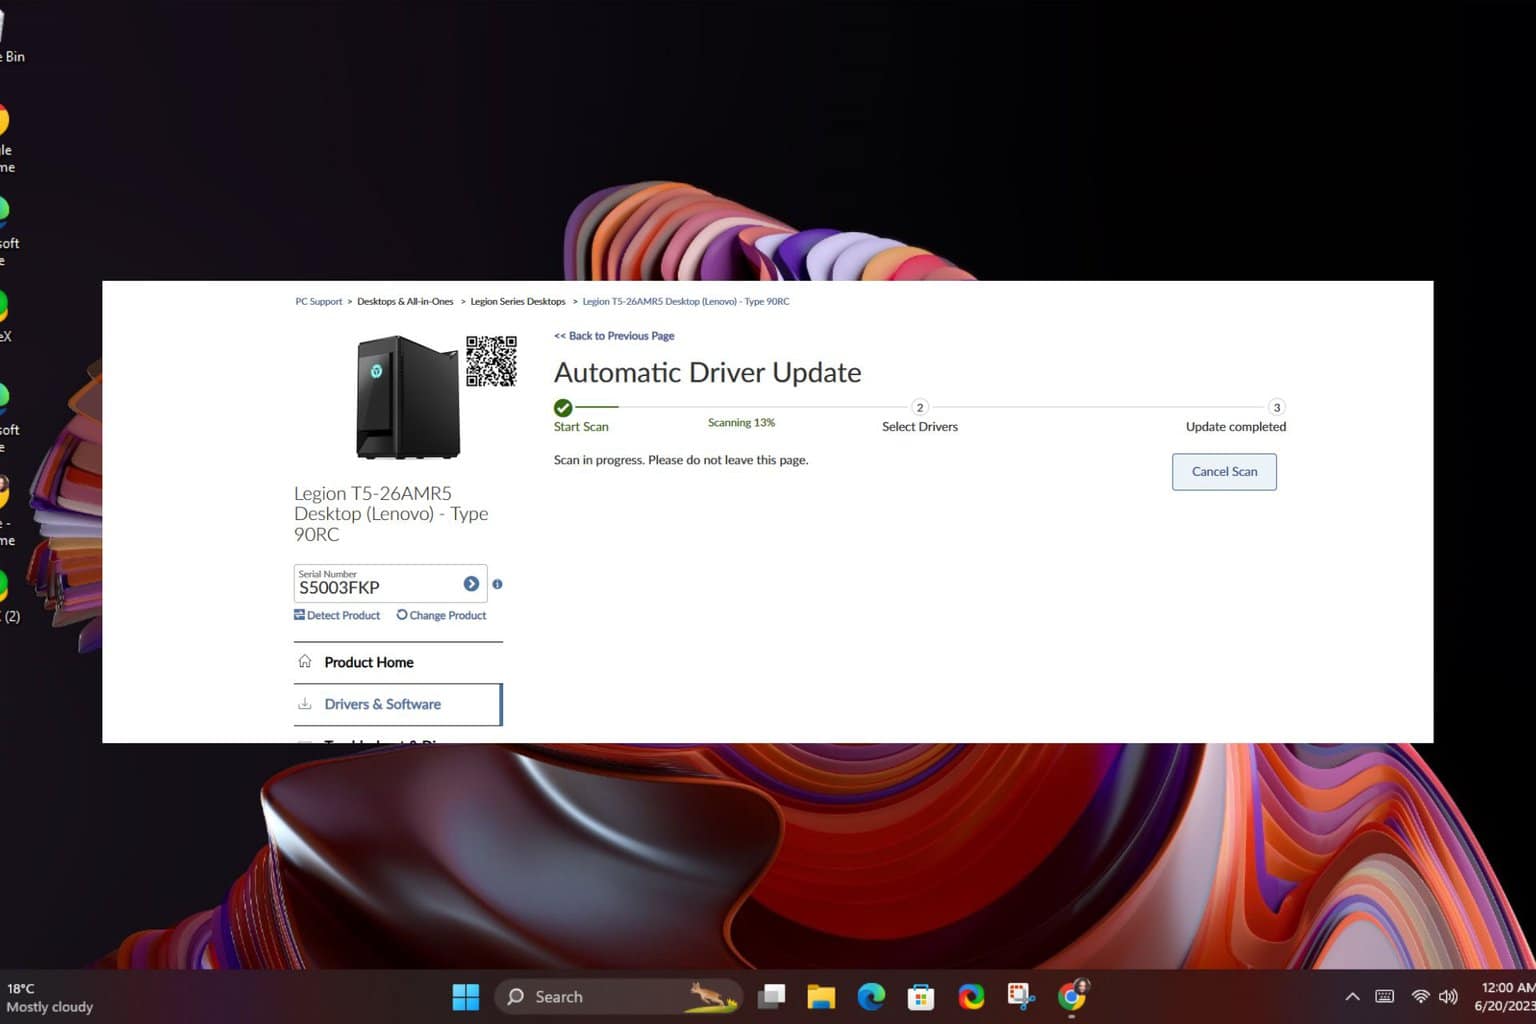
5. Update your BIOS
 NOTE
NOTE
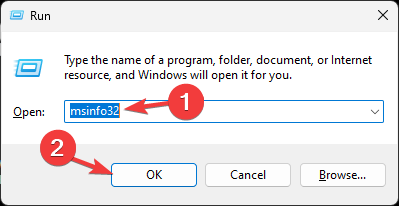
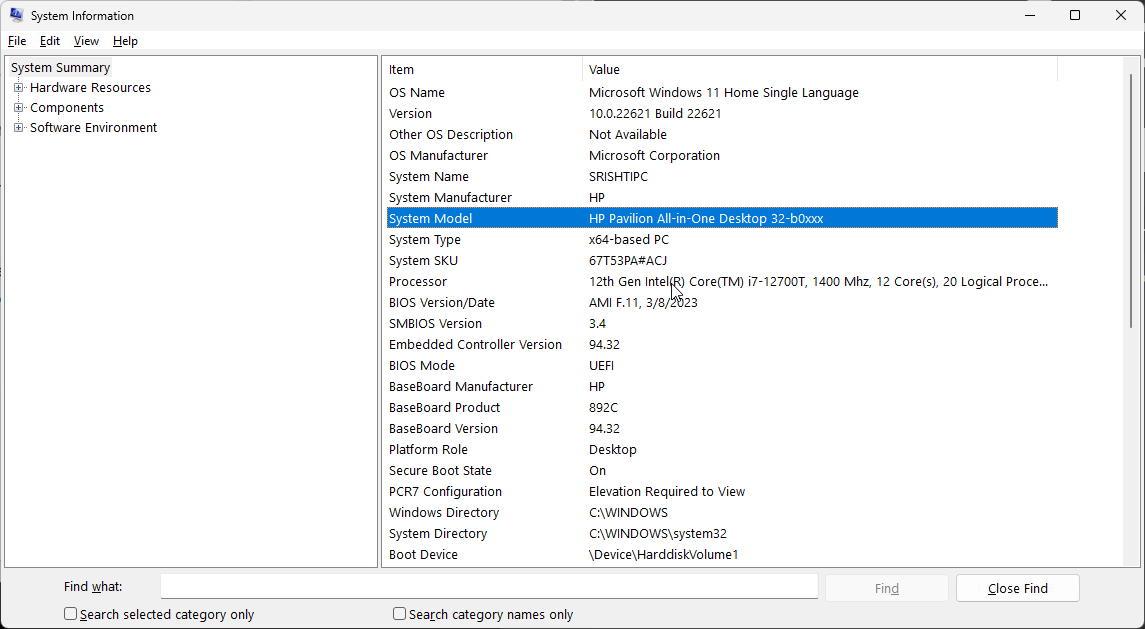
- Press Windows + R to open the Run window. Type msinfo32 and click OK to open System Information.
- Note down the System BIOS and other system-related information such as processor name, OS name, System Model, and more.
- Close all apps, and turn off antivirus and BitLocker encryption.
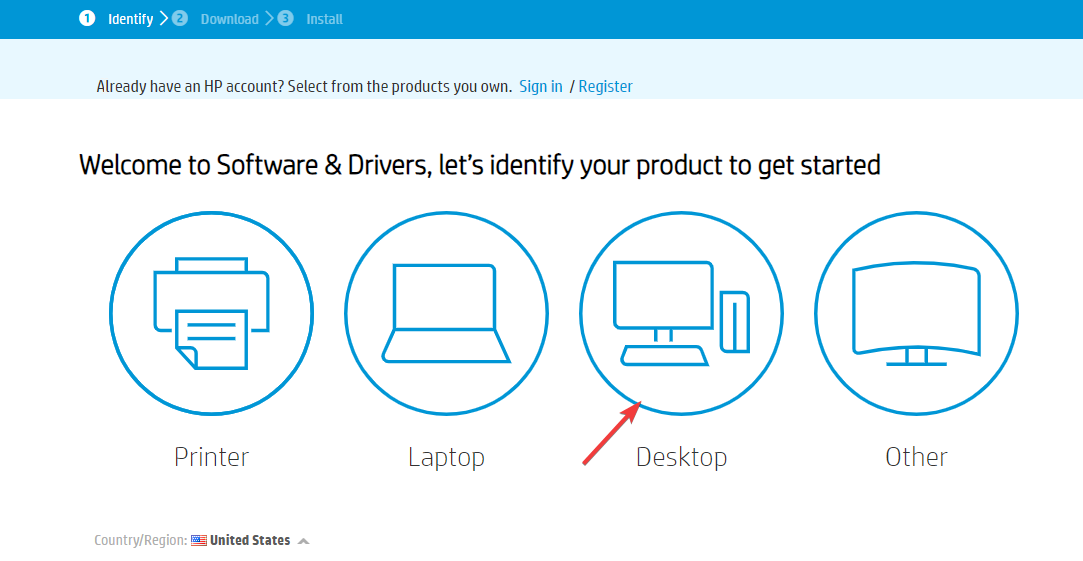
- Visit the HP Software and Driver Downloads page.
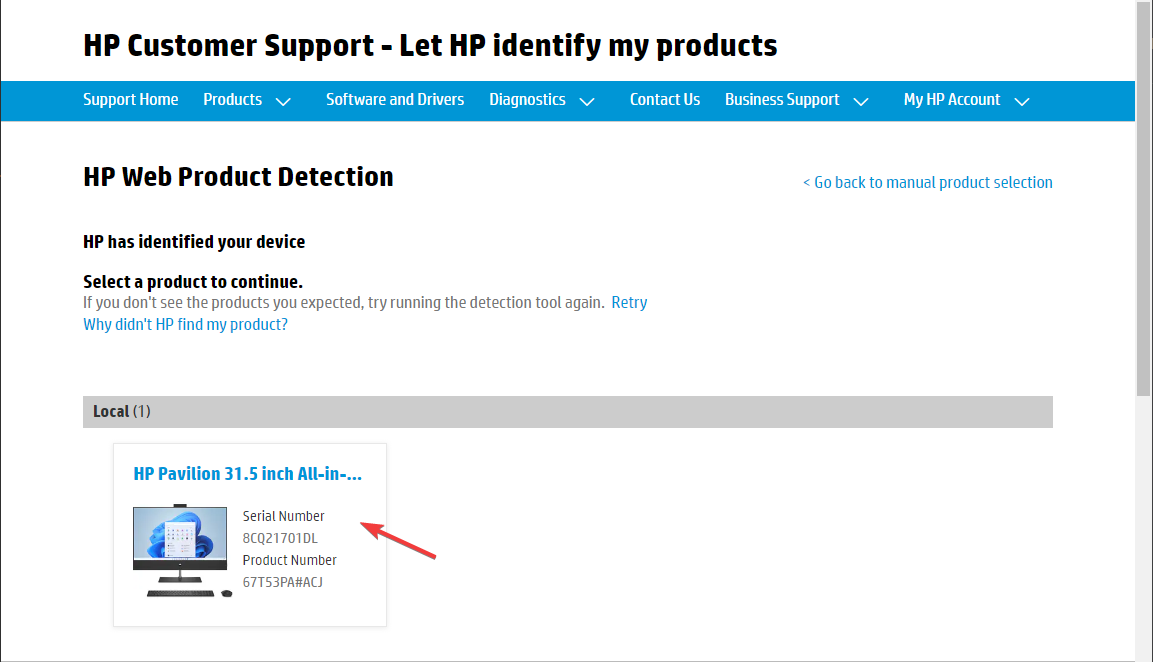
- Choose your laptop or PC. Either enter your product name or let the website find it for you. Select the product, then choose the operating system.
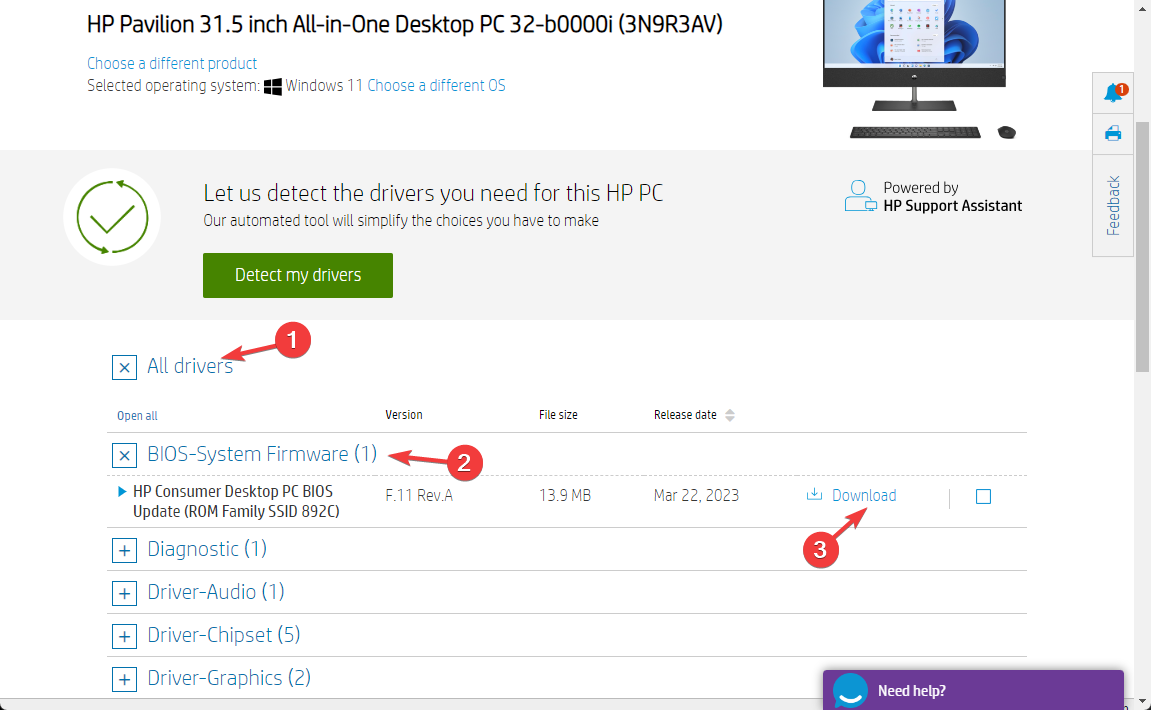
- Click All Drivers to expand the list, locate BIOS- System Firmware, and click Download.
- Once downloaded, double-click the file to install, or if the HP support assistant pops up to help you install, click Yes or OK to let it take over and complete the process.
- Your computer will restart to complete the process.
Did nothing work for you? Try performing a system restore before contacting Customer Support or replacing the battery to ensure the system settings are not the culprit.
If you are facing similar issues, like laptop battery not charging at 80%, we suggest you check out this informative guide to find quick solutions.
We hope this guide helped you and your laptop battery is no longer stuck at 0 percent. If you still have problems charging or were able to troubleshoot this problem in a different way, feel free to drop a comment below.





User forum
0 messages