Making a Transparent Background In GIMP [4 Different Ways]
Take your editing skills to another level in GIMP
5 min. read
Updated on
Read our disclosure page to find out how can you help Windows Report sustain the editorial team. Read more

Today we’ll walk you through the steps of removing the background/ saving your image with a transparent background in GIMP.
There are actually a few different ways to achieve that – depending on your image, skillset and what exactly you want to do with the resulting image. We included all methods:
How do I make the background transparent in GIMP?
Fuzzy select tool
- Launch the GIMP app on your PC.
- Open the image you want to edit in GIMP.
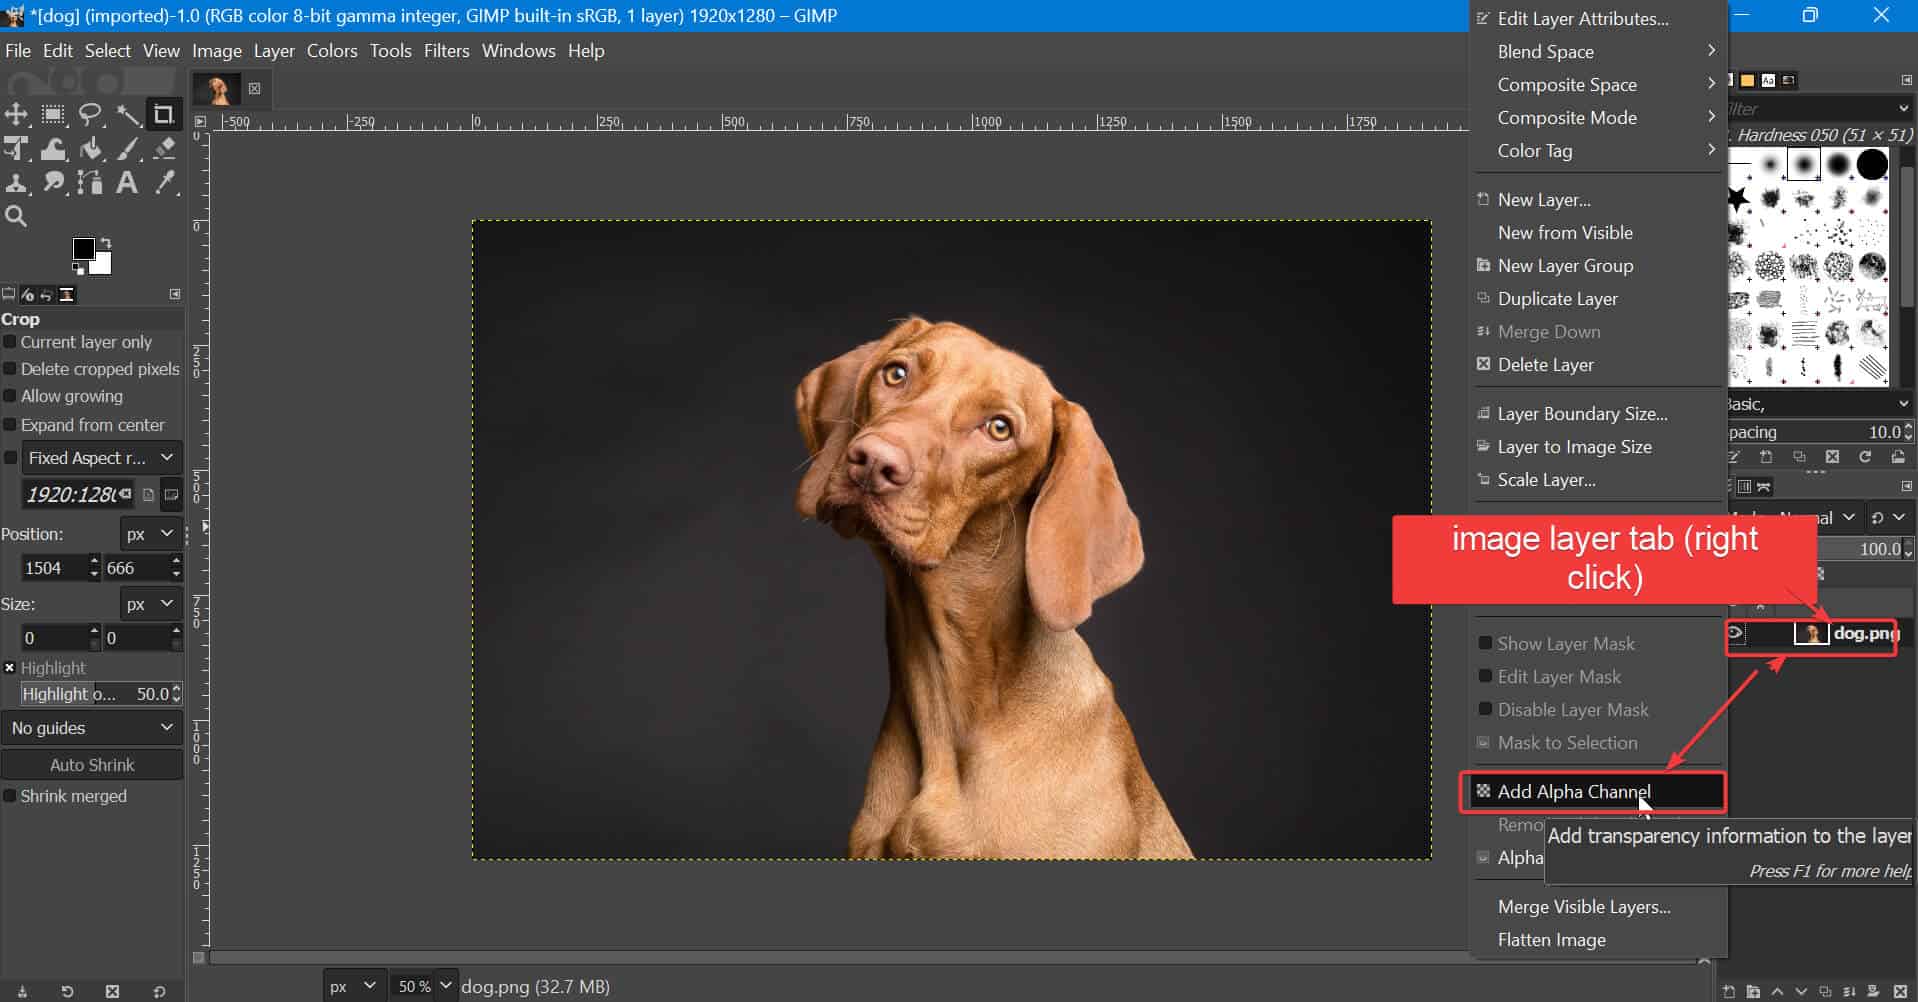
- Right-click on the image layer from the Layer tab in the right sidebar and select Add Alpha Channel (if the option is greyed-out, it means you already have the Alpha Channel selected)
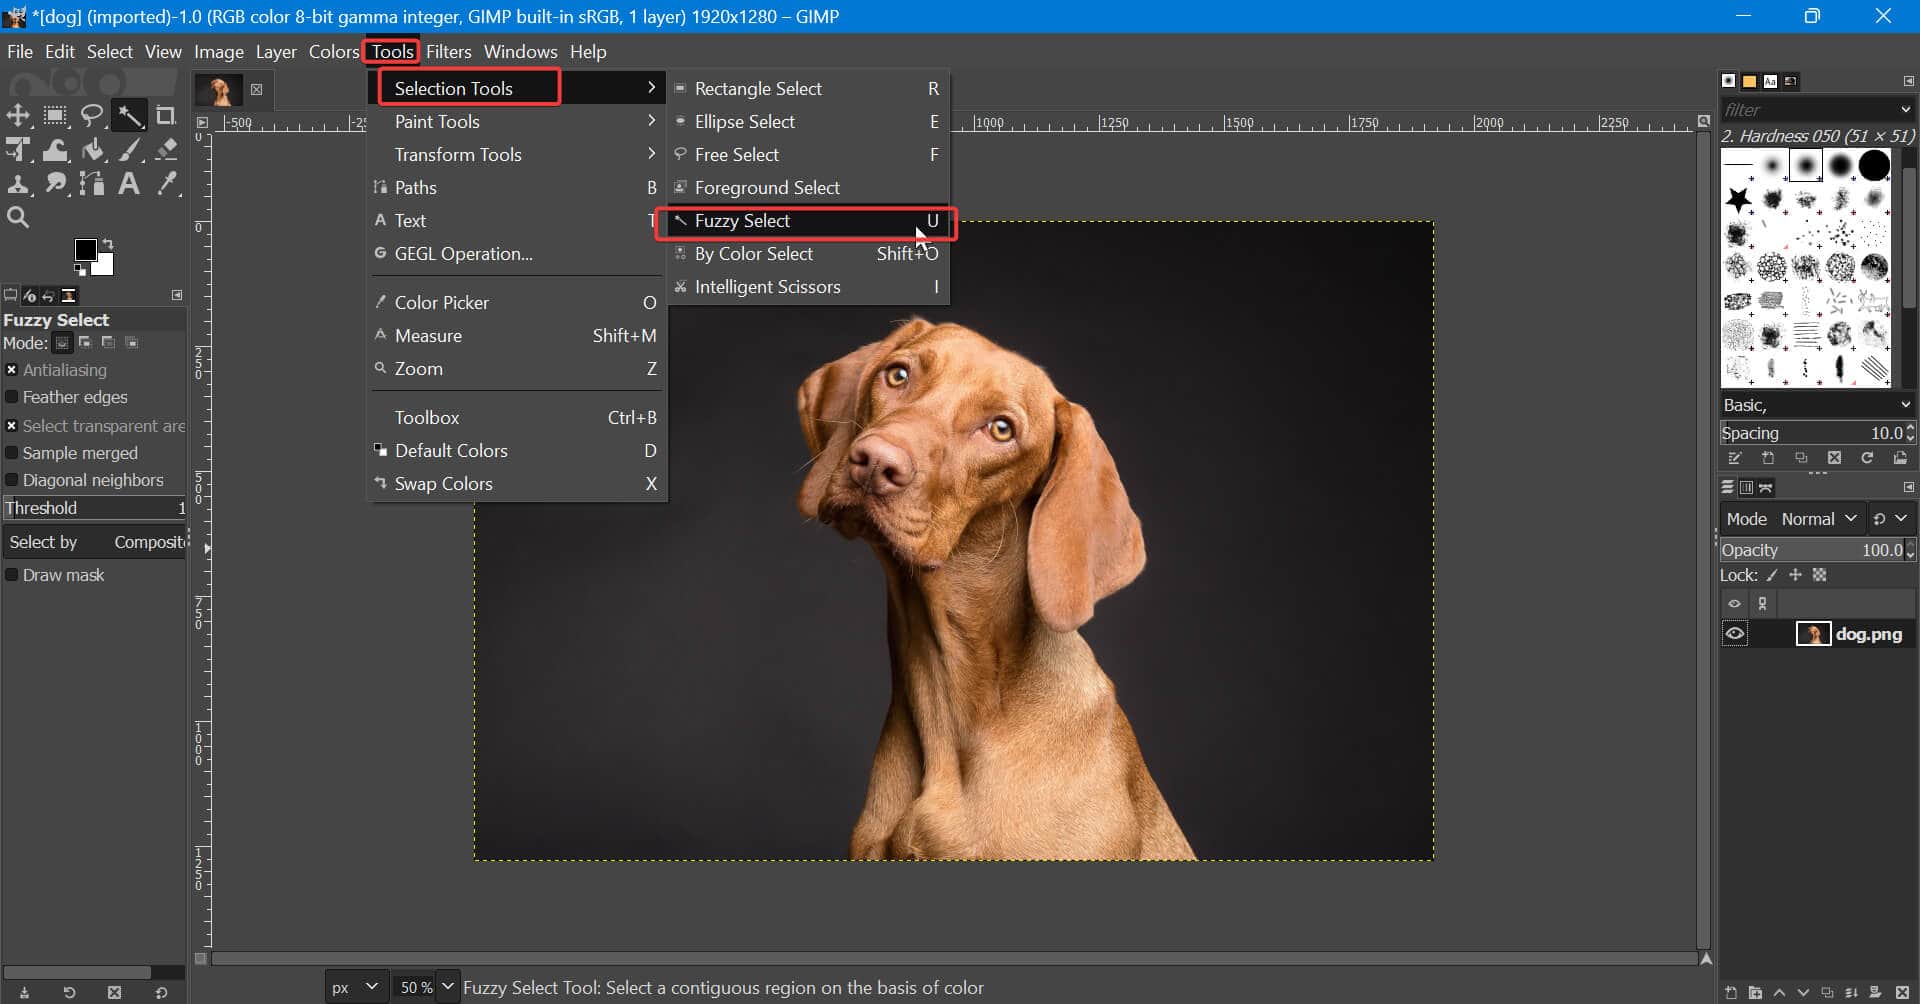
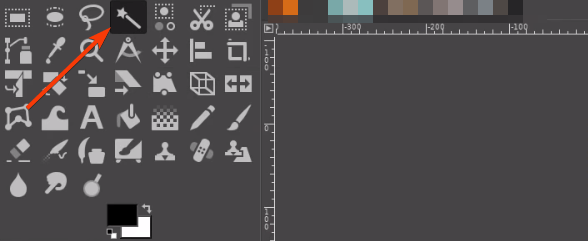
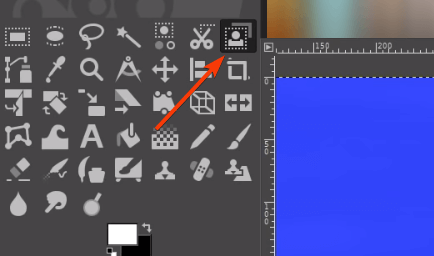
- Navigate to the tools panel and click on the Fuzzy Select Tool (or press U on your keyboard).
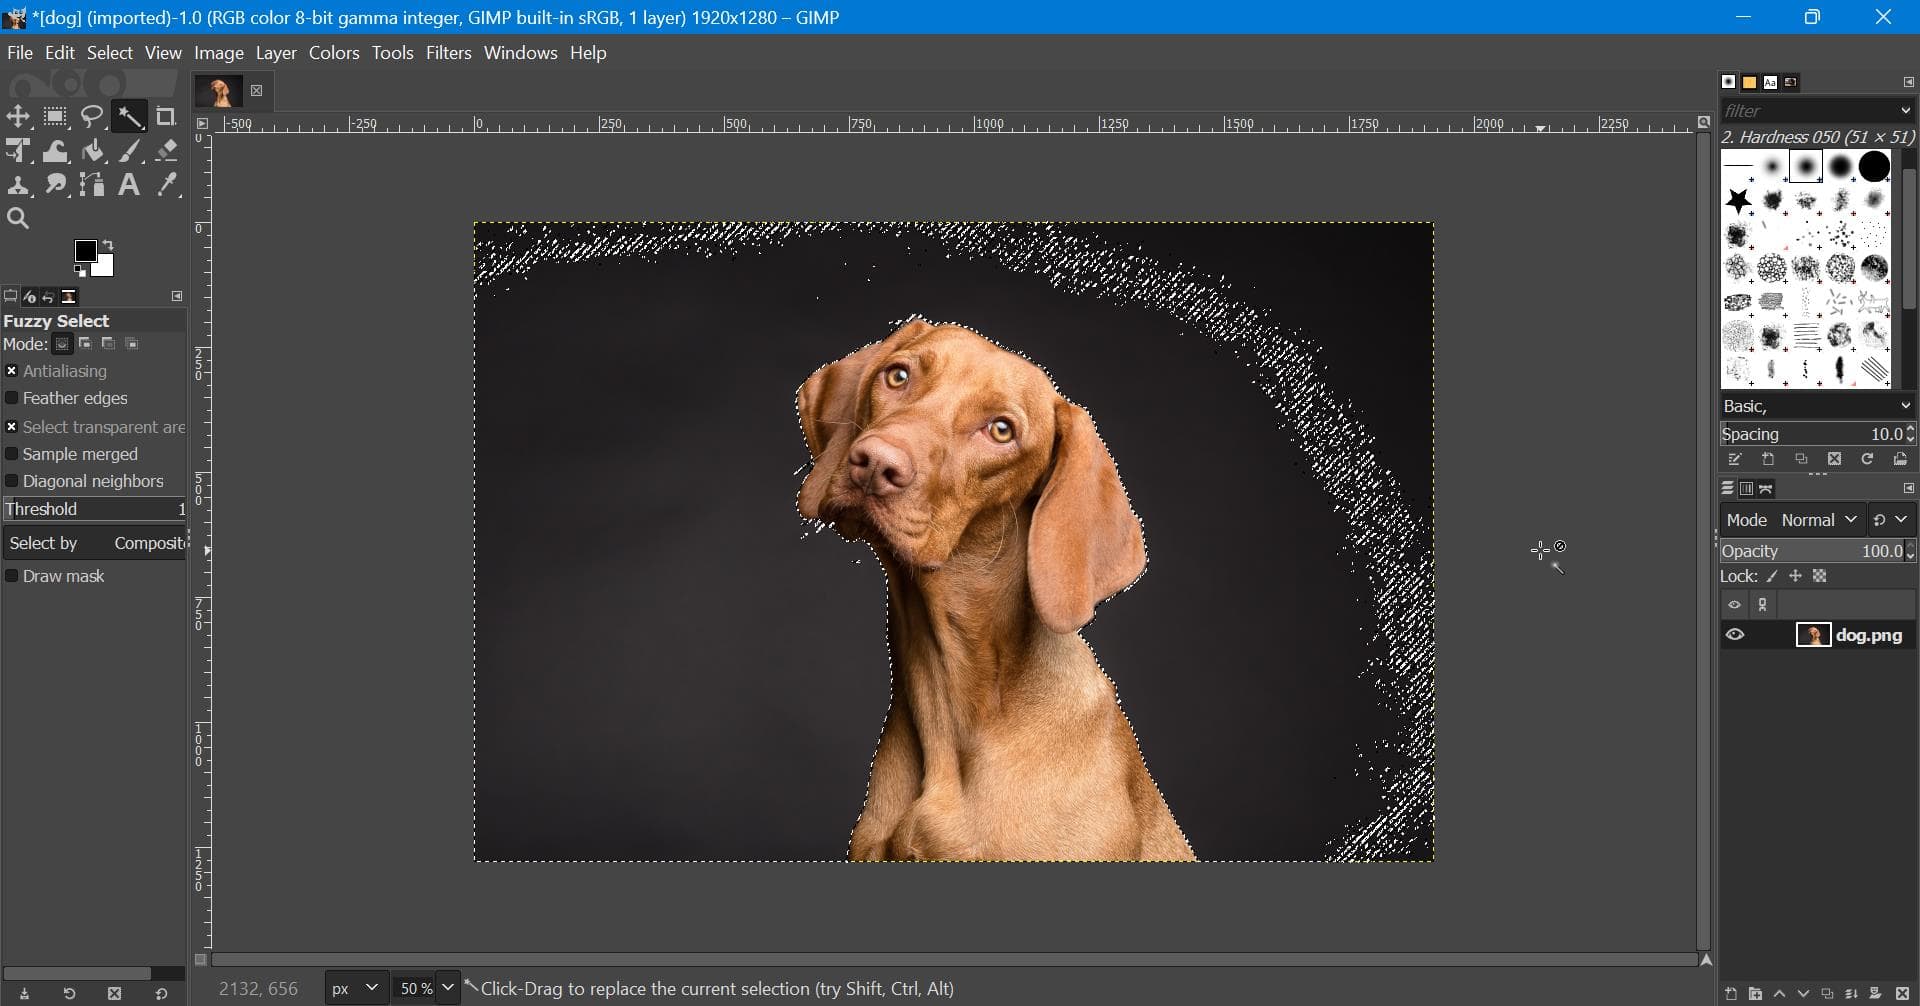
- Click and drag on your subject to create a selection (keep dragging to increase or decrease it). You can add to your selection by holding Shift and clicking on another area.
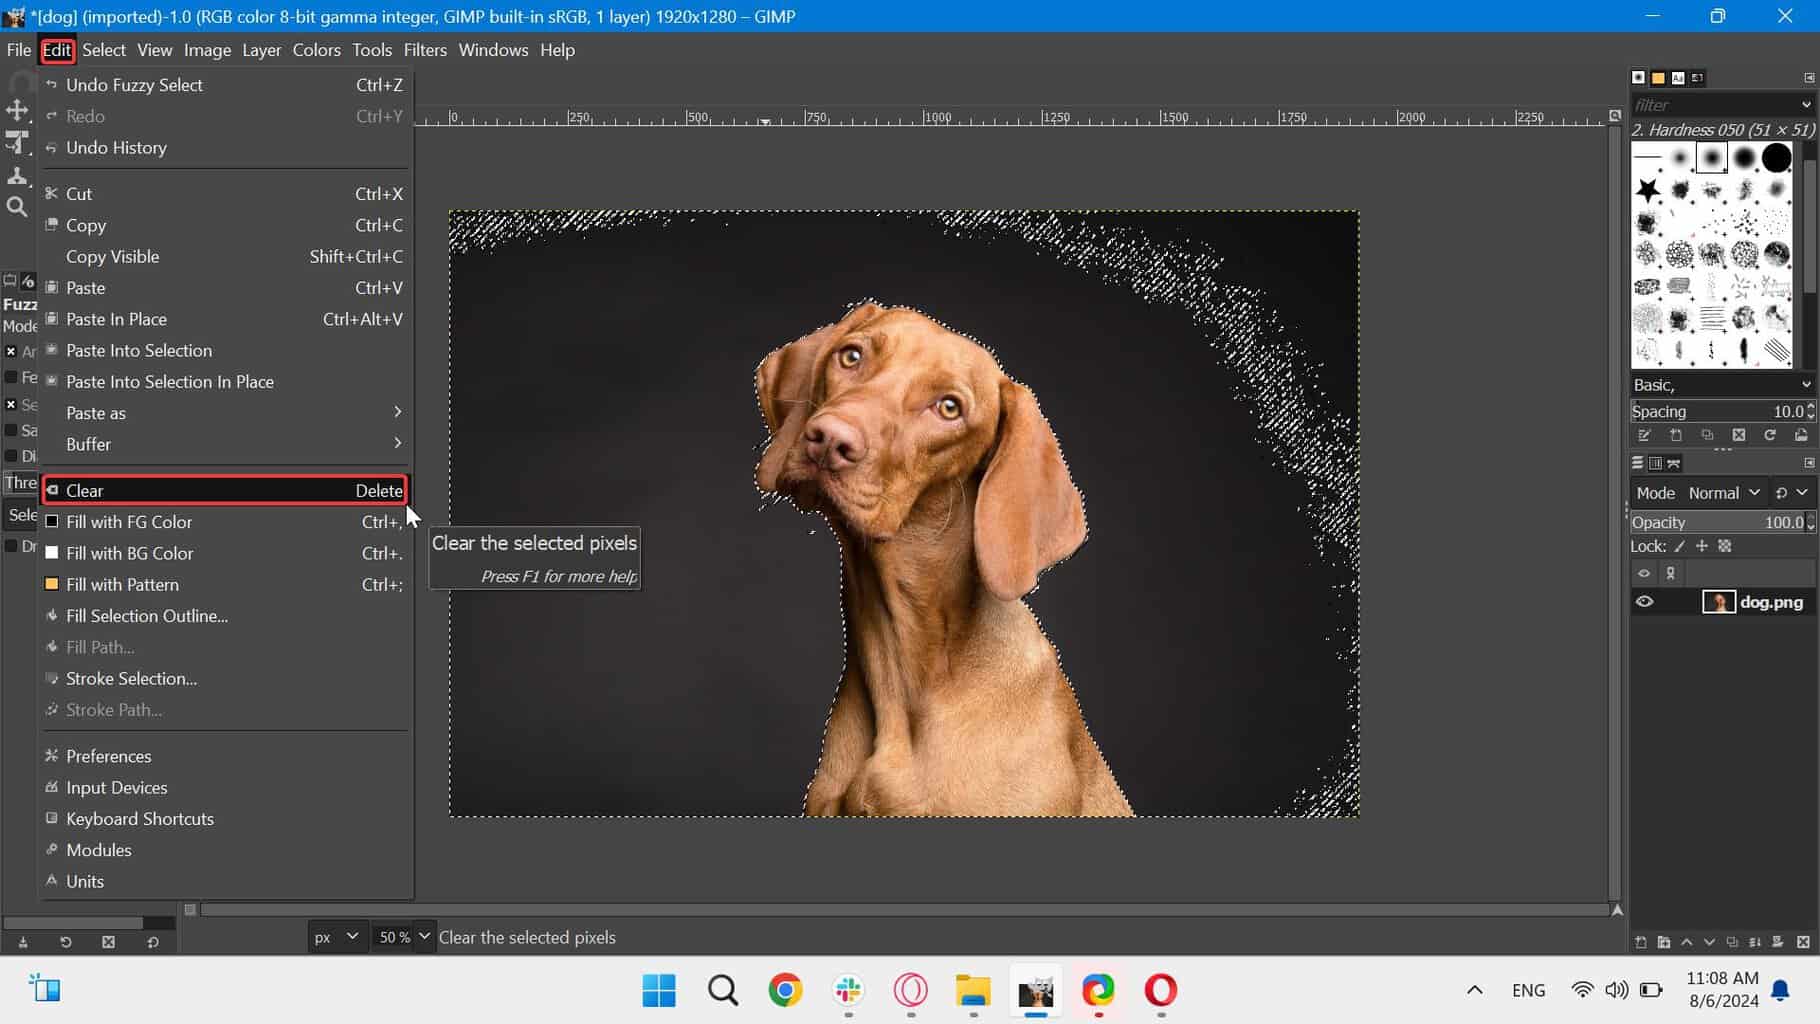
- Press on Edit in the main menu and hit the Clear button. Alternatively, tap the Delete key on your keyboard to delete the background.
On PC, you can easily make the background transparent in GIMP using the Fuzzy Select tool. For this, you need to open the image as a layer, select the background using the tool, and then delete it.
The remaining result will be your image without a background.
It is advisable to have the Antialiasing, Draw mask and Feather Edges options enabled in the Tools section.
By using this tool you can slowly make the background transparent in GIMP.
Select By Color tool
- Open the image.
- Get the Select By Color tool.
- Click anywhere on the image where you want the background gone and start dragging until you reach the desired selection.
- Press Delete on your keyboard.
Paths tool
- Open the image.
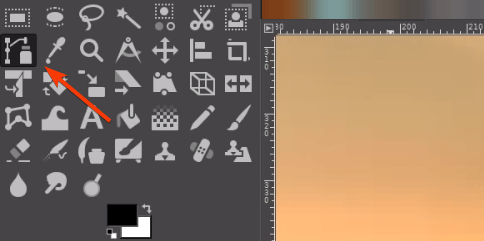
- Select the Paths tool.
- Zoom the image to get a closer view of the details. Start clicking around the edges of your subject to create an outline.
- Curve the lines between the points by dragging them.
- If you stop at a certain point, resume the outline by clicking on the most recent point you created then continue.
- Close the outline by clicking the first point and hold to unite with the last one.
This is a more time-consuming technique, but perhaps the most accurate one if you want to make the background transparent in GIMP.
Layer masks
- Open the image.
- Right-click on the layer and select Duplicate Layer from the available options.
- Then, in the upper-right menu, go to Colors. Select Saturation, and drag the scale to zero. Click OK.
- Go again to Colors. Select Curves and drag the margins of the curve to make the subject as black as possible, and the background as white as possible.
- Then go to Colors and choose Invert.
- Go to Edit and pick Copy Visible. Turn off the visibility of the layer.
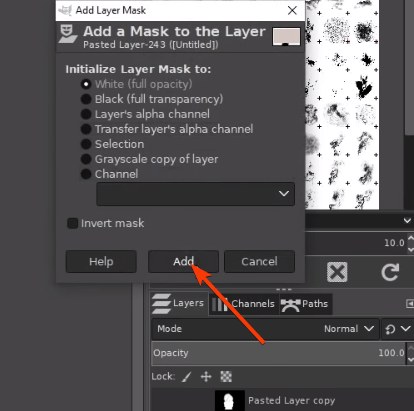
- Next, right-click on the original layer and choose Add Layer Mask. Leave everything as default and click Add.
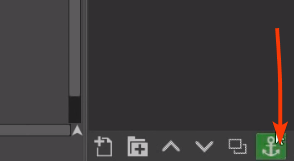
- Then go to Edit and choose Paste. Also, in the right lower part of the screen, click on the green anchor icon. At this point, the black areas should remain visible, while the white areas become transparent.
- Grab a white brush and fill in whatever imperfect areas you still have.
This is the most advanced technique to make the background transparent in GIMP, as you might have noticed. But it works fine when there are a lot of details on the subject’s outline.
It only works well when there’s a lot of contrast between the subject and the background.
Foreground Select tool
- Open the image.
- Grab the Foreground Select tool and manually draw a rough outline around your subject. It does not have to be perfect.
- Then, brush in the subject without touching the margins. Toggle the preview setting to see how it looks.
- Press Enter on the keyboard to convert it into a selection. Then, invert the selection by going to Select > Invert, and then press Delete on your keyboard to remove the background.
Can’t select the subject in GIMP
If you can’t select the subject or are struggling with imprecise selections in GIMP, try to:
- Adjust Tool Settings: Modify Threshold and Feather Edges for better accuracy.
- Refine Edges: Use Select > Feather or Grow/Shrink to refine selections.
- Quick Mask Mode: Enable Quick Mask (Shift + Q) for manual adjustments.
- Increase Contrast: Temporarily boost contrast for easier selection.
- Combine Tools: Use tools like Fuzzy Select with Paths for precision.
Ultimately, if it’s too difficult to get precise results with GIMP, you can use an AI-powered alternative. InPixio offers a free version with basic background removal features, making the process easier, faster, and more precise with minimal effort.
For advanced tools, a paid subscription is required, but the free version is a great starting point for efficient and hassle-free background removal.

InPixio
Simplify the background removal with InPixio—easy, fast, and free!And that should do it. You have five ways of removing the background in GIMP, both for the beginner and for the advanced user. We have a new guide on how to blur background in GIMP, so don’t hesitate to check it out.
If you have other suggestions for making a transparent background in GIMP, don’t hesitate to drop us a line in the comments section below.


User forum
0 messages