Netwtw10.sys Blue Screen Error: 4 Ways to Fix It
Updating your drivers will usually fix Netwtw10.sys BSOD
4 min. read
Updated on
Read our disclosure page to find out how can you help Windows Report sustain the editorial team Read more
Key notes
- Netwtw10.sys Blue Screen due to faulty network driver and corrupt system files.
- Updating your drivers is a great way to fix this issue on your PC.
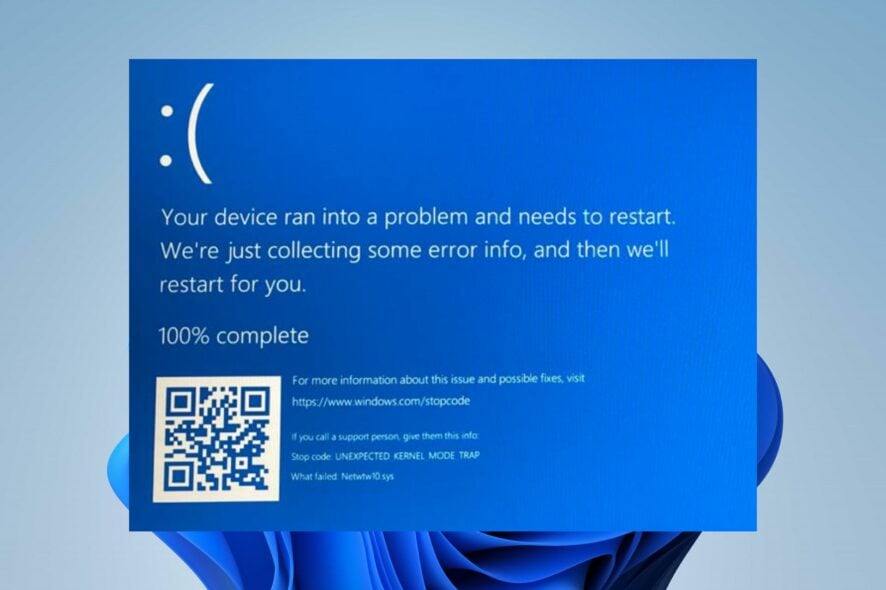
The Blue Screen of Death may appear accompanied by a Netwtw10.sys error randomly. It means an error occurred due to network-related issues and can cause the system to crash. However, we’ll discuss resolving it and getting your system working.
Also, our readers may be interested in how to fix rtf64x64.sys Blue Screen of Death error on Windows 11.
What causes the Netwtw10.sys Blue Screen error?
Some factors that may be responsible for the error are:
- Faulty Network driver – The error may occur if the network device drivers running on the system are not intact. Also, defective or incompatible drivers can cause errors if they impede the Netwtw10.sys file.
- Third-party programs interference – The activities of other apps running on the system can cause the error to occur. Programs such as antivirus software with Firewall features can cause the network driver to be unresponsive, resulting in the BSoD crash.
- Corrupt system files – The error may occur if the system files responsible for the network process are corrupt. Files such as Netwtw08.sys, Netwtw06.sys, Netwtw10.sys running on the PC are essential for the Windows operating system. So, you can encounter this error if the system files are corrupt.
Fortunately, we have provided some solutions below to help you fix the Blue Screen error.
How can I fix the Netwtw10.sys blue screen error?
Before proceeding with any advanced troubleshooting steps, apply the following checks:
- Restart Windows in Safe Mode and check if the error appears.
- Verify that all key hardware components are fully compatible.
- Try contacting Intel Customer Support for assistance.
If you can’t resolve the error, try the steps below:
1. Update your Device drivers via Windows Update
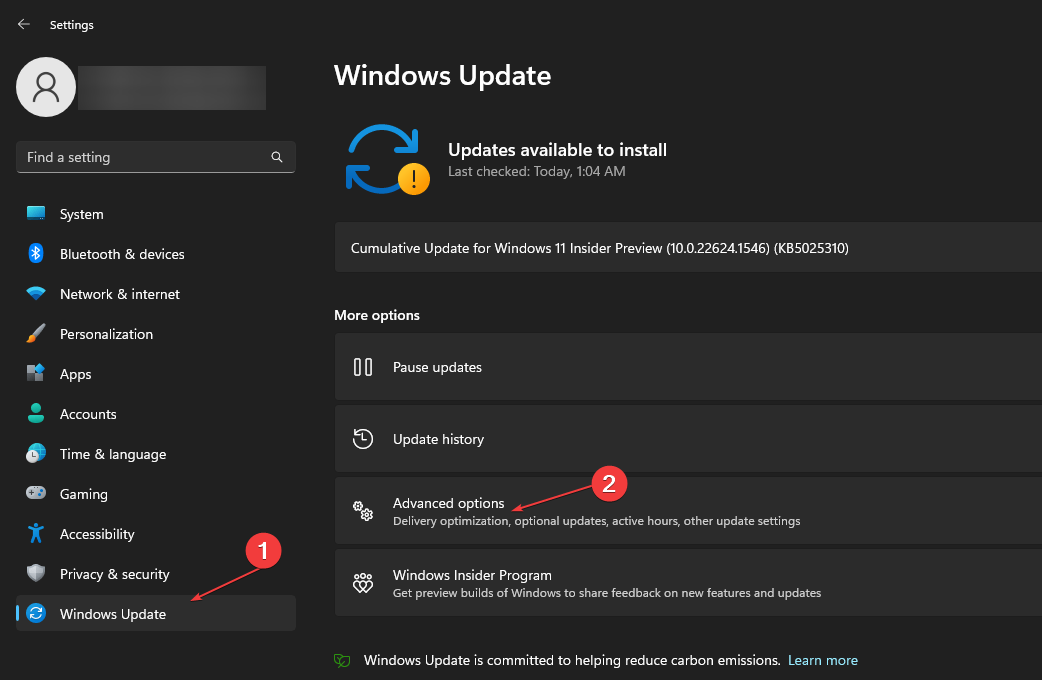
- Press the Windows + I key to open the Settings app.
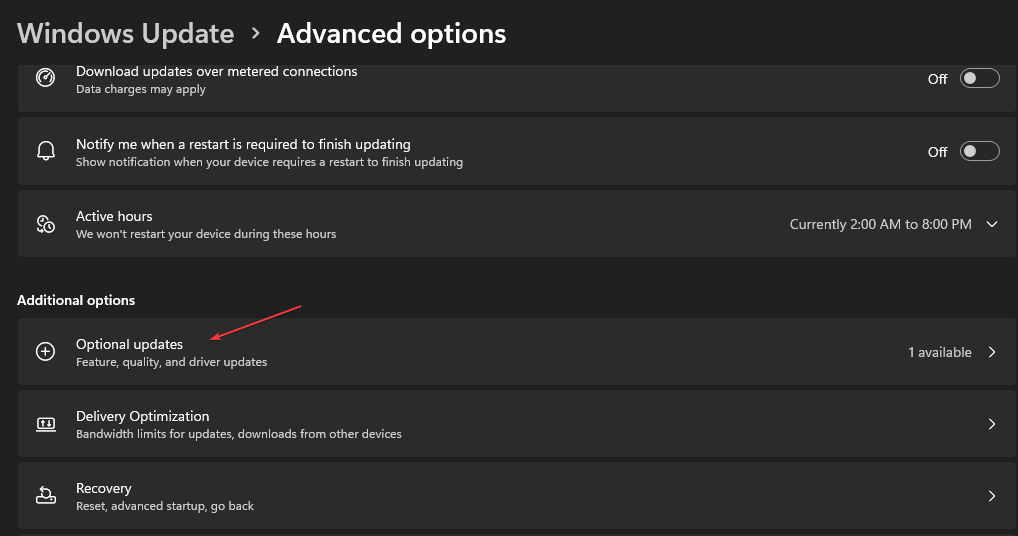
- Click on Windows Update and select the Advanced options.
- Then, click on the Optional Update button.
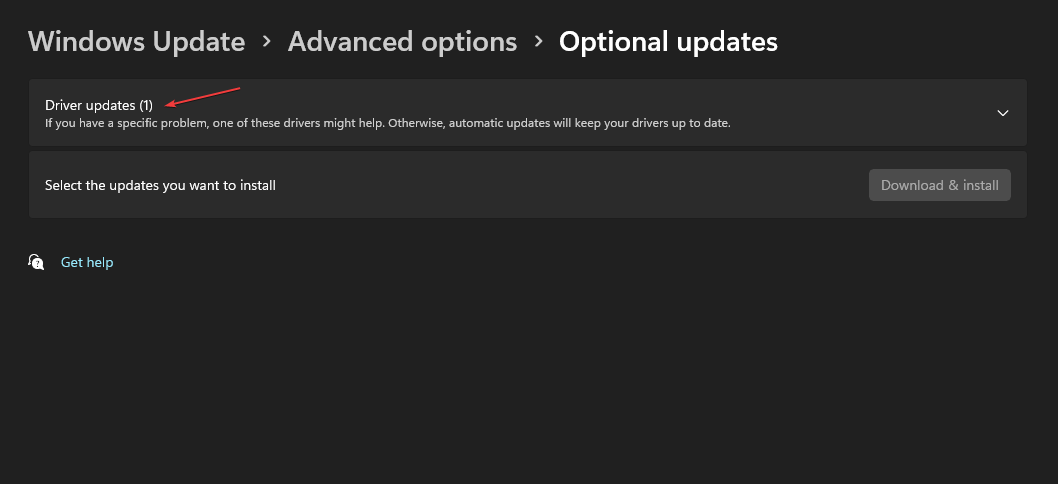
- Click the drop-down button on the Driver Update and checkmark the list of updates available.
- Select the Update and Install button and wait for the drivers to install.
Updating the network driver allows it to fix errors or bugs impeding its performance. You can read about what to do if Windows Update is not loading on Windows 11.
There is also a better alternative to update any drivers from your PC and that is a tailored software like Outbyte Driver Updater. It will scan your system and automatically update old drivers with their latest version.
2. Rollback recent driver updates
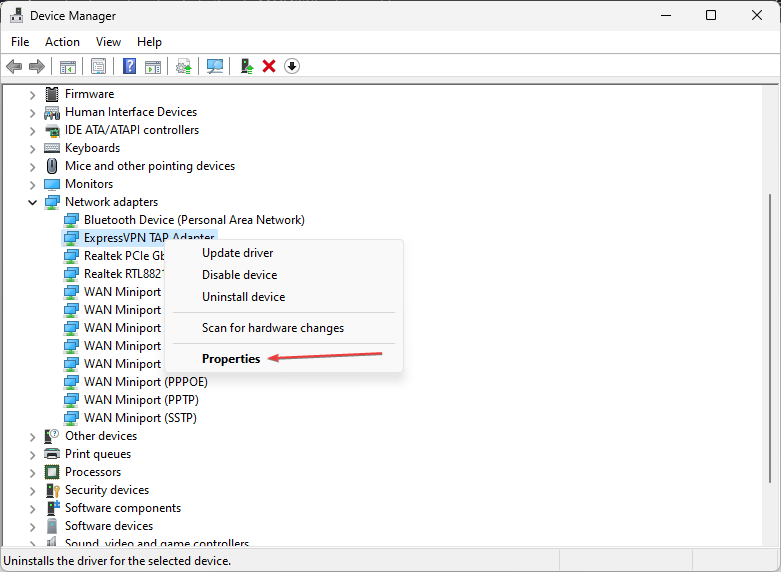
- Press Windows + R key to open the Run dialog box, and type devmgmt.msc, then press Enter to open the Device Manager.
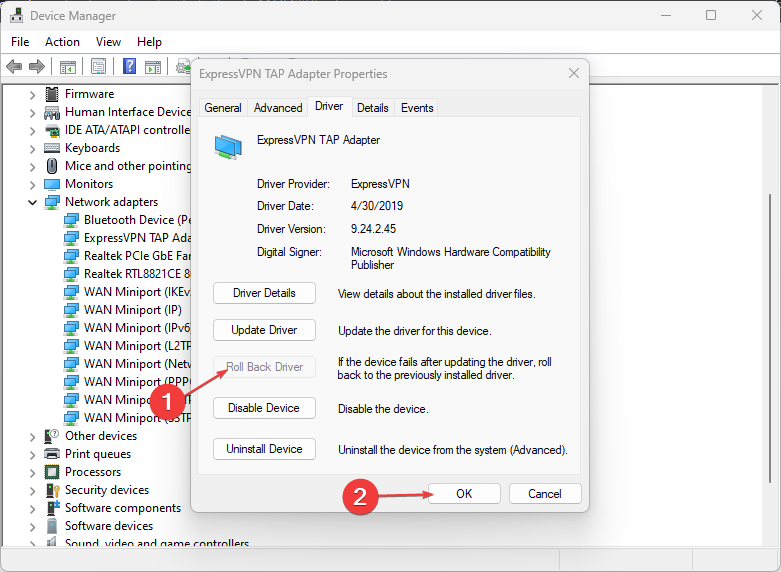
- Open the Network adapters entry, right-click on the driver, and select Properties from the drop-down menu.
- Go to the Driver tab, select the Roll Back Driver option, and click OK.
- Restart your PC and check if the Netwtw10.sys error persists.
Rolling back the recent network device update will remove faulty updates causing the error and resolve compatibility issues.
Alternatively, you can check for how to uninstall updates on Windows 11 for more detailed steps.
3. Run the SFC and DISM to repair damaged system files
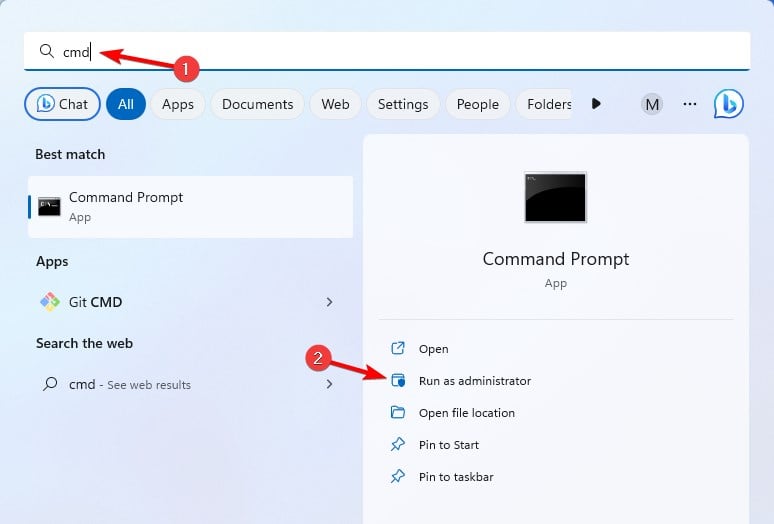
- Left-click the Start button, type Command Prompt, then click Run as administrator.
- Click Yes on the User Account Control (UAC) prompt.
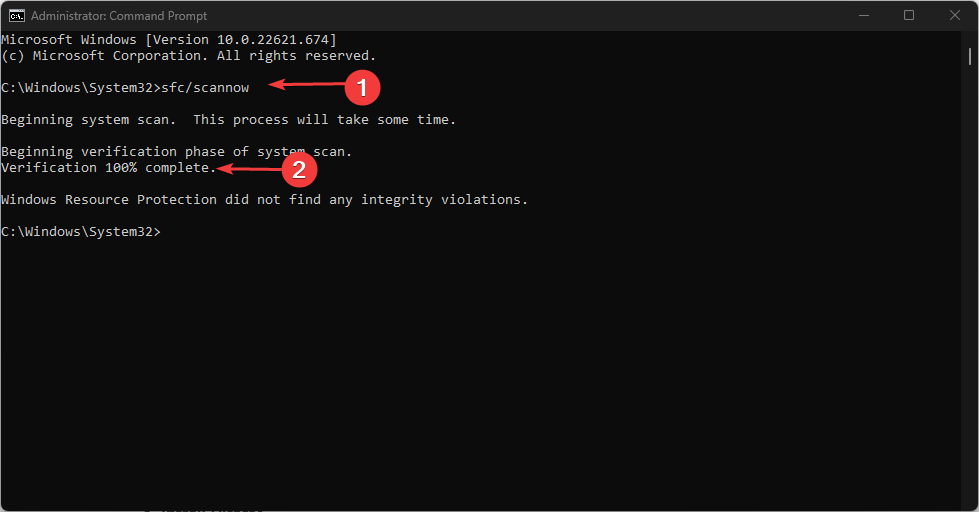
- Input this command and press Enter:
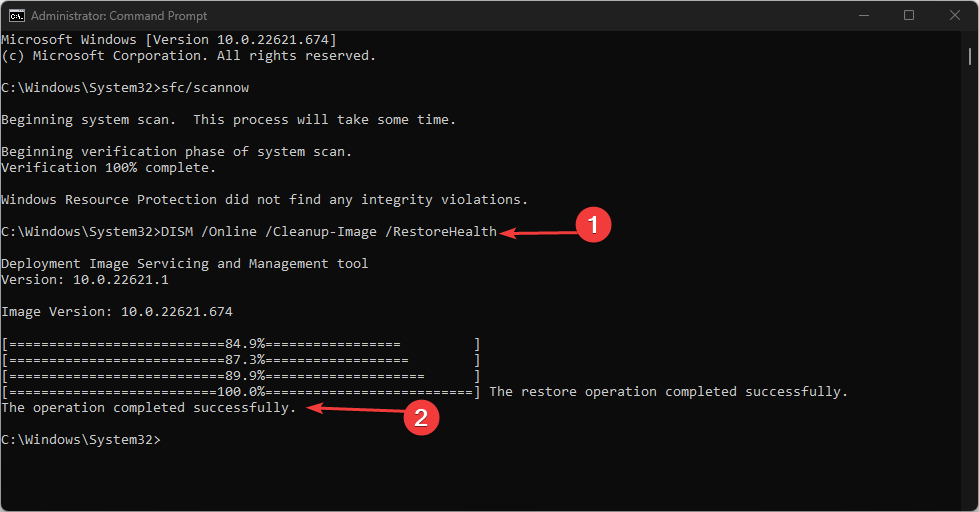
sfc /scannow - Type the following commands and press Enter:
DISM /Online /Cleanup-Image /RestoreHealth - Restart your PC and check if the error appears.
Running SFC and DISM scans will detect and repair corrupt system files causing the Netwtw10.sys BSoD error. Read about ways to fix the run as administrator option if it’s not working on Windows PC.
4. Run System Restore
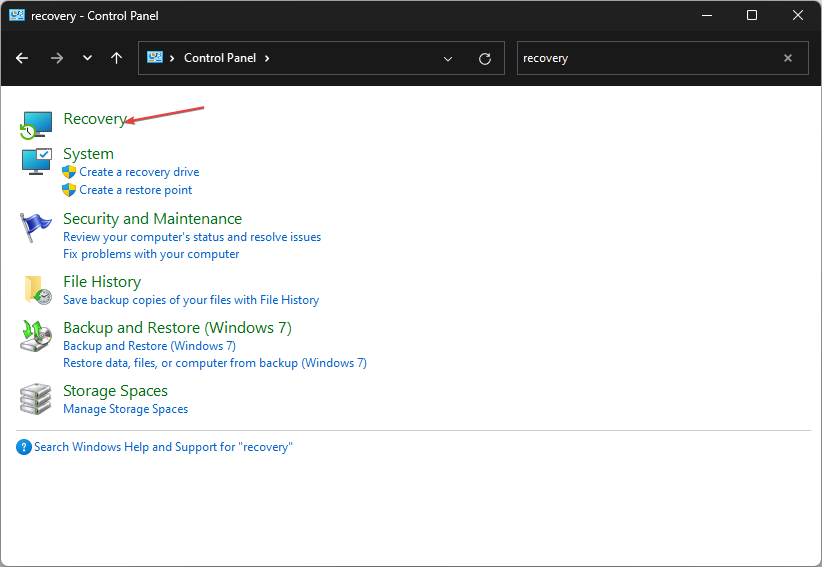
- Press Windows + R key to open the Run dialog box, type control, then press Enter.
- Type recovery in the search bar and select Recovery.
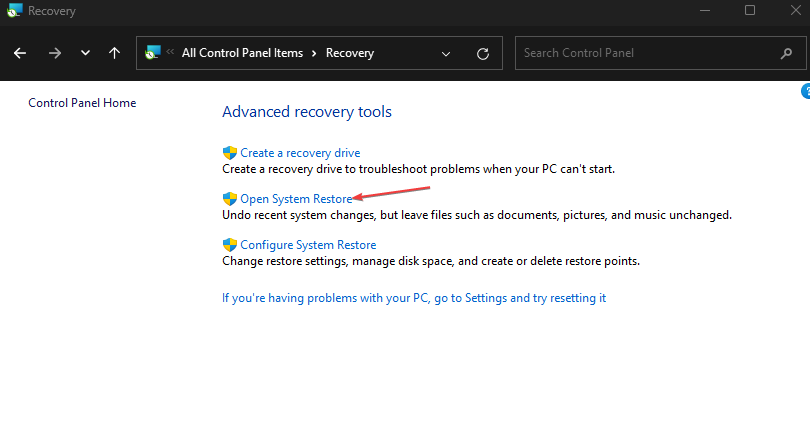
- Then click Open System Restore.
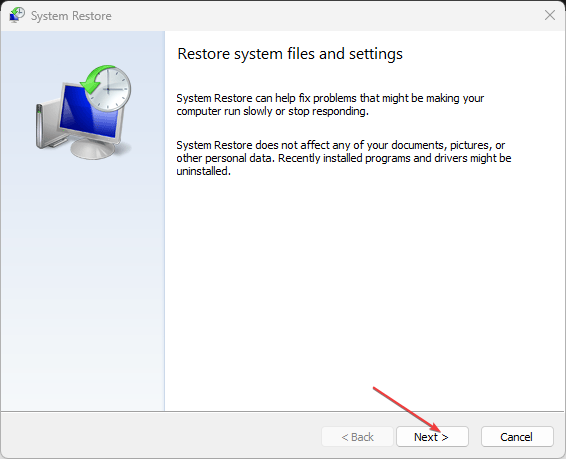
- Click Next in the Restore system files and Settings window.
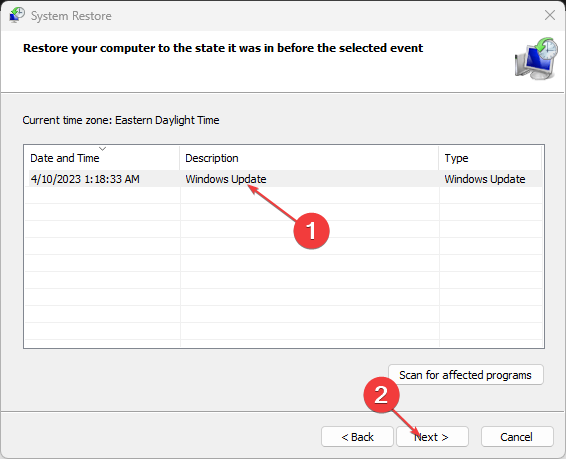
- Choose the restore point you want to restore from and click Next.
- Then, click on Finish after the process.
A System Restore will remove recent activities, recovering the system to the previous point.
You can reach our guide on how to fix Restore Point if it’s not working on your PC.
Alternatively, you can check the causes of BSOD errors. Also, do not hesitate to read about the Brusbsib.sys incompatible driver error on Windows PCs.
If there are further questions or suggestions on other fixes that worked for you, kindly drop them in the comment section.

