Fix: Printer Operation Could Not be Completed
Roll back to previous Windows updates to sort printer problems
Key notes
- If you’re trying to do a print job, but the process fails midway, it’s possible that your connection was interrupted.
- It could also mean an update has brought about changes that interfere with normal printing.
- Always ensure your internet connection is stable in such cases, and try rolling back to a previous update to fix the issue.

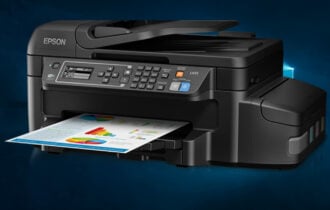
Using a printer on your Windows 11 can present the error Operation could not be completed (error 0x00000709), especially if you’ve recently made some Windows updates.
Usually, it could just be an issue of the printer not being connected to the network, but sometimes, it’s beyond a connection issue. Let’s now have a closer look at what this error means and how to bypass it.
What does the Printer Operation could not be completed mean?
This common error can occur when printing a document, but it does not necessarily mean that your printer is broken. You may also get the sharing printer operation could not be completed (error 0x00000709) message when you attempt to share your printer over the network.
There are many reasons why the Printer operation could not be completed message can pop up on your screen, and here are some of them:
- Default settings – If you let Windows manage the printer to use, in some cases, it might select the wrong printer as your default printer. Other times, the default printer keeps changing.
- Problematic Windows update – Some users reported that this error showed up shortly after a recent Windows update. Sometimes, these updates alter your default settings.
- Incorrect Registry settings – If your registry is corrupted or has missing entries, it may cause this error. Also, if you recently had a virus infection, it may have made some changes in your Registry, causing this error.
- Faulty drivers – Your drivers play an important role in the proper functioning of your printer, so ensure they are always up-to-date.
How do I fix 0x00000709?
Check the following before proceeding to the slightly technical solutions:
- Check whether Windows has trouble connecting to the printer.
- Close all other applications before printing to ensure your computer has enough memory.
- Switch to another USB port on your computer in case other USB ports are damaged.
- Verify that your printer is connected to a PC with an active internet connection.
- Check whether the paper tray is loaded correctly and whether there’s enough for printing.
- Try running the SFC scan.
- Restart your printer by turning it off for 30 seconds, then turn it back on again.
1. Run the Printer troubleshooter
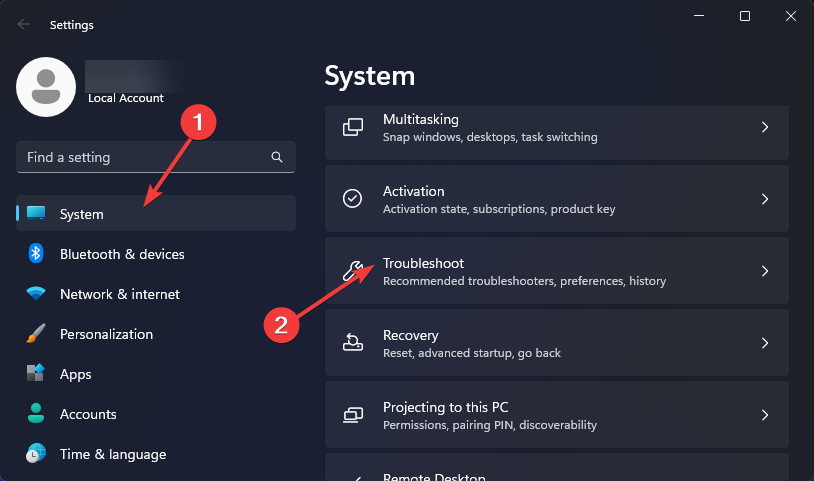
- Hit the Windows key and click on Settings.

- Select System on the left pane, then click Troubleshoot on the right.
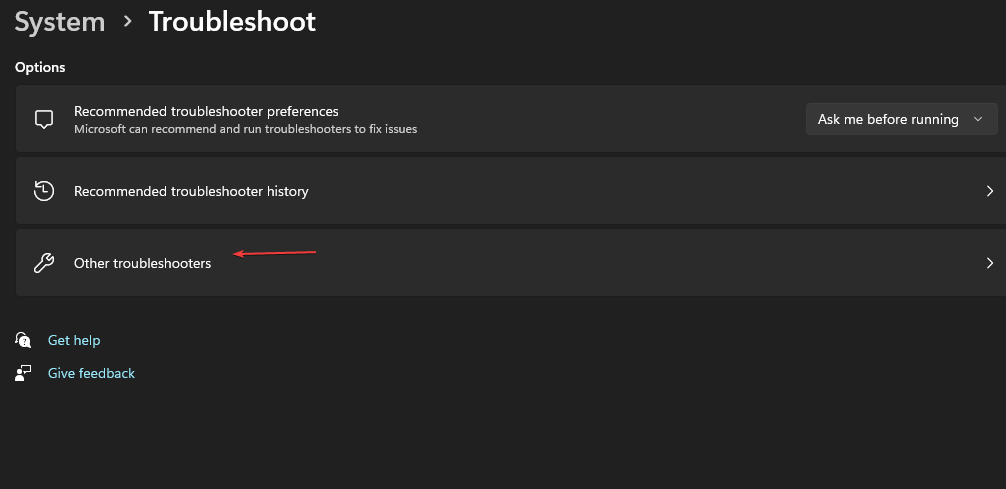
- Click on Other troubleshooters.
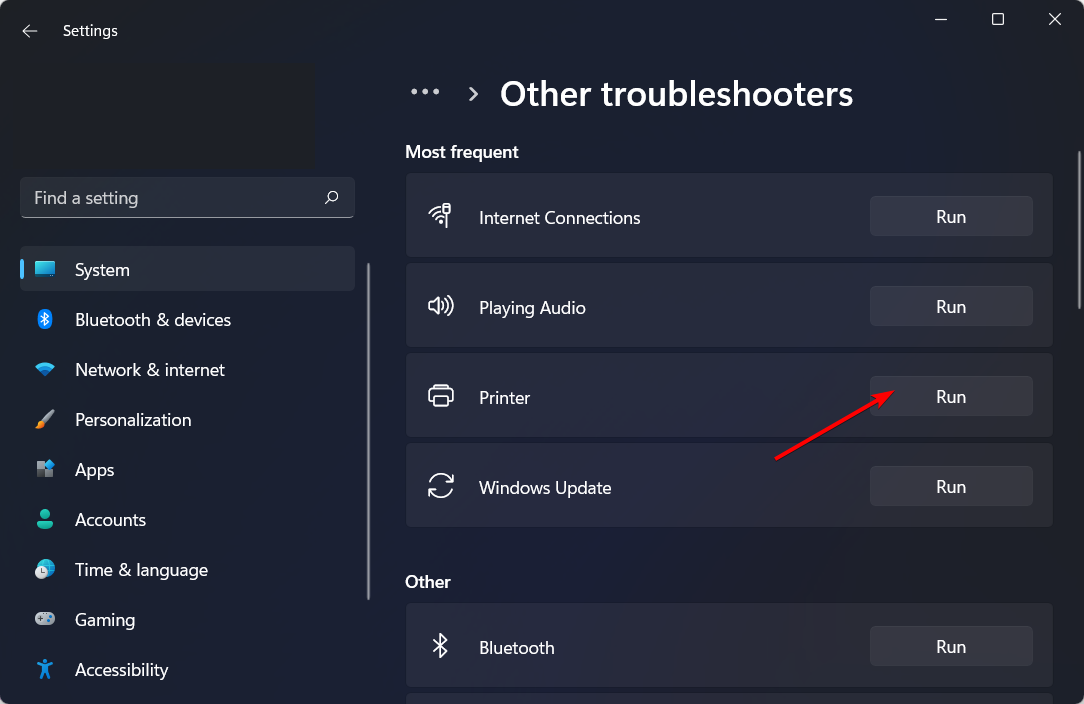
- Find the Print troubleshooter and click the Run button next to it.
2. Restart the Print Spooler service
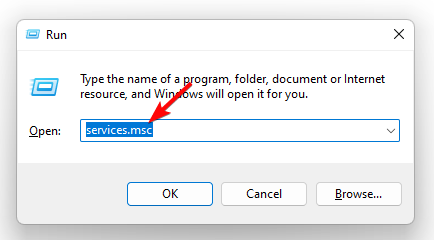
- Hit the Windows + R keys to open the Run command.
- Type services.msc in the dialog box and hit Enter.
- Locate the Print Spooler service, right-click on it, and select Stop.
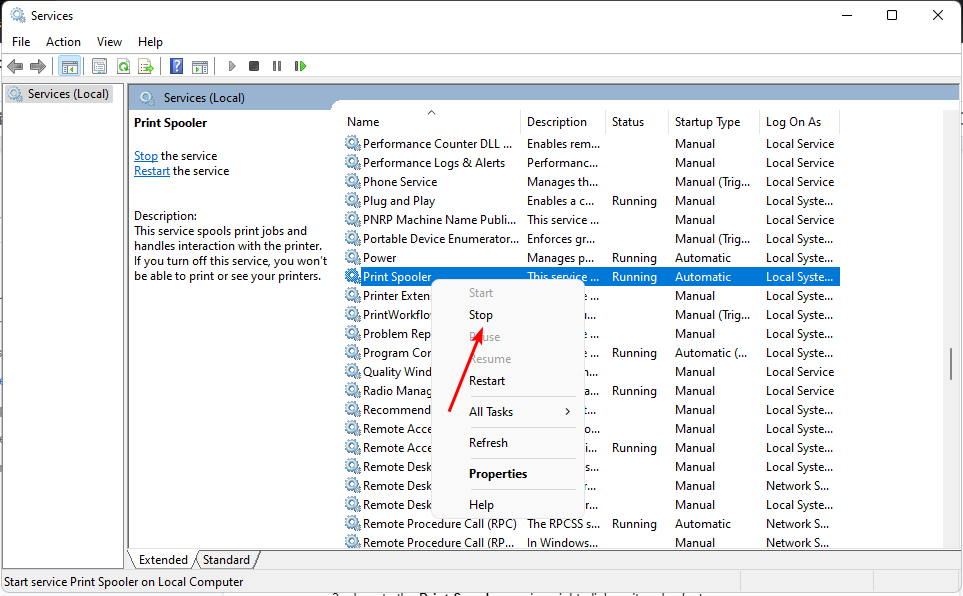
- Right-click on it again, then select Start.

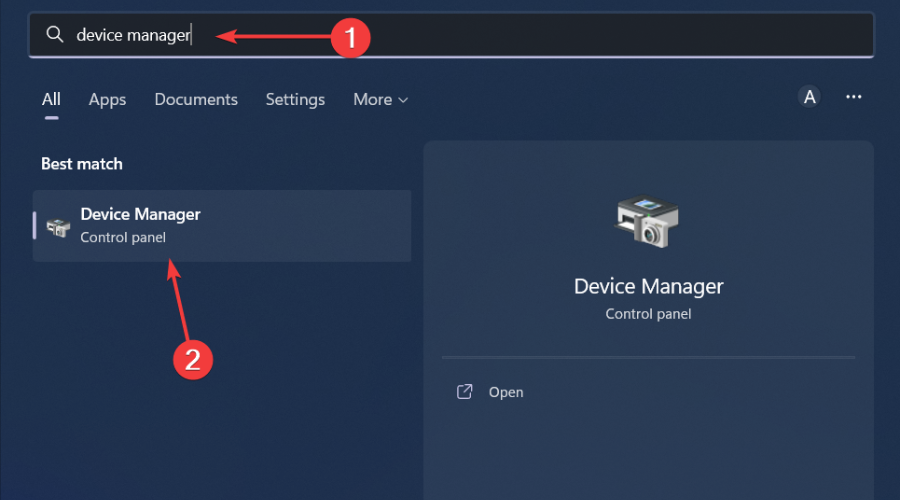
3. Update the Printer drivers
- Hit the Windows key, type Device Manager in the search bar, and click Open.
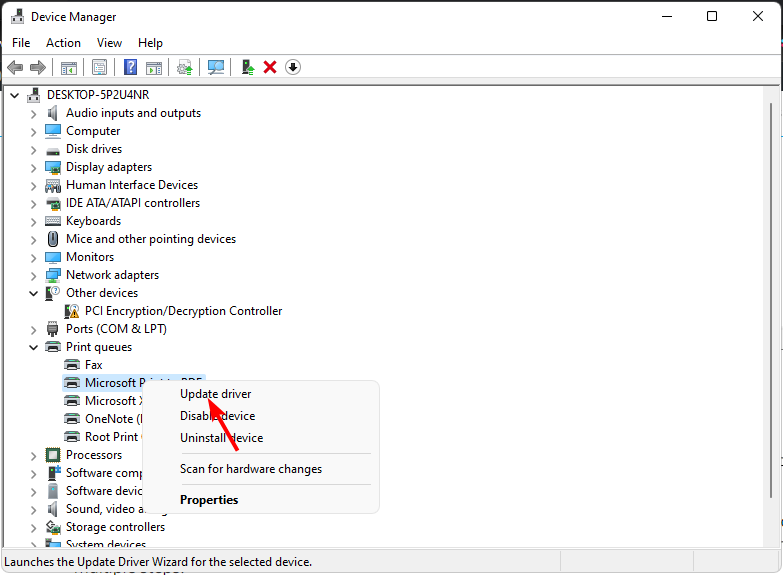
- Navigate to Print queues, locate your printer, right-click on it, and select Update driver.
- Select Search automatically for updated drivers.
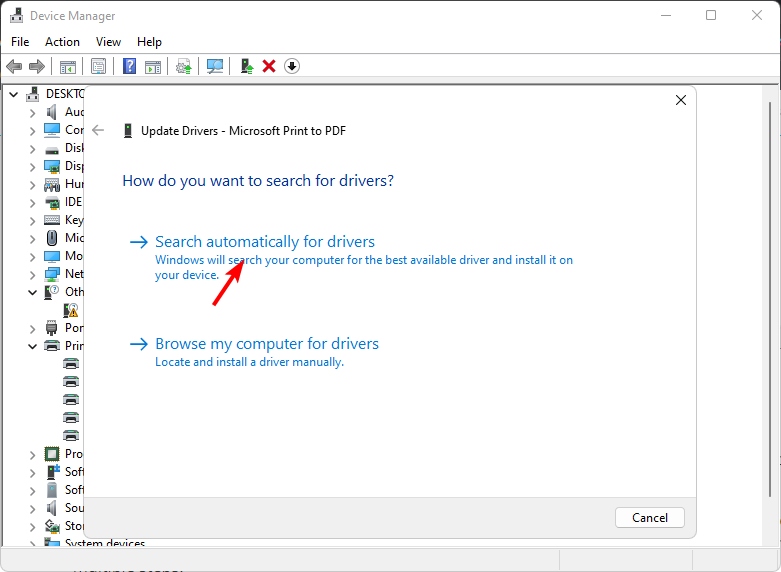
- Windows will find the most suitable driver and recommend you install it.
Manually installing the driver requires some computer knowledge and know-how. It’s not difficult, but not as easy as using a software tool.
Outbyte Driver Updater is a driver updater software that scans your computer and detects all the missing or outdated drivers. This makes the process much simpler and easier for anyone who doesn’t want to go through multiple steps.
4. Disable automatic printer management
- Hit the Windows key and click on Settings.
- Click on Bluetooth & devices, then select Printers & scanners.

- Scroll down to Printer preferences and toggle off the Let Windows manage my default printer option.

5. Set the default printer
- Hit the Windows + R keys to open the Run command.
- Type regedit in the dialog box and hit Enter to open the Registry Editor.
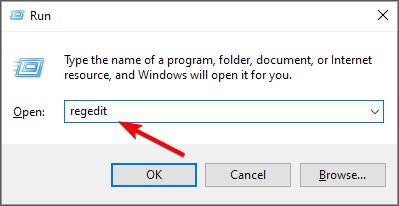
- Navigate to the following location:
Computer\HKEY_CURRENT_USER\Software\Microsoft\Windows NT\CurrentVersion\Windows - Locate LegacyDefaultPrinterMode, double-click on it, and under Value data, enter 1.

Remember to create a backup of your Registry to be on the safe side should anything go wrong when modifying the Registry.
6. Uninstall recent Windows updates
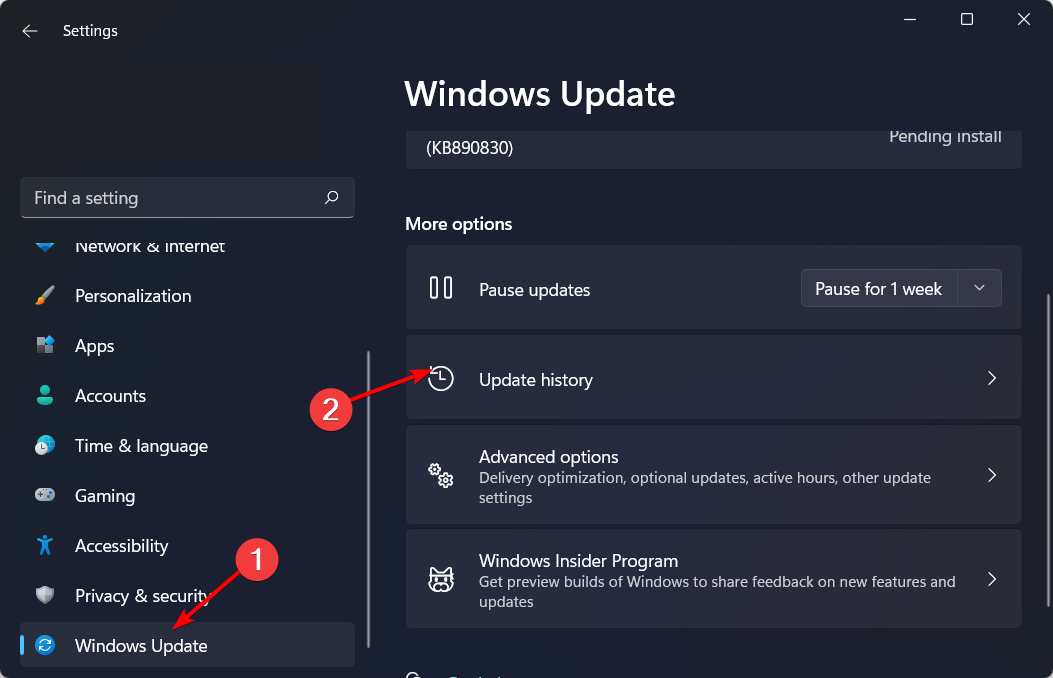
- Hit the Windows key and select Settings.
- Click on Windows Update and select Update history on the right pane.
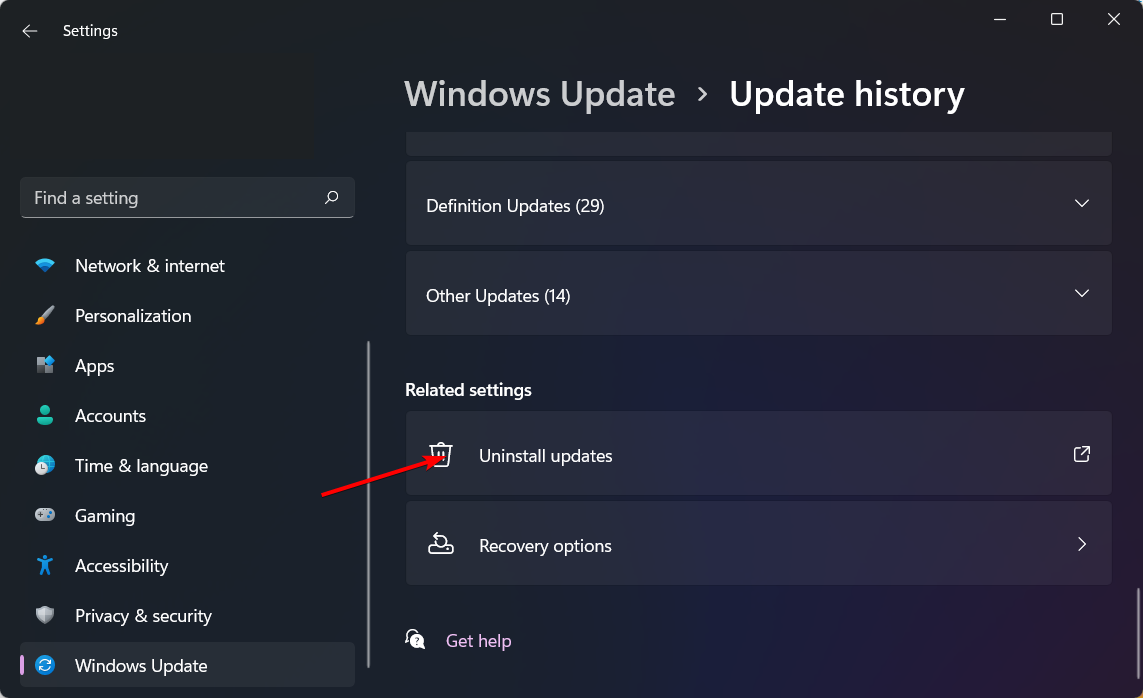
- Scroll down, and under Related settings, click on Uninstall updates.
- This will take you to the most recent installed updates.
- Select the topmost update and click on Uninstall.
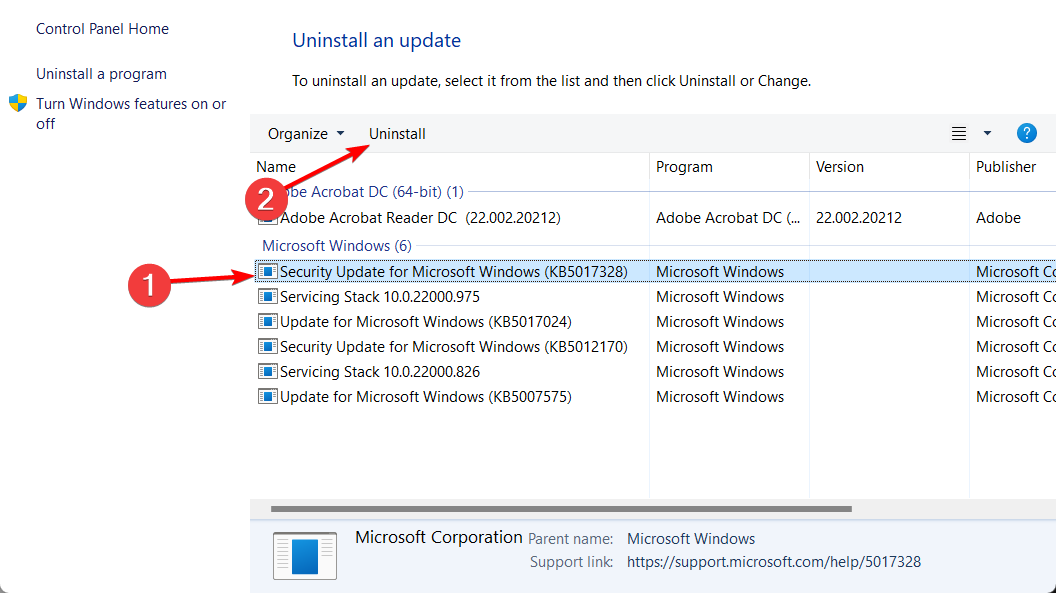
- Restart your PC and check if the problem persists.
And that’s how to solve the Printer Operation could not be completed error. You may also run into another printer-related issue where the printer is not printing the actual size. If so, feel free to check out our detailed article on maneuvering this issue.
Drop us any additional thoughts on this topic in the comment section.
Read our disclosure page to find out how can you help Windows Report sustain the editorial team. Read more


Improve this guide


User forum
0 messages