Windows 10 Randomly Shuts Down: 9 Ways to Permanently Stop It
Check our curated solutions that worked for everyone
7 min. read
Updated on
Read our disclosure page to find out how can you help Windows Report sustain the editorial team. Read more
Key notes
- If your computer randomly turns off, a hardware problem could be the cause.
- Updating your drivers manually or using a third-party program can fix this issue.
- Sleep mode might also cause your computer to randomly shuts down on Windows 10.
- Tweaking your advanced power settings should also get rid of the issue quickly.

All of us have experienced one or two Windows 10 random shutdowns from time to time. Sometimes the culprit is hardware, sometimes software.
Either way, it’s an isolated event. However, what happens if your computer keeps shutting down? On a daily or even hourly basis?
Why is my Windows 10 computer shutting down randomly?
If Windows restarts randomly or shuts down, it’s possible that you have an issue with the power supply, so make sure that everything is properly connected.
In some instances, the computer shuts down while gaming, and the issue can be overheating, overclocking, or even incompatible drivers.
A few users reported that the Shutdown box appears randomly on Windows 11, and this is usually due to system glitches.
Here are a few other instances you may encounter the error:
- Windows 10 immediately shuts down after login
- Computer suddenly turns off and won’t turn back on
- Computer randomly shuts off no error message
No matter the cause of the problem, this guide will help you fix the problem once and for all.
How do I fix random shutdowns in Windows 10?
1. Update your drivers
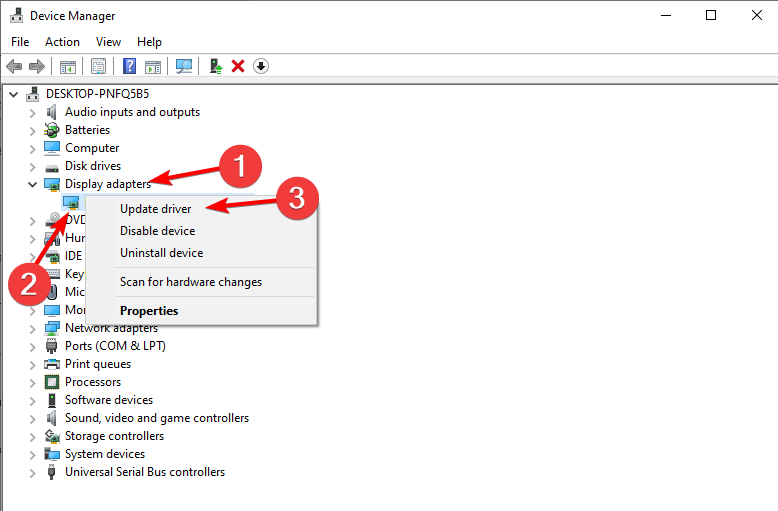
- Click Start and type device manager then click the top result.
- Expand Display adapters. Right-click on your GPU driver and select Update driver.
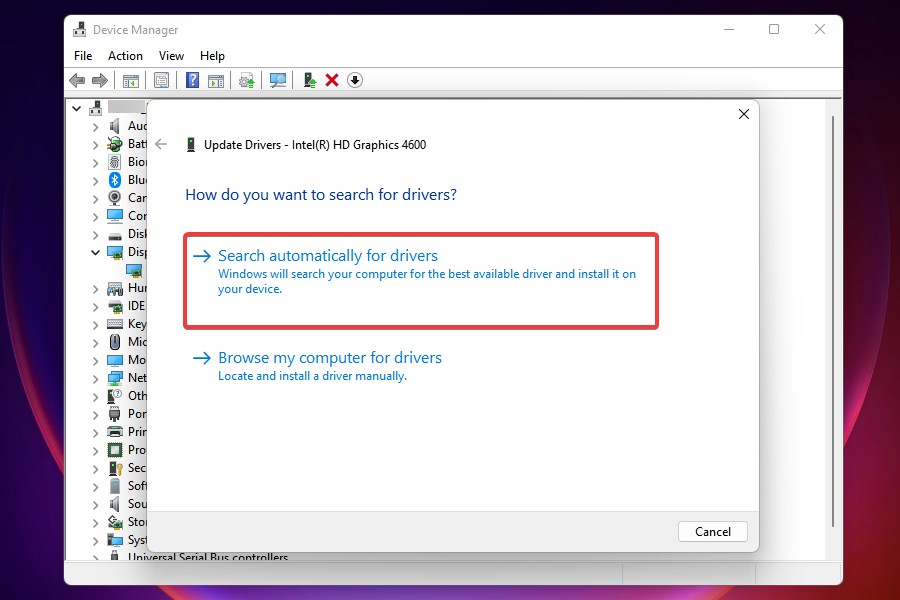
- Select Search automatically for drivers then reboot your PC once the process is done.
Note: If you are using dual-GPU with Intel (integrated) and AMD/nVidia (dedicated) graphic cards, make sure to update drivers for both.
The majority of generic drivers that you received through the Windows Update can be used, but that’s not the case with GPU drivers. You’ll need the latest drivers provided by the official manufacturer.
Update your drivers automatically
If you’re tired of manually searching up drivers for all of your components, you’ll be happy to know that there is a third-party app that can do that for you.
This awesome software will not only scan your computer for compatible drivers, but it will also automatically install them for you as well, saving you a lot of time and effort.
- Download and install the Outbyte Driver Updater app.
- Launch the software and wait for the app to detect all incompatible drivers.
- Now, it will show you a list of all faulty drivers to select the ones to Update or Ignore.
- Click on Update & Apply Selected to download and install the newest versions.
- Restart your PC to ensure the applied changes.

OutByte
Keep your GPU in a flawless state without worrying about possible driver issues.2. Turn off the Sleep mode
- Press Windows + I to open the Settings app then choose System.
- Go to Power & sleep.
- Set both Screen and Sleep to Never.
Sleep mode is great in scenarios when your PC/Laptop is idle for a long period of time.
It preserves energy while enabling you to continue with the use in a few seconds. Until it became a problem in Windows 10. Namely, some users, instead of standard sleep, experienced complete shutdowns.
To be precise, it seems that Safe Mode equals Hibernation in some cases. Because of that, your next step would be to disable sleep mode. We’ll continue from there.
You can also try and set it on 5 hours timeout. That way some other possible interference should be prevented. If the shutdowns repeat, move on to the next steps.
3. Turn off Fast Startup
- Right-click Start and run Power Options.
- In Power Options click Choose what the power buttons do.
- Click Change settings that are currently unavailable.
- Uncheck the Turn on fast startup (recommended) within the Shutdown settings.
- Click OK to confirm and you are done.
With the newly added Fast Startup, Microsoft tried to speed things up while maintaining stability. But, since it affects the way your PC is shutting down, it may summon a lot of errors.
Luckily, you can disable it, check the PC behavior, and move on to the next steps if the workaround failed.
4. Tweak the advanced power settings
1. Press the Windows key, then type choose a power plan and select the top result.
2. Choose your default power plan and click on Change plan settings.
3. Click on Change advanced power settings.
4. Navigate to Processor power management, then System Cooling policy, and set it to Passive.
5. Now, navigate to Hard Disk, then Turn off hard disk after and reduce the value until it shows Never.
6. Save changes and exit.
It seems that a lot of issues are related to power settings in Windows 10. Random shutdowns may be on the list. We have a few tweaks for advanced power settings that are worth trying.
Have in mind that you’ll need administrative permissions in order to perform them.
5. Use this dedicated tool we recommend
The Windows Shutdown Assistant is a dedicated tool that will stop your computer from randomly shutting down. With an easy-to-use interface and automated tasks.
It enables you to shut down the computer at a desired set time automatically.
Additionally, you can set it to shut down the computer in other situations such as system idle, excessive CPU usage, or low battery. The software also allows you to log off, restart, and lock the computer automatically.
This tool supports all Windows Operating Systems and comes with the following features:
- Turn off the computer automatically in various situations
- Schedule to Run a Program or Open a File
- Multiple Functions to Manage Windows Tasks
- Secure Computer Files and Data
- A Visual Break Reminder
- Create a reminder and set it to auto-display on the desktop at a set time.
Feel free to download the trial version now and give it a shot. Besides fixing the random shutdowns, it’s also a great tool to organize your tasks effortlessly.
⇒ Download the Windows Shutdown Assistant
6. Check the CPU temperature
In some cases, your CPU or GPU may overheat and that will lead to random shutdown on Windows 10. Namely, your motherboard is programmed to shut down everything in order to prevent serious damage to your CPU.
This especially goes for laptops that are most of the time lacking an adequate cooling system for intensive gaming.
You can check system temperatures with 3rd-party tools or just casually touch the backside of the laptop.
If the temperatures are alarmingly high, you’ll need to take some action.
- Clean fan bay on laptops or CPU cooler on a desktop.
- Change the thermal paste.
- Use a cooling pad of some kind to reduce heating.
- Change overclock settings to default.
In case your notebook/PC is in warranty, we advise you to take it to your supplier and let the professionals do the cleanup.
7. Update BIOS
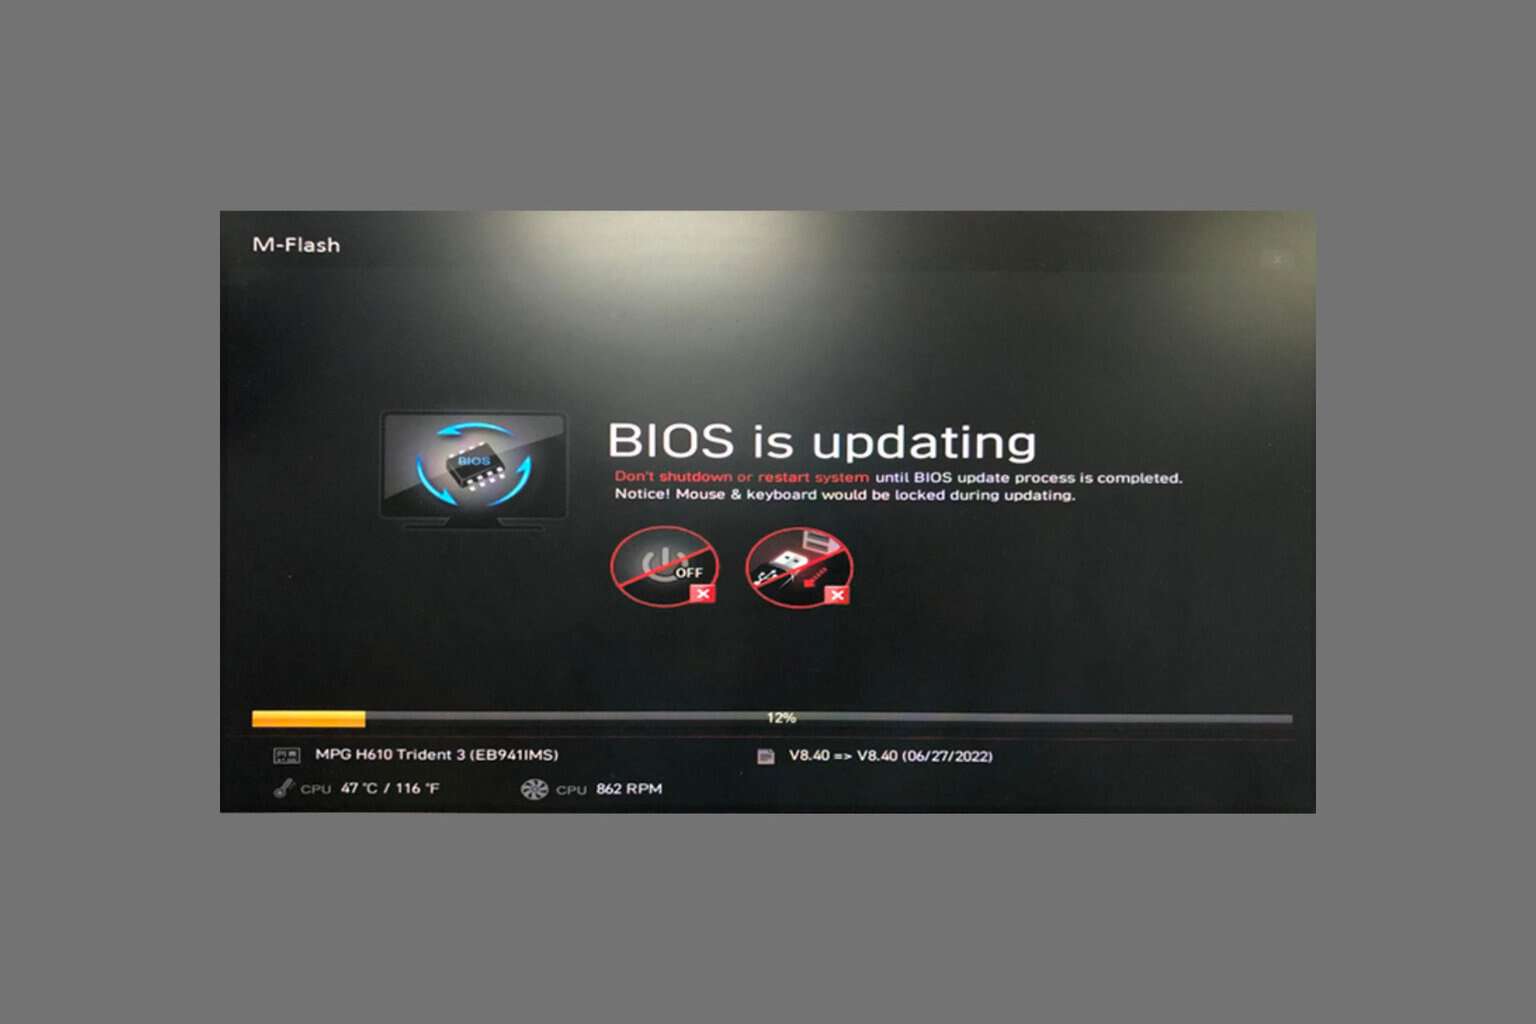
Even though BIOS updating is not advisable, especially for beginners, sometimes it’s required. If misused, Bios updates can cause a lot of problems and most of them are fatal to your PC.
Some motherboards offer special update tool featured in BIOS settings. If you have a new motherboard, you’ll have an easy time updating.
However, those of you with the older configurations have a much harder task.
Make sure you gather all the information before performing the process. Moreover, if your motherboard is up to date, don’t upgrade it.
8. Check HDD state
- Right-click on Start and run Command Prompt (Admin).
- In the command line type, the following command and press Enter to confirm:
wmic diskdrive get status - You’ll know your hard disk is healthy when prompted with OK for every partition.
Another thing worth checking is your HDD. If your HDD is corrupted or it has damaged sectors, you’ll probably encounter a large variety of problems.
Most of the time the system won’t boot, but it may as well be related to sudden shutdowns. For that purpose, you can use 3rd-party tools and scan the disk (like HDDScan), or use the built-in tool and do it internally.
For starters, the built-in tool will serve you right, and here is how to use it. On the other hand, if you are seeing Unknown, Caution, or Bad, your hard disk has some issues.
Of course, you can always scan your HDD with one of the best dedicated tools.
9. Perform a clean reinstall
At the end of the day, the clean reinstallation of Windows is the most viable solution. Of course, if the hardware isn’t the instigator of the uncalled Windows 10 random shutdown.
You can use Media Creation Tool to easily obtain installation setup for either ISO DVD or bootable USB.
Have in mind to back up your data from the system partition before the process commences. Moreover, take good care of your license key.
The process is not as hard as it was on some of the previous systems so you’ll be able to finish in two hours.
That should wrap it up. We hope you’ll find these workarounds appropriate for the Windows 10 random shutdown issue.
Finally, all you can do is try since Microsoft is the one that should address this issue with more enthusiasm. In case you have any suggestions, alternative solutions, or questions, don’t forget to tell us in the comments.


User forum
7 messages