Best Realtek Audio Settings: 4 Tips to Improve Quality
Realtek Audio Manager helps tweaking your audio settings in no time
4 min. read
Updated on
Read our disclosure page to find out how can you help Windows Report sustain the editorial team. Read more
Key notes
- Realtek HD Audio Manager works as a control panel for your audio adapters.
- Many settings are available in the audio manager to improve your audio output for gaming and other activities.
- Not installing the Realtek HD Audio Manager on your PC doesn’t affect its audio performance.
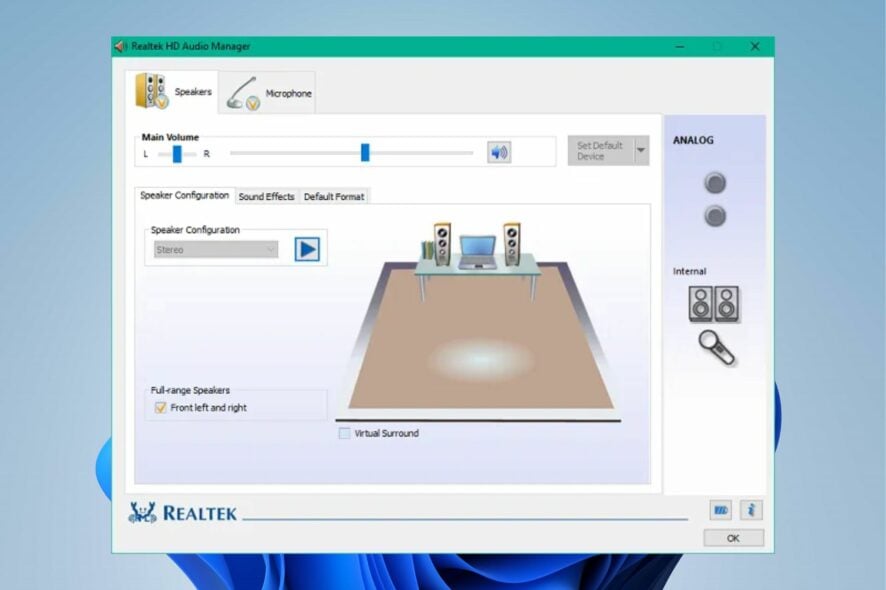
Most Windows use the Realtek High Definition audio driver because it offers the best audio quality Dolby, DTS, and Surround Sound support. However, installing the driver on your PC has an advanced Realtek HD Audio Manager for tuning and adjusting your device’s sound.
Hence, this article will show you how to maximize audio production by tweaking the Realtek High Definition Audio Manager’s settings.
Should I use the Realtek HD Audio Manager?
The Realtek High Definition Audio Manager allows you to maximize and enhance your sound output.
It functions as a Control Panel for your audio adapters. Users ask if it is necessary to use the Audio Manager, and the answer is no because it doesn’t affect your sound output.
However, the Realtek HD Audio Manager allows you to explore audio settings like bass management, room corrections, speaker settings, and more.
Further, it has two different audio tabs: speakers and microphones. Hence, Realtek High Definition Audio Manager ensures easy access to the sound settings on your PC and the option to customize your speaker configuration.
Also, you can adjust the volume of each speaker independently, adjust the microphone volume and perform tests for your device.
However, the Realtek High Definition Audio Manager is not necessary for your audio devices, but we recommend you use it for fast and wide access to audio settings.
Alternatively, please read our detailed guide about why you need Realtek HD Audio Manager on your device.
How do I get Realtek’s best audio setting for all sources?
1. Increase the overall loudness of your audio output
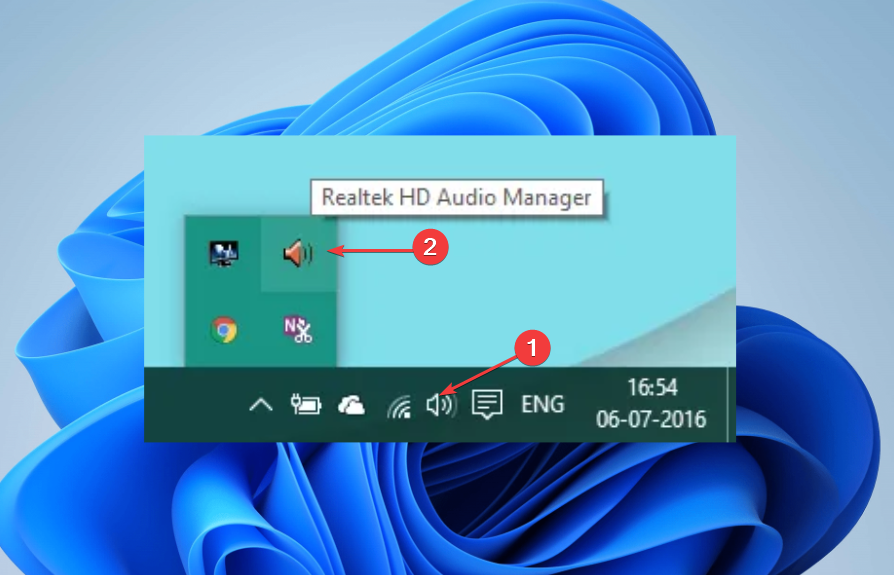
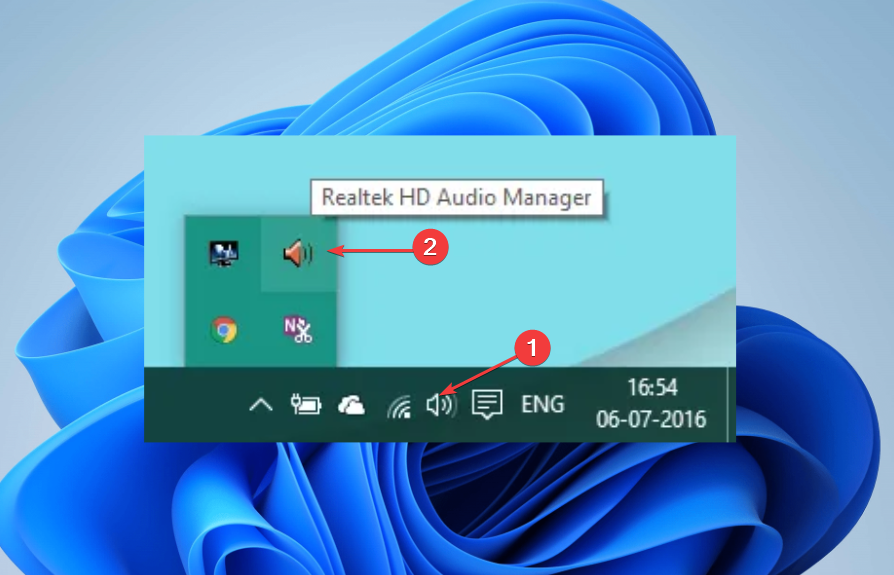
- On the desktop screen, navigate the system tray and right-click on the Realtek HD Audio Manager icon to prompt the audio options menu.
- Select the Sound Manager from the drop-down.
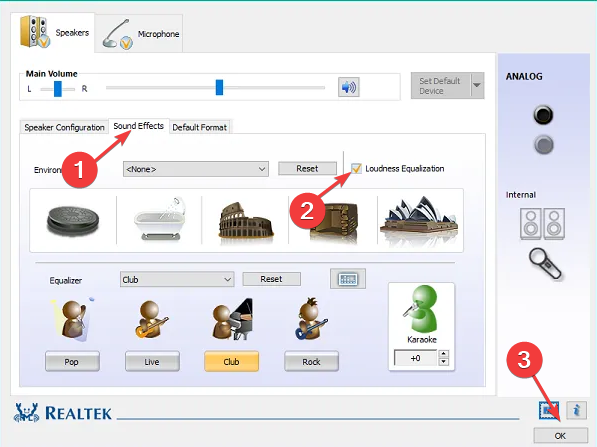
- Click the Sound Effects tab on the Sound Manager window below the Main Volume slider.
- Check the box for the Loudness Equalization option and click on the OK button to save the settings changes.
Enabling the Loudness Equalization feature can also reduce the volume differences in the sound output devices. Also, you can read about how to increase your volume beyond max on your laptop.
2. Set your Default Format
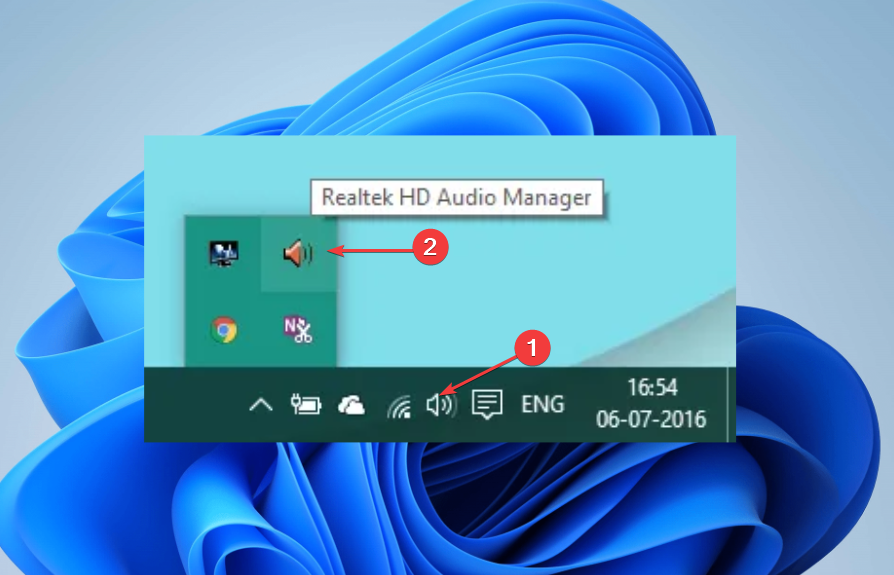
- On the desktop screen, navigate the system tray and right-click on the Realtek HD Audio Manager icon to prompt the audio options menu.
- Select the Sound Manager from the drop-down.
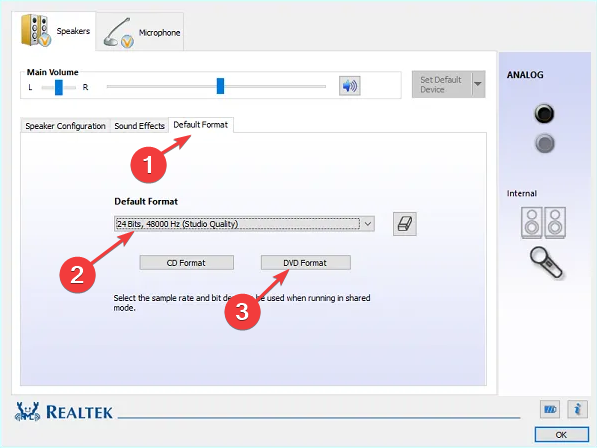
- Click the Default Format tab below the Main Volume slider.
- Set your playback default format to 24Bits 44100 Hz Studio quality and select the DVD format option below.
Settings the Default Format helps reduce sound latency and improve your sound quality.
3. Test the right and left speaker output
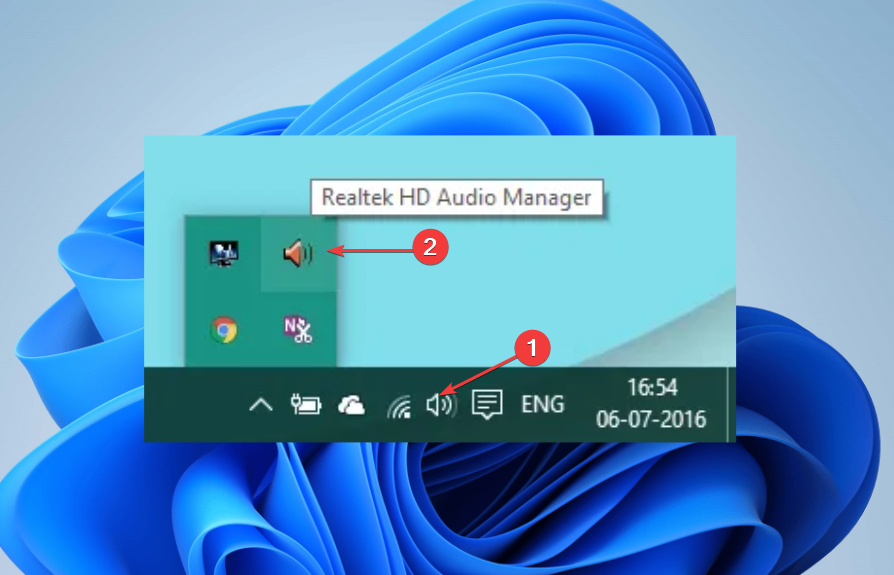
- On the desktop screen, navigate the system tray and right-click on the Realtek HD Audio Manager icon to prompt the audio options menu.
- Select the Sound Manager from the drop-down.
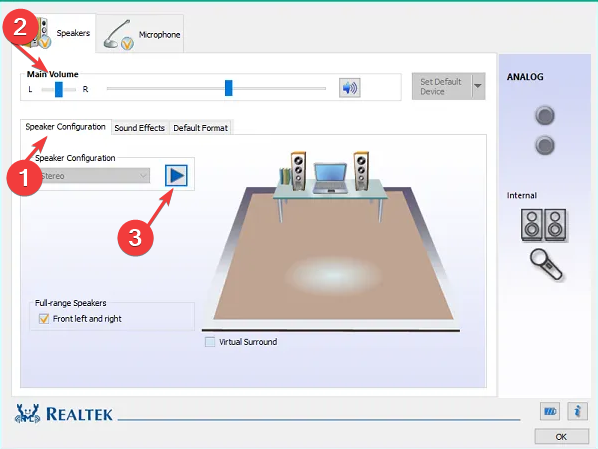
- On the Sound Manager window and click the Speaker Configuration tab below the Main Volume menu.
- Click the Play icon.
The play button in the tab lets you test the output of the right and left speakers, making it easy to identify if there are any irregularities with your sound.
4. Enable the Acoustic Echo cancellation feature
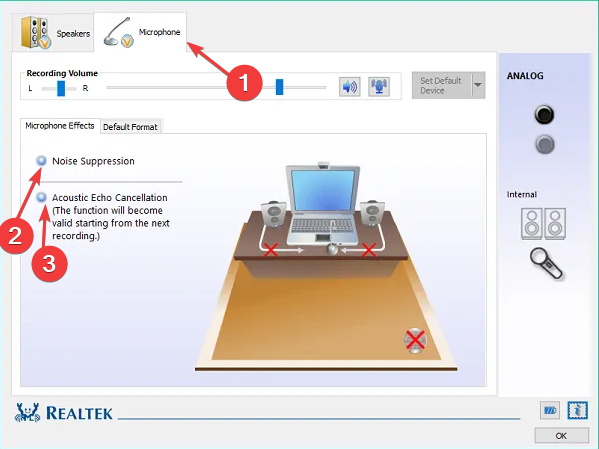
- Right-click on the Realtek HD Audio Manager icon on the desktop tray and select Sound Manager from the drop-down.
- Go to the Microphone tab.
- On the Microphone Effects window, enable the Acoustic Echo cancellation option.
- Also, you can enable the Noise Suppression option too.
The Acoustic Echo cancellation feature reduces the echo from the front speakers during recording. Likewise, the Noise Suppression feature reduces the static background noise during audio recording.
However, tweaking the best Realtek equalizer settings for gaming and other activities doesn’t work independently. You need quality headphones or speakers that produce a better audio output.
Also, you can improve your headphone sound quality in Windows 11 for better performance. Using the Realtek Audio Console can run into numerous issues like failure to detect your Bluetooth headphones.
However, you can read our article about how to fix Realtek HD Audio Manager not opening or working on Windows 11. Also, read the fixes for Realtek HD Audio Manager missing on the PC.
If this guide has been helpful, leave your suggestions or questions in the comments section.

User forum
0 messages