How To Delete Or Move Camera Roll And Saved Pictures Folders

Windows creates Camera Roll and Saved Pictures for apps that store images, but you can move or remove them when you want a cleaner Pictures library.
Table of contents
How Do I Remove Camera Roll and Saved Pictures folders?
Delete the folders from File Explorer
Follow these quick steps to clear the folders manually without affecting other pictures.
- Open File Explorer and select Pictures.
- Right click Camera Roll or Saved Pictures.
- Select Delete and confirm the action.

- Empty Recycle Bin to finalize the removal.
A helpful guide explains what to do when the Camera Roll folder goes missing and covers folder behavior in detail, so don’t miss it.
Stop Windows from recreating the folders
Use this method when apps keep regenerating the folders after you remove them.
- Press Windows + I to open Settings.
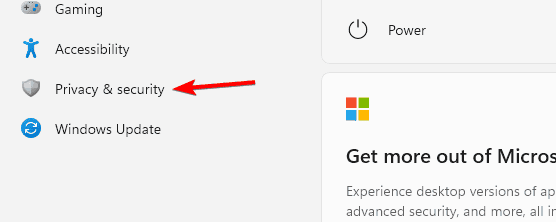
- Select Privacy and security.
- Choose Camera from the sidebar.
- Turn off Let apps access your camera if you never use camera apps.

- Review other app permissions that save pictures and disable ones you do not need.
Another article explains how the Windows Camera app changes its save location and how that affects folders such as Camera Roll.
Move Camera Roll and Saved Pictures folders
You can relocate these folders to another drive when you want better storage organization.
Change the folder location through Properties
This method lets you redirect each folder to a custom path without breaking app access.
- Open File Explorer and go to the Pictures library.
- Right click Camera Roll or Saved Pictures.
- Select Properties from the context menu.

- Open the Location tab in the Properties window.
- Select Move and pick your new folder destination.

- Select Apply to confirm the change.
- Select Yes when asked to move existing files to the new location.
Redirect all Pictures folders to another drive
Use this option if you want every Pictures subfolder stored on a different drive or partition.
- Press Windows + R, type shell:Pictures, then select OK.
- Create or choose the destination folders you want inside the Pictures location.
- Right click Camera Roll or Saved Pictures.
- Select Properties, then open the Location tab.
- Select Move and choose a folder on your preferred drive.
- Select Apply and confirm the prompt to move current files.
A detailed explanation of how Windows stores camera images and manages picture locations appears in a dedicated guide, so don’t miss it.
Why these steps work
Camera Roll and Saved Pictures follow the same redirection rules as other user folders, so when you move or delete them, Windows respects your choice and only recreates them when an app with the right permissions demands a valid save path.
Why Windows creates these folders
These folders appear when apps such as Camera or Photos need a default save location, yet you can control where they live or if they exist at all.
FAQs
Apps such as Camera, Photos, OneDrive, or screenshot tools create them again when they look for a default folder and do not find one.
Yes, it is safe as long as no app actively saves images there, and even then, the folders simply appear again when the app needs them.
Yes, OneDrive can recreate them when picture syncing stays active, so you should adjust OneDrive photo backup settings if you want full control.
Yes, you can select an external drive from the Location tab, although folders may disappear when the drive is not connected, which can confuse some apps.
By removing or moving the Camera Roll and Saved Pictures folders, you keep your Pictures library under control while still allowing Windows and your apps to function correctly, since they either follow your new folder paths or recreate the folders only when they truly need them.
You can read a dedicated guide on saving pictures to Camera Roll in Windows to understand how the Camera app stores photos and handles picture locations.
Read our disclosure page to find out how can you help Windows Report sustain the editorial team. Read more


Improve this guide


User forum
0 messages