Standard Hardware Security Not Supported [Error Fix]
You should enable the virtualization technology (Hyper-V) in BIOS
Key notes
- If you have recently reset your PC or upgraded to Windows 11, you may see the Standard hardware security not supported n notification in the Windows Security app.
- While the Standard hardware security not supported notification is usually seen in Windows 11, version 22H2, it can also occur for other versions.
- The error may usually appear if your device does not meet the minimum requirements for hardware security. However, there could be other reasons as well.

Some users have been complaining that they see a notification in their Windows Security app that says, Standard hardware security not supported.
At the same time, this error seems to appear even if the device meets the standards for hardware security, and has the latest drivers, Windows updates, and BIOS firmware installed.
What does it mean by standard hardware security not supported?
Having said that, this message occurs when your device does not meet at least one of the requirements of standard hardware security:
- The device has TPM 2.0 (security processor), and it’s enabled
- Secure boot is enabled
- DEP is turned on (Data Execution Prevention)
- UEFI MAT ((Unified Extensible Firmware Interface Memory Memory Attributes Table)
- CPU Virtualization is enabled
What causes standard hardware security not supported?
So, if you see the Standard hardware security not supported error notification in Windows 11, it could be because:
- The minimum requirements for hardware security are not met – It could be possible that the TPM 2.0, secure boot, or virtualization is not enabled in the BIOS settings.
- Outdated system drivers – If the drivers are not updated to the latest version, this may trigger the standard hardware security not supported error.
- BIOS firmware not updated – Chances are that you see the error notification due to outdated BIOS firmware.
- Corrupted Windows update – Sometimes, it could be a corrupted Windows update causing the error.
- Recurrent Windows 11 bug – In many cases, it has been reported that the standard hardware security not supported error shows up due to a bug in the OS.
What can I do if standard hardware security is not supported on Windows 11?
Before you move over to the main section to try the primary methods, here are a few quick checks:
- Make sure you have enabled secure boot in the BIOS.
- Check if TPM 2.0 is enabled and installed properly.
- Update the drivers to the latest version.
- Uninstall the recent Windows update
However, if none of the above steps help you eliminate the standard hardware security not supported error, we have some expert tips to fix the issue.
1. Enable Data Execution Prevention (DEP)
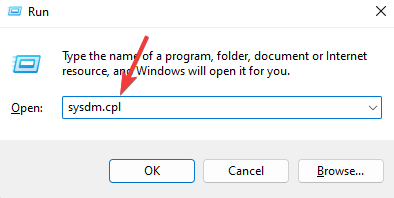
- Press the Win + R keys to open the Run dialogue. Type sysdm.cpl and hit Enter to open System Properties.
- Now, select the Advanced tab, and under Performance, click on Settings.

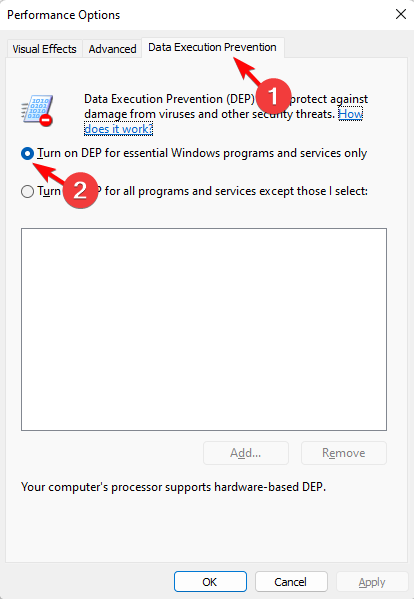
- Next, go to the Data Execution Prevention tab, and select Turn on DEP for essential Windows programs and services only option. Press Apply and OK.
Now, restart your PC and check if you could successfully fix the standard hardware security not supported error in Windows 11 or if you still see the notification.
2. Enable BIOS settings
- Access BIOS on your PC, select UEFI Firmware Settings, and select Expert mode.
- Here, go to CPU settings or System Configuration, look for either Intel Virtualization Technology, Virtualization Technology, VT-x, AMD-V, or SVM, and set it to Enable.

- This enables Core isolation in Windows Security.
- Next, under the Advance tab, navigate to System Agent Configuration or North Bridge Configuration, and enable VT-d or IOMMU to enable Memory integrity in Windows Security.

- Now, enable Intel Platform Trust Technology (PTT) or the AMD equivalent, and the motherboard chipset acts as a TPM. This enables the Security processor in Windows Security.

- Next, enable Secure Boot, and select Install default Secure Boot keys.

- Here, select Windows UEFI mode for OS type. This will turn on Secure boot in Windows Security.

- Press F10 to save and exit.
Now, open the Windows Security app, and the standard hardware security not supported notification should be gone.
You will now see that Core isolation, Security processor, and Secure boot options are enabled in Windows security.
3. Downgrade to Windows 10 and upgrade again
- Downgrade Windows 11 to Windows 10 using the Windows 10 installation media.
- Now that you are done setting up, click on the Windows Security icon in the system tray.

- Next, in the Windows Security app, click on Device Security on the left. Now, on the right, go to Core Isolation and click on Core isolation details.

- On the next screen, go to Memory integrity, and turn it on to scan for Incompatible Drivers.

- You can now pick a driver remover to completely uninstall all traces of the incompatible drivers.
- Repeat steps 2 to 5 again, and see if there are incompatible drivers. If not, enable it and restart the computer.
- Finally, upgrade your PC to Windows 11 using the Windows 11 ISO, and the standard hardware security not supported error should be fixed.
You can also follow the instructions in our detailed post to learn how to downgrade Windows 11 to 10 on a new laptop.
4. Reregister Windows Security App using PowerShell
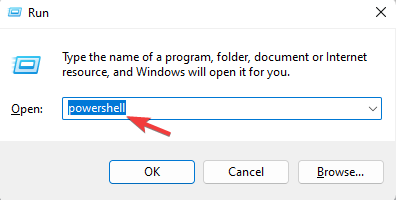
- Press the Win + R shortcut keys to open the Run console. Type in Powershell, and press the Ctrl + Shift + Enter keys together to launch the elevated Powershell window.
- Now, run the below command in the Powershell (Admin) window and hit Enter:
PowerShell -ExecutionPolicy Unrestricted -Command "& {$manifest = (Get-AppxPackage *Microsoft.Windows.SecHealthUI*).InstallLocation + '\AppxManifest.xml' ; Add-AppxPackage -DisableDevelopmentMode -Register $manifest}"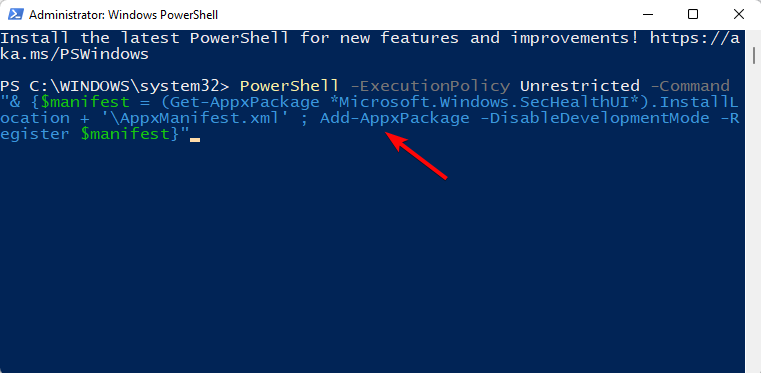
- Once the command executes successfully, close PowerShell and restart the PC. This should help you fix the standard hardware security error in Windows 11.
To know more on how to reinstall Windows Security on Windows 11, you can refer to our detailed guide for more information.
5. Reinstall the Windows Security Platform
- Download the latest version of the Windows Security app. Now, create a restore point, and then unzip the downloaded ZIP file on the desktop.
- Next, press the Win + E keys to open File Explorer, navigate to C:\Windows\System32\SecurityHealth, right-click on the setup file, and select Properties.

- Now, follow the below path to change to Administrators, and take ownership of that folder:
Properties > Security tab, > Advanced > Owner > Change > Select User or Group > Advanced
- In the next window, click on Find Now, go to the Search results, select Administrators, and press OK.

- In the Select User or Group dialog, click on Check Names and press OK.

- Now, in the Advanced Security Settings window, select Replace owner on sub containers and objects, press Apply and OK to save the changes, and return to the Properties dialog.

- Here, under Group or user names, select Administrators, and click on Edit.

- Next, in the Permissions window, select Administrators, and check the Allow box next to Full Control. Press Apply and then OK.

- Back in the SecurityHealth folder in the File Explorer window, copy the 1.0.2207.20002-0 folder, and paste it on the Desktop to the SecurityHealth folder.

- Now, you can open the folder and run the application Microsoft.SecHealthUI_8wekyb3d8bbwe.appx as an administrator.
Once done, restart your PC, and check if this helps eliminate the standard hardware security error.
Also, you must check if the BIOS is updated. If not, then update the BIOS firmware to the latest version to fix the standard hardware security not supported issue.
Besides, if your device already meets the hardware security standards, you can simply access the BIOS settings, disable the virtualization and enable it again.
If none of the above methods work, you may do a clean install of Windows 11 using a USB, and this should help you get rid of the issue.
For any other queries related to Windows 11 or the Windows Security app, do let us know in the comments section below.
Read our disclosure page to find out how can you help Windows Report sustain the editorial team. Read more


Improve this guide


User forum
0 messages