Fix: Windows is Stuck on Cleaning Up - 0 Percent Complete
Getting past this error ensures smooth Windows update for the future
5 min. read
Updated on
Read our disclosure page to find out how can you help Windows Report sustain the editorial team. Read more
Key notes
- Whenever a new Windows Update is being installed, your computer will clear out the old files to make room for the new.
- However, users have reported the cleanup process getting stuck at zero percent and not budging an inch.
- This guide will show you to get past zero percent so the updating process can go as smoothly as possible, including how to perform a clean boot.
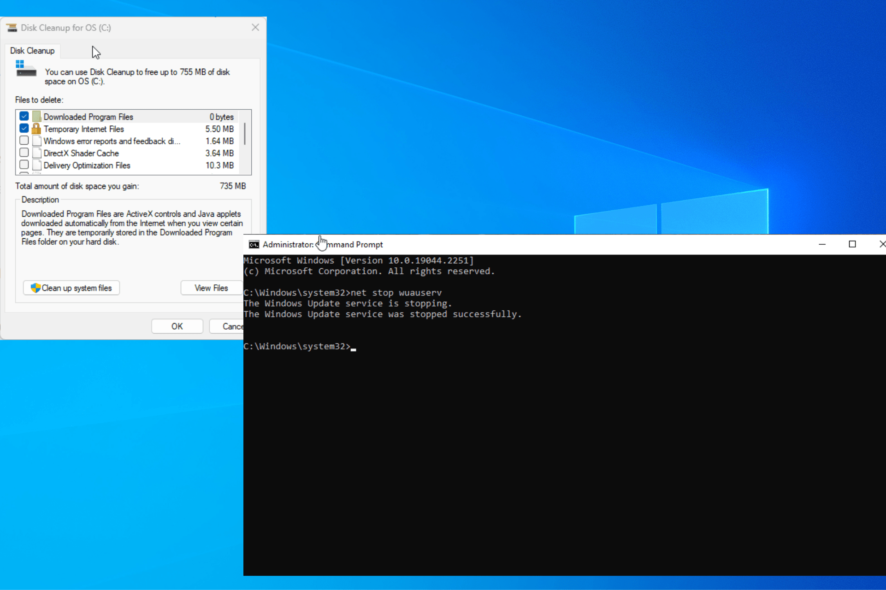
Despite Windows 11 being around for about a year now, Microsoft frequently supports and updates Windows 10 and will probably do so for a while. Updates often bring fixes and new features to an OS.
To facilitate this, Windows 10 updates have a Cleanup feature that gets rid of the old files to make way for the new ones. But some users have reported the Cleanup feature not starting beyond launching.
What causes Windows Update to get stuck on cleaning up?
The main driving force behind Window Update’s Cleanup feature is the Disk Cleanup tool itself. Any time the cleanup is stuck at zero percent, there’s something wrong with the app.
- Your Windows computer has too many files: It’s entirely possible that because you have so many files that need to be parsed, it will take Disk Cleanup a long time to finish.
- Your computer is experiencing slow performance: As a consequence of too many files, Windows may experience a performance drop because it’s all too much to process.
- Corrupt files may be getting in the way: We recommend repairing and restoring corrupted files to get past this obstacle and ensure things run smoothly.
What can I do if Windows 11 is stuck on Cleaning up – 0 percent complete?
Before trying out any of the solutions, we recommend the following:
- Wait it out. Perhaps you have so many files on your hardware that it takes your computer extra time to finish.
- Create a restore point in case things go south and you have a way to bring your computer back to its previous state.
- Turn off or uninstall your antivirus. It’s been reported that sometimes antivirus software will get in the way of important Windows functions.
- Run the Windows Update Troubleshooter to identify the problem and resolve it. The software has been known to have its issues, so we recommend running a debug tool to fix it.
- Install any new Windows updates currently available, specifically in Safe Mode. Microsoft frequently rolls out fixes in its updates.
1. Run a series of commands
- Bring up the Command Prompt in the Windows search bar and select Run as administrator.
- Click Yes if a User Access Control window pops up.
- Type the following in Command Prompt and press Enter on your keyboard to stop Windows Update:
net stop wuauserv - Next, type in the following commands and hit Enter after each one:
net stop bitsnet stop cryptsvcnet stop trustedinstaller - After that’s done, type in the following command and press Enter after each one:
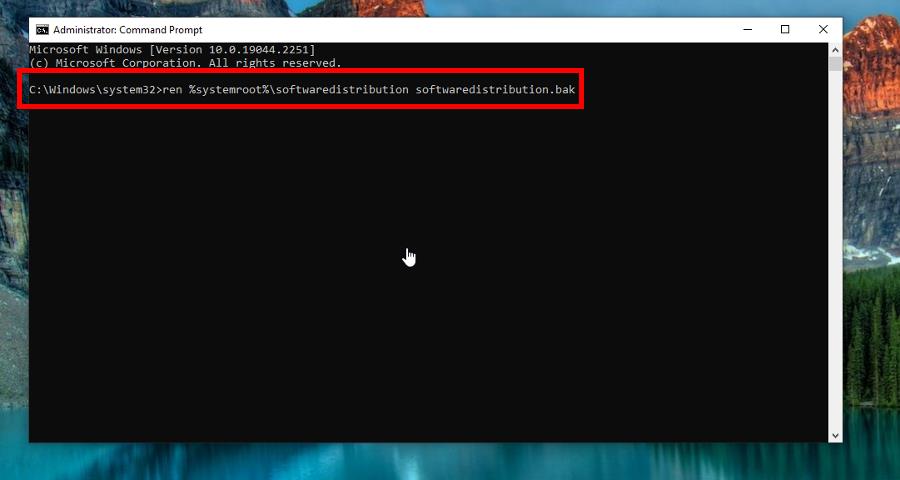
ren %systemroot%\softwaredistribution softwaredistribution.bakren%systemroot%\system32\catroot2 catroot2.bak - Now it’s time to restart earlier services. Start by typing in the following and hit Enter after each one:
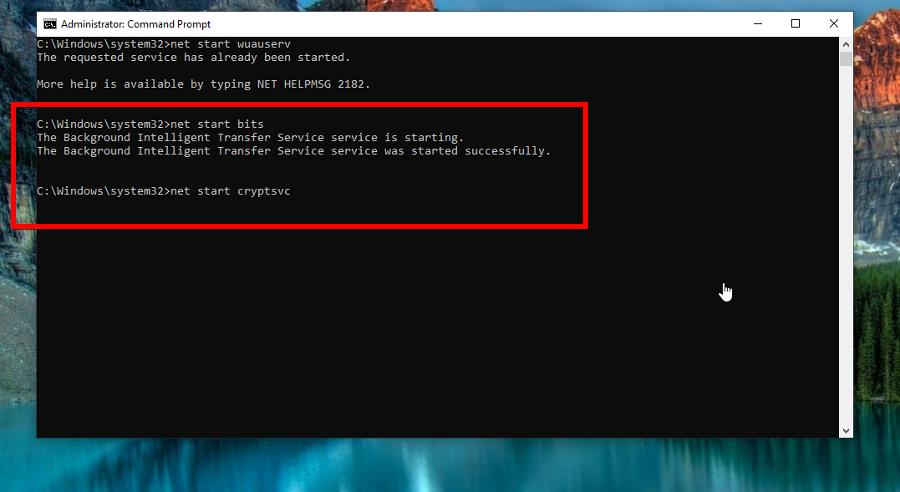
net start wuauservnet start bitsnet start cryptvc - Type in the following commands and press Enter like before:
net start trustedinstallernet start appidvc
Stopping and restarting the services in the solution clear out the Windows Update cache so the system can redownload the files instead of using the ones already on the drive. Those files may be damaged.
2. Perform a clean boot
- Now it’s time to perform a clean boot. Open System Configuration on your computer.
- Go to the Services tab, click Hide all Microsoft services then Disable all. Select Apply to finish in this tab.
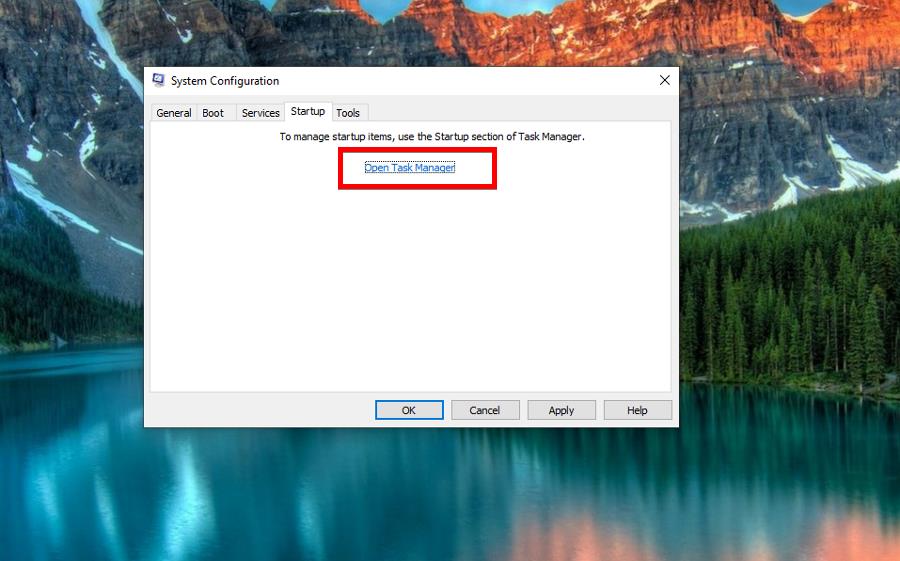
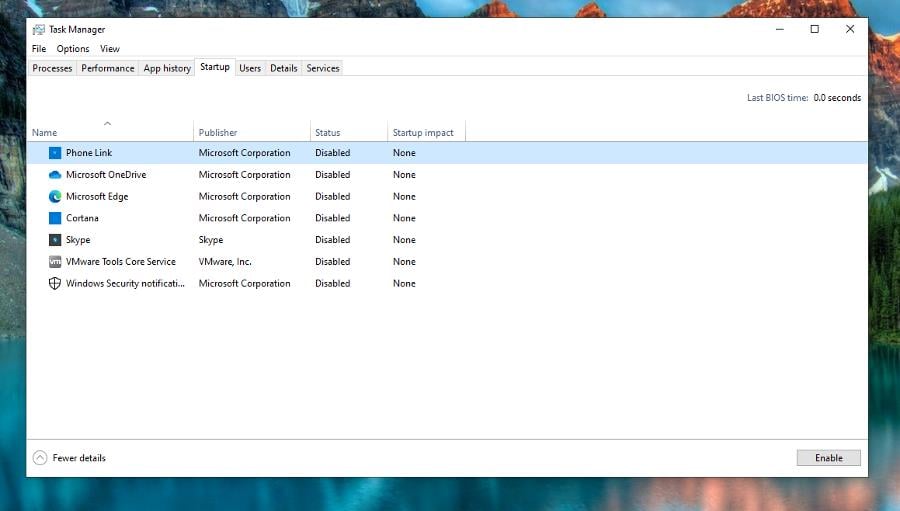
- Go to the Startup tab and click Open Task Manager.
- Select each item you see in Task Manager and disable everything.
- Close Task Manager, click Apply, then OK.
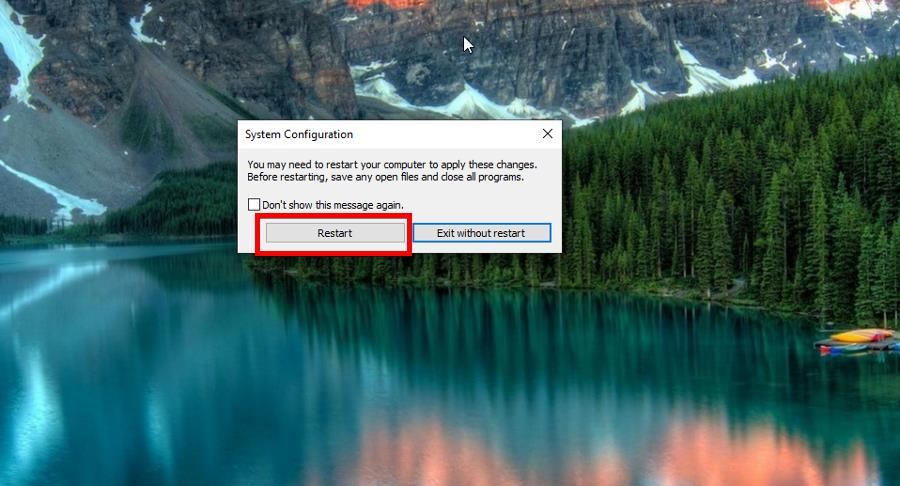
- Select Restart in the new window that appears. After the clean reboot, update your drivers and see if the problem has been fixed.
3. Run an SFC scan
- Bring up the Command Prompt again with the same administrator permissions as before.
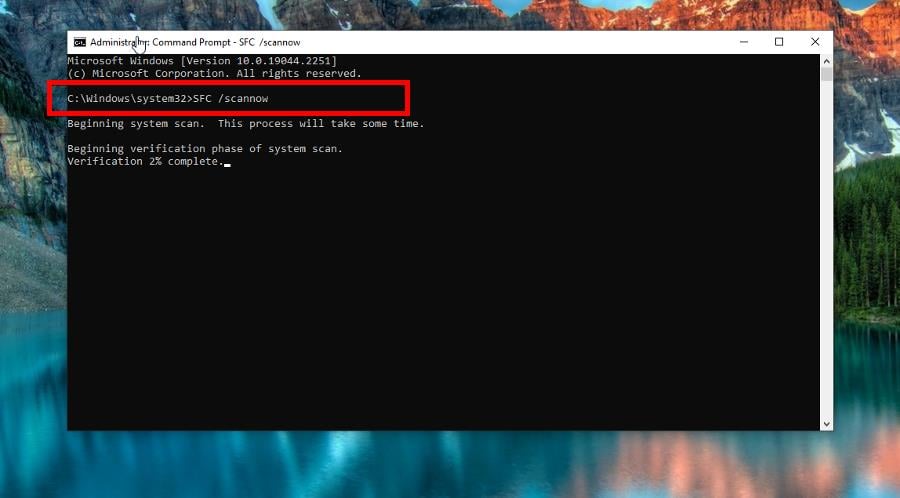
- Type in the following and hit Enter on your keyboard:
SFC /scannow - Wait for the process to finish.
- Next enter the DISM command:
DISM /Online /Cleanup-Image /CheckHealth - Type in and press Enter:
DISM /Online /Cleanup-Image /ScanHealth - Now, type the following and press Enter:
DISM /Online /Cleanup-Image /RestoreHealth - Restart your computer to complete the process.
This solution is recommended to be performed after the clean boot, but you can do this at any time and see similar results.
How can I fix the 0 percent clean-up issue in Windows 11?
In case of facing this issue on this OS, do not hesitate to run the troubleshooter and SFC scan on Windows 11, as described below.
- First, open the Settings menu and click System on the left-hand side.
- Scroll down to Troubleshoot and click it. Select Other troubleshooters on the following page.
- Click Run next to Windows Update activate the troubleshooter. Give it time to finish.
- Select Next if a window appears telling you to restart your computer.
- A window will appear telling you what the problems were and if it fixed them.
- Now, bring up Command Prompt on Windows Search and select Run as administrator.
- Type the following command and hit Enter on your keyboard:
SFC /scannow - Wait for your computer to finish the process.
Note that this straightforward solution is the best for Windows 11, but you can also try it out on Windows 10.
Also, whenever Windows Update’s cleanup feature gets rid of old files, it puts them in a folder called Windows.old.
Older versions of Windows tend to be more stable, so this folder is handy to have in case you want to revert. But you can get rid of it, if you choose, to free up space on your hardware.
We also recommend checking out our best memory cleaner list. These apps clear out all the extra fluff software manufacturers may add. In return, you’ll experience much faster performance.
Feel free to comment below if you have questions about other Windows 10 problems. And please tell us if there’s a specific guide for any error or app you’d like to see.






User forum
0 messages