How to take and save screenshots on Windows 10 [STEP-BY-STEP GUIDE]
![]() 7 min. read
7 min. read
![]() Updated on
Updated on
Share this article

Improve this guide
Read our disclosure page to find out how can you help Windows Report sustain the editorial team Read more

Sometimes you need to quickly share a screenshot with someone online. Creating and sharing them is relatively simple, and today we’re going to show you where your screenshots go on Windows 10.
How do I take screenshots on PC?
- Use Print Screen key
- Use Windows Key + PrtScn shortcut
- Use the Snipping tool
- Use Game Bar in Windows 10
Creating screenshots on Windows 10 is fairly simple, and it doesn’t even require you to use a complex software application.
You can easily create screenshots on Windows 10 with built-in tools or with dedicated tools, and today we’re going to show you where your screenshots are saved by default on Windows 10.
Where does Windows 10 save my screenshots?
If you haven’t changed your default settings, you should be able to find your screenshots under the following path: C: Users[User]My PicturesScreenshots.
Of course, you can also create a dedicated folder where you can save your screenshots. You can create the folder on your desktop or use a location of your choice.
Furthermore, you can also upload your screenshots if you need to share them with someone. Follow this article to find out more about how to upload screenshots and what tools to use.
Editor’s choice: Use a dedicated tool for screenshots
By using a simple yet with enough features to accomplish what you want but not confuse you. Keep your screenshots organized, ready to be used right away with innovative software.
With screen recording software you can save your screenshots straight to your hard drive to the destination of your choosing. And, you will be able to store the screenshots in various file formats.
You may quickly capture an image to highlight key areas or sections, capture videos, schedule a screen recording, keep a history of your work, and even edit using a drawing panel.
4 quick methods to take screenshots on PC
Method 1 – Use Print Screen key
This is probably one of the oldest methods of creating screenshots. To create a screenshot simply press the Print Screen or PrtScn key on your keyboard. By pressing this key you’ll create a screenshot of your entire screen.
If you want to create just a screenshot of your current window, you can do so by using Alt + PrtScn shortcut.
By using these shortcuts your screenshot will be saved to your Clipboard. In order to save it to your hard drive, you need to start Paint or any other image editing software and paste the screenshot from the Clipboard by pressing Ctrl + V shortcut.
Although this method is rather simple, we have to warn you that you won’t be able to view any previously made screenshots. Clipboard saves only one entry at a time, and if you accidentally copy something else into Clipboard you’ll remove your screenshot.
If you use this method, it’s recommended to paste the screenshot to your image editor as soon as you can in order not to lose it. By using any image editing tool you can save the screenshot to any folder that you want.
We have to mention that you can somewhat avoid the problem with Clipboard simply by using a clipboard manager tool. These types of tools allow you to view all items that were copied to your Clipboard so you won’t ever lose your unsaved screenshots again.
If you’re having trouble with copy-pasting on Windows 10, this complete guide will help you solve any issues with it.
Method 2 – Use Windows Key + PrtScn shortcut
Print Screen shortcut was available in previous versions of Windows, but with Windows 8 Microsoft introduced a new shortcut. In Windows 8 we got Windows Key + PrtScn shortcut, and this one made its way to Windows 10.
We have to mention that some laptops might use a slightly different shortcut, so be sure to check your laptop’s instruction manual for details.
By using this shortcut your screen will become dim for a half second and you’ll hear the shutter sound. This means that you successfully created a screenshot.
Keep in mind that this method will create a screenshot of an entire screen.
By using this method all your screenshots are saved to C:UsersYour_usernamePicturesScreenshots directory.
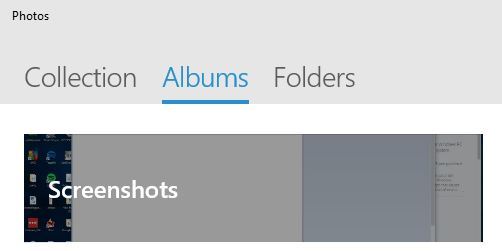
You can also access your Screenshots by opening Photos app and going to Albums > Screenshots section.
We have to mention that you can change the default screenshot directory if you wish to do so. To do that follow these steps:
- Open your current screenshot directory. By default it should be C:UsersYour_usernamePicturesScreenshots.
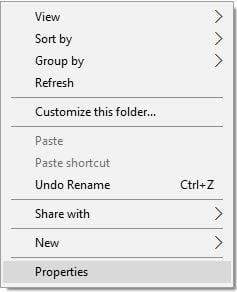
- Right click the empty space and choose Properties from the menu.

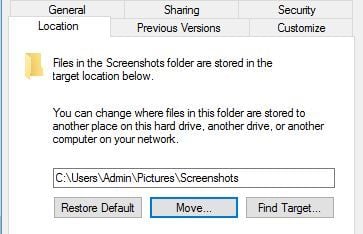
- Go to Location tab and click the Move button.

- Select a new directory for your screenshots. You’ll see a message asking you to move all the files from the old location to the new one. Choose Yes.
- After doing that, your screenshot folder will change. Regarding new screenshots, they will be saved to the new screenshots folder.
Although this method is rather simple, it has its flaws. By using this method you can’t create screenshot of a single window, which can be an issue for some users.
If you want to keep all your screenshots nicely organized in a single folder, we suggest that you try this method.
Method 3 – Use the Snipping tool
Windows 10 comes with built-in Snipping tool that allows you to easily create screenshots. This is a simple yet powerful tool, and in order to run it, do the following:
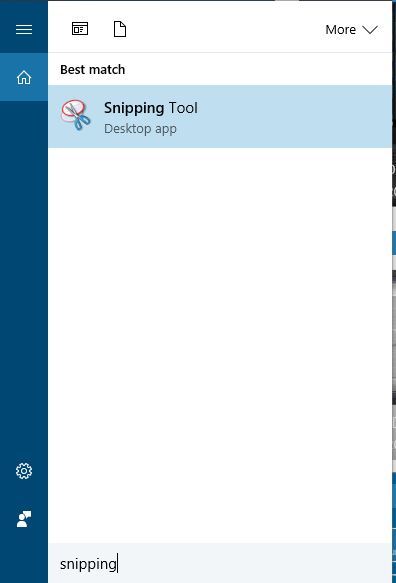
- Press Windows Key + S and enter snipping.
- Select Snipping Tool from the list.

Snipping tool allows you to create window snips so you can easily create a screenshot of a currently opened window. If you want, you can create full-screen screenshots as well.
This application supports free-form and rectangular screenshots so you can easily screenshot only the specific parts of the screen.
The application also has a delay function which can be rather useful especially if you want to screenshot open menus.
After you create a screenshot, you can edit it with a pen tool or highlight certain items. If you require any advanced editing, you can copy the screenshot to the Clipboard and paste it to any photo editing tool.
Regarding saving, you need to save each screenshot manually while using the Snipping Tool.
Also, we have to mention that there’s no dedicated screenshot folder, so you’ll have to manually choose the save location for each screenshot.
This is probably one of the most advanced methods to take and save screenshots on Windows 10.
Using this method you can screenshot certain parts of your screen and perform basic editing operations which can be extremely useful.
If you can’t find the snipping tool in Windows 10, take a look at this easy to follow guide to help you get back on track immediately.
Method 4 – Use Game Bar in Windows 10
Windows 10 comes with useful feature called Game Bar. This feature allows you to record videos and take screenshots while in game. Of course, you can use this feature to create screenshots from any application as well.
To create a screenshot with Game Bar, simply press Windows Key + Alt + PrtScn. Keep in mind that in order to use this feature you need to enable Game DVR option from Xbox app.
When you press the keyboard shortcut a small window might appear. If that happens, be sure to select Yes, this is a game option. After doing so, you’ll be able to create screenshots without any problems.
Regarding your screenshots, they will be saved to C:UsersYour_usernameVideosCaptures directory.
Also, you can see your saved screenshots from the Xbox app. To do that, follow these steps:
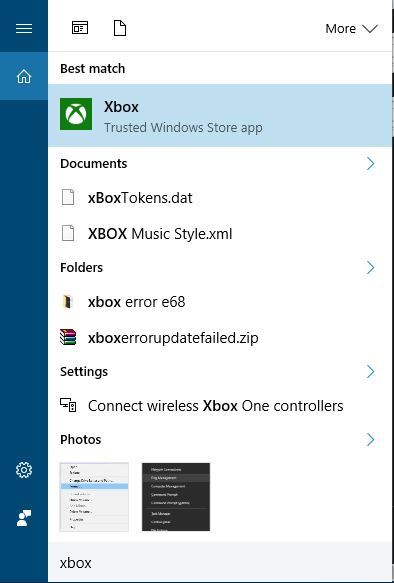
- Press Windows Key + S and enter xbox. Choose Xbox from the menu.

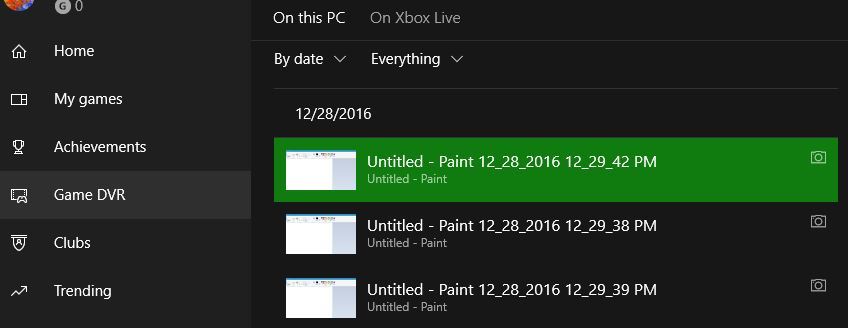
- When Xbox app opens, from the menu on the left choose Game DVR.
- Select On this PC and you’ll see all created screenshots.

- If you want, you can click individual screenshots and choose Open Folder option to open the save directory.
As you can see, creating screenshots on Windows 10 is rather simple, and depending on the method that you use your screenshots will be stored in a different location.
In conclusion, now that you know how to create screenshots and where to find them, feel free to try any of our methods. If you have any more questions, feel free to drop them in the comments section below.