FIX: Windows 10/11 update is taking a bit longer than expected
6 min. read
Updated on
Read our disclosure page to find out how can you help Windows Report sustain the editorial team. Read more
Installing Windows updates over-the-air can be tiresome and pushy, but it’s most of the time fast and reliable experience. However, sometimes, and especially with major updates and upgrades (from Windows 7 or 8 to Windows 10), users run into various critical issues. Sometimes there are errors and sometimes issues come with never-ending loading prompts. “It’s taking a bit longer than expected” prompt is the place where lots of users got stuck.
There are various ways to address this issue. If you’re unable to go past the screen after multiple attempts, we made sure to provide you with the solutions and instructions below.
How to address “It’s taking a bit longer than expected” update error in Windows 10
- Check the storage space and connection
- Run Update troubleshooter
- Uninstall third-party antivirus and unplug peripheral devices
- Update the system via the Update Assistant
- Update the system with the external installation media
- Perform a clean reinstall
1: Check the storage space and connection
Before we move to solutions, we suggest waiting for some time. A lot of users managed to get the updates/upgrades work after some time. Needless to say that it took hours. This depends on your bandwidth and HDD speeds, respectively. Of course, if nothing happens after, say 2 hours, we recommend moving slowly through the list. Also, resetting your PC won’t break the procedure, and, in words of some affected users, it can help.
In comparison to minor, frequent updates, major updates require a lot of space. Firstly, the updates are downloaded to a dedicated directory and then the installation can commence. Make sure that you have at least 6 to 10 GB of free space on the system partition. Furthermore, we recommend checking the connection. Even after the installation files are securely downloaded, some sequences still require the internet connection.
After you’ve confirmed that everything is fine but the delay persists, continue with the steps below.
2: Run Update troubleshooter
The next obvious step is to try and run the Windows Update troubleshooter which is to be found amongst the other tools in the Troubleshoot menu. If this doesn’t resolve the error, it’ll at least give you a better insight on which is causing the problem at hand. After you run the tool, it should restart the update services, and restart the download of the update files.
Here’s how to run the Update Troubleshooter in Windows 10:
- Press Windows key + I to open the Settings app.
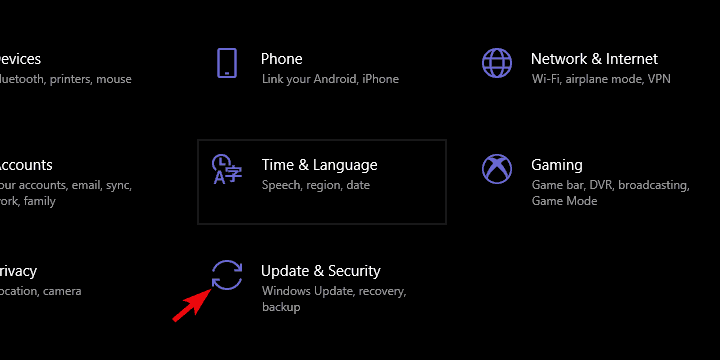
- Choose Update & Security.
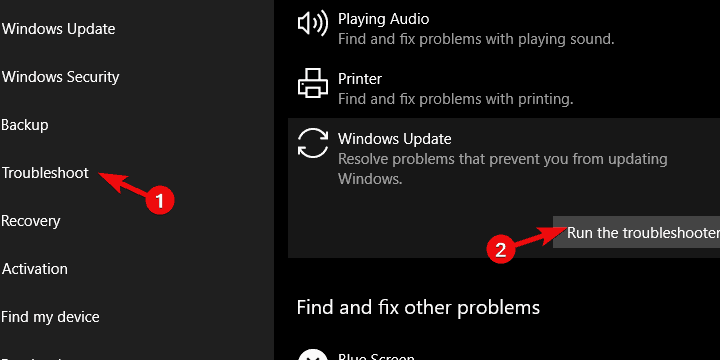
- Select Troubleshoot from the left pane.
- Expand Windows Update troubleshooter and click on “Run the troubleshooter“.
In case you’re still stuck on the same screen, move with the subsequent steps.
3: Uninstall third-party antivirus and unplug peripheral devices
The next thing you can try concerns third-party applications which most-commonly interfere with update/upgrade processes. And those are antivirus solutions. They can block the system updates or evoke all kinds of different issues during the aforementioned procedures. The community especially regards McAfee and Norton Antivirus, but all others can cause errors, nonetheless.
In addition, we also suggest unplugging peripheral devices, like printers, scanners, or basically anything else besides the essentials. Major system updates also tend to install drivers during the transition. This can be an issue, especially since the generic drivers are not always fitting the frame.
4: Update the system via the Update Assistant
Since the standard update method is far from flawless, we might look in the other direction. There are other means to update or upgrade your system to the latest major build. The first in line is a nifty tool which, for me at least, always worked well. Firstly, it allows you to get the updates faster than usual. The second and more important point — it rarely get’s you stuck. Moreover, it checks for possible compatibility inconsistencies, so you’ll know if the available storage space will make do.
In case you’re uncertain how to download and use this tool, we provided the step-by-step instructions. Check them out below:
- Download the Update Assistant, here.
- Backup your data from the system partition.
- Run the Update Assistant.
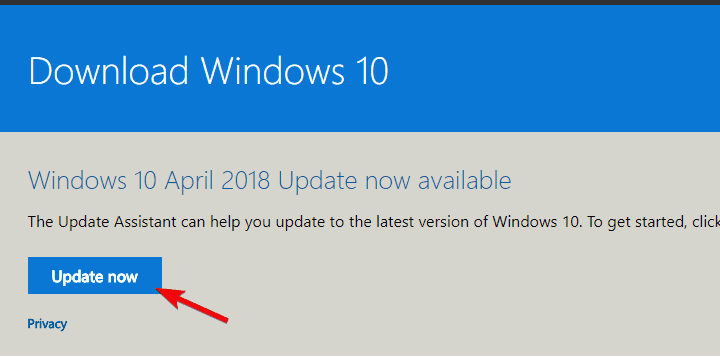
- Click on the “Update now” button.
- After the tool checks the compatibility, click Next and wait until the update files are downloaded. This can take a while.
- Finally, click update and follow the further instructions. Your PC will restart multiple times until everything is set.
5: Update the system with the USB installation media
If the previous approach, for some reason, has failed you, there’s still an alternative. Besides the Update Assistant, Microsoft relies on Media Creation Tool for software distribution. You can use this utility for upgrading right away or, even better, for creating the installation media. For the latter, you can use either an ISO file and burn it onto DVD or create a bootable USB thumb stick. And then update Windows 10. This almost completely eliminates system errors since the update source is external.
This isn’t such a drag and you get to have the installation media just in case something goes awry in future. Here’s how to create an installation media and update your system that way:
- Download the Media Creation Tool from here.
- Plug in the USB flash drive with at least 6 GB.
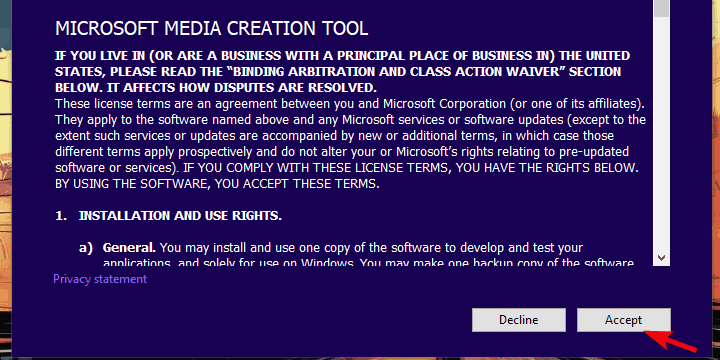
- Run Media Creation Tool and accept the License Terms.
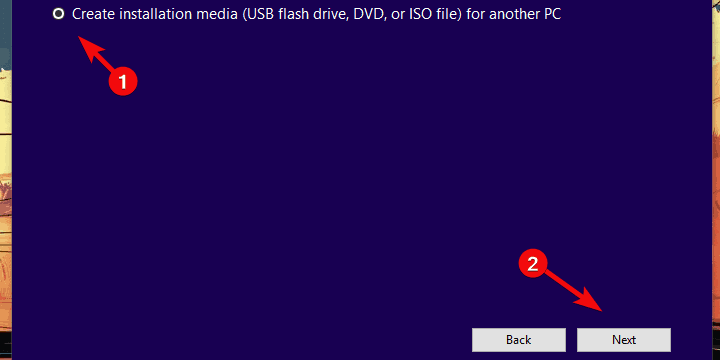
- Choose ”Create installation media (USB flash drive, DVD, or ISO file) for another PC”.
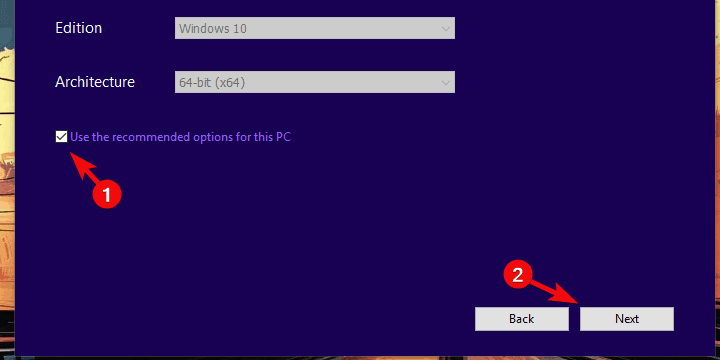
- Choose the fitting language, architecture, and edition and click Next.
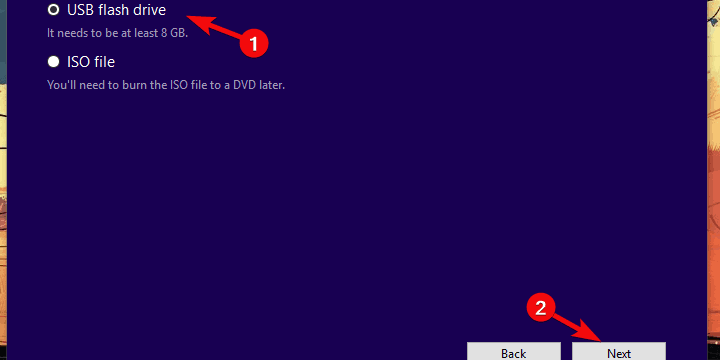
- Select USB flash drive and then click Next.
- Media Creation Tool will download the setup and copy the installation files onto the USB flash drive.
- Restart your PC.
- Open File Explorer and access the USB drive.
- Double-click Setup and the follow the further instructions.
6: Perform a clean reinstall
Finally, if none of the previous solutions brought the resolution, we’re afraid you should reconsider a clean reinstallation as your next step. This isn’t the most preferable outcome, but if there’s nothing else you can do, it should help. The majority of issues occur when Windows 10 is just an upgrade over Windows 7 or Windows 8, so starting from a scratch might do you good.
We made sure to explain how to perform a clean reinstallation in this article. Also, don’t forget to backup your data before formatting the system drive.
That’s a wrap-up. Don’t forget to share your experience with this error or provide alternative solutions to help the cause. You can post all your feedback in the comments section below.
RELATED STORIES YOU SHOULD CHECK OUT:


User forum
0 messages