How to Enable/Disable Touch Keyboard And Handwriting Panel Service
You can easily enable this service from the Services window
Key notes
- Command Prompt lets you enable or disable this service with just a single command.
- If you're not a fan of Command Prompt, you can use PowerShell as an alternative.

The Touch Keyboard and Handwriting Panel service brings touch features and handwriting functionality to compatible devices.
If the service isn’t working, certain Windows apps might not work, and in today’s guide, we’re going to show you how to enable or disable it on your PC.
How do I enable the Touch Keyboard and Handwriting Panel service?
1. Use the Services window
- Press Windows key + R and enter services.msc.
- Locate the Touch Keyboard and Handwriting Panel service, right-click it, and choose Start.

- Alternatively, double-click the service.
- Next, set the Startup Type to Automatic and click on Start.

- Click Apply and OK to save changes.
If you want to disable the Keyboard and Handwriting Panel service, repeat the same steps, but set the Startup type to Disabled or Manual and click on Stop to stop the service.
2. Use the Command Prompt
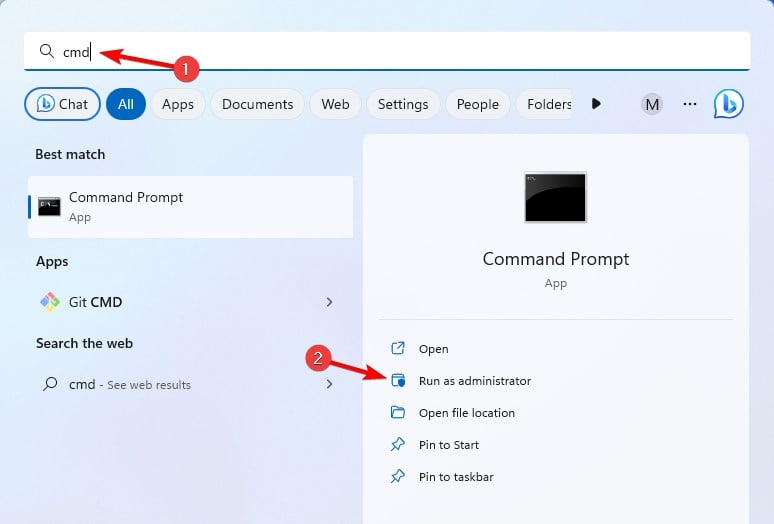
- Press the Windows key + S and enter cmd. Select Run as administrator.
- Now run the following command:
sc queryex state=all type=service
- The list of all services will appear. Locate the Touch Keyboard and Handwriting Panel service and check its service name. It should be TabletInputService.
- Now run the following command to start the service:
net start "TabletInputService"
- To stop the service, you can use
net stop "TabletInputService"
To disable the service run the following command: sc config "TabletInputService" start=disabled

If you want to enable the service and set the startup type to Automatic: sc config "TabletInputService" start=auto

For different startup types, you can use the following parameters:
- Manual startup: start=demand
- Automatic delayed: start=delayed-auto
To start the service immediately, use the sc start "TabletInputService"
3. Use the PowerShell
- Press Windows key + S, enter powershell, and choose Run as administrator.

- Enter the following command to get the list of all services on your PC:
Get-Service
- Look for the Touch Keyboard and Handwriting Panel service. Its name should be TabletInputService.
- To start the service, run the following command:
Start-Service -Name "TabletInputService"
- You can stop the service with this command:
Stop-Service -Name "TabletInputService"
To disable the service, use this command: Set-Service -Name "TabletInputService" -Status stopped -StartupType disabled

To enable the service, use the following command: Set-Service -Name "TabletInputService" -Status running -StartupType automatic

Touch Keyboard and Handwriting Panel service is missing on Windows 11
- Keep Windows up to date, or try performing an in-place upgrade.
- Start PowerShell as administrator and run
Get-AppxPackage -allusers | foreach {Add-AppxPackage -register “$($_.InstallLocation)\appxmanifest.xml” -DisableDevelopmentMode}
Touch Keyboard and Handwriting Panel service is associated with the TabTip.exe file, and if there are problems with this service, the on-screen keyboard won’t work in Windows.
The service is also associated with fingertip handwriting, and if you want to know more about it, we have a guide on how to enable fingertip handwriting in Windows 11.
If you have any questions regarding this service, let us know in the comments below.
Read our disclosure page to find out how can you help Windows Report sustain the editorial team. Read more


Improve this guide


User forum
0 messages