TPM 2.0 Device Detected But Connection Can't Be Established [Fix]
Modifying the TPM settings in System BIOS will help
3 min. read
Updated on
Read our disclosure page to find out how can you help Windows Report sustain the editorial team. Read more
Key notes
- This error usually comes up when you upgrade the VxRail cluster to the 4.7x version family.
- This guide will cover all the expert-recommended methods to eliminate the problem.

You are not alone if you have encountered the TPM 2.0 device detected but a connection can’t be established error while upgrading the VXi cluster.
Many users have complained about the same. Fortunately, we can fix the issue with a few changes in System BIOS in no time.
This guide will discuss all the steps to fix the error right after talking about the probable causes.
What causes the TPM 2.0 device detected but a connection cannot be established error?
There are several reasons for the error to occur; some of the popular ones are :
- TPM algorithm – If the TPM2 algorithm selection for the ESXi host’s BIOS is not set to use the SHA256 hashing algorithm, you might get this error.
- Intel(R) TXT disabled – You may get this TPM error if the Intel(R) TXT is disabled. To resolve this, you need to enable it.
- Secure BOOT disabled – If Secure BOOT is not enabled, you might get this message in vCenter. To fix this, you need to enable Secure BOOT.
What can I do if TPM 2.0 device is detected but a connection cannot be established?
Below are the requirements that your vCenter Server environment should meet to use TPM 2.0 chip:
- vCenter Server 6.7
- ESXi 6.7 host: TPM 2.0 chip installed and configured.
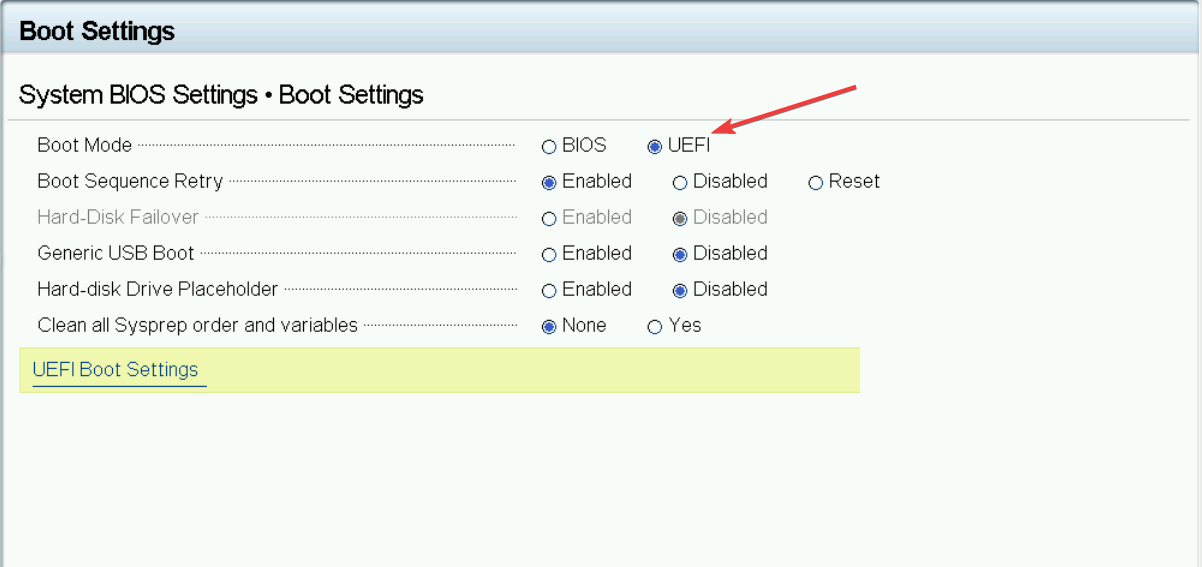
- Make sure UEFI is selected.
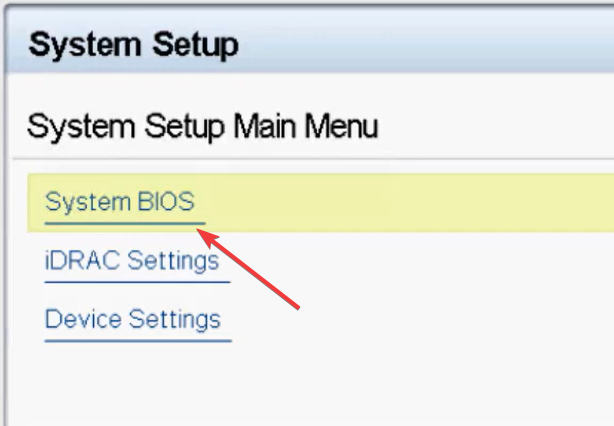
- Reboot the server. On the System Setup page, from the Main Menu, select System BIOS.
- Under System BIOS Settings, click Boot Settings. Check if UEFI is enabled.
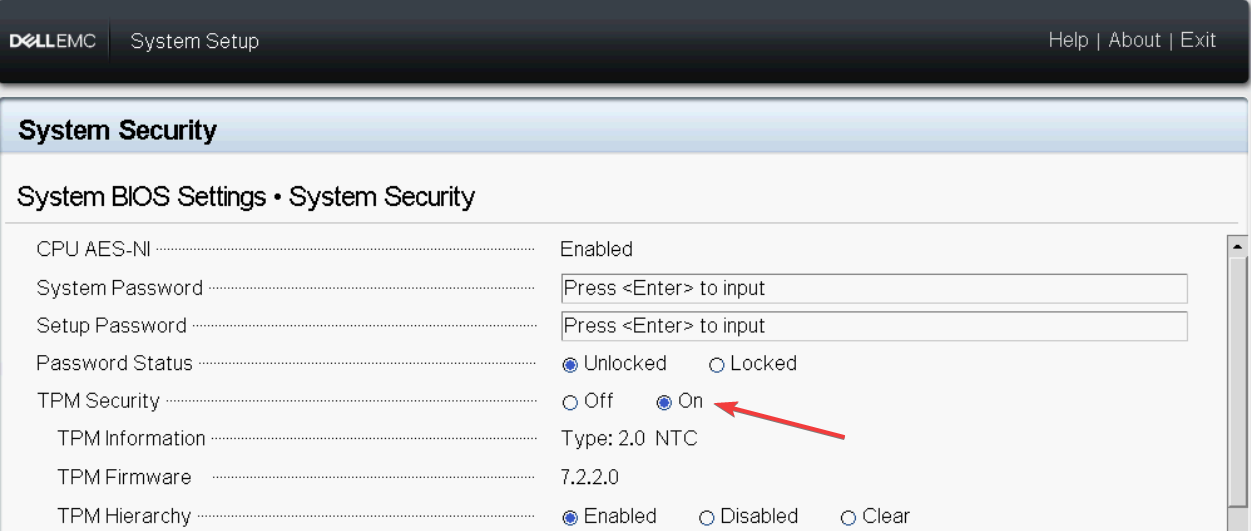
- Now click System Security.
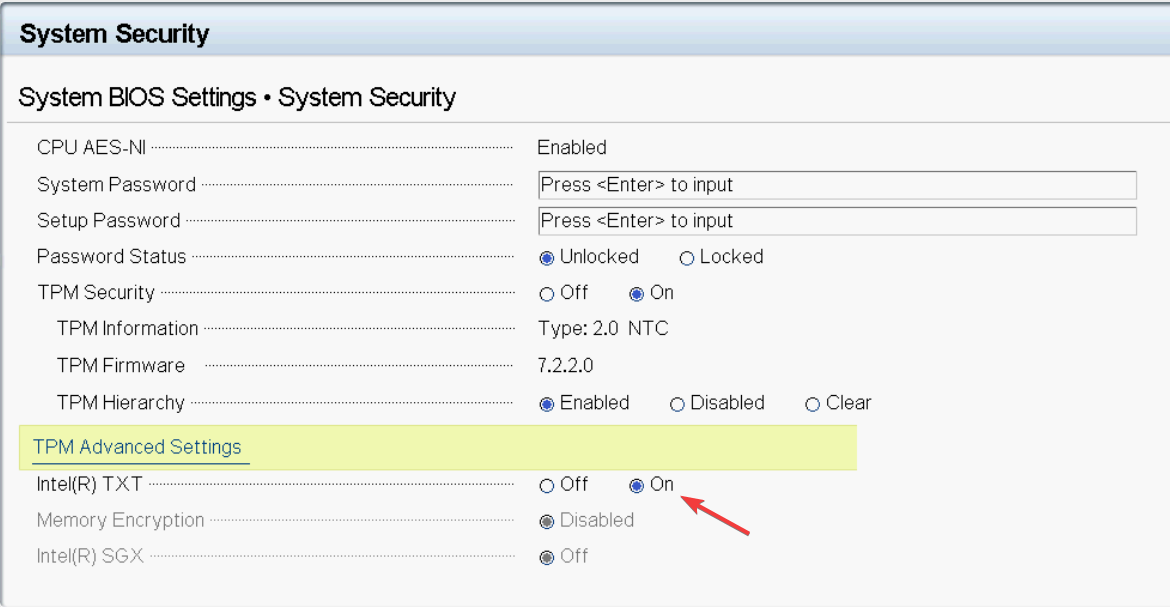
- Go to TPM Security and make sure it is turned On.
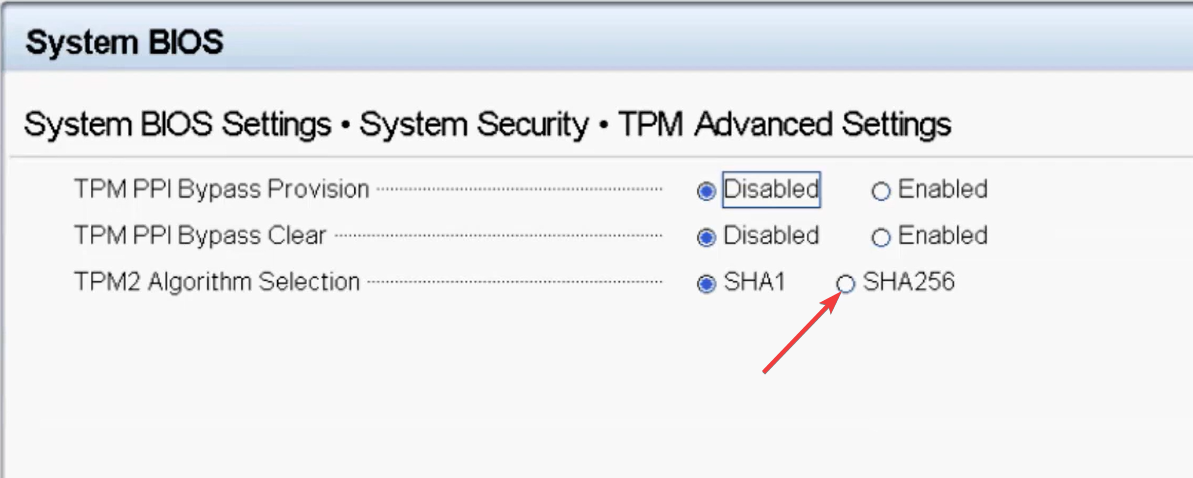
- Click on TPM Advanced Settings link.
- Locate TPM2 Algorithm Selection and change it to SHA256.
- Now go back and under TPM Advanced Settings, locate Intel(R) TXT, and click on the radio button for On to enable it.
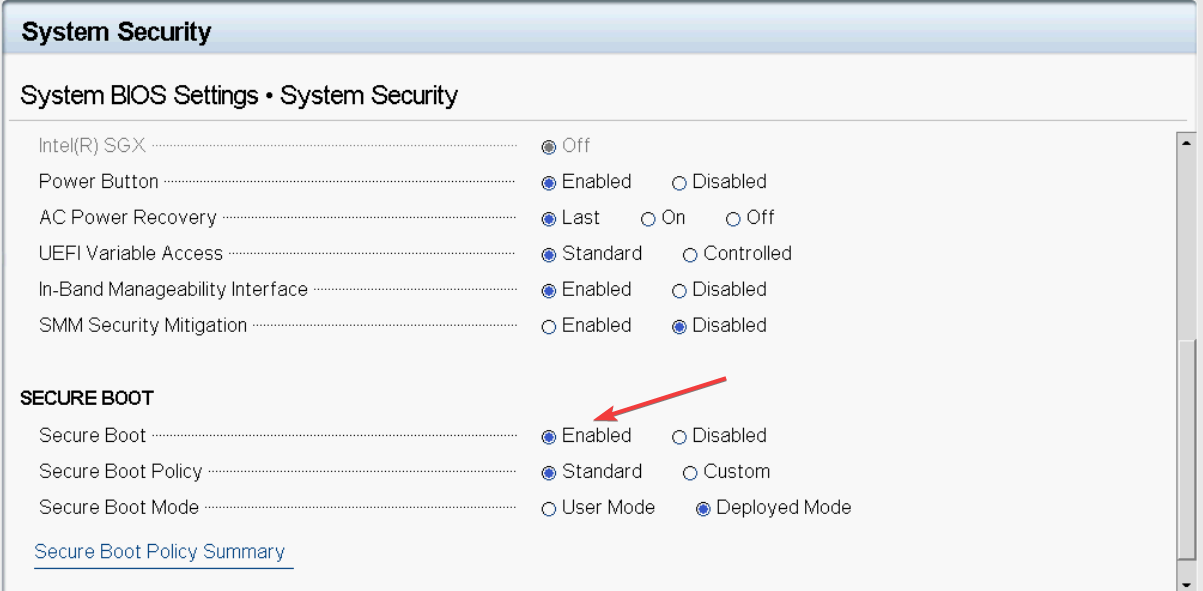
- Locate Secure BOOT and select Enabled.
- Click Back to go back to the System BIOS screen. Now click Finish and then Yes to save the changes.
- On the System Setup page, click Finish. Then, on the following prompt, click Yes to exit and reboot the system.
- Once you are on the vCenter, go to the host, and remove the error message by clicking the Reset to Green option.
So, these are the steps you need to follow to fix the TPM 2.0 device detected but a connection cannot be established error. If you have other issues, like the TPM device not being detected, you need to check your BIOS settings.
If you have any other questions or concerns about TPM or TPM malfunctioning, feel free to mention them in the comments below.


User forum
0 messages