TPM Could Not be Initialized: 3 Easy Ways to Fix it
![]() 6 min. read
6 min. read
![]() Updated on
Updated on
Share this article
Improve this guide
Read our disclosure page to find out how can you help Windows Report sustain the editorial team. Read more
Key notes
- The software giant has declared that Windows 11 may only be installed on devices that have TPM 2.0 on them.
- However, consumers have complained that when they reboot their PC, they receive the TPM could not be initialized error.
- One of the possible approaches, in this case, is to turn the module off.
Starting with Windows 10 and Windows 11, the operating system immediately initializes and assumes control of the TPM device.
This is a departure from prior operating systems, in which you would initialize the TPM and set an owner password before using the device.
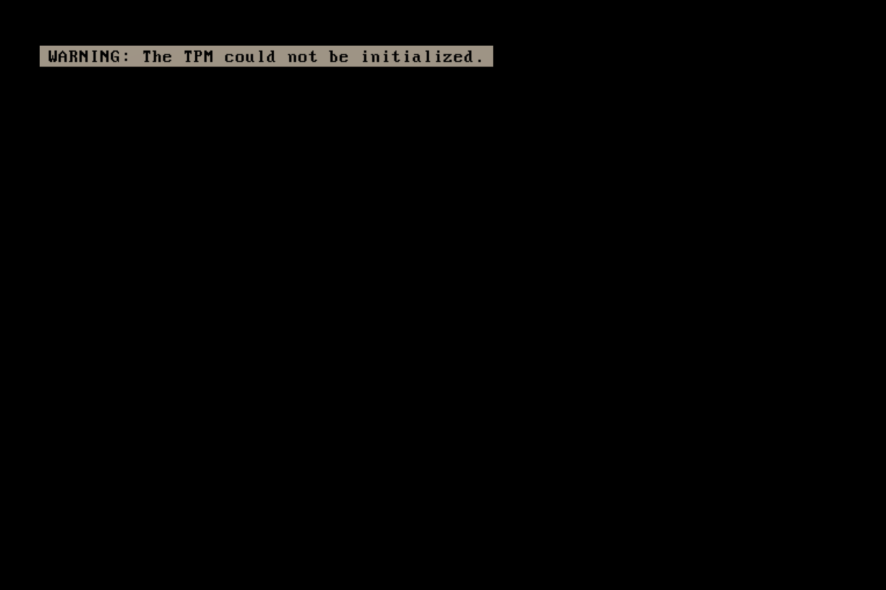
It is possible that the startup of the TPM will fail in Windows 11 if your machine is experiencing network connectivity problems, throwing the TPM could not be initialized error.
If you discover that Windows is unable to automatically launch it, take a look at the following solutions to resolve the problem.
Why TPM 2.0 for Windows 11?
At its most basic level, the TPM is a little chip on the motherboard of your computer, which is sometimes located apart from the main CPU and memory.
The chip is analogous to the keypad you use to disarm your home security alarm every time you step in the door, or to the authenticator software you use on your phone to enter into the bank account when you log into your account online.
When using the Legacy or CSM modes of the BIOS, TPM 2.0 is not supported. Devices using TPM 2.0 must have their BIOS mode set to Native UEFI exclusively in order to function properly.
It is necessary to disable the Legacy and Compatibility Support Module (CSM) settings in order to proceed. Enable the Secure Boot function to provide an extra layer of protection.
When the BIOS mode is changed from legacy to UEFI, an installed operating system on hardware configured in legacy mode will prevent the OS from booting.
Before changing the BIOS mode, run the MBR2GPT program, which will prepare the operating system and the disk to support UEFI.
TPM 2.0 products and systems provide significant security benefits over TPM 1.2 products and systems, including the following:
- The TPM 1.2 specification only permits the use of the RSA and the SHA-1 hashing algorithms as hashing algorithms.
- Some organizations are abandoning the use of the SHA-1 hash algorithm for security reasons. Notably, the National Institute of Standards and Industry (NIST) has mandated that several government organizations transition to SHA-256 as of 2014.
- Technology leaders such as Microsoft and Google have declared that they would phase out support for SHA-1-based signing or certifications in 2017.
- TPM 2.0 improves cryptographic agility by being more adaptable to a wider range of cryptographic methods than previous versions.
- In comparison to previous versions, TPM 2.0 provides more consistency in the user experience across different implementations.
- Whereas TPM 1.2 parts are discrete silicon components soldered on the motherboard, TPM 2.0 parts are available as discrete (dTPM) silicon components, integrated components in one or more semiconductor packages, and firmware (fTPM) based components running in a trusted execution environment (TEE).
What can I do if TPM could not be initialized in Windows 11?
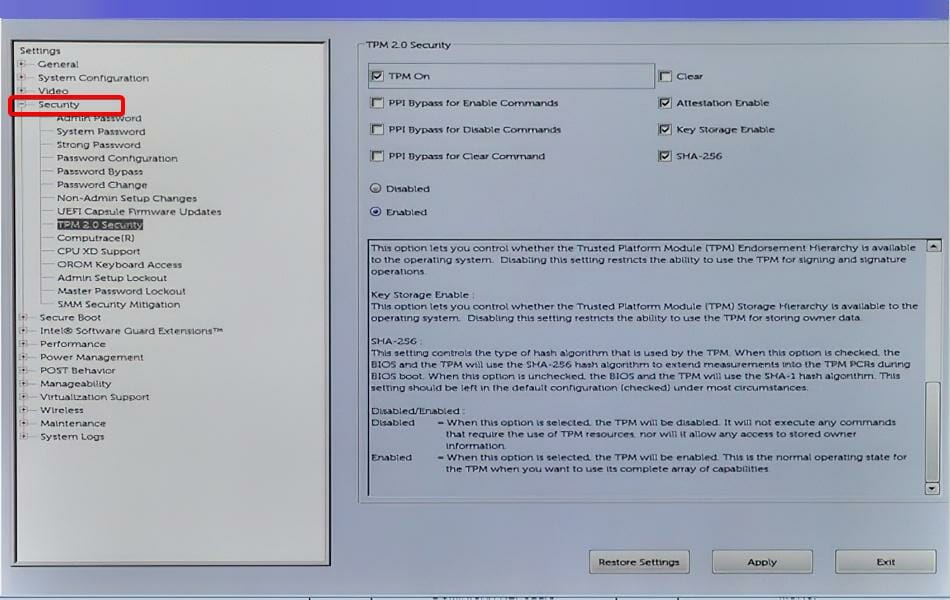
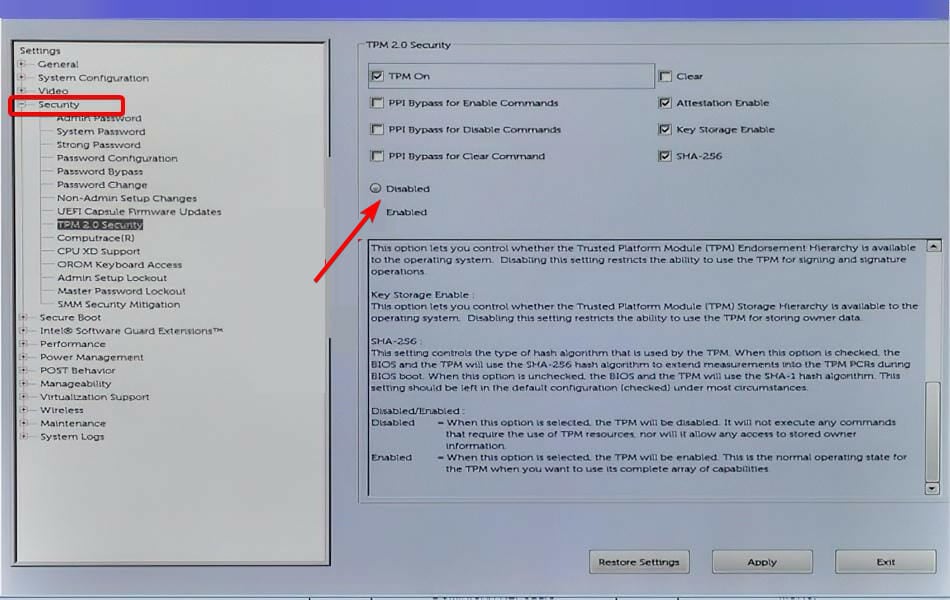
1. Turn the TPM off
- Boot your computer and press the F2 key to enter the BIOS setup mode.
- Locate the Security option on the left side and expand it.

- Click on the TPM option nested under the Security setting and ensure the Disabled radio button is checked in order to deactivate it.
- Reboot your PC.
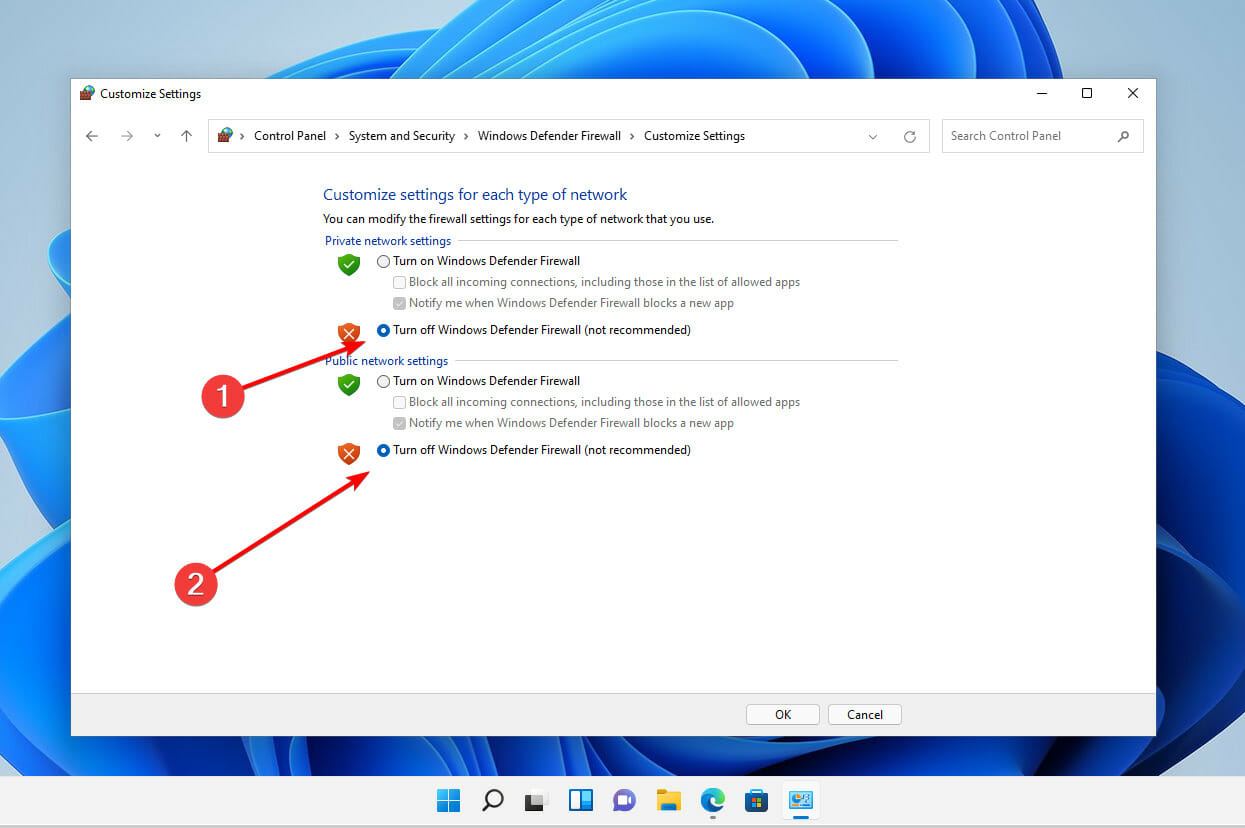
2. Disable your firewall
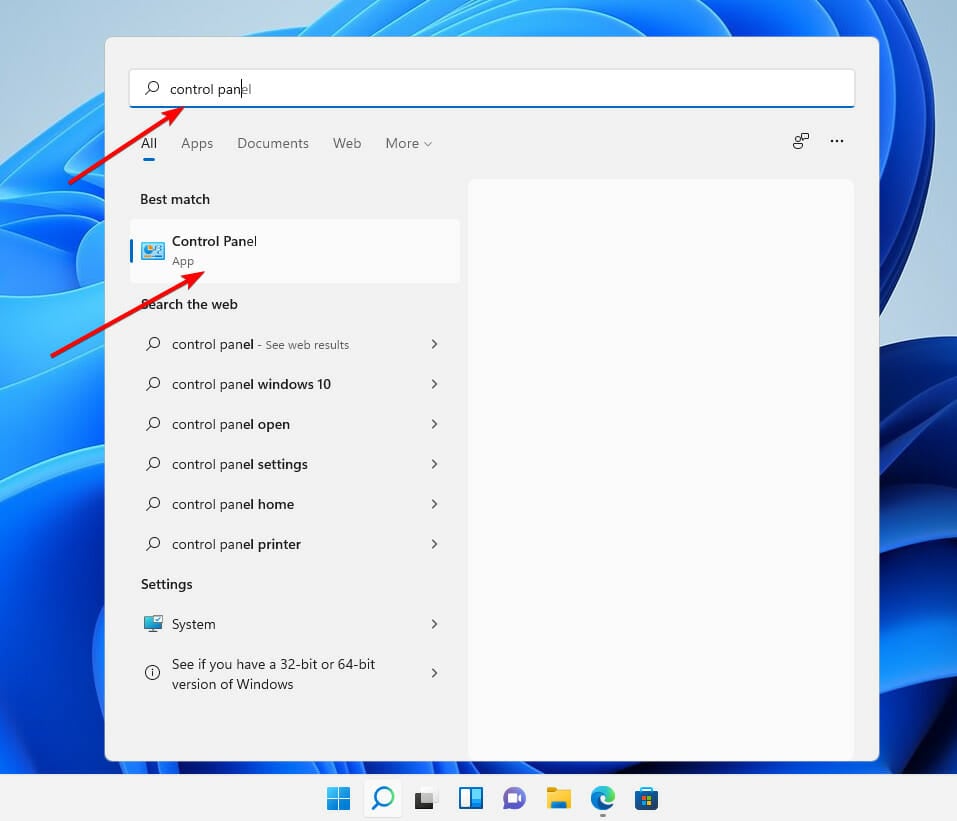
- Press Windows + S , type Control Panel and choose the most relevant result.

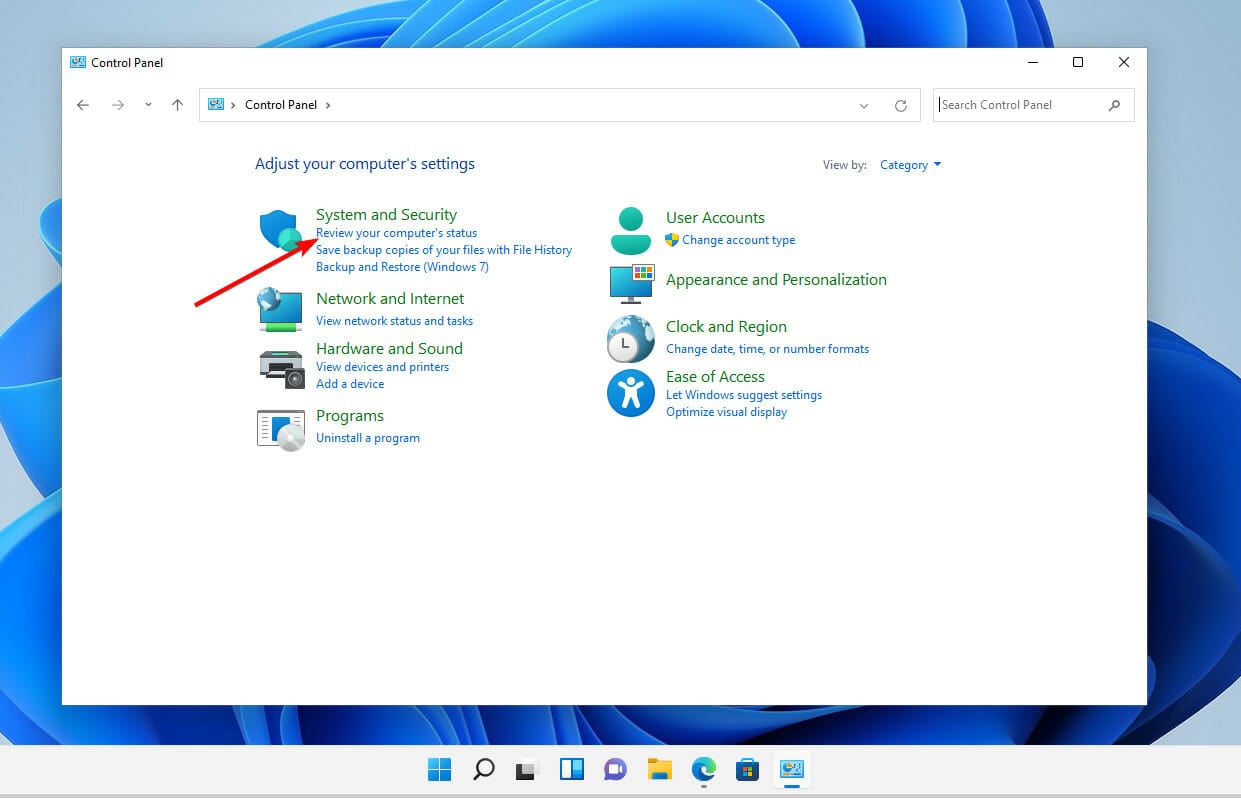
- Click on System and Security.

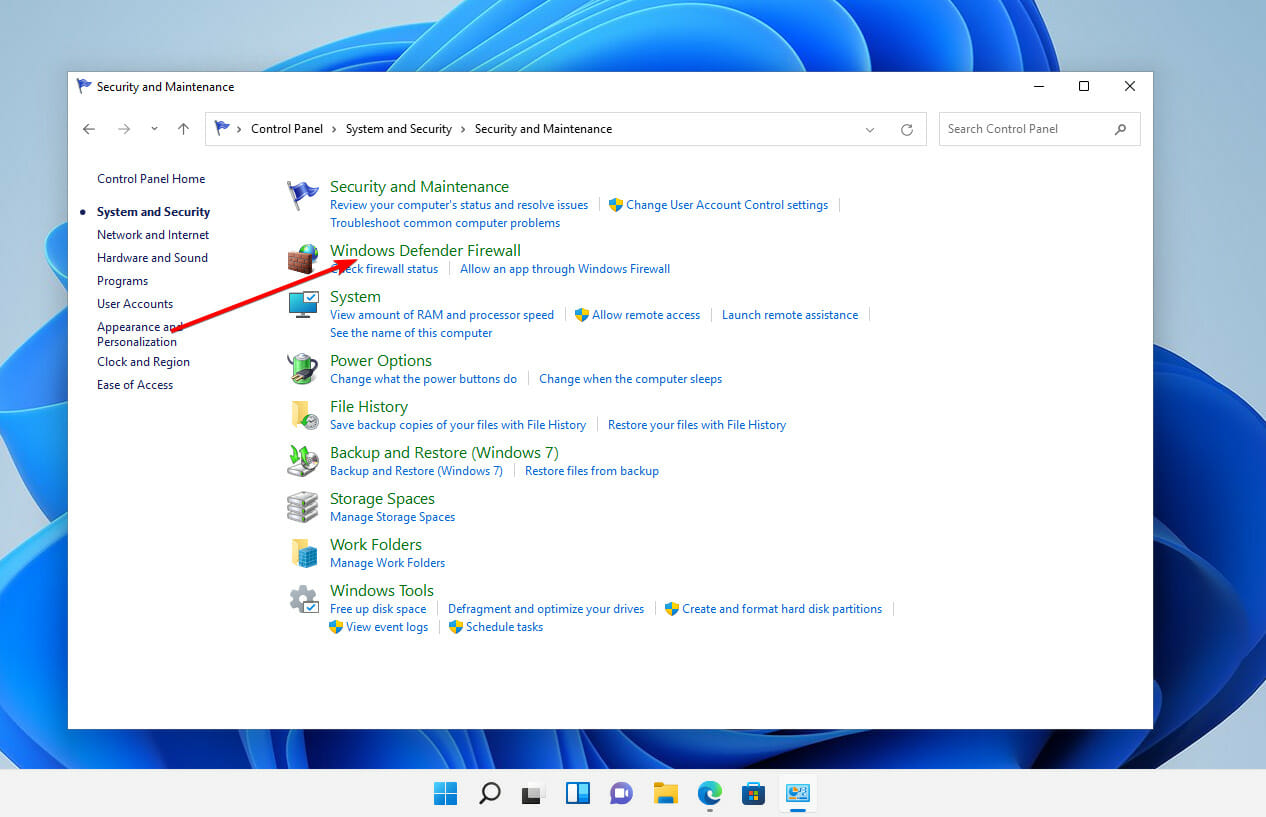
- Select Windows Defender Firewall.

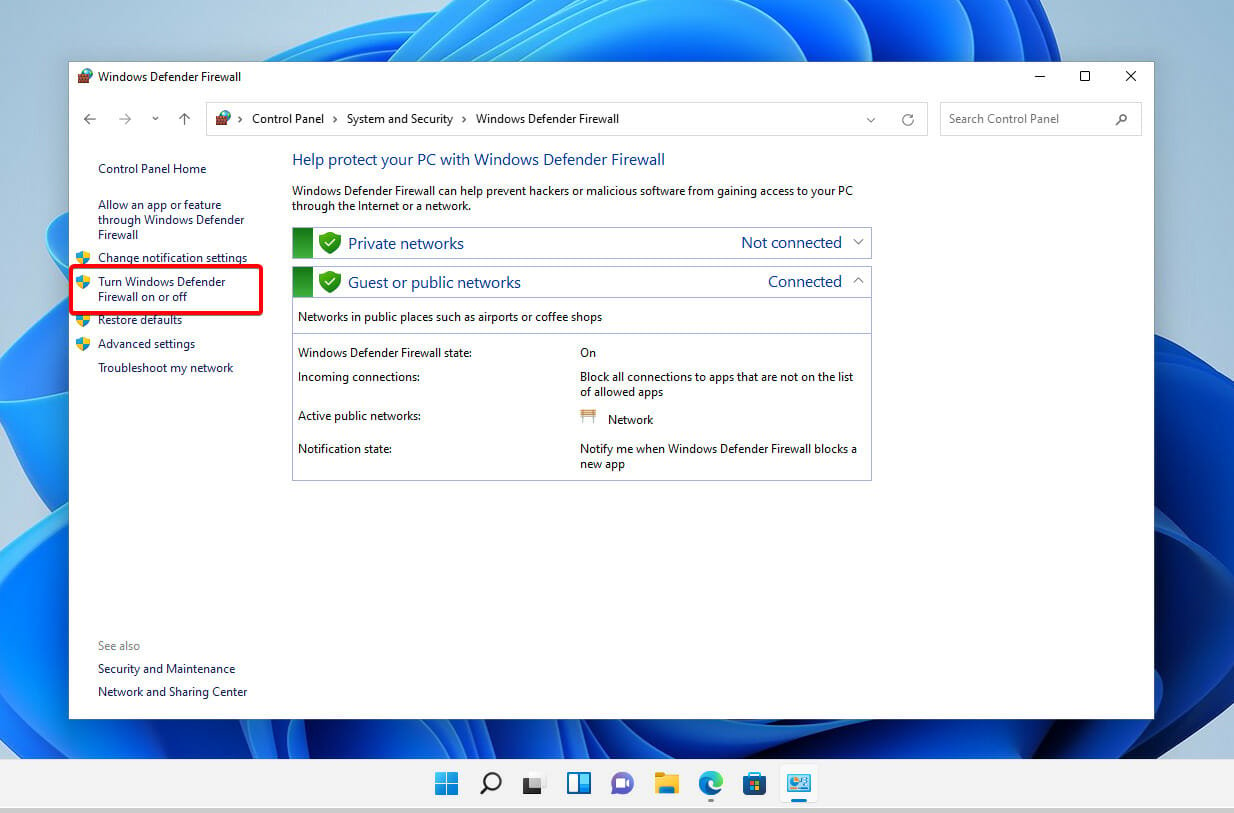
- From the list of links on the left side of the window, choose Turn Windows Firewall On or Off.

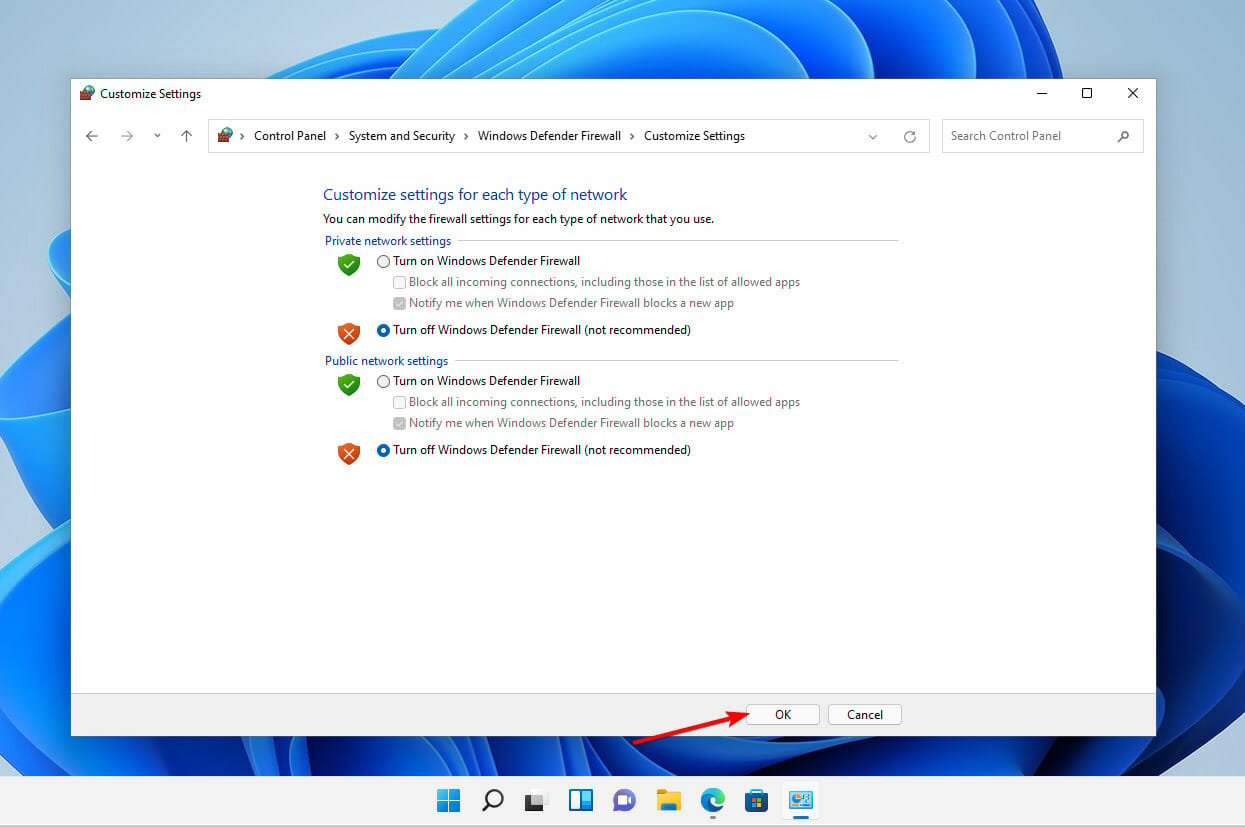
- Click on the Turn Off Windows Firewall (Not Recommended) option.

- Click the OK button and close the Windows Firewall window.
In Windows 11, the initialization of the TPM cannot be completed when your computer has network connection issues.
This can occur on a PC that is currently disconnected from the network, separated from the domain by a firewall, or experiencing a network component failure
In the case of the latter, we recommend that you check your cable and network adapter connections first.
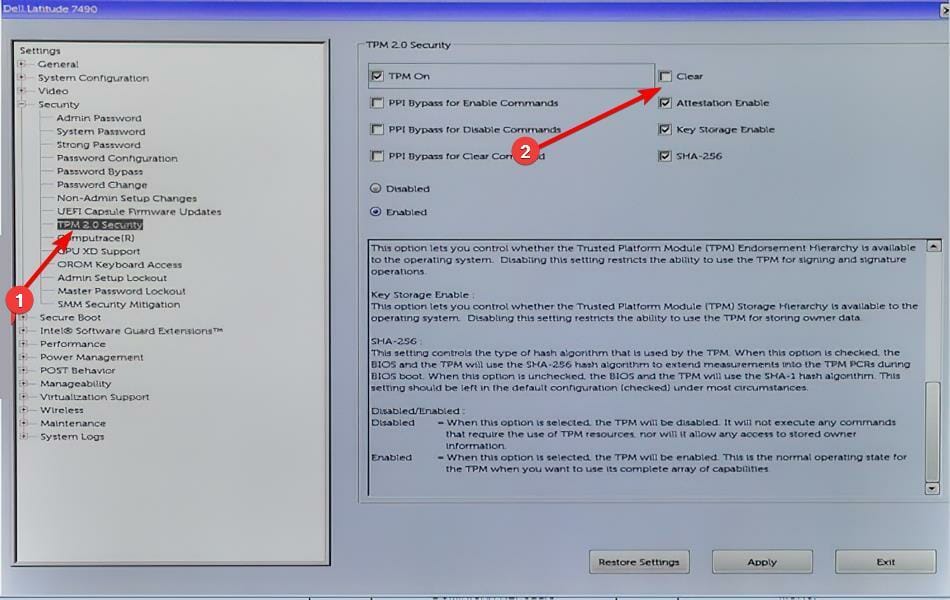
3. Clear the TPM from the BIOS menu
- Boot your computer and press the F2 key to enter the BIOS setup mode.
- Locate the Security option on the left side and expand it.
- Click on the TPM option nested under the Security setting, and check the Clear box.
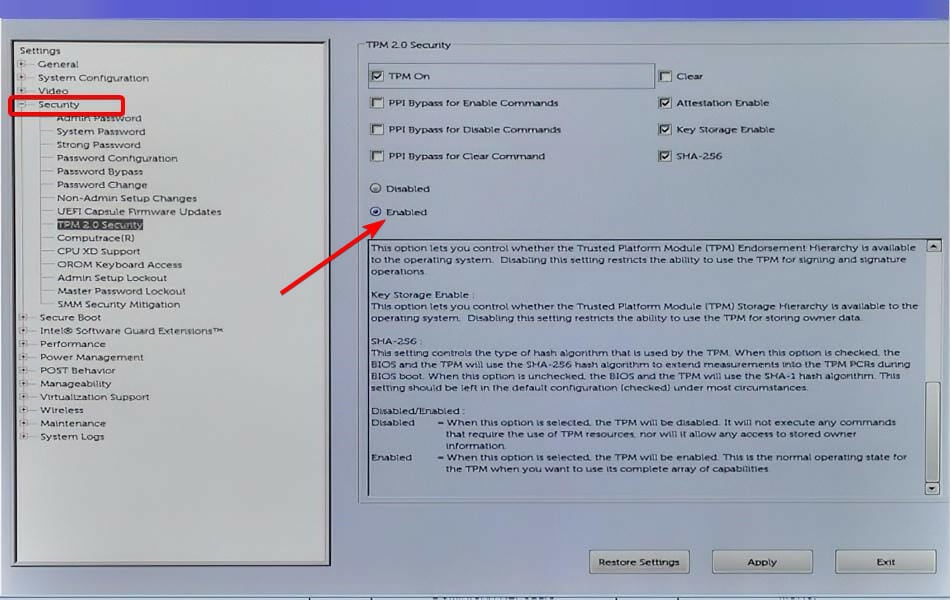
- Reboot your computer and re-enter into the BIOS menu, again by pressing the F2 key.
- Ensure the Enabled radio button is checked in order to activate the TPM.
- Restart your PC.
Should I clear my TPM?
 NOTE
NOTE
As part of a total computer reset, you may wish to clear the TPM. For example, you could erase all data from the computer and entirely restart it in preparation for a clean installation. 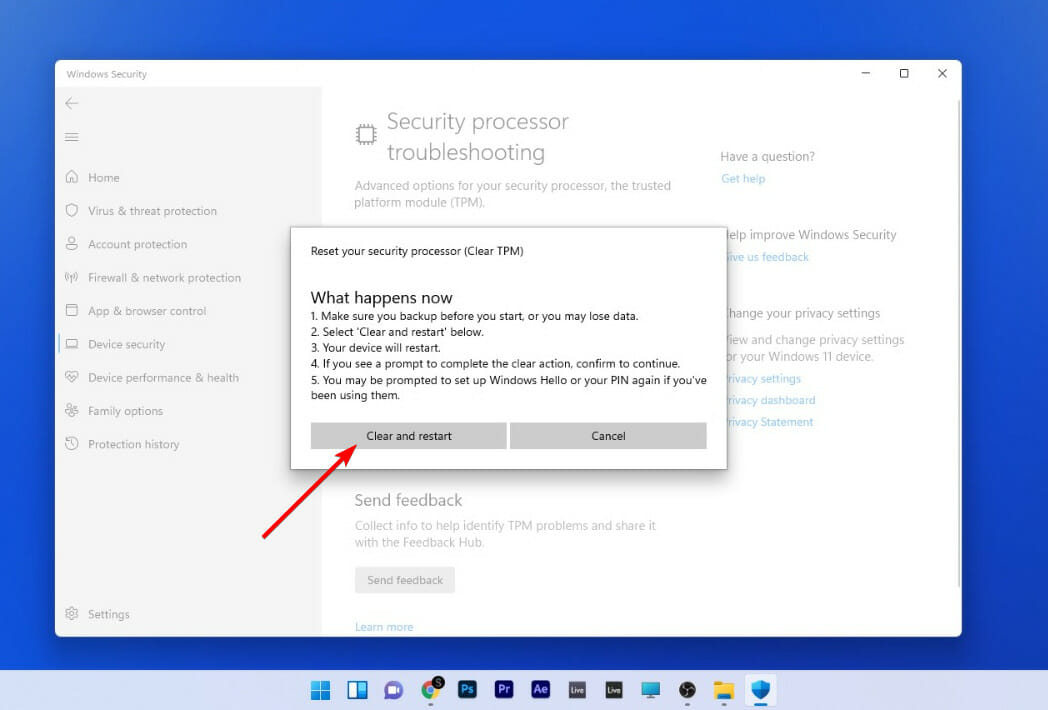
It is possible to clear the TPM using the Windows Defender Security Center software, which may be seen as a troubleshooting step or as final preparation before a complete installation of a new operating system.
Preparing for a clean installation in this manner helps to guarantee that the new OS can fully deploy any TPM-based functionality that it provides, such as attestation, by ensuring that it has the necessary resources.
However, even if the TPM is not deleted prior to the installation of a new operating system, the vast majority of TPM functionality will most likely continue to function correctly.
Unless you are selling your laptop to someone else, or if you are encountering difficulties with it, such as the TPM could not be setup error, you don’t necessarily need to clear it.
If you determine that you are ready to completely reset your TPM, please see our post on how to clear it in Windows 11 for more information. Remember to double-check any precautions before proceeding with the emptying procedure.
We already prepared for you an article with further information which contains everything you need to know about Windows 11 and TPM.
In addition, our users profited from reading our article, which included alternative remedies to the TPM had malfunctioned error.
We hope that these methods were of assistance in resolving the TPM could not be initialized issue. If you found our answers to be useful, please let us know by leaving a message in the comments section below.
![6 ways to fix ILLEGAL_ATS_INITIALIZATION [BSoD Fix]](https://cdn.windowsreport.com/wp-content/uploads/2024/12/ILLEGAL_ATS_INITIALIZATION-BSoD-Fix.png)
User forum
0 messages