How to Turn Off 3D Display Mode in Windows 11
Easily disable via the dedicated graphic Control Panel
4 min. read
Updated on
Read our disclosure page to find out how can you help Windows Report sustain the editorial team. Read more
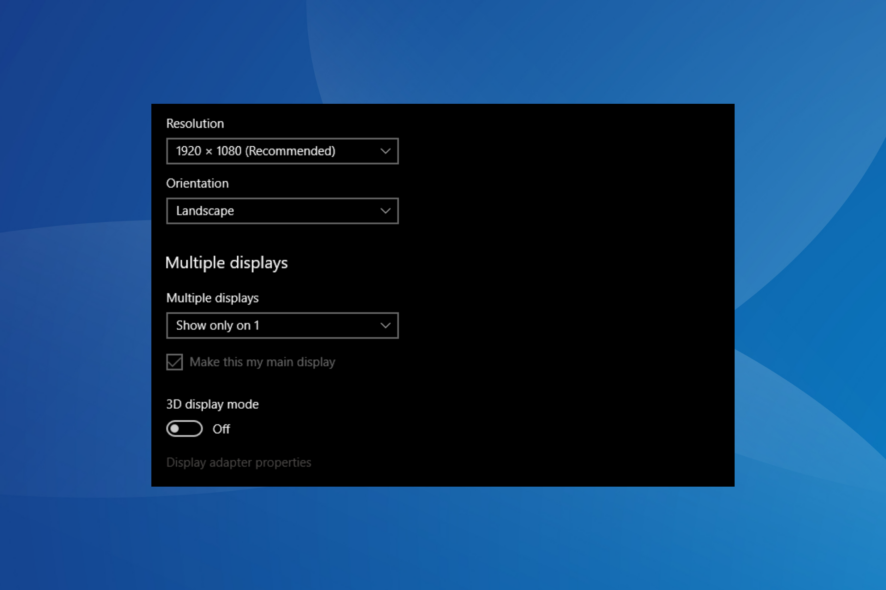
The 3D display mode may conflict with the ability of a monitor, and it’s often best that you turn off the 3D display mode in Windows 11.
Enabling it may cause the screen to go black, and the display won’t return even on subsequent reboots. In some cases, it was just a black screen with the cursor.
How can I turn off 3D display mode in Windows 11?
1. Change the projection mode
1.1. Boot into Safe Mode
- Shut down the computer, then press the Power button, and as soon as the Windows logo appears, hold the Power button to turn it off again.
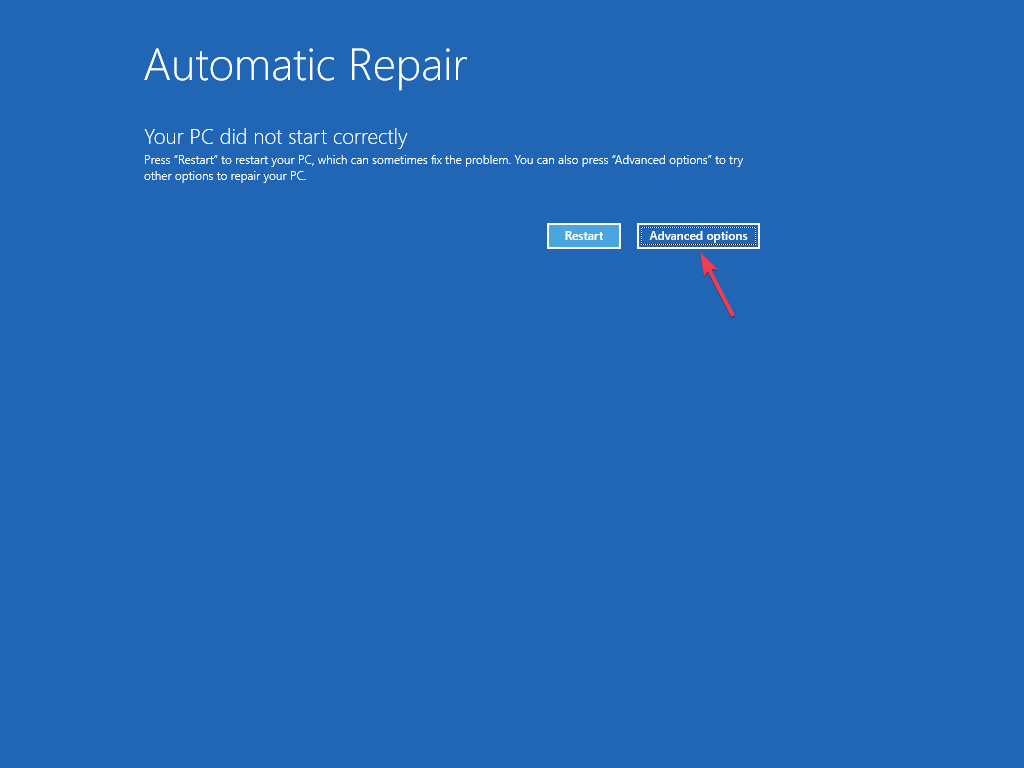
- Repeat this thrice, and on the fourth attempt, Windows will begin an Automatic Repair. After the scan, click on Advanced options.
- Click on Troubleshoot.
- Again, click Advanced Options.
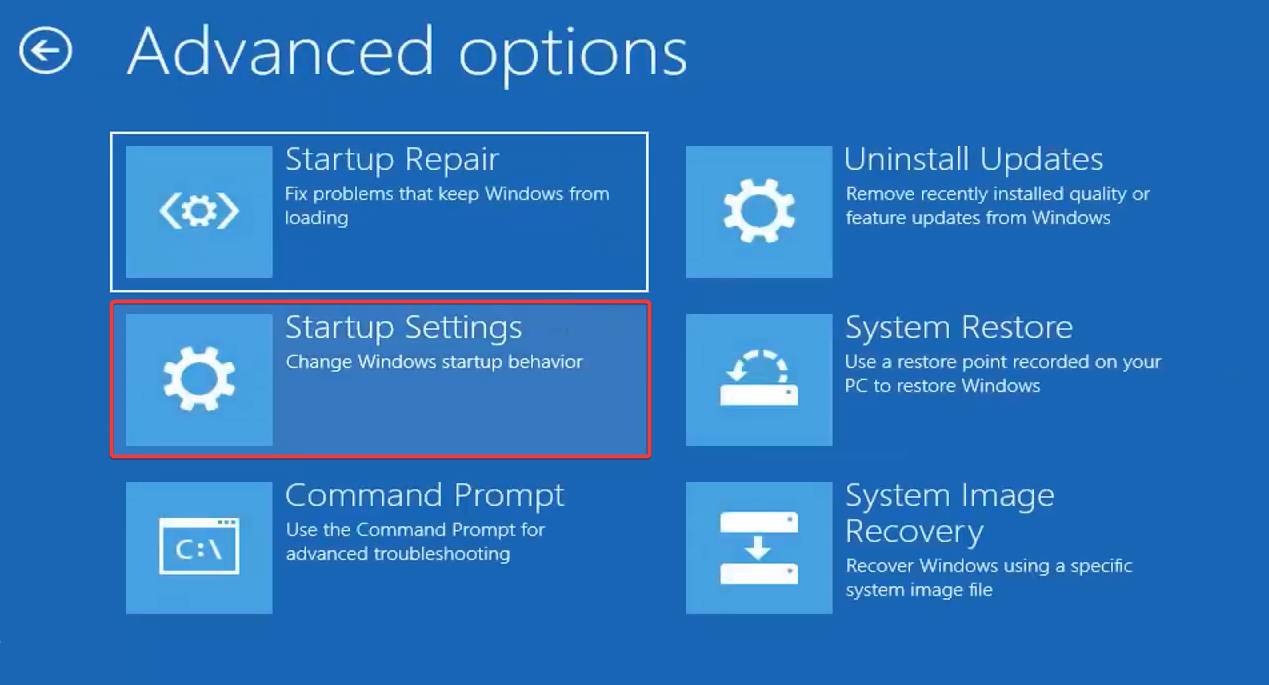
- Now, click on Startup Settings.
- After the PC restarts, press 5 or F5 to boot Windows into Safe Mode with Networking.
1.2 Switch to another projection mode
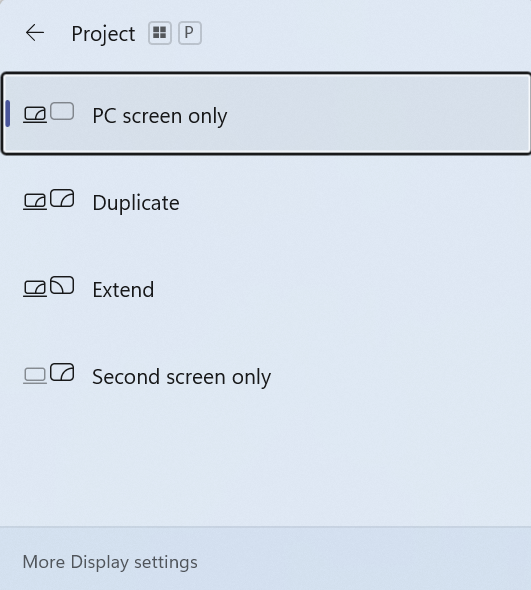
- After the PC restarts, press Windows + P to view the available projection modes.
- Select each of the available options individually, and when the 3D display mode toggle appears, disable it.
- You can check that under the Display settings.
We did this because in our tests, after you enable the 3D display mode, the button goes missing, and you may even end up with a black screen with a cursor. Changing the projection mode should help in this case!
If that doesn’t work, connect another monitor, one compatible with the 3D display mode, and then disable the feature.
2. Reinstall the graphics driver
- Boot Windows 11 into Safe Mode.
- Press Windows + X to open the Power User menu, and select Device Manager from the list.
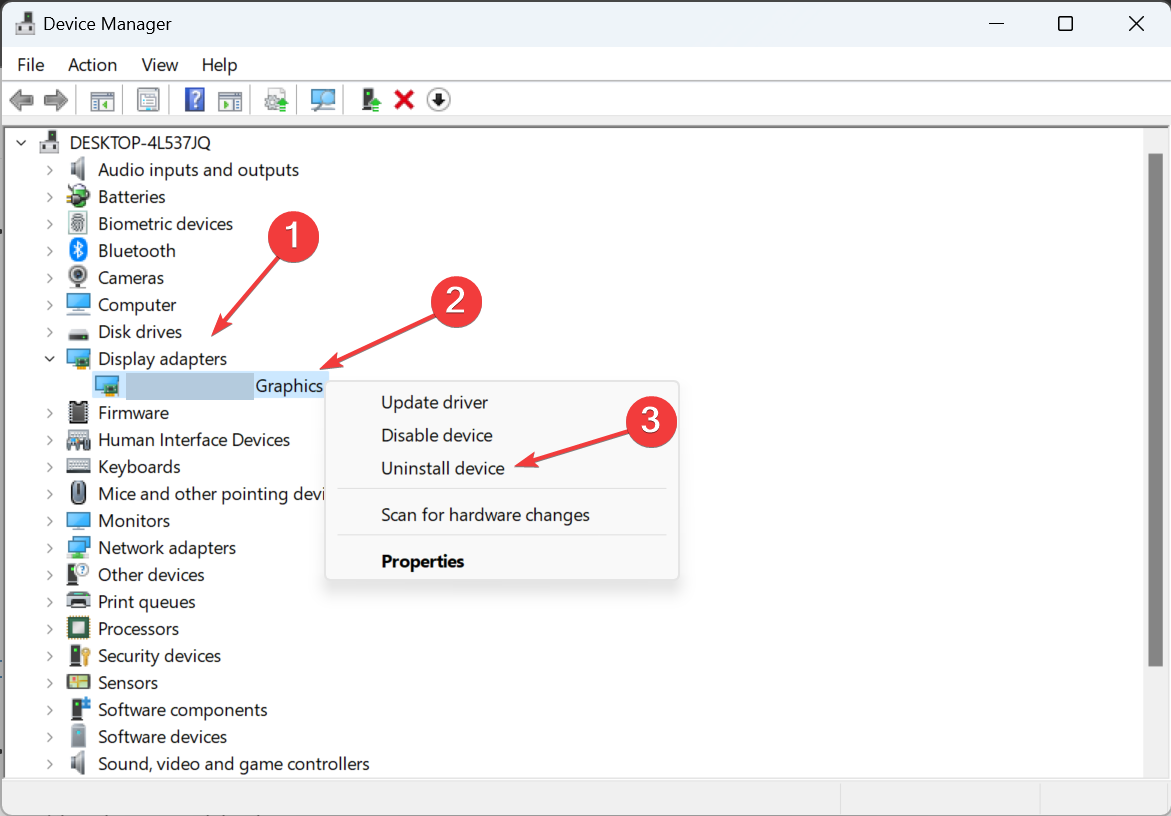
- Expand the Display adapters entry, right-click on the active graphics card, and select Uninstall device.
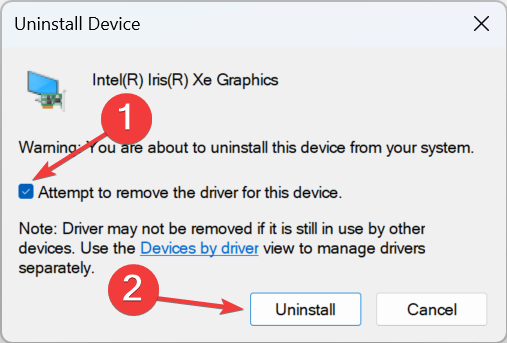
- Tick the checkbox for Attempt to remove the driver for this device, and click Uninstall.
- Similarly, uninstall the drivers for any other display adapters listed here.
- Restart Windows 11 into normal mode, and the 3D display mode should be turned off in Windows 11.
3. Via the dedicated graphic card’s Control Panel
The dedicated Control Panel for the graphics card has the 3D display mode setting if both the hardware and driver support it.
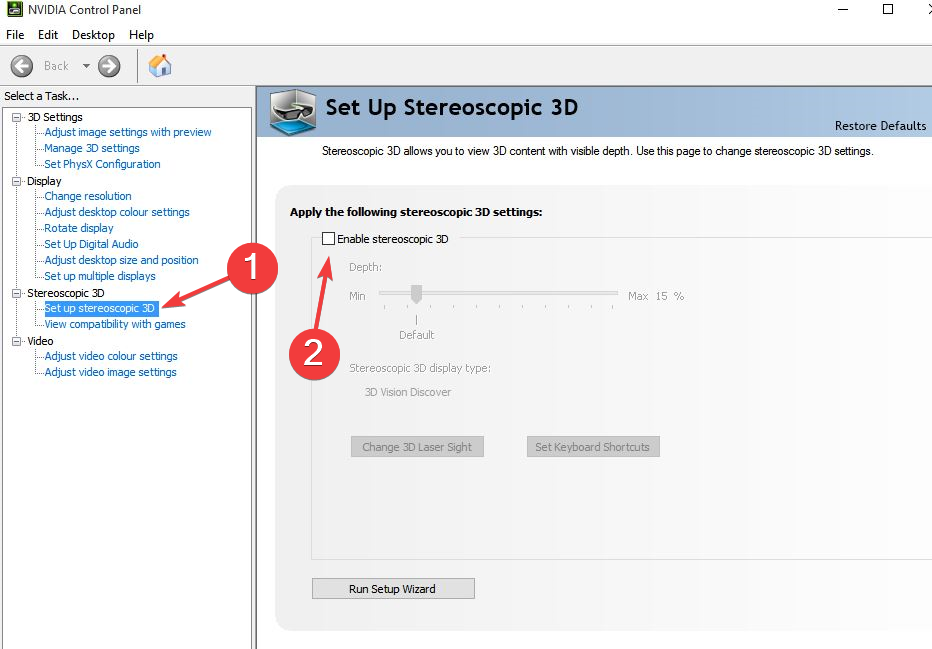
- For the NVIDIA Control Panel, go to Set up stereoscopic 3D from the navigation pane > untick the checkbox for Enable stereoscopic 3D.
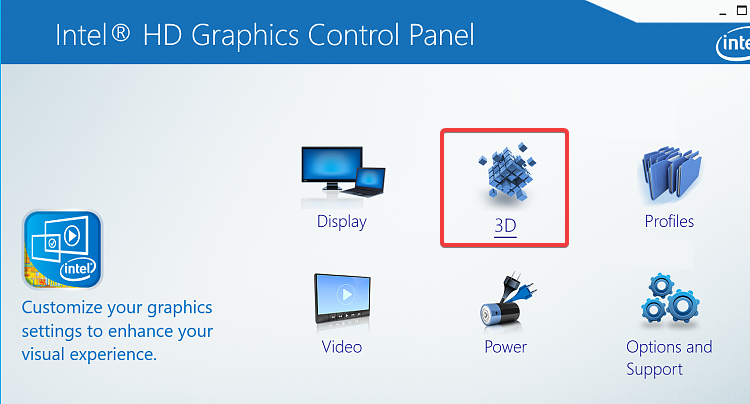
- For the Intel Graphics Control Panel, you will find the 3D option on the main screen. Go to it and disable the toggle.
4. Delete related entries from the Registry Editor
- Boot Windows into Safe Mode.
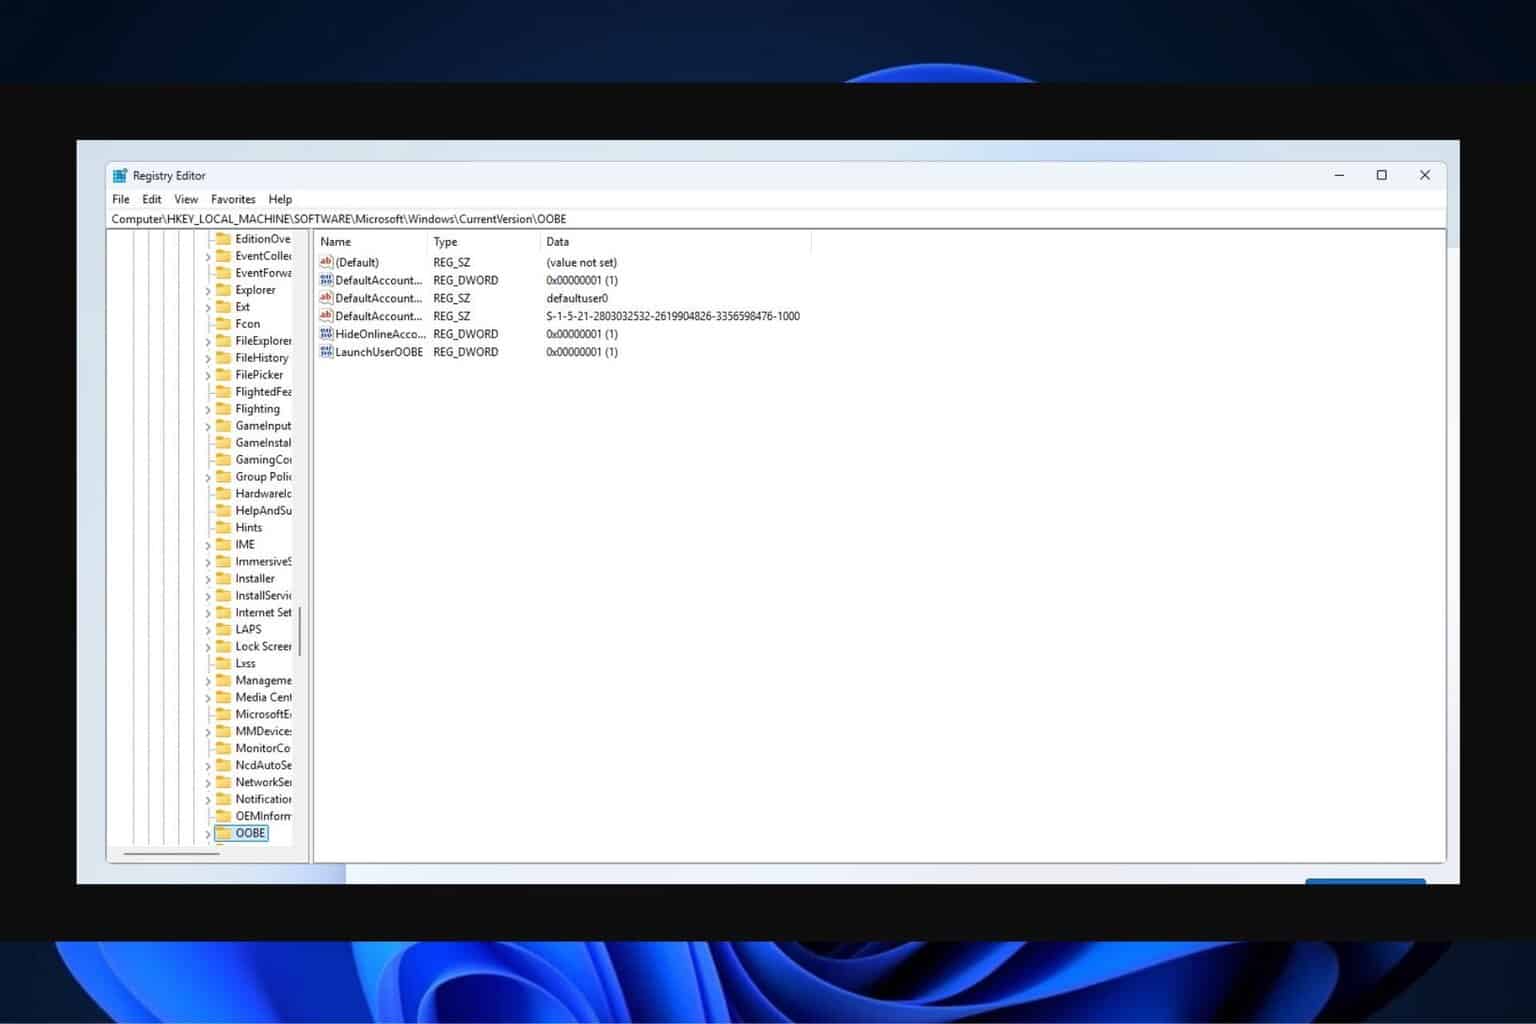
- Press Windows + R to open Run, type regedit in the text field, and hit Enter.
- Click Yes in the UAC prompt.
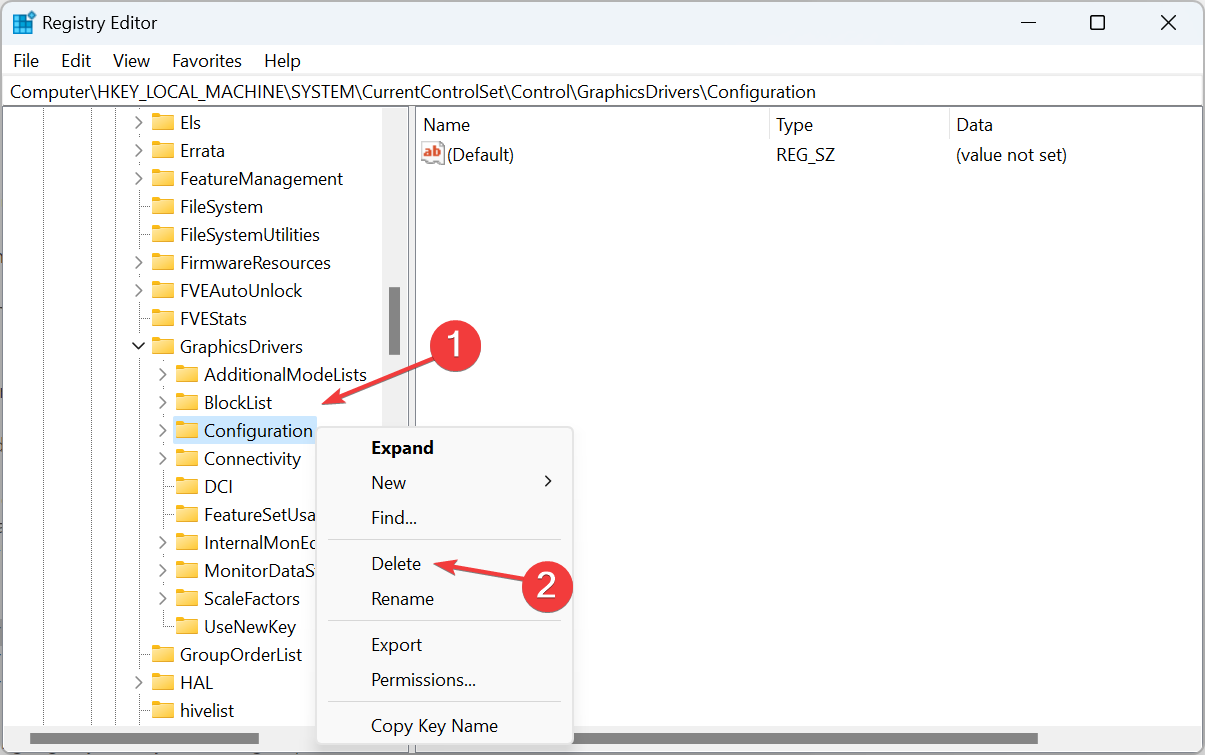
- Paste the following path in the address bar and hit Enter:
HKEY_LOCAL_MACHINE\SYSTEM\CurrentControlSet\Control\GraphicsDrivers - Right-click on the Configuration key in the navigation pane, and select Delete.
- Click Yes in the confirmation prompt.
- Similarly, delete the following two keys:
- Connectivity
- ScaleFactors
- Restart the computer normally and check for improvements.
5. Perform a system restore
- Press Windows + S to open Search, type Create a restore point in the text field, and click the relevant result.
- Click the System Restore button.
- If available, select the Choose a different restore point option, and click Next.
- Pick a restore point created before the issue first appeared, and click Next.
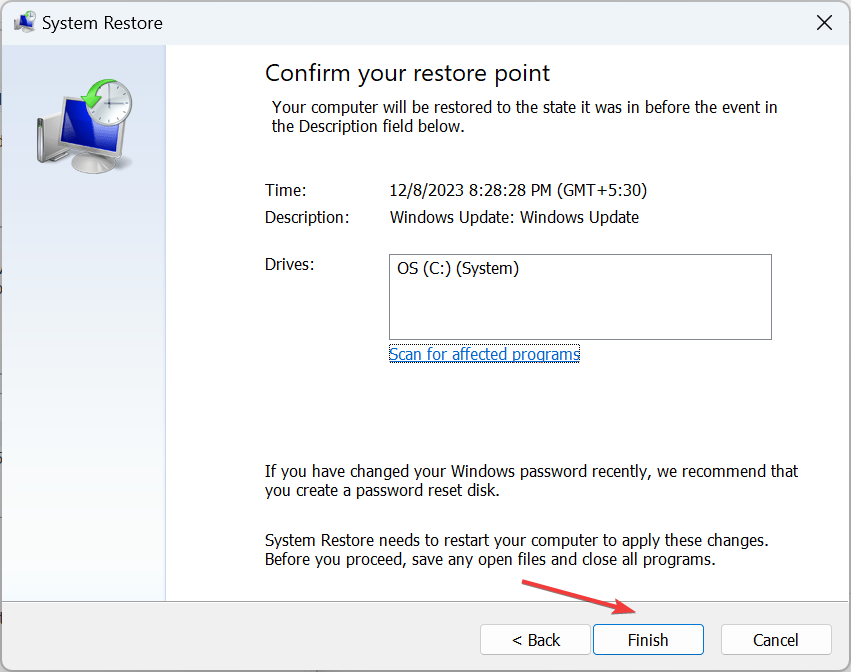
- Verify the restore details, and click Finish.
- Wait for the restore process to complete. It usually takes 30-60 minutes.
6. Reset Windows
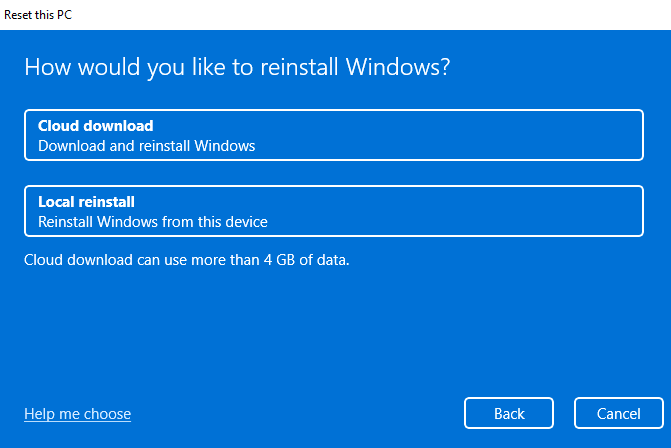
If you don’t have a restore point or can’t reinstall the graphics driver, reset Windows to factory defaults. This will wipe out all the data, including personal files and installed apps.
The other option is to reinstall Windows 11. It’s the same as resetting the OS but comes in handy in extreme situations when a reset is not possible. You will need a bootable USB drive to perform a reinstall.
With one of these solutions, you should be able to turn off the 3D display mode in Windows 11 without losing data (except for a reset). And this will help get rid of the black screen.
Before you leave, discover some quick tips to make Windows 11 faster and get the best performance!
For any queries or to share more solutions with us, drop a comment below.







User forum
0 messages