Turn Off Excel AutoSave in 6 Simple Ways
4 min. read
Updated on
Read our disclosure page to find out how can you help Windows Report sustain the editorial team. Read more
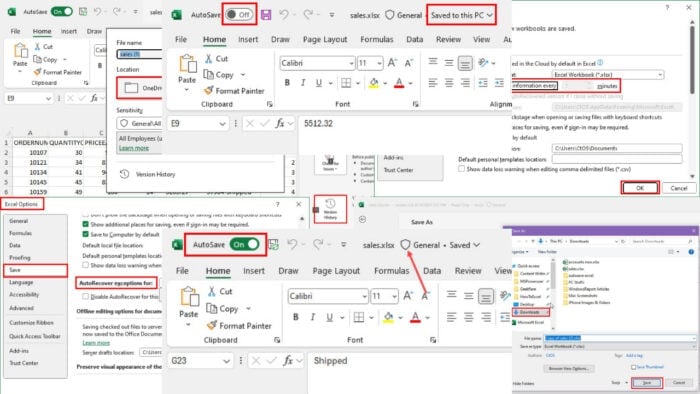
You can turn off Excel AutoSave easily with the right instructions. That’s where this guide comes in!
Microsoft Excel comes with various redundancy systems to safeguard unsaved work. They include Excel AutoSave, AutoRecover, and Version History. These tools work differently but ensure the most recent update is saved online and offline.
If you ever need to disable the AutoSave feature, read on!
Turn Off Excel AutoSave – 6 Methods
Let’s take a look at the approaches you can choose:
Using the Dedicated Switch
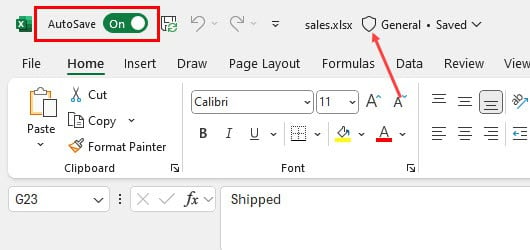
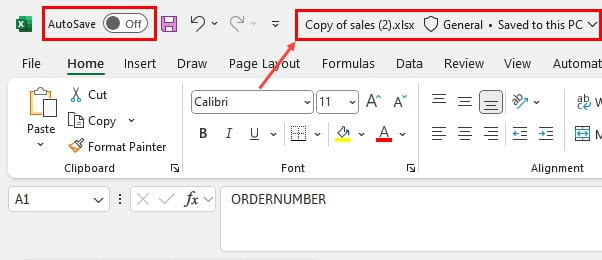
Excel for Microsoft 365 comes with an AutoSave switch in the top left corner of the software interface.
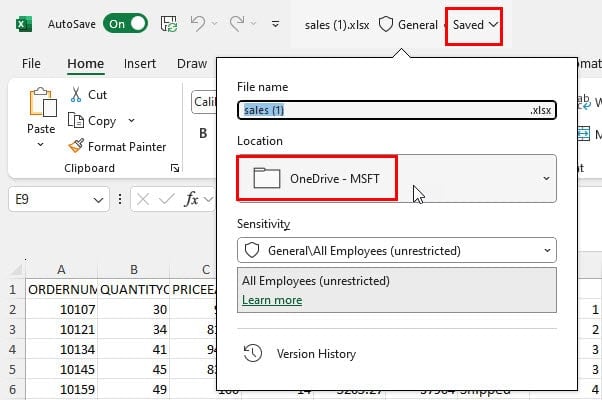
When active, you should see a shield icon to the right of the workbook name along with the OneDrive or SharePoint Online location in the top status bar.
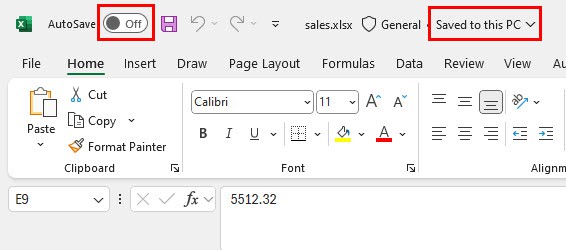
To turn off the AutoSave feature, simply slide the toggle button to the left.
If done successfully, the status of the file will change to Saved to the PC.
Please note that this applies only to the active workbook. It won’t impact any others saved locally on your PC.
Disable AutoSave for OneDrive & SharePoint Files
If you wish to globally disable Excel AutoSave on your PC, follow these steps instead:
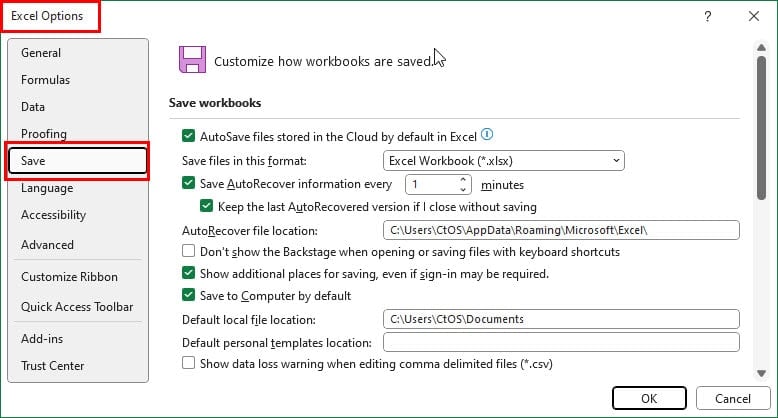
- Press Alt + F + T to launch the Excel Options dialog box.
- There, click on the Save category in the left-side navigation panel.
- Different workbook-saving policies will show up on the right-side menu.
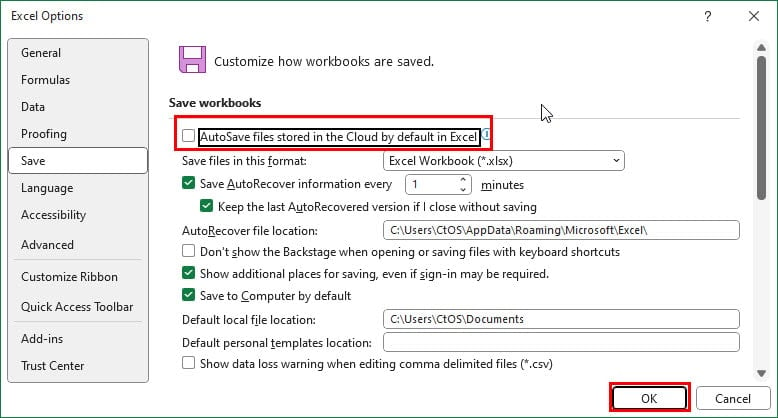
- Uncheck the box for the AutoSave files stored in the Cloud… option.
- Click OK to save the changes you’ve made.
Using Version History
If you disable the Version History feature, Excel will automatically deactivate the AutoSave feature. Here’s how:
- Make sure you’re on the source workbook where AutoSave is active.
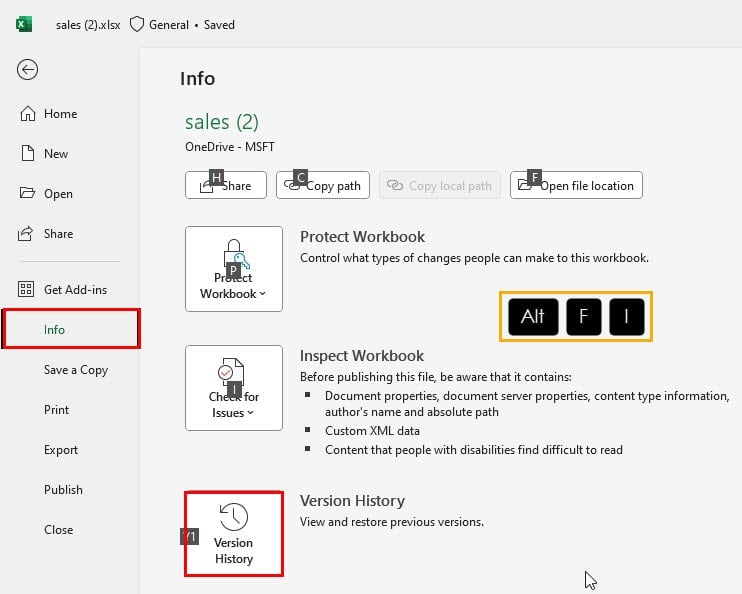
- Now, press Alt + F + I to open the Excel Info screen.
- On the right side, click on the Version History button.
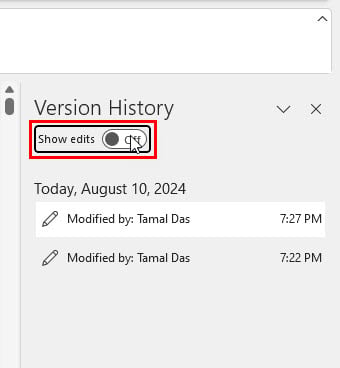
- You’ll be taken back to the Excel worksheet and the Version History panel will open on the right side.
- Click on the Show edits switch to disable the Version History feature.
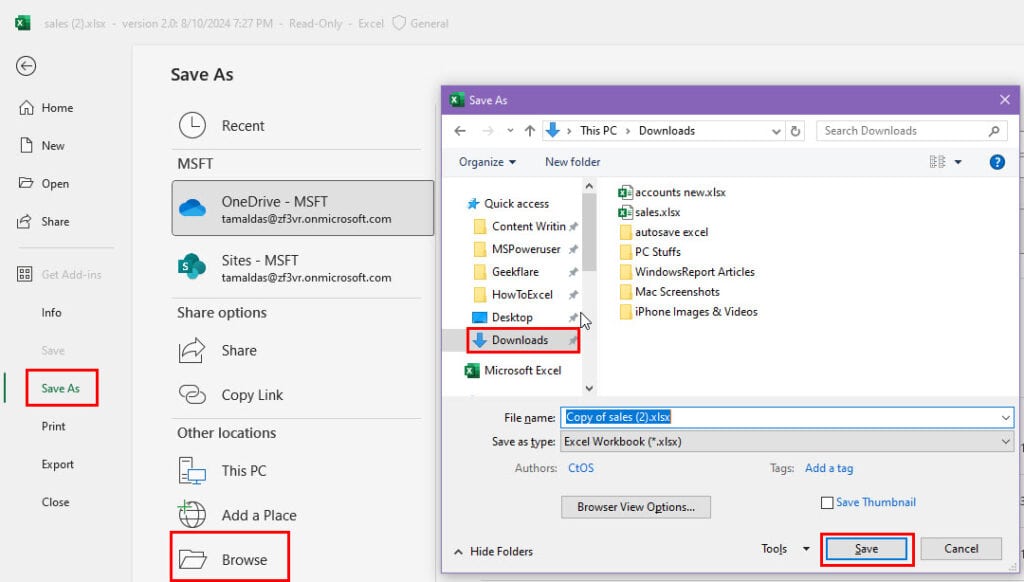
- Now, go to the File tab in the ribbon menu.
- Select Save As from the left-side navigation panel.
- Click Browse below the Other locations section on the right-side menu.
- The Save As dialog box will open.
- Choose the location where you want to save the Excel file.
- Hit the Save button.
- Now, the saved file will open in edit mode with the disabled AutoSave feature.
Disable AutoSave for Offline Workbooks
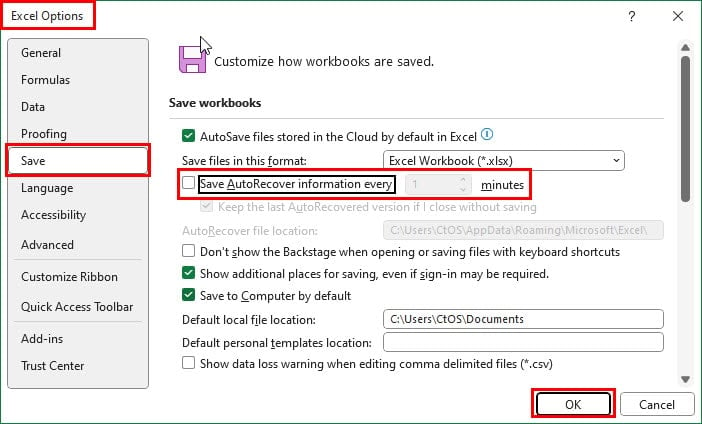
Microsoft Excel saves an offline workbook at regular intervals for recovery purposes. Here’s how you can disable this feature:
- Open the Excel Options dialog box and navigate to the Save category.
- Uncheck the box for the Save AutoRecover information every 10 minutes option.
- Click OK to save this modification.
Turn Off AutoSave for One Workbook
If you wish to deactivate automatic backup for one offline Excel workbook, do the following:
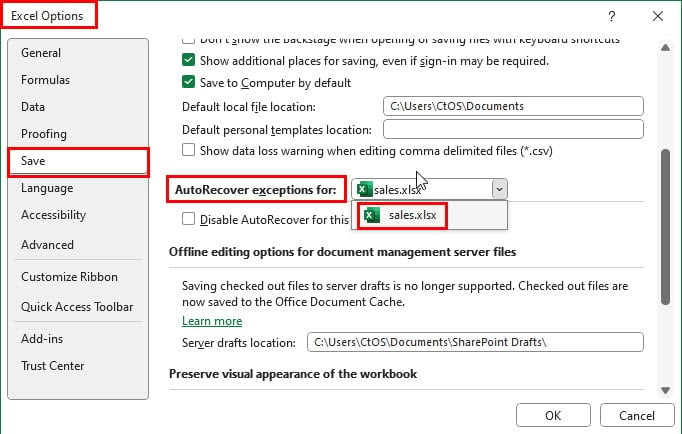
- Navigate to the Excel Options dialog box.
- Click on the Save category on the left.
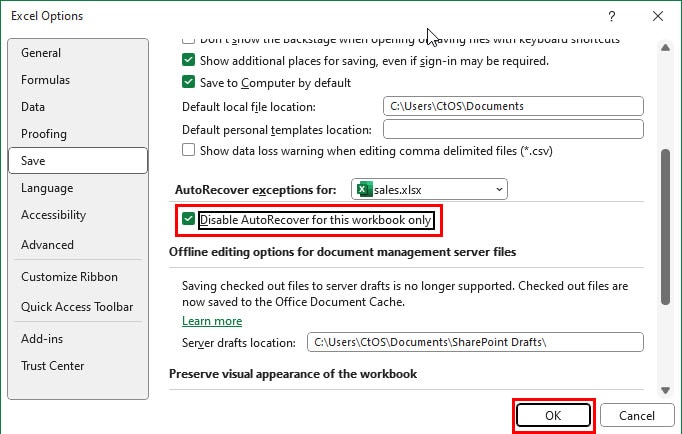
- On the right side, scroll down to the AutoRecover exceptions for: section.
- Select the active workbook in the drop-down menu.
- Checkmark the box for Disable AutoRecover for this workbook only option.
- Hit the OK button to save the modification.
Disable AutoSave on Mac
If you’re using Excel for Mac, you can follow these steps to pause AutoSave and AutoRecover:
- Open an Excel workbook on your MacBook.
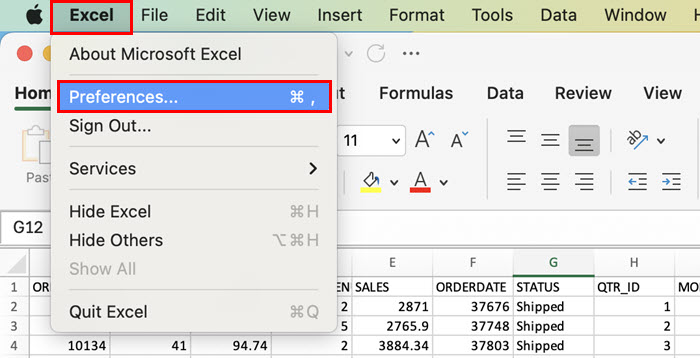
- Click on the Excel menu near the Apple monogram in the top left corner.
- Select the Preferences option in the context menu.
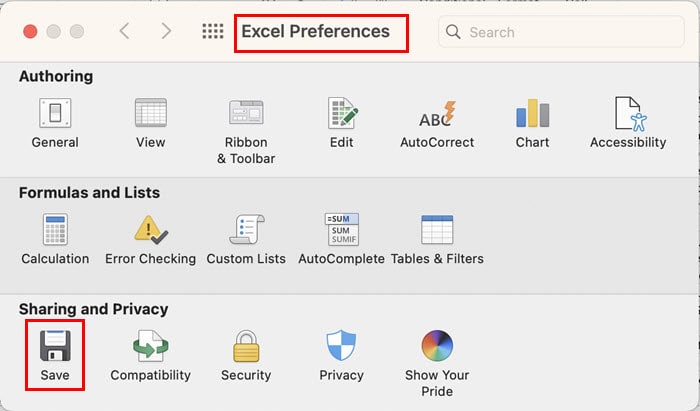
- The Excel Preferences dialog will open.
- There, select the Save menu below the Sharing and Privacy section.
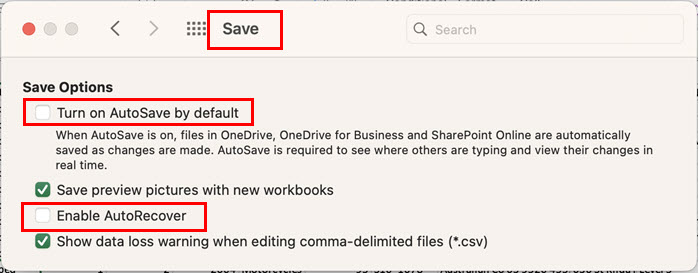
- You’ll see the Save dialog box.
- Uncheck the box for the following options:
- Turn on AutoSave by default.
- Enable AutoRecover.
Summary
These are the six best ways to turn off Excel AutoSave for workbooks stored locally on the PC, OneDrive, and SharePoint.
Do you know of a better approach? Feel free to share it in the comments!
If you’ve made custom changes and want to revert back to the original configurations, check out how to reset Excel to default settings. You can also learn how to stop files from closing automatically or how to turn off AutoSave on Word.


User forum
0 messages