uiautomationcore.dll Missing: How to Download & Fix it
Missing uiautomationcore.dll may be due to outdated OS
4 min. read
Updated on
Read our disclosure page to find out how can you help Windows Report sustain the editorial team Read more
Key notes
- Uiautomationcore.dll missing error can occur for many reasons.
- Corrupt system files can be responsible for the missing file on your computer.
- Running a System File Checker can fix the problem.
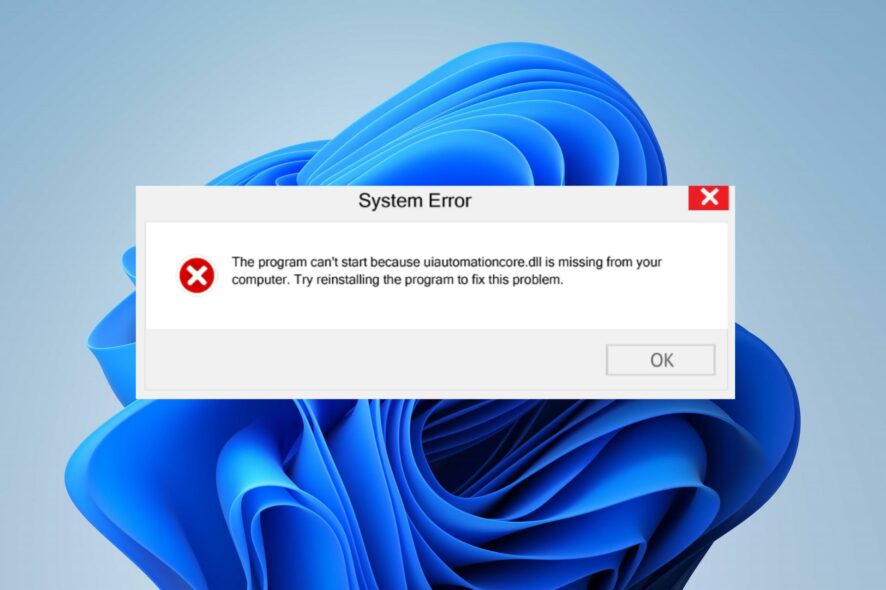
Encountering The program can’t start because uiautomationcore.dll is missing from your computer error indicates that the file is not available or accessible. Hence, the programs that need it can’t start due to its inaccessibility on Windows 10.
Also, you may run into Windows.devices.smartcards.dll missing error due to missing files on your PC.
Why is uiautomationcore.dll missing?
The uiautomationcore.dll missing on Windows 11 can be due to many factors. Corrupt system files can cause the uiautomationcore.dll file on your computer to be unavailable or missing. Also, corrupt files impede the activities of other components on your computer.
Furthermore, you can run into the uiautomationcore.dll missing error due to other factors such as:
- Missing or deleted uiautomationcore.dll file – The error can occur if the DLL file is missing or deleted from the Windows Registry. It affects its functionality because it is no longer intact. So, the services dependent on it won’t work, resulting in the error.
- Outdated Windows OS – Windows devices are known to run into several issues when the Operating System is outdated. It indicates the lack of necessary Windows Updates for fixing bugs. So, the missing file error may occur if Windows is not up to date.
- Malicious software – Users can encounter the uiautomationcore.dll missing error due to the malicious apps on the computer. This faulty software can disrupt other programs running on the PC and cause your system files to miss or become inaccessible.
There are various instances where you can encounter the uiautomationcore.dll missing error. Nevertheless, you can fix them by troubleshooting your PC.
How do I fix uiautomationcore.dll if it’s missing on my Windows 10?
Before proceeding with any solution for the error on Windows 10, go through the following preliminary checks:
- Stop apps running in the background on your PC.
- Temporarily disable antivirus software and any recently installed apps.
- Restart Windows in Safe Mode and check if the error persists.
Try the solutions below if you can’t fix the error:
1. Run a System File Checker (SFC scan)
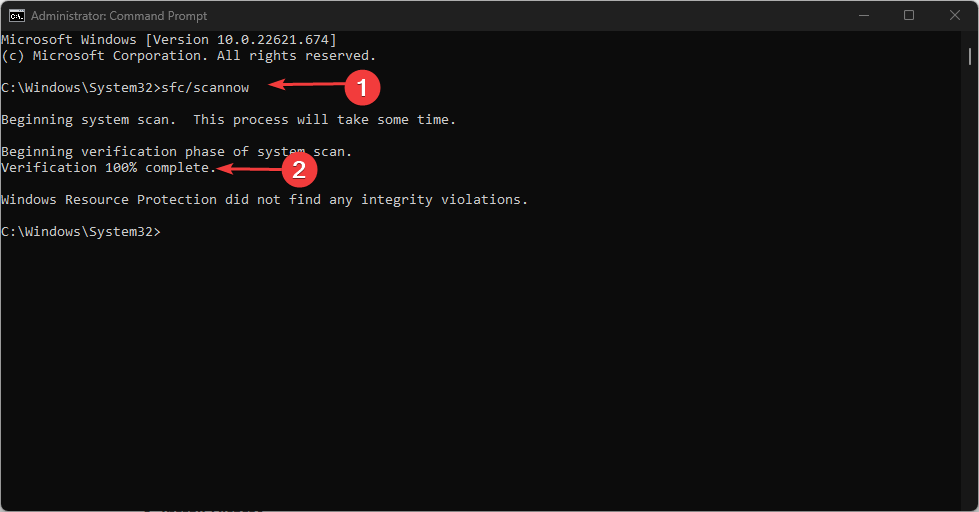
- Left-click the Start button, type Command Prompt, and select Run as administrator.
- Click Yes on the User Account Control window.
- Type the following and press Enter:
sfc /scannow - Restart your PC and check if the error persists.
Running an SFC scan will find and repair corrupt system files causing the missing system file error. Also, it can restore the uiautomationcore.dll file if it is corrupt. Read about fixing the run as administrator option if it’s not working on your PC.
Besides manually running an SFC scan, you can also opt for a specialized tool that can execute this procedure automatically.
2. Run System Restore
- Left-click the Start button and type Restore, then click on Create a Restore Point.
- Go to the System Protection tab, and select System Restore.
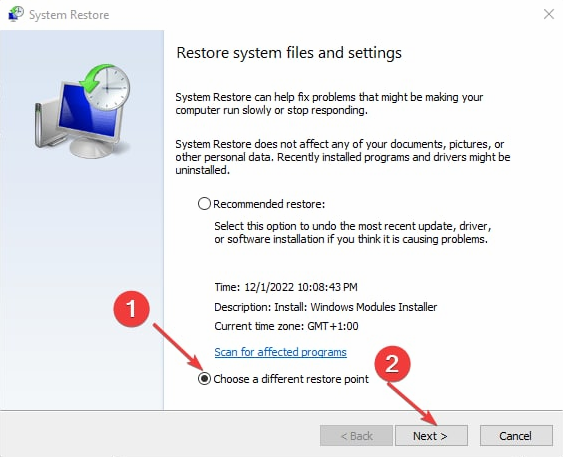
- Choose a different system restore and click Next to select a specific Restore Point.
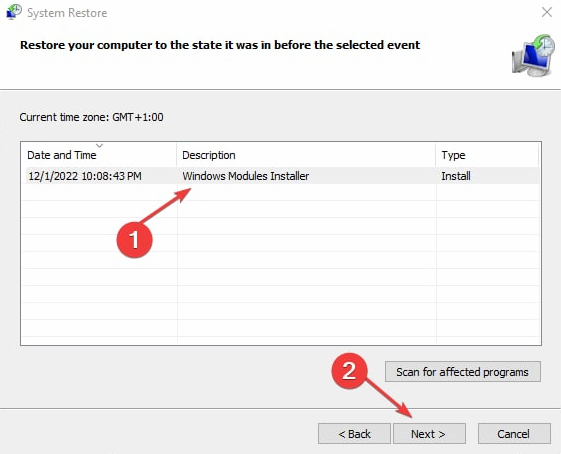
- Select the last time your PC worked perfectly, and click Next.
- Click the Finish button.
The System Restore will backdate your PC to the last time it functioned properly, removing the corrupt items causing the error. Check how to fix Restore Point if it’s not working and if you have any issues running it on your PC.
3. Update Windows OS
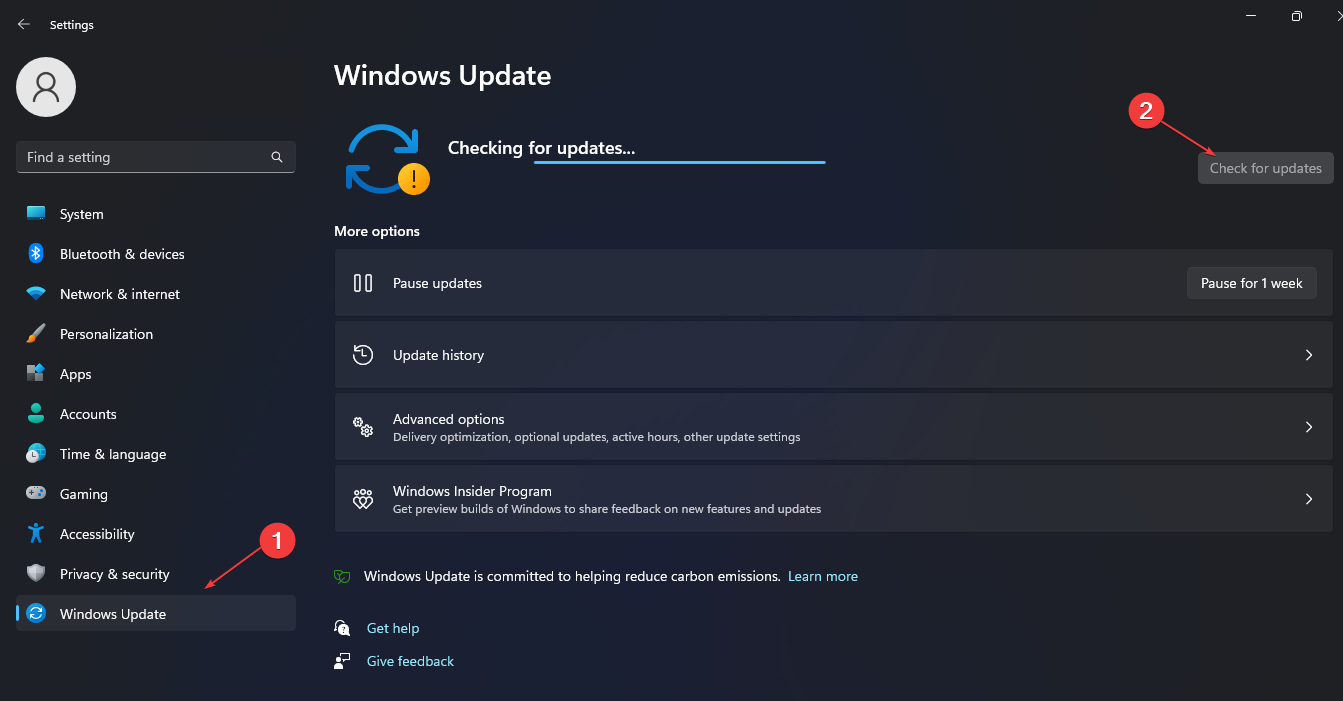
- Press Windows + I key to open the Settings app.
- Click on Windows Update and select Check for updates.
If there are any updates available, Windows will search for and install them. Update Windows OS will fix bugs affecting your PC and update your drivers. check how to fix Windows not connecting to update services on your PC.
4. Download and re-register the uiautomationcore.dll file
 NOTE
NOTE
- Launch your browser and download the correct version of uiautomationCore.dll for your PC.
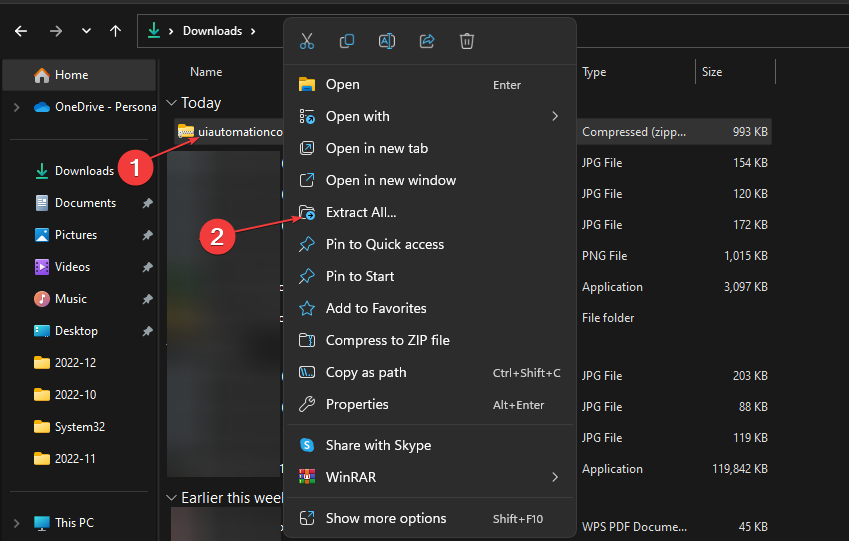
- Open the downloaded zip file, click the Extract icon at the top bar and select Desktop for a location to extract the DLL file.
- Left-click the Start button, type Command Prompt, and click Run as administrator.
- Click Yes on the User Account Control prompt.
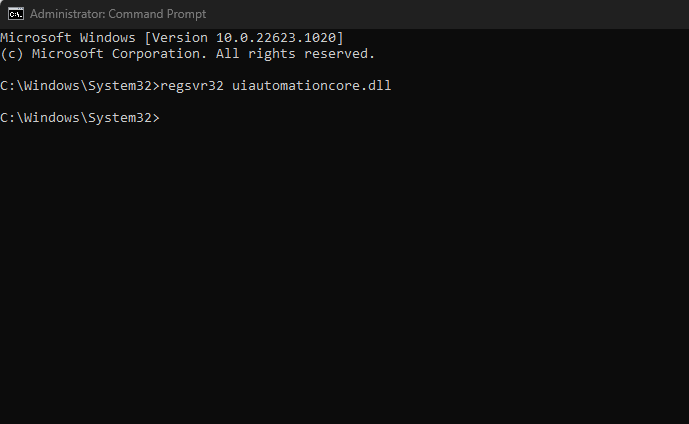
- Type this command and press Enter:
regsvr32 uiautomationcore.dll - Restart your PC.
Replacing the file should fix the error. The uiautomationcore.dll missing error should cease to pop up on your PC after this.
Alternatively, you can read our detailed guide about fixing DLL files missing from your PC.
Also, our readers may be interested in our article on fixing a corrupt bootres.dll file in Windows 10/11.
If you have further questions or suggestions, ensure to drop them in the comments section.

