Can't Reach DHCP Server: 5 Ways to Fix it
Changing advanced network settings can fix this

Many users rerported issues with their Internet connection, and they have encountered Can’t reach the DHCP server the network connection quality might be low error message. This can be a problem, but there are ways to fix it.
Why is the DHCP server not reachable?
There are several reasons, including outdated network adapter drivers, wireless adapter settings or glitches with DHCP.
How can I fix the Can’t reach DHCP server error?
Before trying anything else, try restarting your router or modem. Also, try disconnecting the network cable from the router/modem. Inspect network cables for hardware damage.
1. Update or reinstall your network drivers
- Press the Windows key + X, and select Device Manager.

- Select a category to see names of devices, then right-click on the one you’d like to update.
- Select Update driver.

- Click on Search automatically for updated driver software.

- Once it’s done updating you’re all set.
To reinstall your network drivers, follow these steps:
- Open Device Manager again.
- Locate your network device, right-click it and choose Uninstall device.
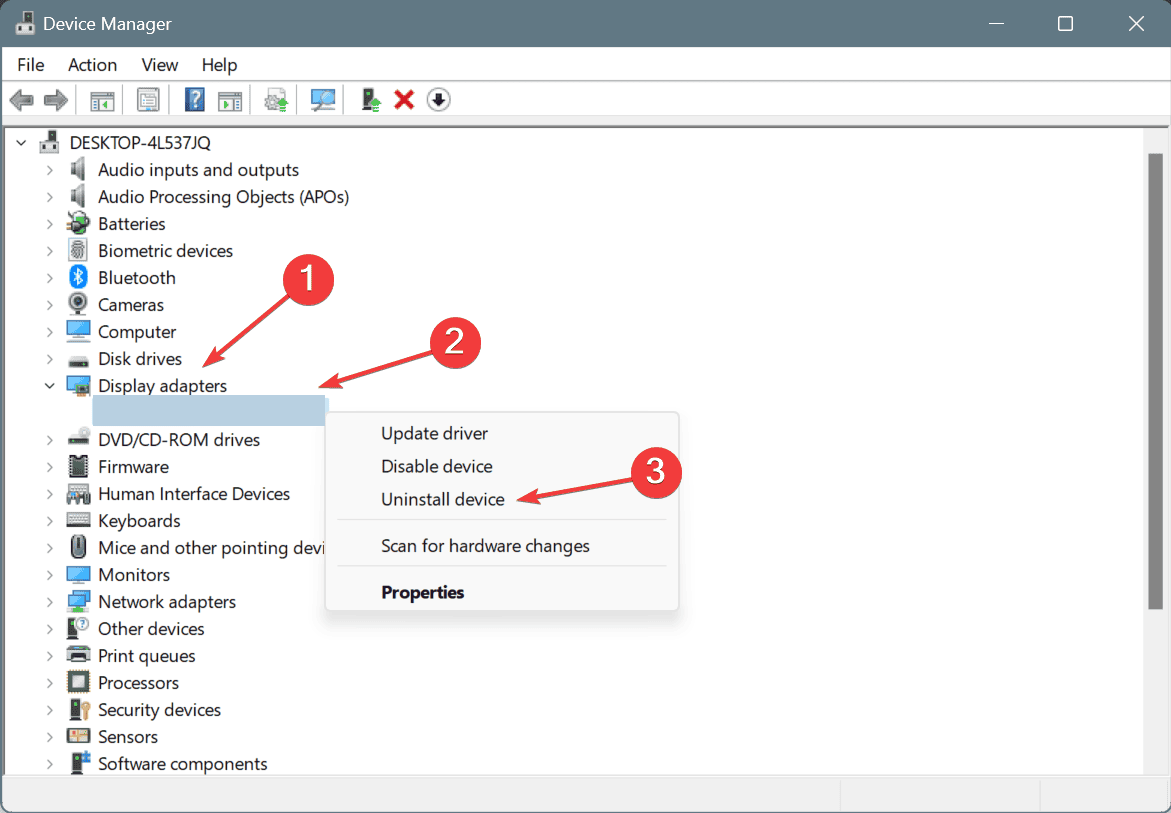
- Check the Remove driver software for this device option.
- Select Uninstall.
- Click the Scan for hardware changes icon.

- Windows will now try to install the default driver.
2. Change wireless adapter settings
- Open Device Manager.
- Locate your wireless adapter and double-click it.
- Navigate to the Advanced tab.
- Locate 802.11a/b/g Wireless Mode and set it to any 2.4GHz value.

This is a simple solution if you can’t reach DHCP server on WiFi, but keep in mind that 2.4GHz connection is slower.
3. Register your DNS via cmd
- Type cmd in your Start Menu. Open Command Prompt.

- Enter
ipconfig /registerdns - Type exit in Command Prompt.
- Restart your PC.
4. Enable or disable DHCP
- Search for View network connections and select the first option.

- Double-click the active network connection. Next, select Properties.
- Click on Internet Protocol Version 4. Select Properties.
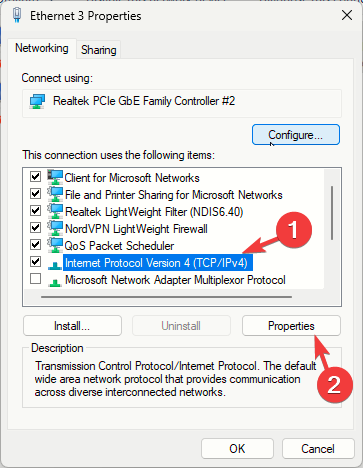
- Click on Use the following IP address.

- Enter the values for your IP Address, Subnet Mask, etc. And check if that works.
- If DHCP is disabled, click on both Obtain an IP Address automatically and Obtain DNS Server Address Automatically and save changes.
This method can be useful if you can’t reach DHCP server via Ethernet on Windows 11.
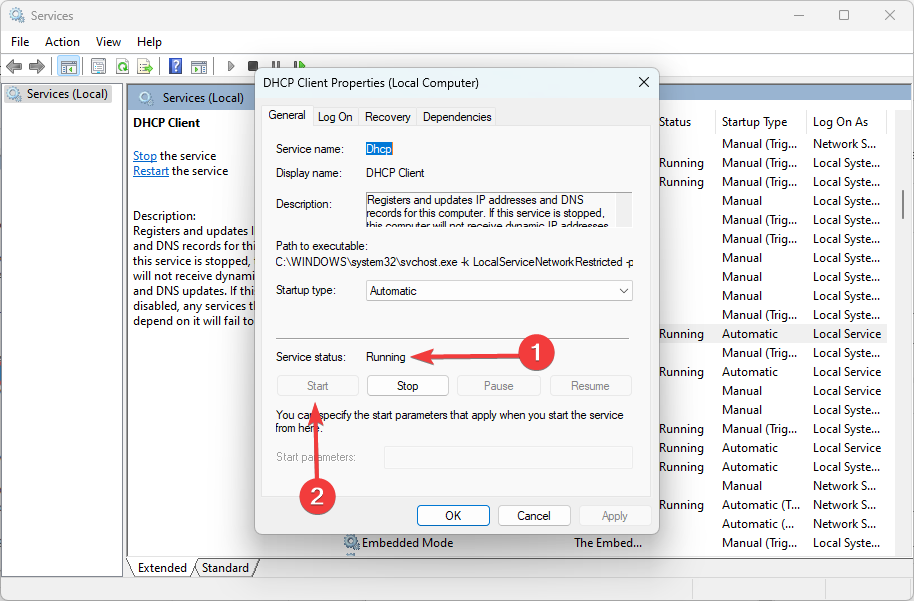
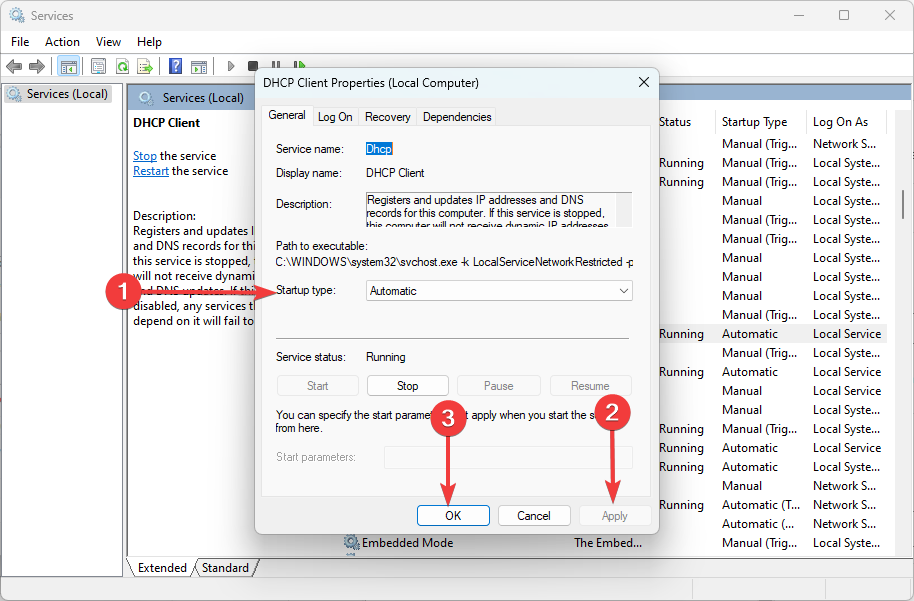
5. Restart your DHCP client service
- Press Windows + R, type services.msc, and hit Enter.
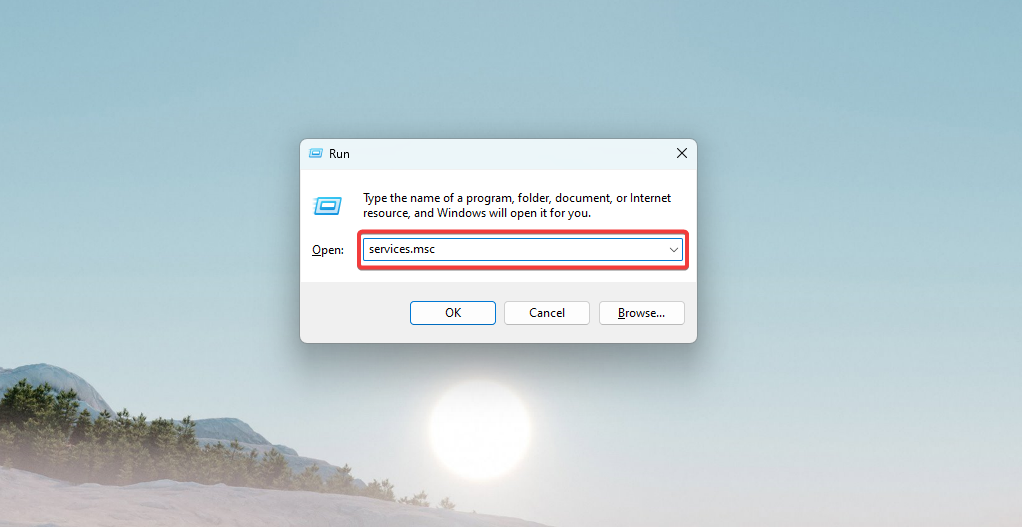
- Scroll down to the DHCP Client service and double-click on it to get to its properties.
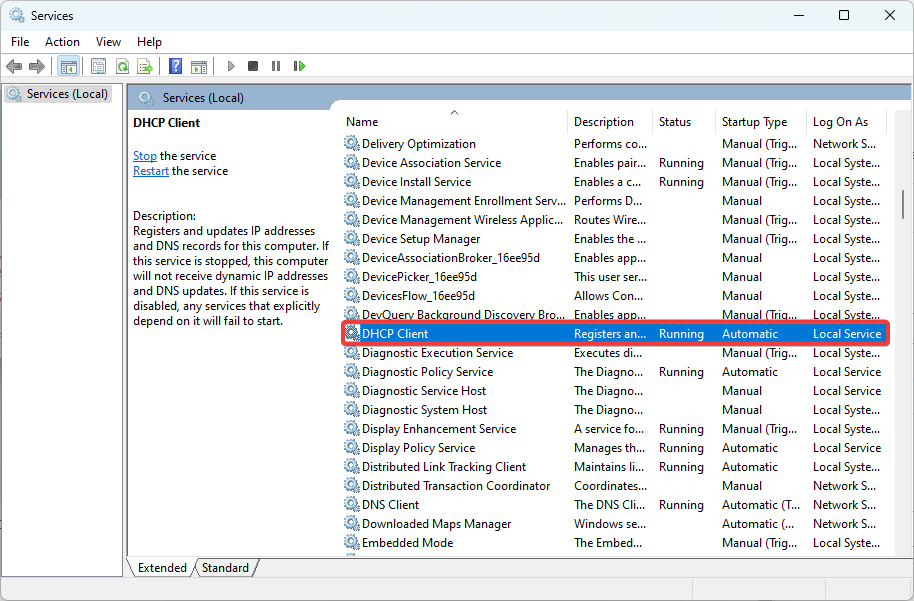
- Make sure Service status is set to Running; if not, click on Start.
- Make sure the Startup type is set to Automatic, then click Apply and OK.

We hope that these solutions worked for you in solving the unable to contact your DHCP server error message and that your Ethernet works fine now.
To learn more, we have a guide on what to do if DHCP is not enabled for Wi-Fi or if it’s not enabled on Ethernet. For Windows 11 users, we have a great guide on what to do if DHCP is not working on Windows 11, so don’t miss it.
Before you leave, you might be interested in our DHCP server stopped working guide.
Let us know what other network issues you have faced, in the comments section down below.
Read our disclosure page to find out how can you help Windows Report sustain the editorial team. Read more


Improve this guide


User forum
0 messages