Unable To Execute File in the Temporary Directory Error 5 Fixed
![]() 8 min. read
8 min. read
![]() Published on
Published on
Share this article
Improve this guide
Read our disclosure page to find out how can you help Windows Report sustain the editorial team. Read more
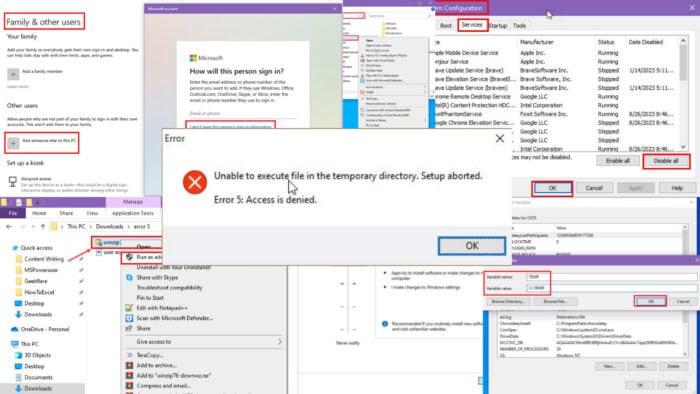
Did you get a pop-up saying “Unable to execute file in the temporary directory. Error 5: Access is denied.”?
This issue is related to the Windows InstallShield tool and temporary folders on the Windows installation drive. It’s primarily the C: drive. Sometimes, the InstallShield wizard can’t unpack the content of the installation package, and you’ll get this error message.

It usually happens for the following reasons:
- The active user account doesn’t have admin rights to install certain apps.
- Hard drive or SSD malfunction prevents creating new directories or writing to existing folders.
- Someone has modified folder security rights so your user account can’t write data.
- InstallShield wizard can’t locate or use the default TEMP folder in the C: drive.
- PC is infected with malware.
- Antivirus is aggressively blocking apps, including the InstallShield wizard.
- Windows 10/11 Firewall is blocking the rewriting of content in the TEMP folders.
To help you fix the issue, I’ve reproduced this error on a Windows 10 PC. Here are the solutions that worked for me!
How To Fix Unable To Execute File in the Temporary Directory Error 5
Here are some techniques to try, starting with the simplest. Follow this order for the quickest and best results:
Log On as an Administrator
- Click on the Start menu button and then on your user profile picture in the bottom right corner.
- A context menu will show up. Select Sign out.

- Wait for your computer to return to the login screen.
- If you see more than one user account, click on the one that’s the Administrator account.
- You might need to contact the device owner or IT support personnel if you don’t know which admin account to use.
- Enter the required credentials in the User name and Password fields.
- Hit Enter to log on as an administrator.
Now, try installing the app again.
Run Installer as Administrator
If you’re already logged in to the Windows PC as an administrator, try the following instead:
- Locate the installer package, select it, and right-click.
- Click on the Run as administrator from the context menu.

- The InstallShield wizard of the software package will now gain privileged access to read and write storage drives and directories.
Set Full Control for the Temp Folder
- Navigate to the following location to find the Temp folder used by the InstallShield wizard.
C:\Users\CtOS\AppData\Local- Replace CtOS with your user account name.
- Locate the Temp folder and right-click on it.
- Select Properties from the context menu.

- The Temp Properties dialog box will show up.
- Navigate to the Security tab.
- Select your user account in the Group or user names section.
- In the Permissions for section, look for given accesses below the Allow column.
- If it looks like the image below, the selected user account doesn’t have enough permission to use this folder.
- Click on the Edit button.

- The Permissions for Temp dialog will open.
- Again select your user account.
- Checkmark the boxes for all the items below the Allow column.
- Click Apply and OK to enforce the changes.

- Again, click Apply and OK on the Temp Properties dialog box.

This should help you fix the “Unable To Execute File in the Temporary Directory Error 5” problem when installing software.
Clear the Temporary Files
Navigate to the following Temp folders in your Windows PC and delete all the content inside these directories.
Try to erase as many temporary files as you can from them:
C:\Windows\Temp
C:\Users\CtOS\AppData\Local\Temp
In the above Temp directory address, replace CtOS with your user account name.
You’ll need administrator access to delete the content of these Temp folders.
Create a New Default TEMP Folder
- Go to the Windows installation drive and create a new folder named TEMP.

- Press the Windows + R keys to open the Run dialog.
- Type
sysdm.cplin the Open field and press Enter.

- In the System Properties window, go to the Advanced tab.
- Click on the Environment Variables option.

- Under User variables for CtOS, click New.
- In place of CtOS, you’ll see your user account name.

- For the Variable name field, enter TEMP.
- In the Variable value field, enter the full path to your new Temp folder as shown below:
C:\TEMP- Click OK.
- Click OK again to close all windows.

Run Disk Cleanup
- Type Disk Cleanup in the Start menu.
- Click on the Disk Cleanup app below the Best match section.

- You’ll see the Disk Cleanup: Drive Selection dialog box.
- Ensure, the Windows installation drive is selected there. For example, (C:\).

- You’ll now see the Disk Cleanup for WINDOWS 10 dialog box.
- In place of WINDOWS 10, you might see Local Disk C: or any other name you’ve assigned to the Windows installation folder.
- Click on the Clean up system files button.

- Again, you’ll see the Disk Cleanup: Drive Selection pop-up.

- Select the same drive again.
- Windows will delete unnecessary system files.
- When the Disk Cleanup for WINDOWS 10 dialog shows, click on the OK button.

- You’ll now see the Disk Cleanup progress bar.

Once you’ve cleaned the C: drive, try to install the app again.
Turn User Account Control Off
- Click on the Start menu button.
- Type User Account Control.
- Select the Change User Account Control settings below the Best match.

- You’ll now see the User Account Control Settings dialog box.
- Usually, it should be on the Always notify side.

- Slide it down to the Never notify level.
- Click OK.

- You might need to approve the action by clicking Yes or Continue on a confirmation dialog.
Test if the issue has been fixed or not. Follow the steps mentioned above to revert the User Account Control level to Always notify.
Perform a Clean Boot
- Press the Windows and R keys together to open the Run dialog box.
- Type
msconfigin the Open field and hit Enter.

- In the System Configuration window, click on the Services tab.
- Check the box next to Hide all Microsoft services.
- Click Disable all.

- Click on the Startup tab.
- Click Open Task Manager.
- In the Task Manager, go to the Startup tab.
- For each startup item, right-click on it and select Disable.
- Close the Task Manager.

- In the System Configuration window, click Apply and then OK.
- Restart your PC.
Test if the issue is fixed or not. Once you’re able to install the new app, follow these steps again to enable non-Microsoft services and startup services from Task Manager. Reboot your PC to enforce these changes.
Create a New Administrator Account
- Press the Windows + R keys to open the Settings app.
- Click on the Accounts menu in the list.
- You’ll see the Settings > Your info menu.
- Click on the Family & other users option in the left-side navigation panel.

- Select the Add someone else to this PC button below the Other users section on the right.
- A Microsoft account sign-in dialog will open. Click on the I don’t have this… hyperlink.

- Select Add a user without a Microsoft account on the next screen.
- Enter the necessary details on the Create a user for this PC dialog and click Next.

- You should see the newly created account in the Other users section.
- Click on that and hit the Change account type button.

- You’ll see the Change account type dialog.
- Click on the Account type drop-down menu and choose Administrator.
- Hit OK to apply the modification you just made.

- Now, log out of the existing Windows user account and log in with the new Admin account.
You should now try to install the new app and see if the “Unable To Execute File in the Temporary Directory Error 5” issue is fixed.
Disable the Antivirus Program Briefly
- Open the Windows Settings by pressing the Windows + I keys together and click on the Update & Security option.
- On the Update & Security menu, click on the Windows Security option.

- Click on the Virus & threat protection setting below the Protection areas section on the right.

- Select Manage settings below the Virus & threat protection settings.

- Use the toggle button to disable the Real-time protection feature.

- Keep this window as is.
- Try to install the new app.
- If it works, use the Real-time protection toggle button again to activate the security feature.
Reboot Windows Into Safe Mode
- Click on the Start menu and select the Power button.
- A context menu with three power options will show up.
- Press the Shift key on the keyboard and click on the Restart button.
- The Windows PC will restart and boot into the WinRE environment.
- Click Troubleshoot.

- Select Advanced options in the Troubleshoot screen.

- Click on the Startup Settings.

- Select Restart on the next screen.

- The PC will reboot to the Startup Settings menu with several options.
- There, press the numeric 4 key for Safe Mode.

- The PC will reboot into Safe Mode.

Now, check if Error 5 surfaces again when you try to install an app.
Summary
So, these are the fixes you can follow to overcome the Unable to execute file in the temporary directory Error 5 when installing apps. These methods will work effectively on Windows 7, 8, 11, etc.
You might also want to check out You have been denied permission to access this folder and Folder access denied Windows 11 if you face any of these issues.


User forum
0 messages