Unsupported 16-bit Application Error: 5 Ways to Fix it
Your computer might be under attack!
5 min. read
Updated on
Read our disclosure page to find out how can you help Windows Report sustain the editorial team. Read more
Key notes
- Unsupported 16-bit application is a weird error that can happen due to compatibility issues, corrupted files, or, most commonly, virus infection.
- Try scanning for viruses and uninstalling the app that’s causing problems to clear it.
- If you wish to install an old game on your PC that’s incompatible with its specs, you might think about setting up a virtual machine instead.
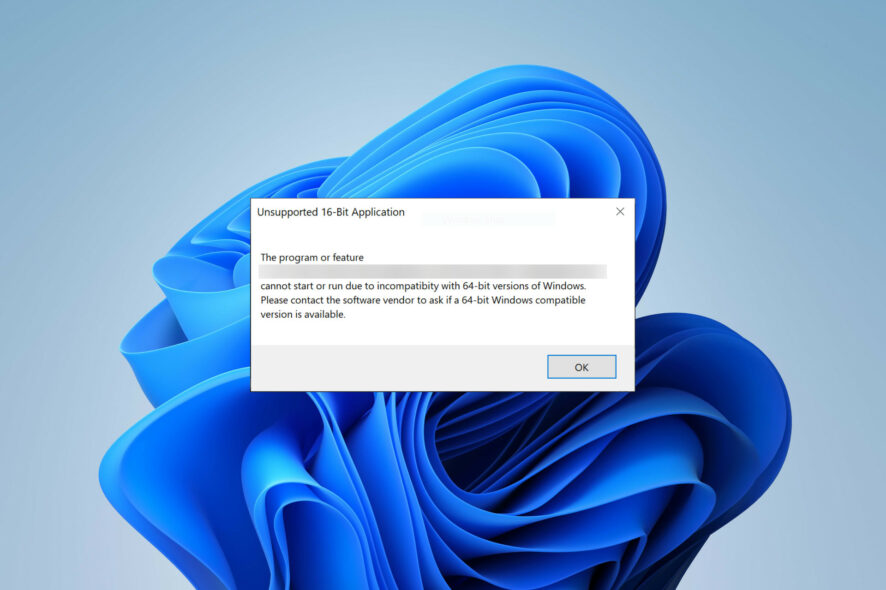
Have you ever encountered an unsupported 16-bit application error? Perhaps while trying to install an old game or just out of a sudden (which may be a sign your PC is infected by a virus).
Whatever the case, join us in the next few paragraphs, as today, we’ll explain everything about the unsupported 16-bit application error – what it is, when it happens, and how to fix it.
What is the unsupported 16-bit application error?
The Unsupported 16-bit application error is a weird glitch error to happen in your Windows PC.
It’s most commonly accompanied by the pop-up message explaining that the app cannot start or run due to compatibility issues with 64-bit versions of Windows and that you should contact the software vendor for the 64-bit compatible version.
It typically occurs when:
- You try to run a 16-bit application on a 64-bit operating system: Windows 64-bit no longer supports 16-bit apps; only its 32-bit version can run it. You can try running compatibility mode or installing a virtual machine.
- The app you’re trying to run is incompatible with your operating system.
- Your PC is infected: Malware masks itself as a legit file, but when your computer suspects something is out of the ordinary, it could result in getting the error. Don’t forget to run thorough and frequent virus checks with your trusted antivirus software.
- There are corrupted system files: Occasionally, corrupted files are the culprit behind the glitch.
All in all, encountering such an error out of the blue is your computer telling you there’s something wrong and you need to fix it. However, if you’re trying to install a 16-bit app on your new Windows 11 or Windows 10 PC, you will have to find some workaround.
How do I fix an unsupported 16-bit application?
1. Enable Compatibility Mode
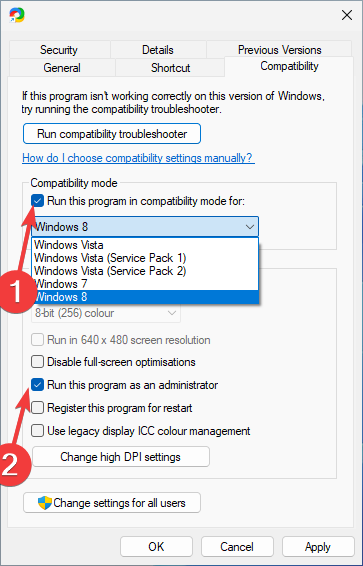
- Right-click on the app icon and open Properties.
- Navigate to the Compatibility tab. Check the box next to Run this program in compatibility mode and select an older version of Windows. Additionally, you might check Run this program as an administrator.
- Click on OK to save the changes.
If you’re sure your app isn’t 16-bit and it suddenly started displaying this error message, you may try to tweak its compatibility settings.
Enabling compatibility mode tricks the operating system into running the application as if it were running on an older version of Windows. This can often resolve the unsupported 16-bit application error.
2. Fix corrupted files with System File Checker
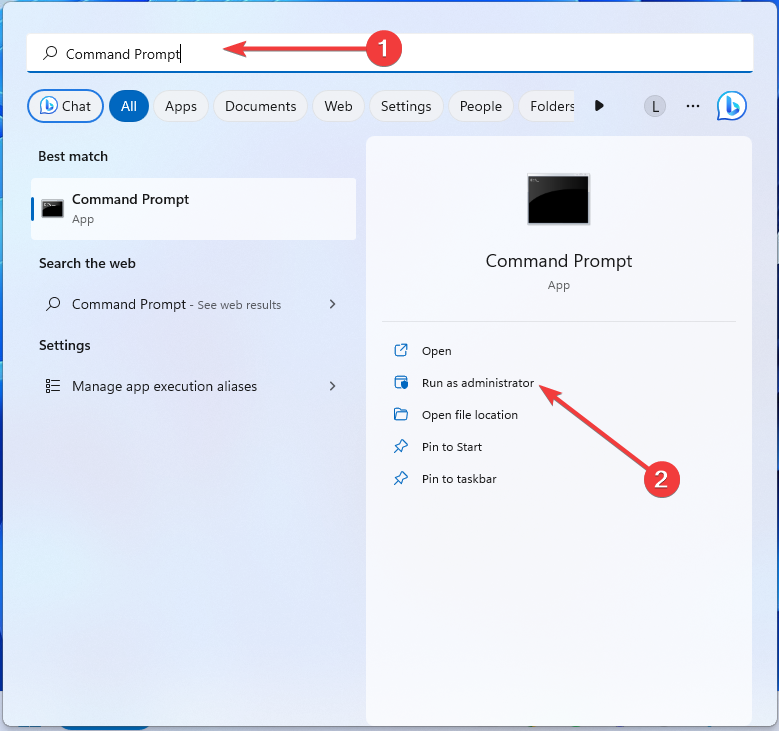
- Tap Windows and search for Command Prompt. Click on Run as administrator.
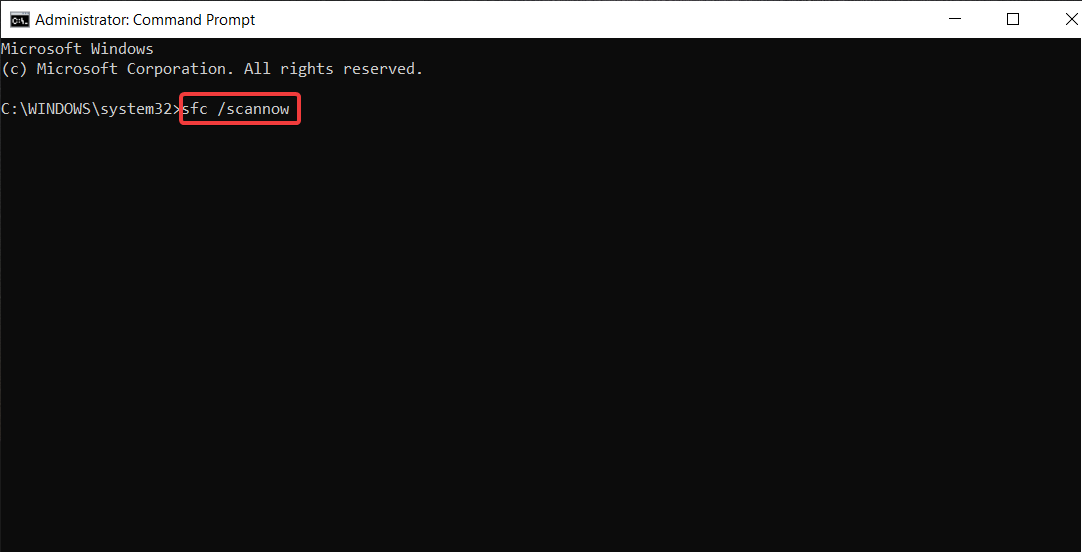
- Type in the following command and press Enter:
sfc /scannow - If SFC returns an error, try the following commands and press Enter after each one:
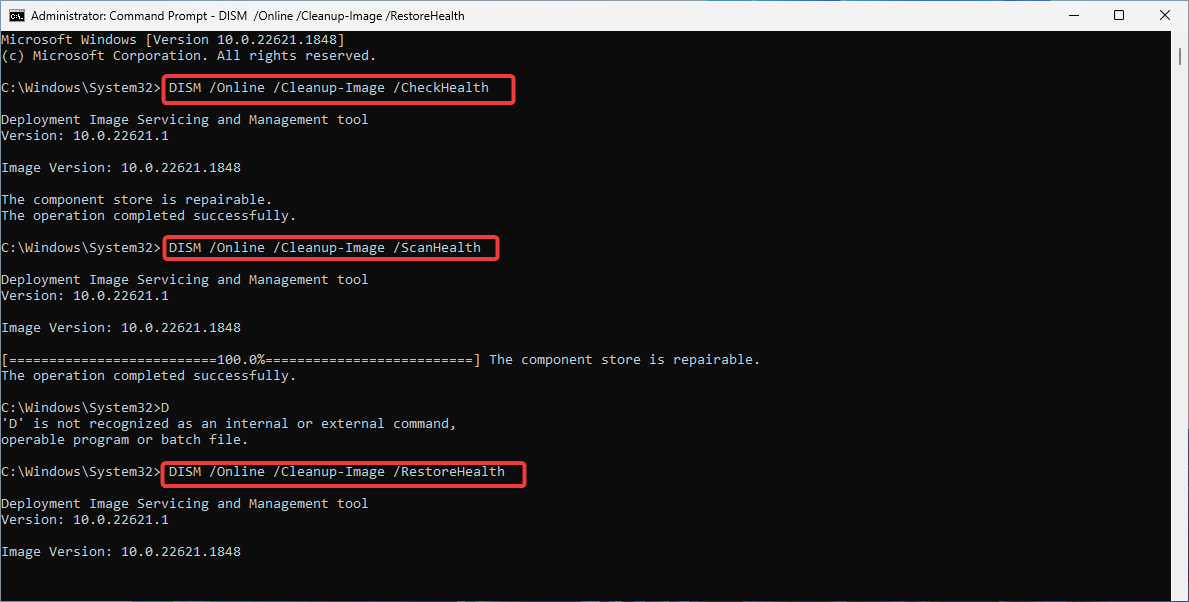
DISM /Online /Cleanup-Image /CheckHealthDISM /Online /Cleanup-Image /ScanHealthDISM /Online /Cleanup-Image /RestoreHealth
The SFC and DISM commands help you repair system file corruption, which is also a common reason behind the application error.
Besides this manual process, you can also perform these steps even safer and faster with specialized third-party repair software.
3. Scan for viruses
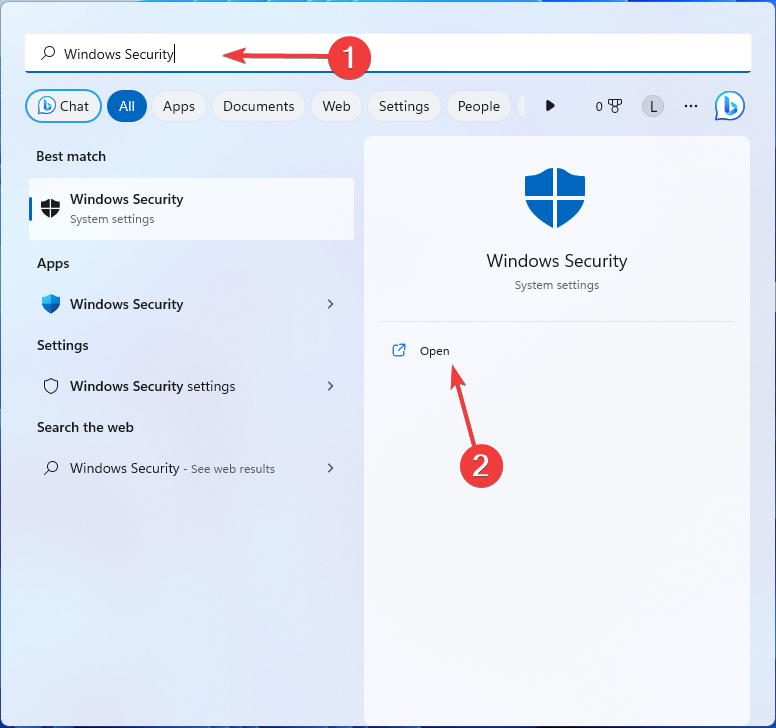
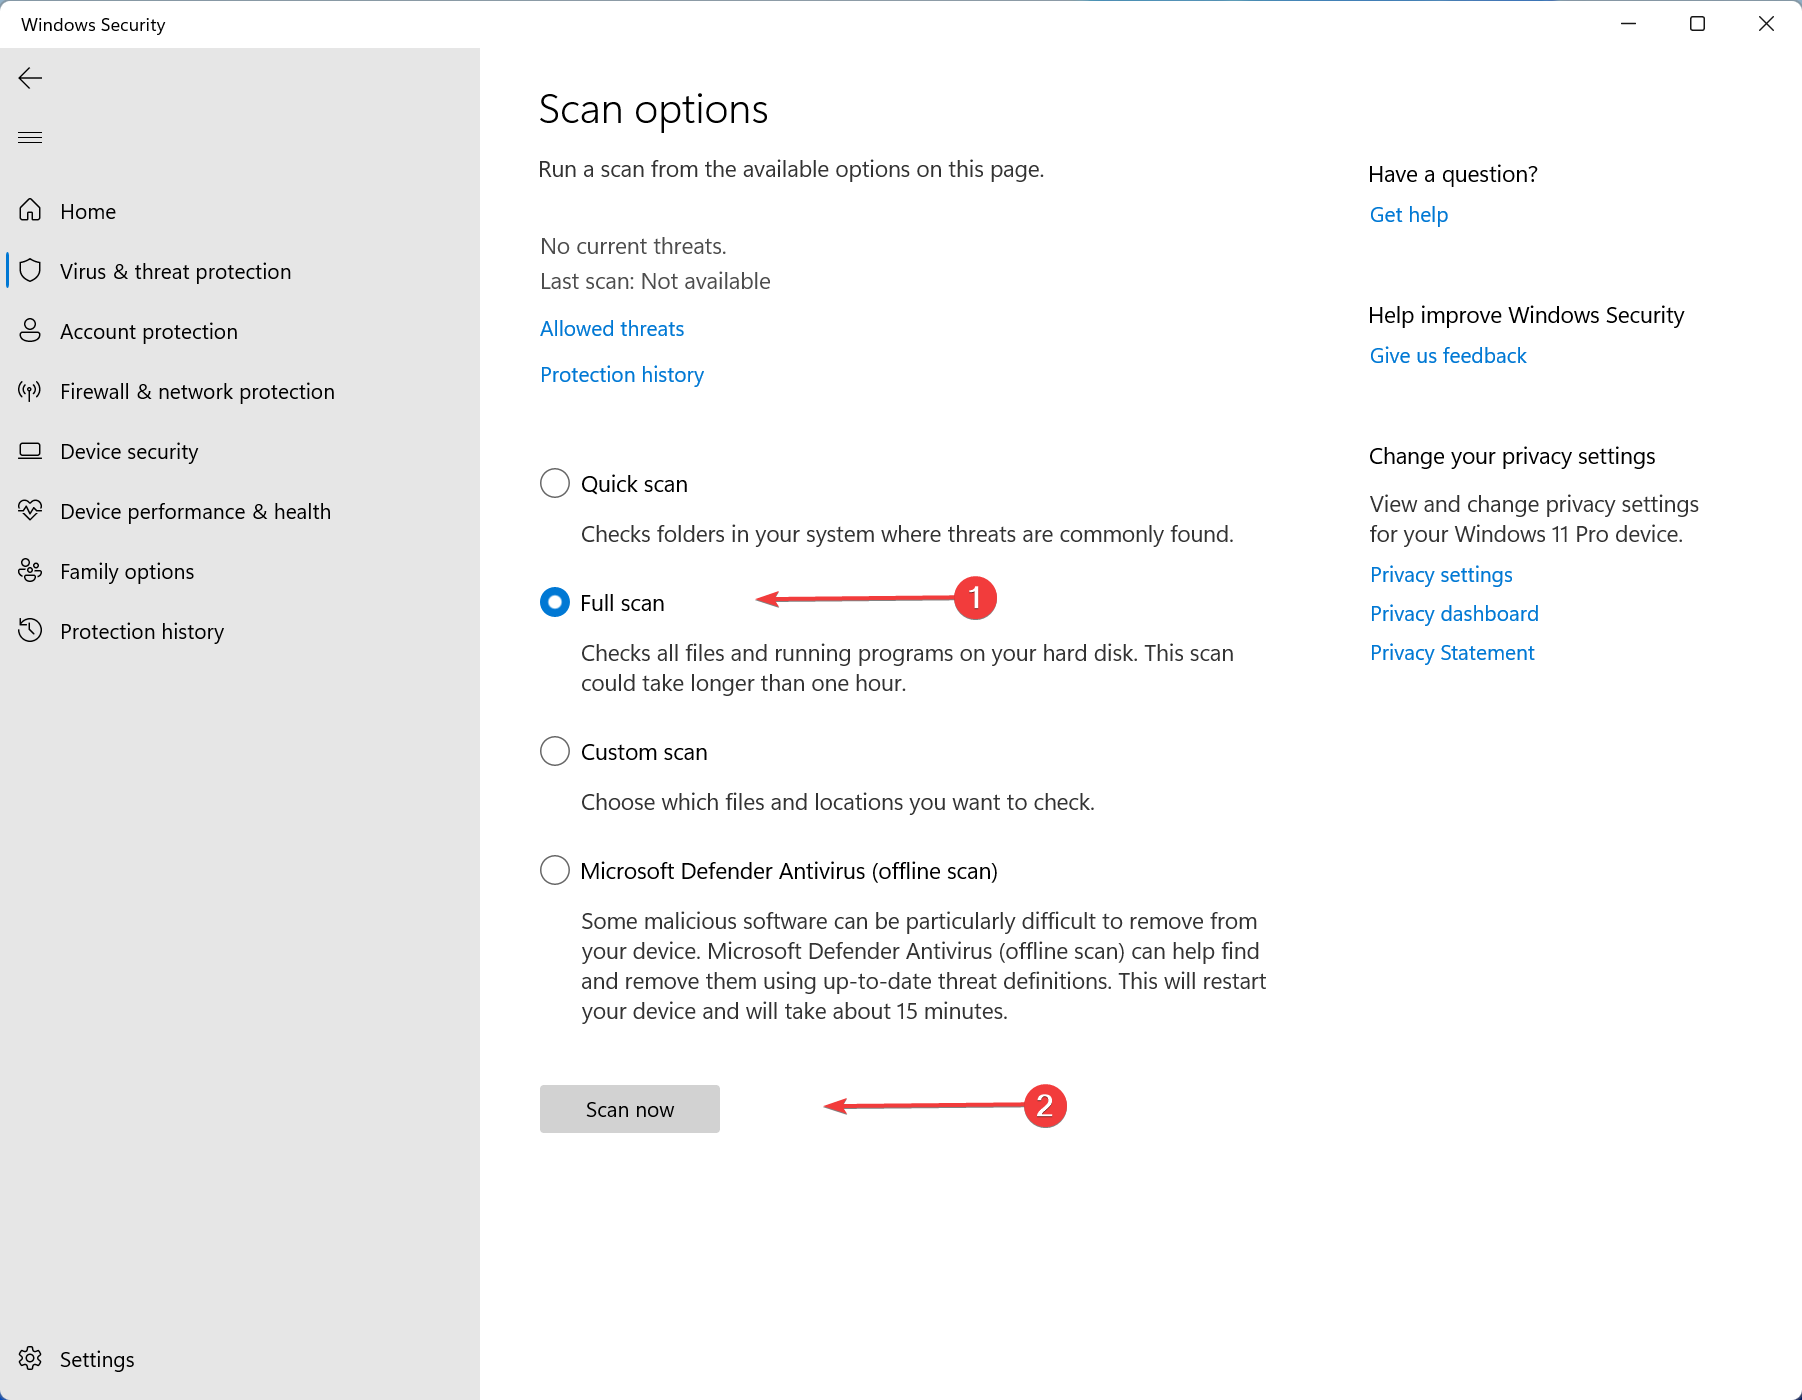
- Press the Windows key, search for Windows Security, and click Open.
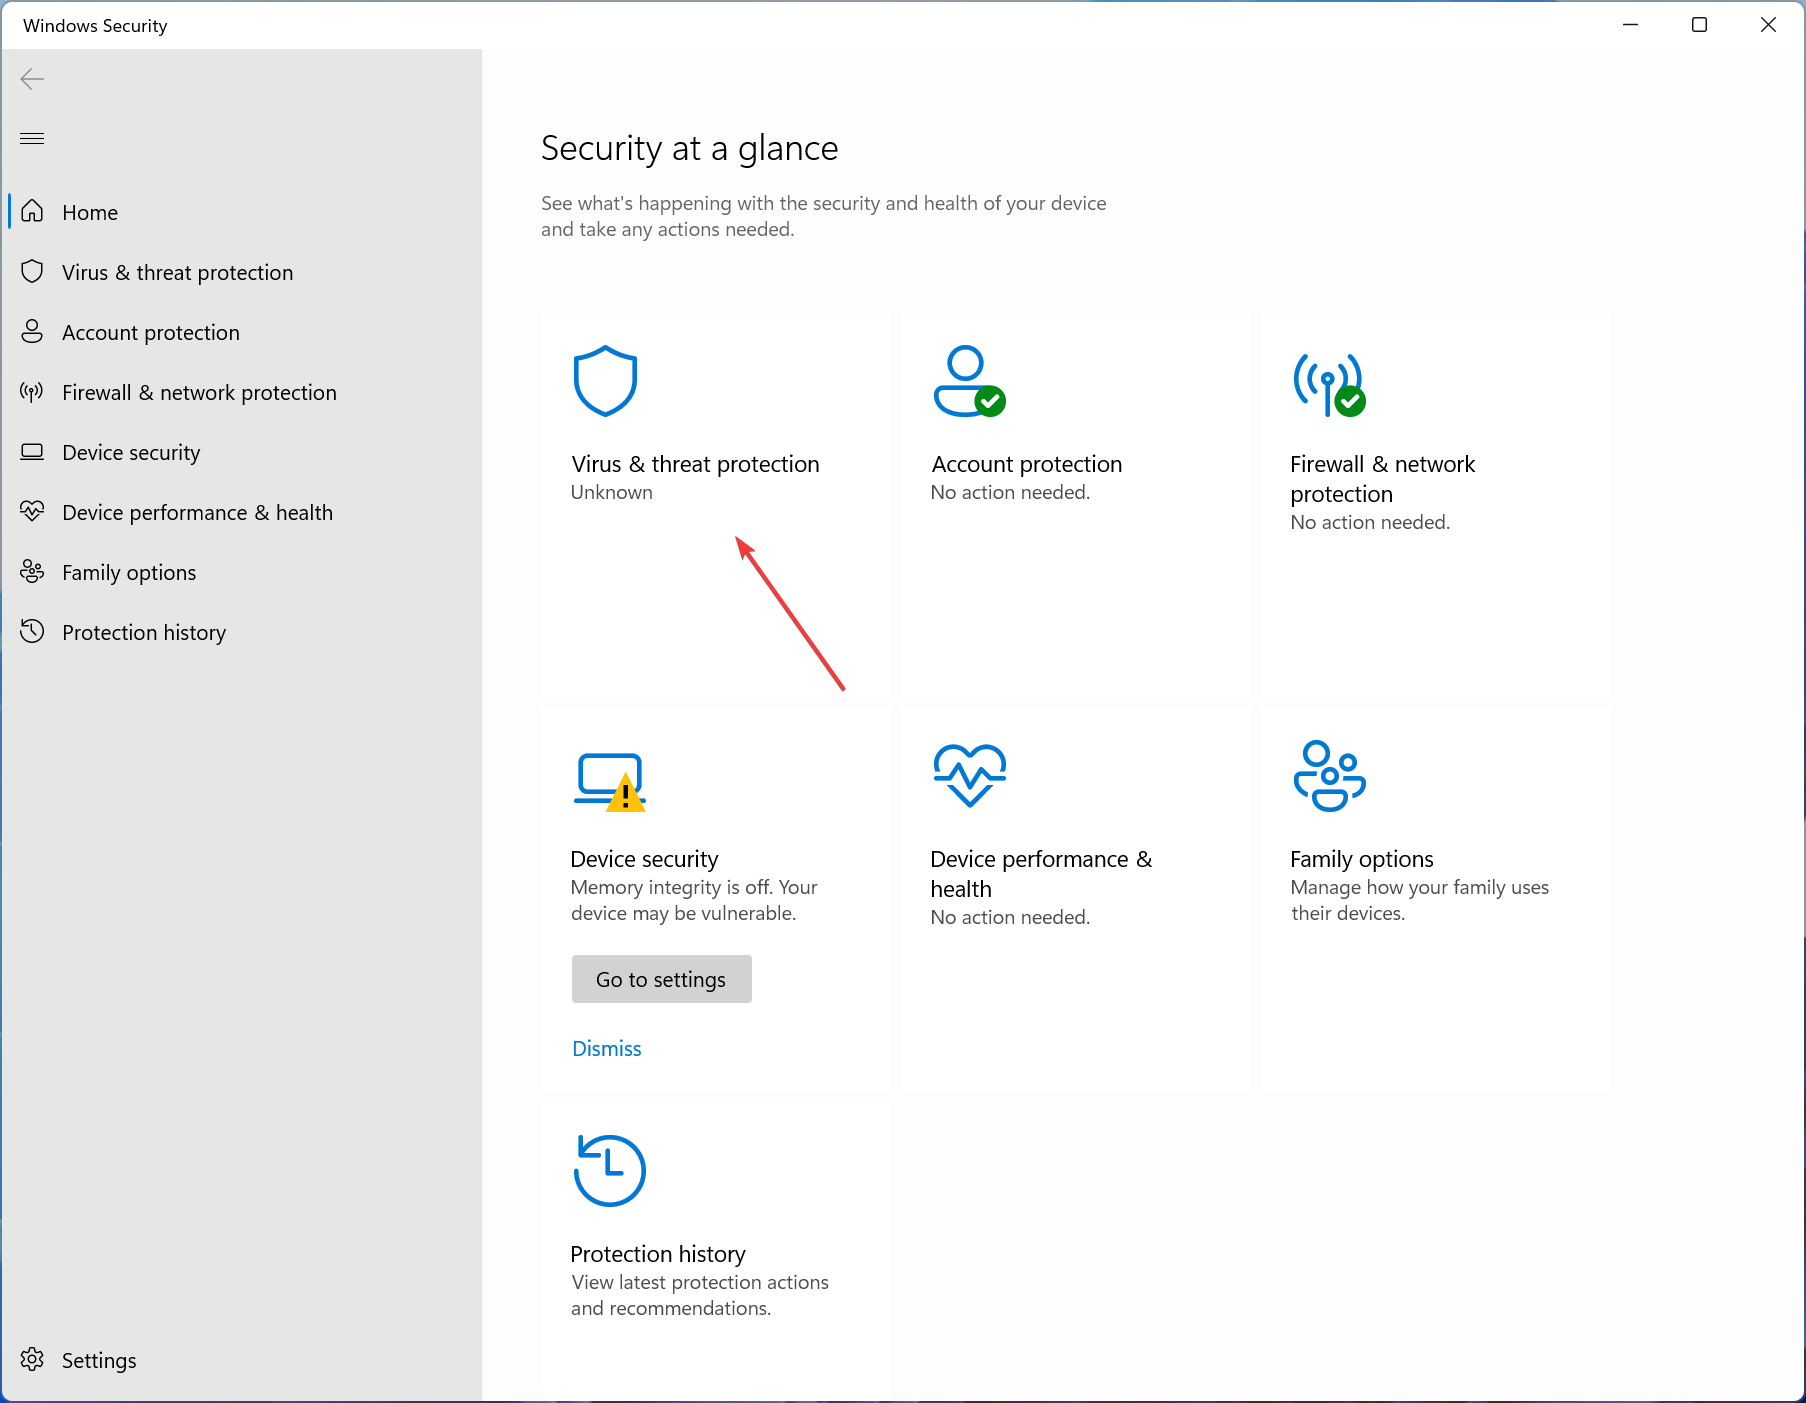
- Go to Virus & threat protection.
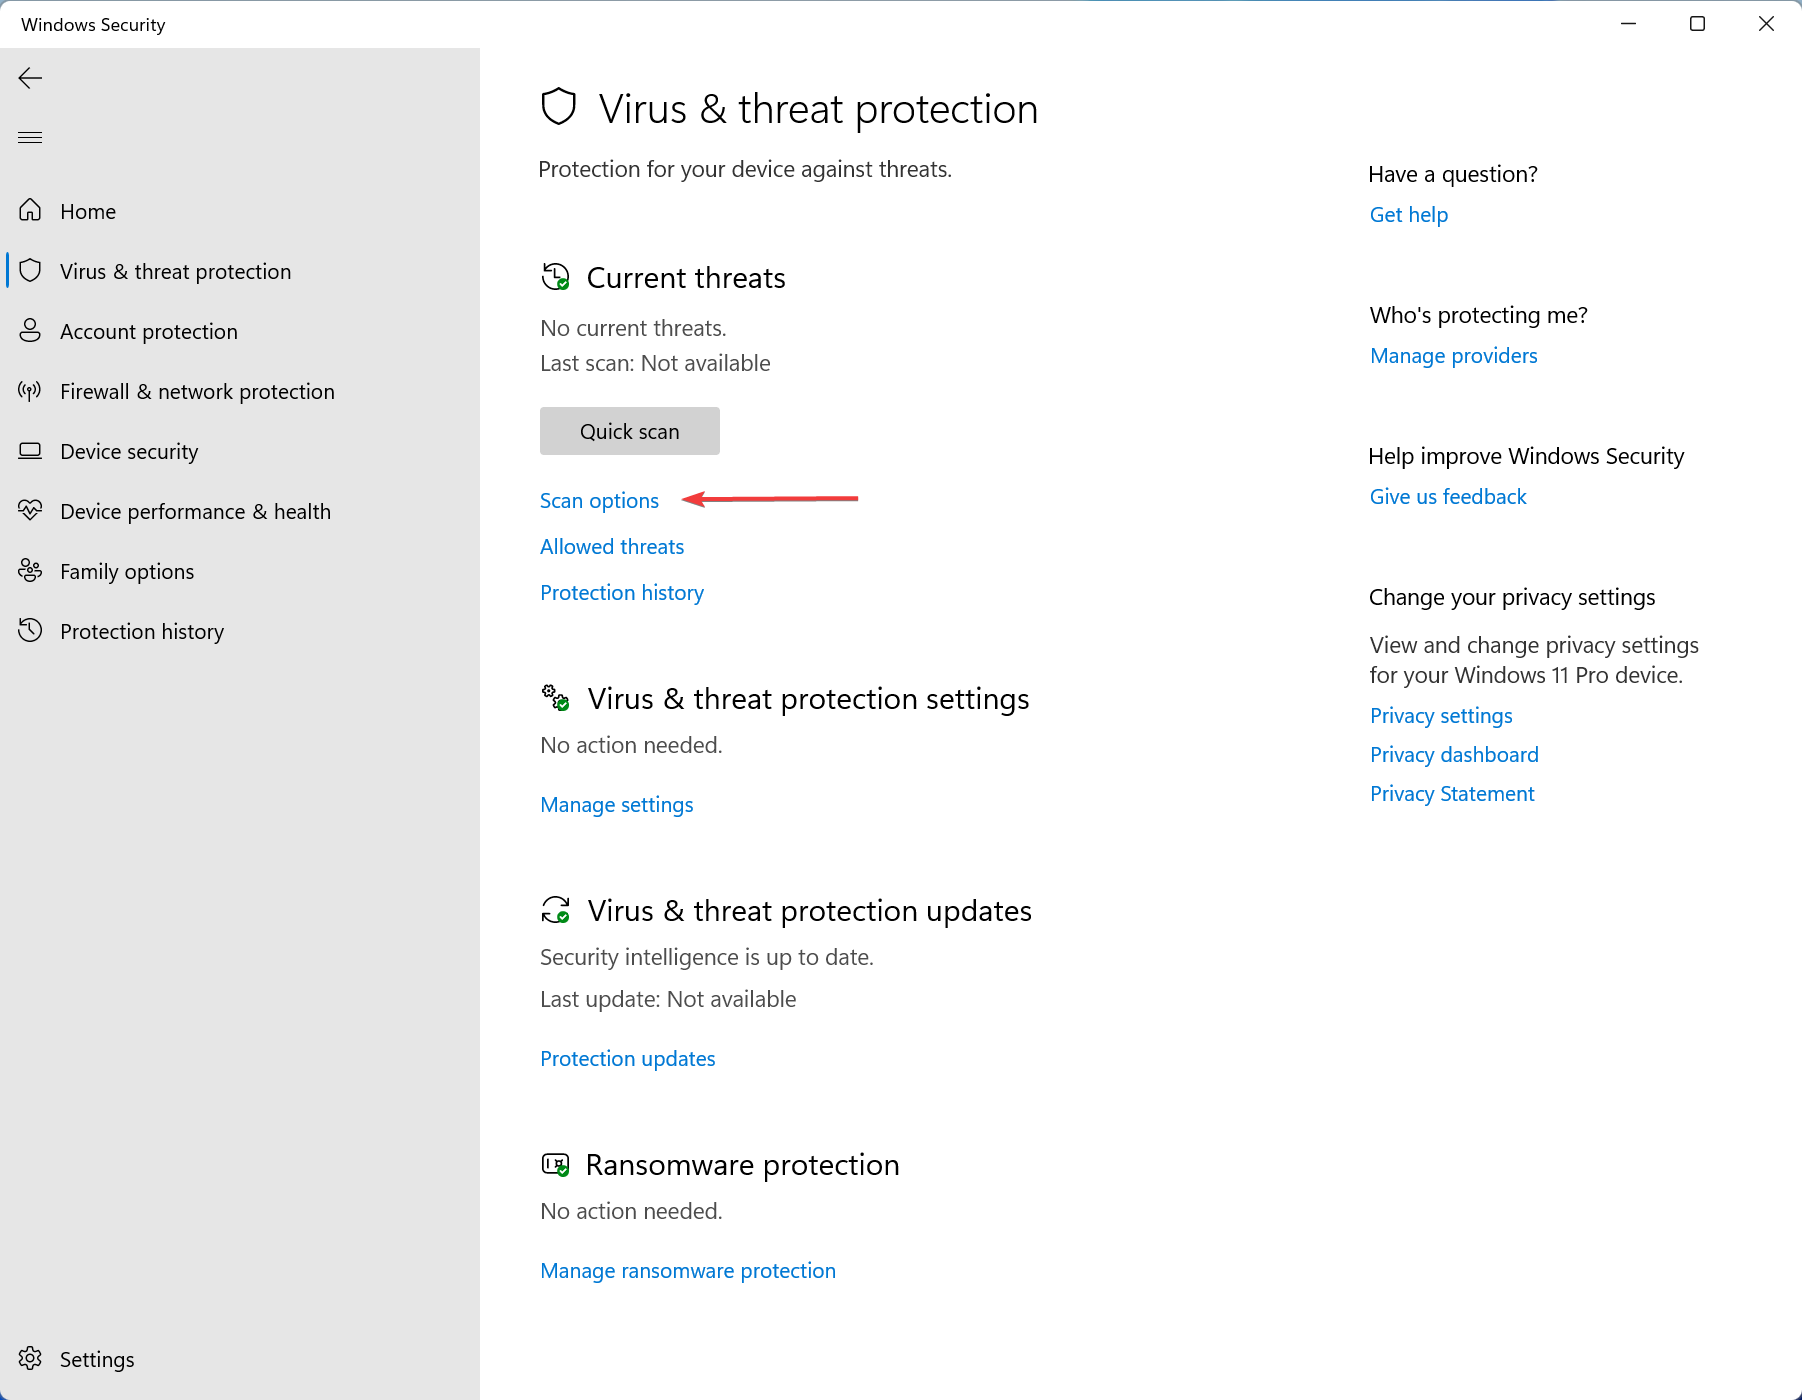
- Open Scan options.
- Choose Full scan and click on Scan now.
The most common reason for the unsupported 16-bit application error is a virus infection. Don’t worry! Performing a deep scan with Windows built-in tool or with your reliable antivirus software should get rid of the issue.
4. Perform a clean boot
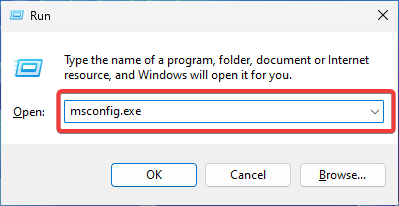
- Press Windows + R key to open the Run dialog. Type the following command and press Enter:
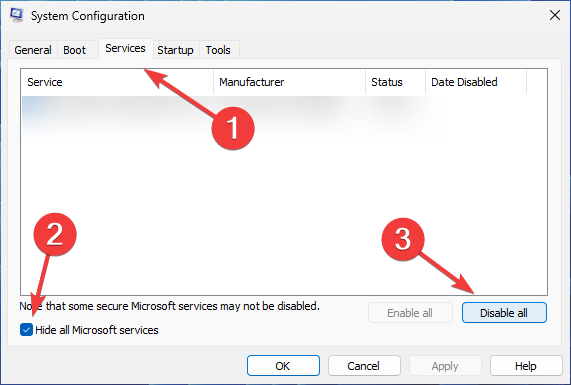
msconfig.exe - Go to the Services tab and check the Hide all Microsoft services box. Then click on Disable all.
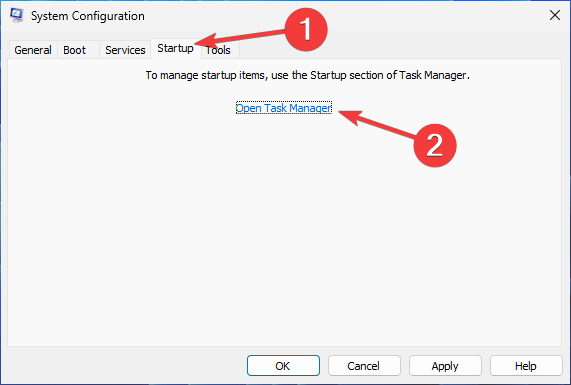
- Now, go to the Startup tab and click on Open Task Manager.
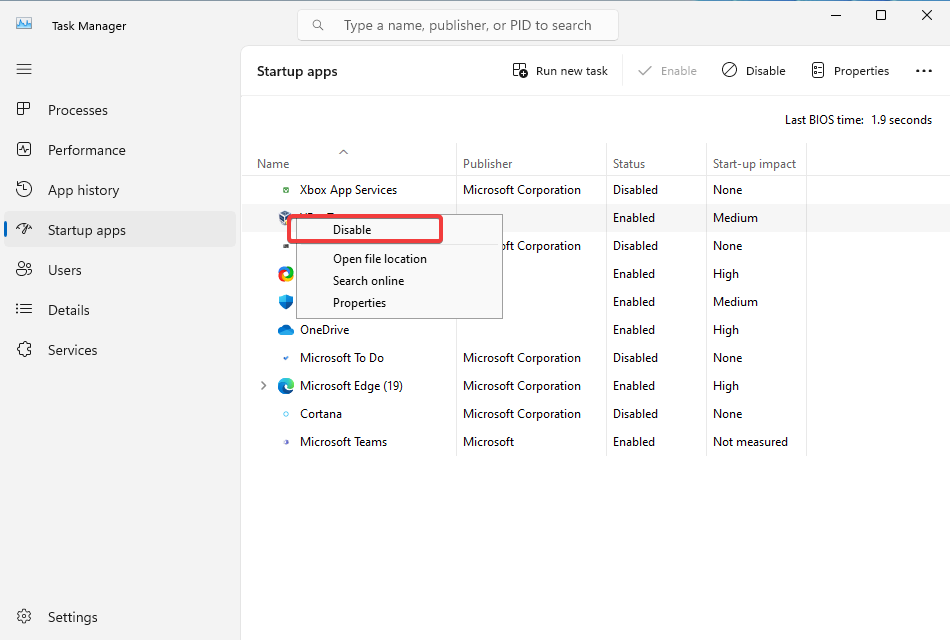
- Disable all items in the Startup apps section by right-clicking on each one and choosing Disable from the menu.
- Close Task Manager and click Apply and OK in the System Configuration window.
- Select Restart in the pop-up window that appears.
If you’re unable to identify which application is causing the issue, then it might be a good idea to perform a clean boot. This way, you’ll be able to determine the culprit app.
5. Reinstall the affected application
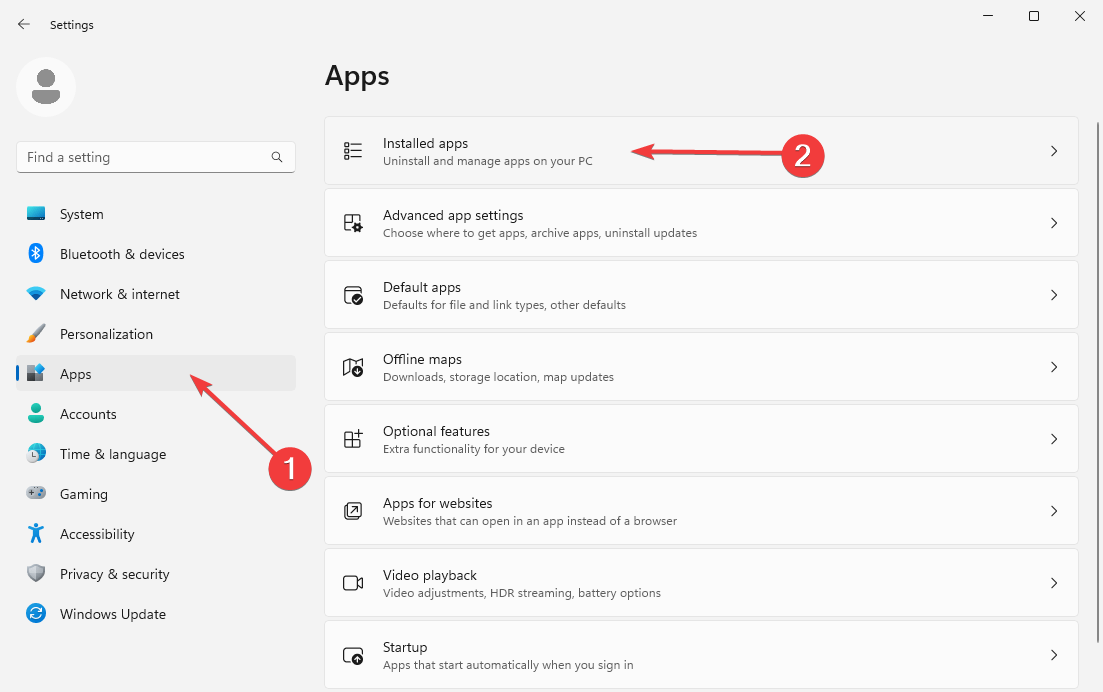
- Press Windows + I key to open Settings. Go to Apps and then Installed Apps.
- Locate the program that resulted in the issue. Click on the three horizontal dots and choose Uninstall.
- Follow the on-screen prompts to remove the software completely. If you wish to reinstall the program again, visit its website and download it from the official source.
- Once the installation is complete, check if the error still persists.
However, if you’re looking for a way to enable 16-bit application support in Windows 10 or 11, you have to do some additional manual work (hint: the most common fix is setting up a virtual machine).
Also, you may want to learn how to install and play old games on your Windows 11 machine.
That’s it for today! We hope you managed to resolve your unsupported 16-bit application error. If not, as always, you can leave your comments or questions below, and we’ll get back to you.




User forum
0 messages